When you click on links to various merchants on this site and make a purchase, this can result in this site earning a commission. Affiliate programs and affiliations include, but are not limited to, the eBay Partner Network.
Replacing A341E shift solenoids - 'The High Points'
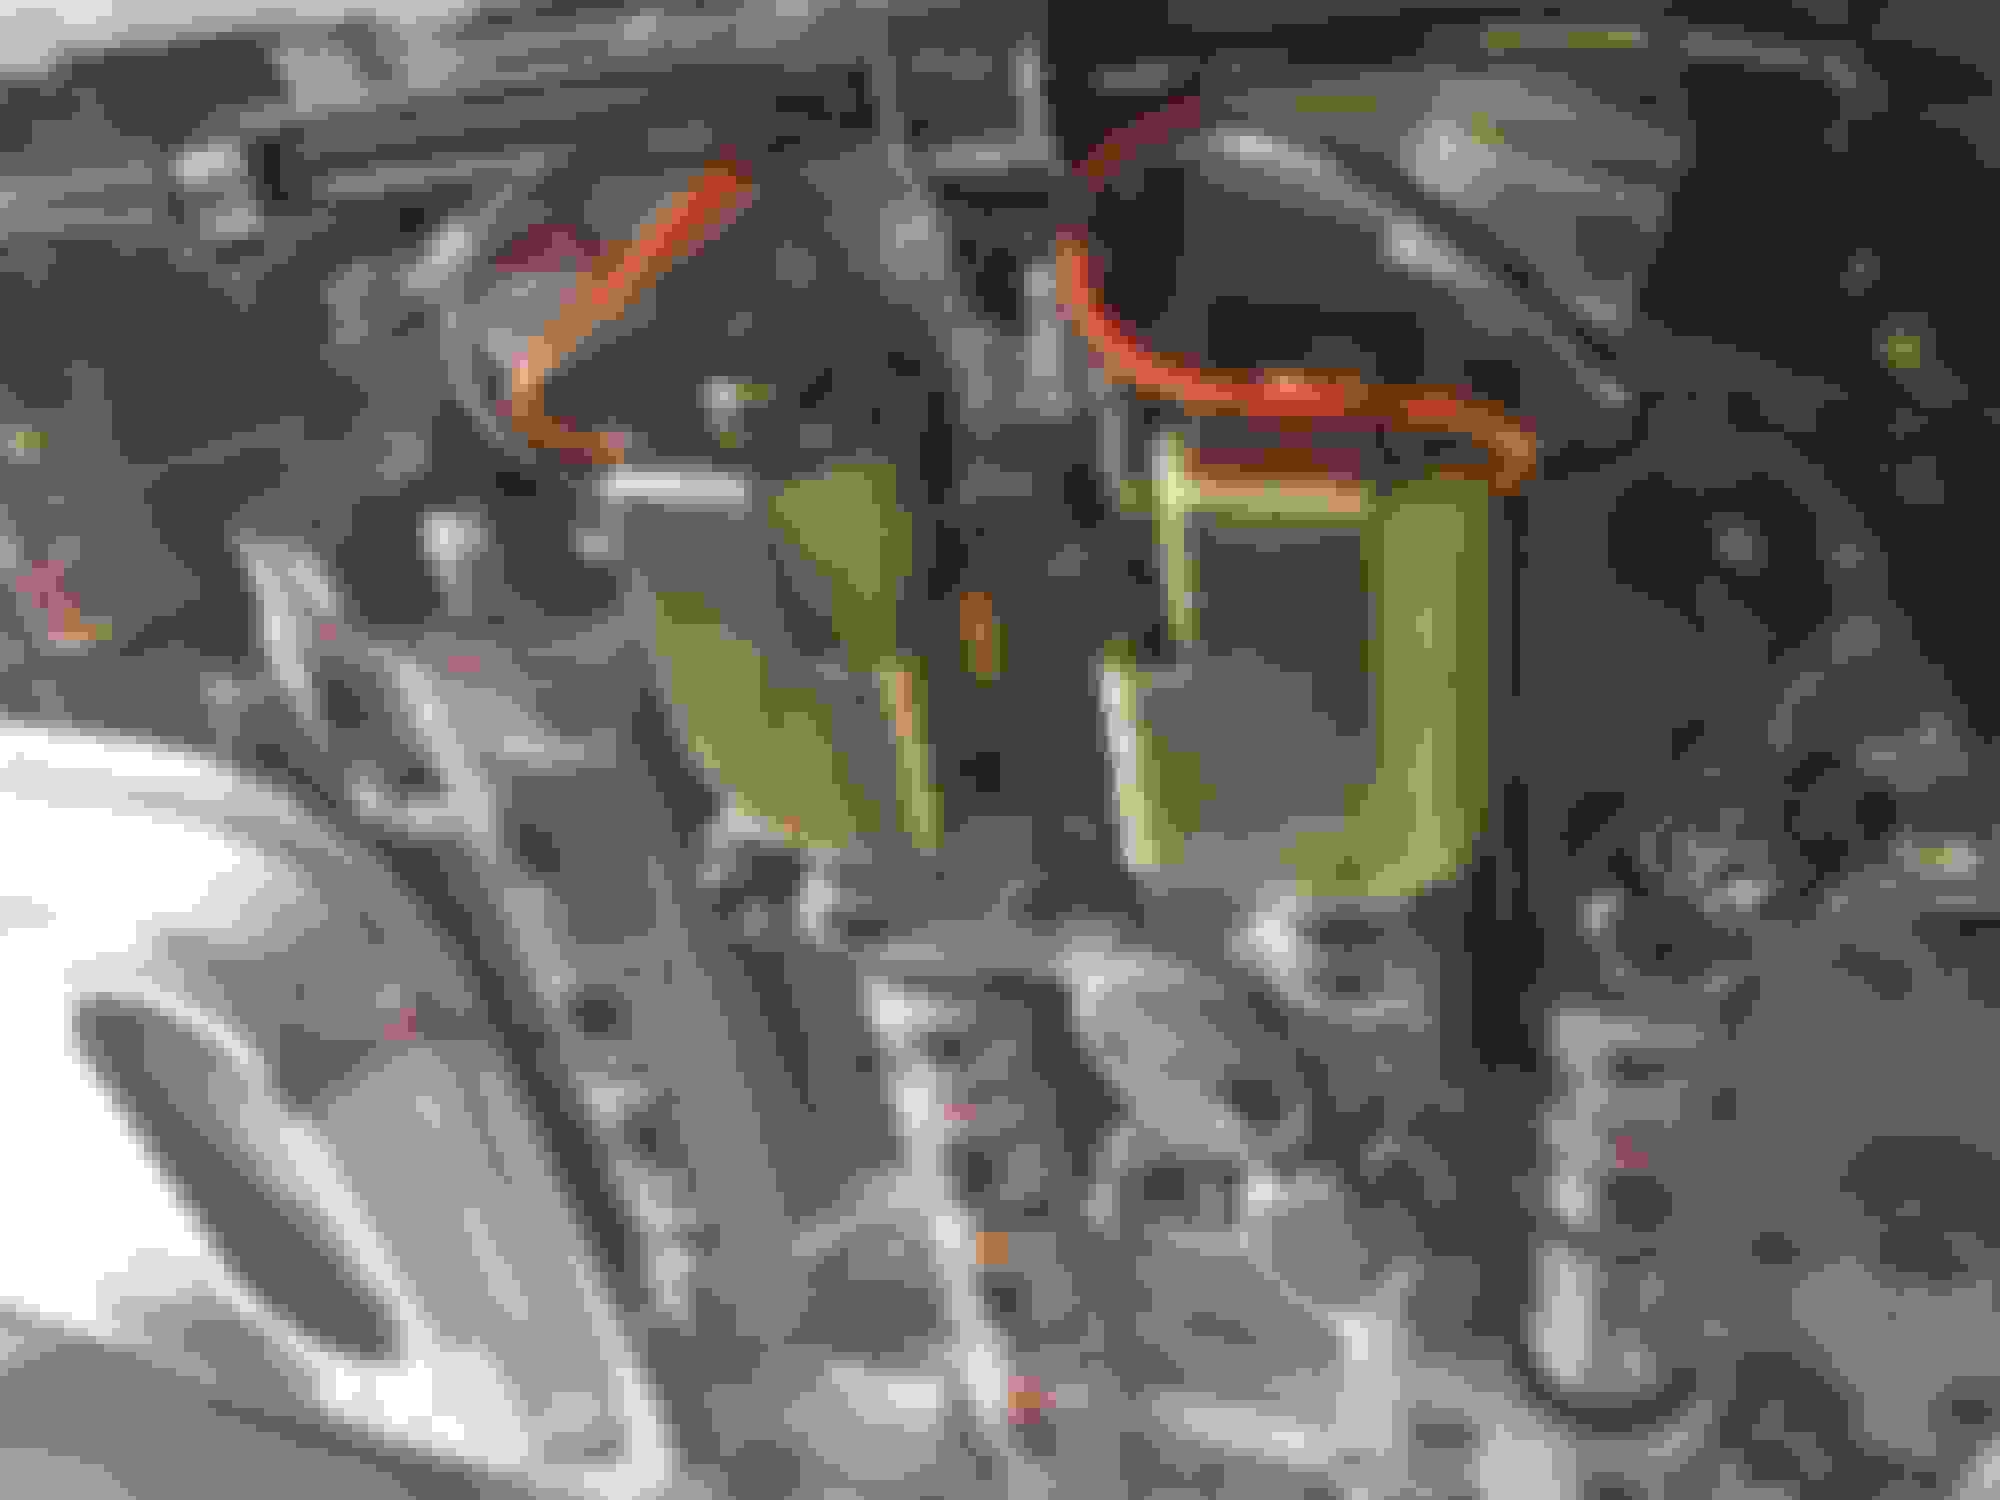
I had a trans code 63 and the vehicle would shift up ok, but wouldn't shift down without manually moving the shifter. New solenoid time! I bought the solenoids off eBay, already installed in a bracket. They were a little over $130 shipped.
I got the beater in the air with the help of my expert mechanic.
PROTIP: Go ahead and lay your gasket out flat. They love to wad them up and throw them in the box with the filter.
The drain plug is 14mm and there are a gabillion 10mm bolts holding it on. I don't think the trans had been previously serviced. I went around the perimeter with a razor blade, but i still had to go gorilla on it with a dead-blow hammer, because, apparently, no maintenance has been done on this pig. Ever. I don't like trying to chisel or pry very much, I goofed-up the mating surface before doing that.
Hey look, I only spilled a little bit!
Do a 'pans off - dance off' now. The filter is held on by 3 10mm bolts, they're all the same length. Be careful putting these bolts back in, they shouldn't be tightened much at all, like just a little bit more that you can tighten them by hand when holding the socket.
What we're after.
New hotness.
Super in-depth instructions.
Everything slapped back in.
The bracket and solenoids went in with zero drama. I avoid any kits with universal brackets.
I used a 3M Roloc gasket removal disc on an air angle grinder to get the old gasket material off, a normal scrapper wasn't cutting it. Blaster everything with magical brake parts cleaner, because honestly, I'd clean my kids with it if it smelled better. Clean and replace the magnets, how do they even work?
ANOTHER HOT PROTIP: Use a gasket tack to hold your gasket in place, because you'll probably screw it up if you don't.
Yank it off the stands, throw in 4ish quarts, go drink bourbon. I DON'T CARE IF THE SUN IS STILL UP, WHO ARE YOU, MY MOM?
I'm curious what the jack stands are on? When I use jack stands I have the harbor freight jack stand rubber pads on them and set them close to the aluminum front crossmember and on the lower control arm.
I'm curious what the jack stands are on? When I use jack stands I have the harbor freight jack stand rubber pads on them and set them close to the aluminum front crossmember and on the lower control arm.
They were on the factory lift points at the pinch weld under the rockers.
Metal to metal? And just sitting on them? If there is no little shallow slit on those pads then it could have slid right off. And if the jack stand pads were so the big gully was on the pinch weld area it would then smash into the floor and rocker panel areas. When I use those areas I have little hard wood pieces with a slit to match that pinch weld and use large wood blocks. If it was just balancing on the pinch welds your pretty lucky it didn't come off one or both especially when pulling hard on a wrench, and the pinch welds like to fold over as well, once they do that they like to keep on keeping on with it? And at that angle only a corner digs into the pinch weld. I am really surprised it held okay.
Metal to metal? And just sitting on them? If there is no little shallow slit on those pads then it could have slid right off. And if the jack stand pads were so the big gully was on the pinch weld area it would then smash into the floor and rocker panel areas. When I use those areas I have little hard wood pieces with a slit to match that pinch weld and use large wood blocks. If it was just balancing on the pinch welds your pretty lucky it didn't come off one or both especially when pulling hard on a wrench, and the pinch welds like to fold over as well, once they do that they like to keep on keeping on with it? And at that angle only a corner digs into the pinch weld. I am really surprised it held okay.
They held fine. I had a jack under the cross member as well. It's had to see in the pictures, but the jack stands fit perfectly in the little notches in the jack points in the rocker.
good job on the details of the install, esp what it took to remove the old gasket material. i would maybe include what torque numbers you used on the pan, and what bourbon brand you prefer.

 04-18-16, 05:27 PM