


YannG's 05 Lexus LS430 Build thread


Thread Starter
Intermediate


Joined: Jan 2014
Posts: 355
Likes: 180
From: GA
Thread Starter
Intermediate
Joined: Jan 2014
Posts: 355
Likes: 180
From: GA
 Update - Maitenance + JDM mirrors
Hello,
I've been very busy lately so I apologize for the lack of updates
Since my last post:
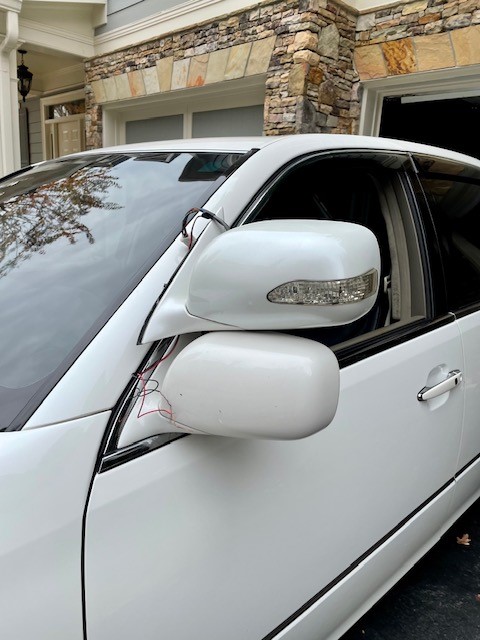
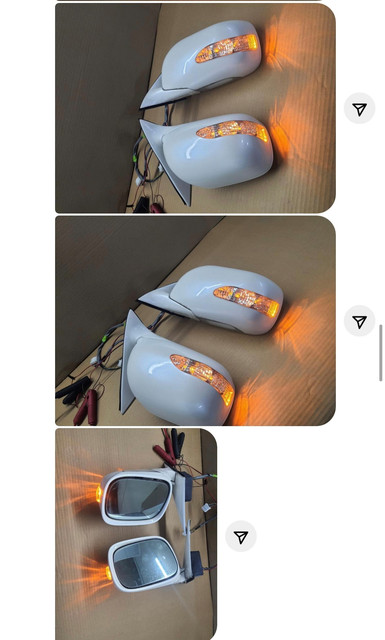

I will try to document the whole LED Mirror installation process as I didn't find much information online regarding the wiring.
Thanks,
Yann.
I've been very busy lately so I apologize for the lack of updates
Since my last post:
- I've received the trim I am going to use on the lip kit (Honda OEM grey) and can hopefully start test fitting the kit.
- I just received the JDM mirrors I ordered from japan (paint match is great - Crystal white)
- I think I need to replace my valve cover gaskets as I think they are leaking.
I will try to document the whole LED Mirror installation process as I didn't find much information online regarding the wiring.
Thanks,
Yann.

Thread Starter
Intermediate
Joined: Jan 2014
Posts: 355
Likes: 180
From: GA
Thank you Charlie - The car is on 210k!
Thread Starter
Intermediate
Joined: Jan 2014
Posts: 355
Likes: 180
From: GA
JDM LED Mirror - Installation
Hello,
Hope everyone's had a great Christmas !
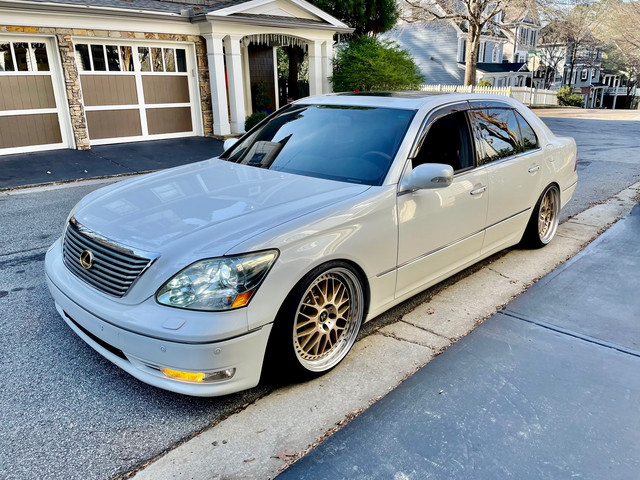
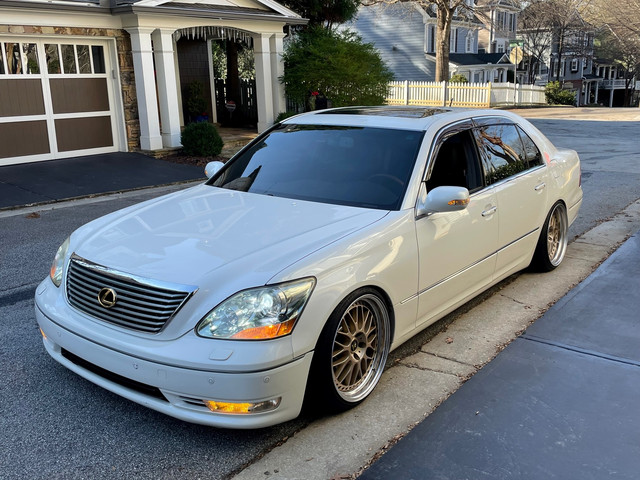
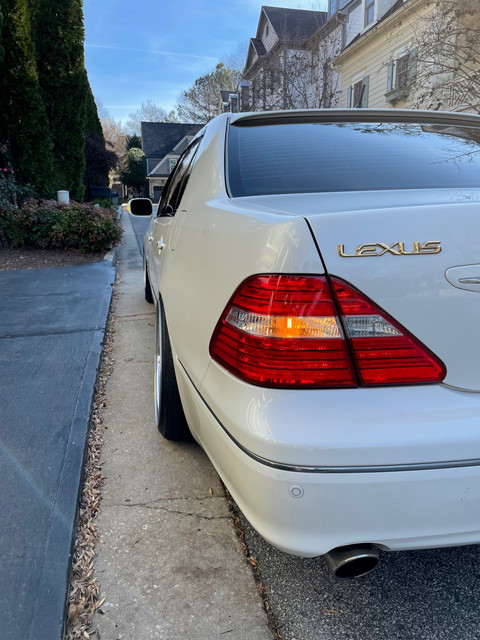
Quick update, I fitted my LED mirrors - The process was a lot more involved than I initially thought but they turned out great.
Start by removing the door panel and remove the OEM mirror:
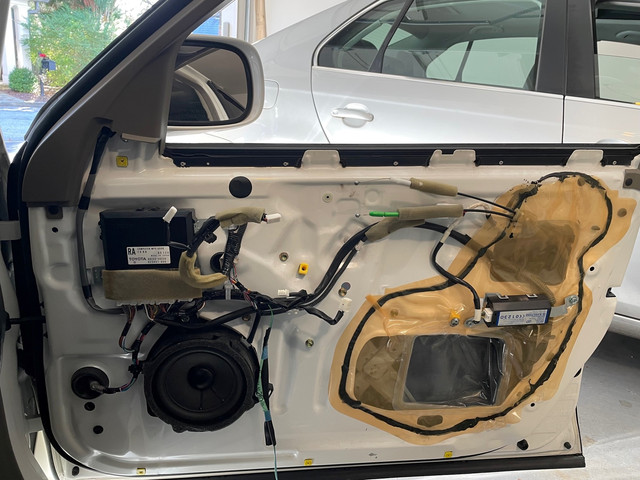

Here is where the fun begins, start by running some wiring through the grommets in the door. I found it best to tape the wires to a zip-tie.

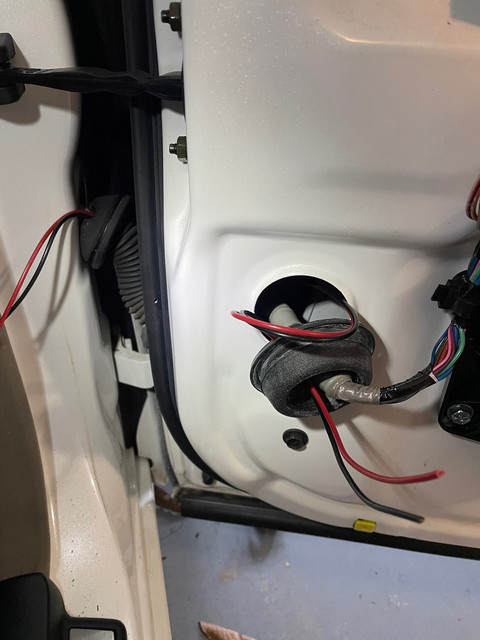
I unbolted the fuse box (passenger side) to get access to the wiring.
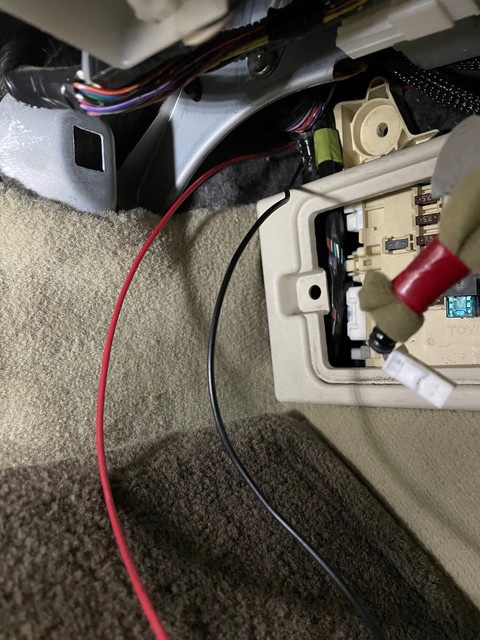
I ran the wires underneath the dashboard / behind the center panel
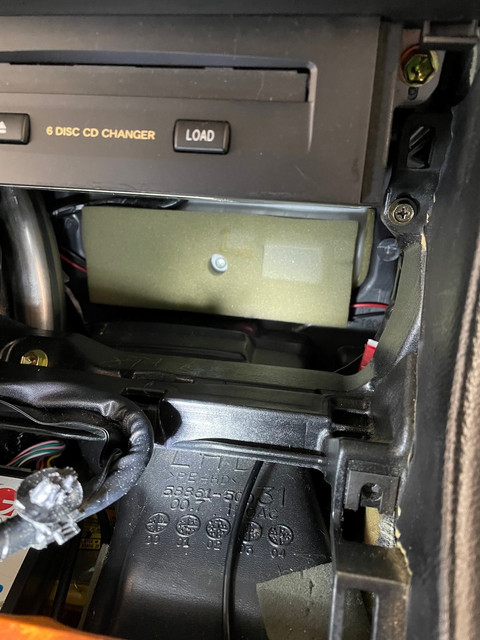
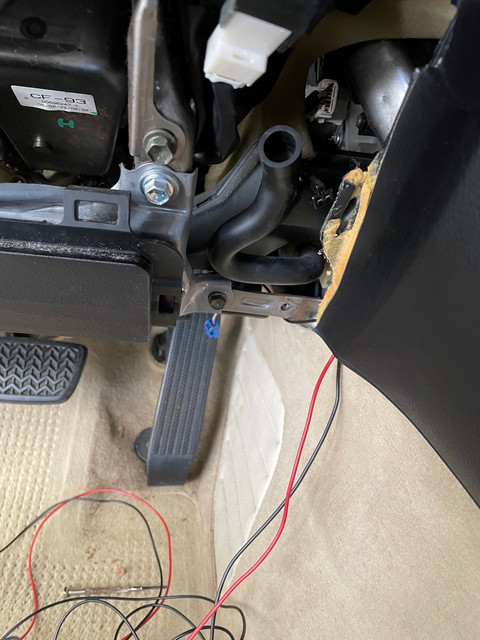
Repeat the same steps on the driver's side with the wiring.

The wiring was fairly straight forward, I pulled on different plugs with the hazards on and determined which plug I needed to tap into.
Wire colors to splice the positive into:
Left - Green with black stripe
Right - Green with yellow stripe
For the ground I just bolted ring connectors to an existing bolt.
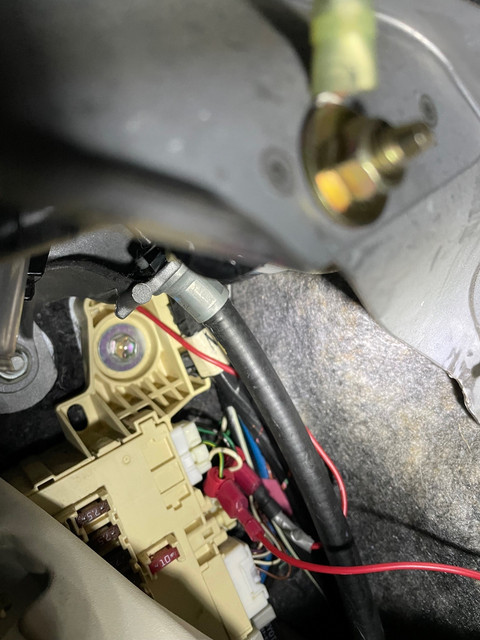
I used heat shrink on all connectors and made sure all of the connections were tight before putting everything back together.
Special thanks to Justin Winn for his help !
Overall I am very happy with the result - folks driving behind me see when my turn signal is on and they fold just like OEM mirrors.
All comments welcomed.
Thanks,
Yann
Hope everyone's had a great Christmas !
Quick update, I fitted my LED mirrors - The process was a lot more involved than I initially thought but they turned out great.
Start by removing the door panel and remove the OEM mirror:
Here is where the fun begins, start by running some wiring through the grommets in the door. I found it best to tape the wires to a zip-tie.
I unbolted the fuse box (passenger side) to get access to the wiring.
I ran the wires underneath the dashboard / behind the center panel
Repeat the same steps on the driver's side with the wiring.
The wiring was fairly straight forward, I pulled on different plugs with the hazards on and determined which plug I needed to tap into.
Wire colors to splice the positive into:
Left - Green with black stripe
Right - Green with yellow stripe
For the ground I just bolted ring connectors to an existing bolt.
I used heat shrink on all connectors and made sure all of the connections were tight before putting everything back together.
Special thanks to Justin Winn for his help !
Overall I am very happy with the result - folks driving behind me see when my turn signal is on and they fold just like OEM mirrors.
All comments welcomed.
Thanks,
Yann



Racer

Joined: Jan 2017
Posts: 1,975
Likes: 820
From: TX
Man, that looks amazing, what a subtle touch. I can't imagine there are too many sets of these in America. Now, were these mirrors OEM over there as an option, or are they an aftermarket-modified JDM mirror?
I'm going to keep an eye out on YAJ for a set, just for fun. Hopefully the wire colors didn't change between 2005 and 2006.
What's up next for your car?
I'm going to keep an eye out on YAJ for a set, just for fun. Hopefully the wire colors didn't change between 2005 and 2006.
What's up next for your car?

Driver
Joined: May 2017
Posts: 92
Likes: 15
From: Nevada
Hello,
Hope everyone's had a great Christmas !
Quick update, I fitted my LED mirrors - The process was a lot more involved than I initially thought but they turned out great.
Start by removing the door panel and remove the OEM mirror:
Here is where the fun begins, start by running some wiring through the grommets in the door. I found it best to tape the wires to a zip-tie.
I unbolted the fuse box (passenger side) to get access to the wiring.
I ran the wires underneath the dashboard / behind the center panel
Repeat the same steps on the driver's side with the wiring.
The wiring was fairly straight forward, I pulled on different plugs with the hazards on and determined which plug I needed to tap into.
Wire colors to splice the positive into:
Left - Green with black stripe
Right - Green with yellow stripe
For the ground I just bolted ring connectors to an existing bolt.
I used heat shrink on all connectors and made sure all of the connections were tight before putting everything back together.
Special thanks to Justin Winn for his help !
Overall I am very happy with the result - folks driving behind me see when my turn signal is on and they fold just like OEM mirrors.
All comments welcomed.
Thanks,
Yann
Hope everyone's had a great Christmas !
Quick update, I fitted my LED mirrors - The process was a lot more involved than I initially thought but they turned out great.
Start by removing the door panel and remove the OEM mirror:
Here is where the fun begins, start by running some wiring through the grommets in the door. I found it best to tape the wires to a zip-tie.
I unbolted the fuse box (passenger side) to get access to the wiring.
I ran the wires underneath the dashboard / behind the center panel
Repeat the same steps on the driver's side with the wiring.
The wiring was fairly straight forward, I pulled on different plugs with the hazards on and determined which plug I needed to tap into.
Wire colors to splice the positive into:
Left - Green with black stripe
Right - Green with yellow stripe
For the ground I just bolted ring connectors to an existing bolt.
I used heat shrink on all connectors and made sure all of the connections were tight before putting everything back together.
Special thanks to Justin Winn for his help !
Overall I am very happy with the result - folks driving behind me see when my turn signal is on and they fold just like OEM mirrors.
All comments welcomed.
Thanks,
Yann
Correct me if I'm wrong but both mirrors go to the driver side? And can both grounds go to the same bolt? Thanks Yann! Also thanks for making me want to spend more money lmao.
Thread Starter
Intermediate
Joined: Jan 2014
Posts: 355
Likes: 180
From: GA
Man, that looks amazing, what a subtle touch. I can't imagine there are too many sets of these in America. Now, were these mirrors OEM over there as an option, or are they an aftermarket-modified JDM mirror?
I'm going to keep an eye out on YAJ for a set, just for fun. Hopefully the wire colors didn't change between 2005 and 2006.
What's up next for your car?
I'm going to keep an eye out on YAJ for a set, just for fun. Hopefully the wire colors didn't change between 2005 and 2006.
What's up next for your car?
Next up - the lip kit! I was just working on it yesterday! Pictures soon!
I am not claiming this is the best way to wire them up, just the way I did it


Racer

Joined: Jun 2010
Posts: 1,457
Likes: 68
From: oo
I bought a moonlight pearl 06 Ls430 about 2 months ago and just ordered an OEM Celsior lip kit and Benz style jdm switchback side mirrors. I need to talk to you about wiring up my mirrors and fitting the lip kit on neat and perfect!! Im pretty sure we got the kit from the same person
Thread Starter
Intermediate
Joined: Jan 2014
Posts: 355
Likes: 180
From: GA
valve Cover gasket
Hello,
As previously mentioned my passenger side valve cover gasket was leaking so I decided to replace both sides with dan's help from "The Auto Lounge".
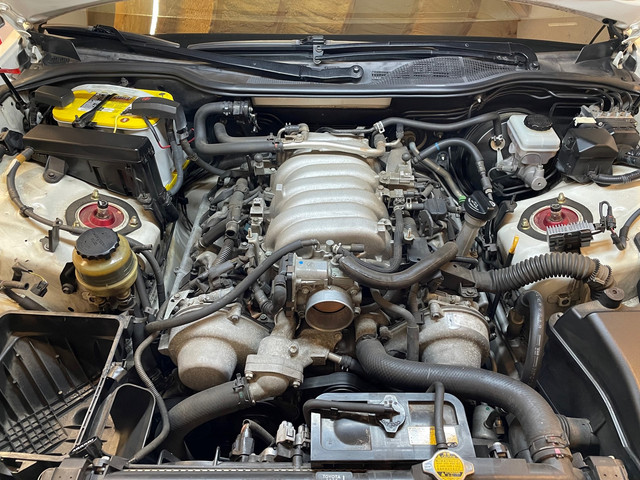
I also decided to swap out the front hubs to see if it helped with this loud noise i've been having around 55pmh ( it didnt fix the noise and I think my tires are the culprit - To be continued...)

I also went ahead and did an oil and oil filter change as I do them every 5k.

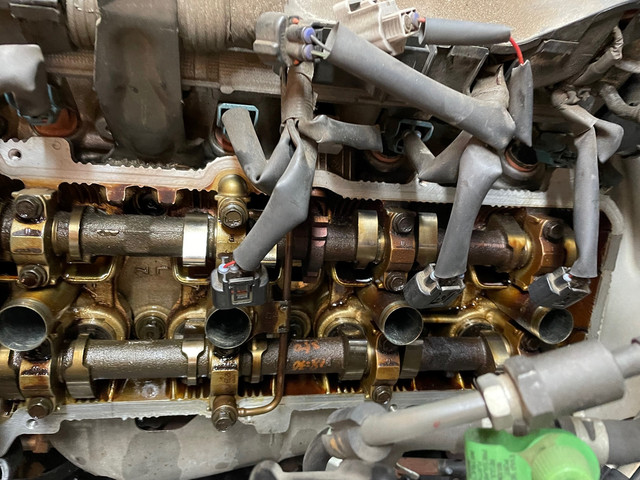
Driver side cover removed:
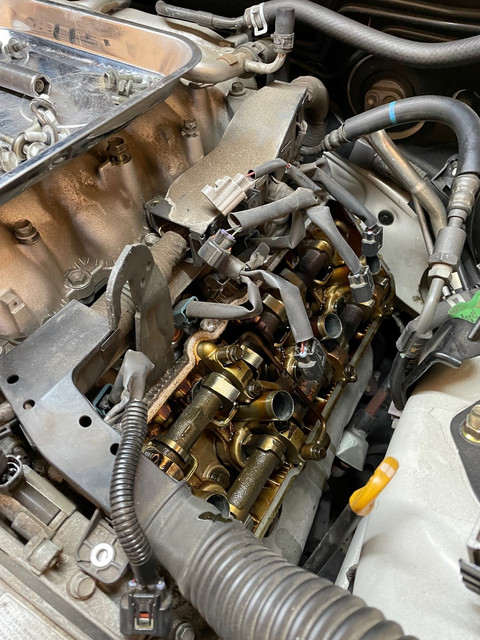
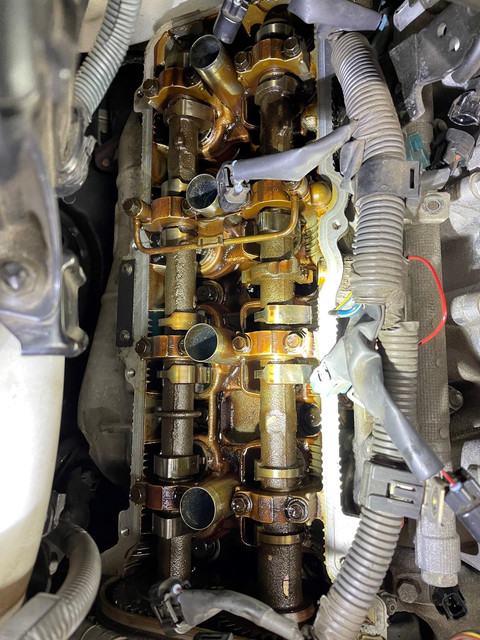
Passenger side cover removed:
The valve cover tube seals were also replaced ( forgot to take a picture)
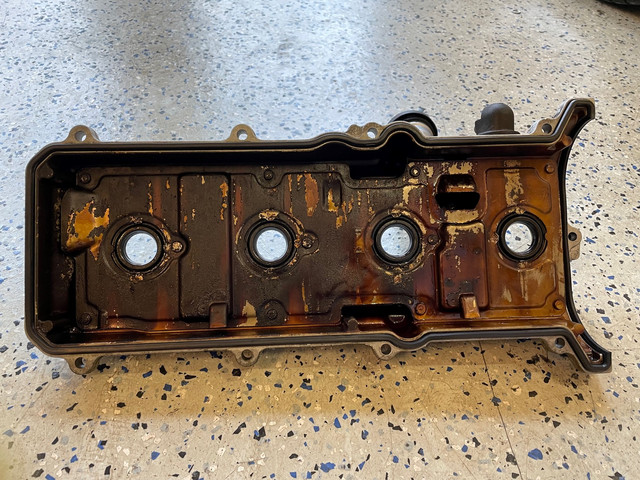
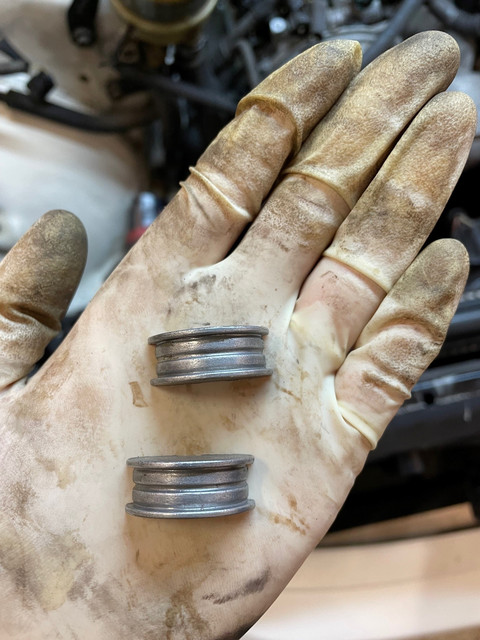
Valve cover half-moons removed and cleaned:
Surface area thoroughly cleaned and prepped:
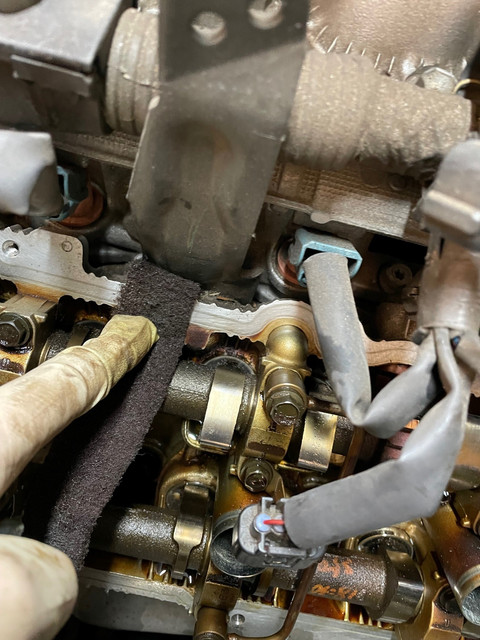
Also removed any residue on the half moon base:

Put everything back on and seems to be leak free (although i'll be double-checking regularly)
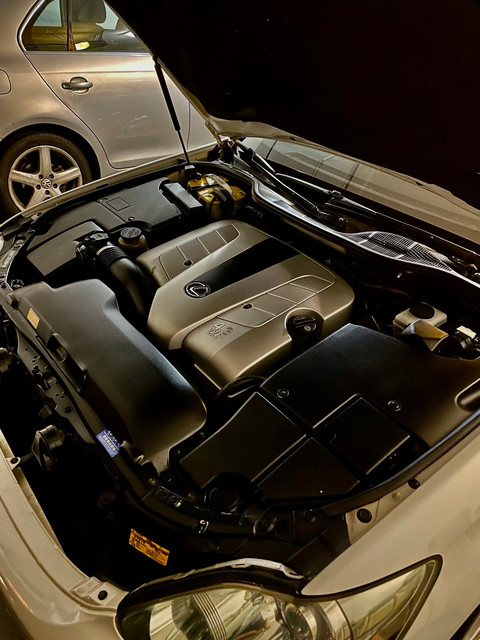
Next post will feature the front lip install + sideskirts.
Thanks,
Yann.
As previously mentioned my passenger side valve cover gasket was leaking so I decided to replace both sides with dan's help from "The Auto Lounge".
I also decided to swap out the front hubs to see if it helped with this loud noise i've been having around 55pmh ( it didnt fix the noise and I think my tires are the culprit - To be continued...)
I also went ahead and did an oil and oil filter change as I do them every 5k.
Driver side cover removed:
Passenger side cover removed:
The valve cover tube seals were also replaced ( forgot to take a picture)
Valve cover half-moons removed and cleaned:
Surface area thoroughly cleaned and prepped:
Also removed any residue on the half moon base:
Put everything back on and seems to be leak free (although i'll be double-checking regularly)
Next post will feature the front lip install + sideskirts.
Thanks,
Yann.

Thread Starter
Intermediate
Joined: Jan 2014
Posts: 355
Likes: 180
From: GA
Celsior kit - Part 1
Hello all,
The time has finally come to install the JDM Celsior lip kit!
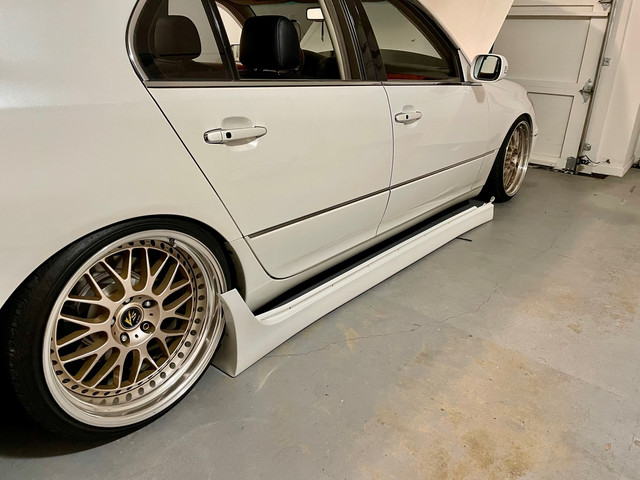
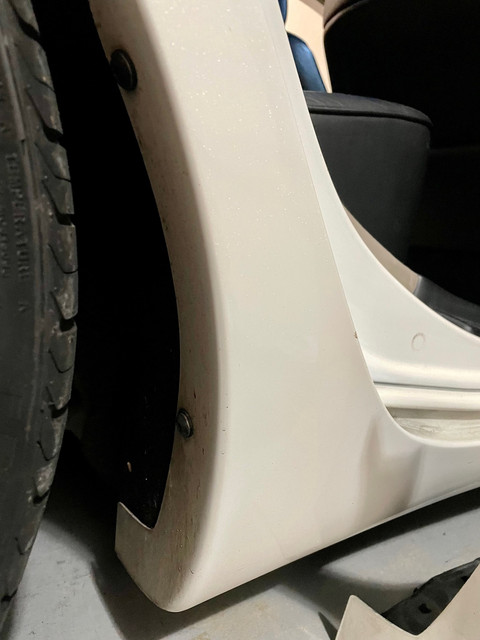
Started by removing the oem sideskirts bolts

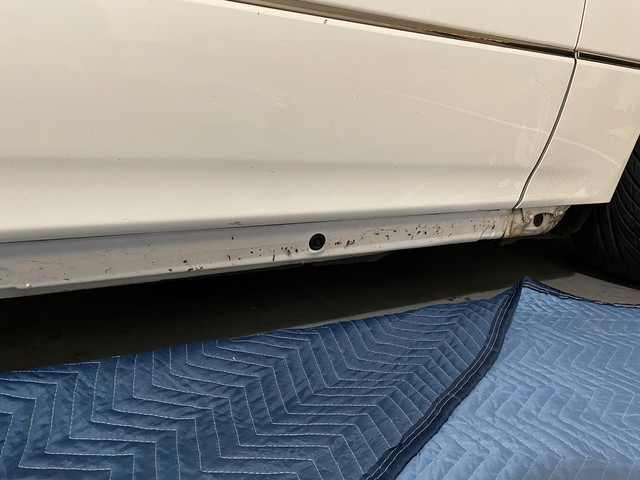
Cleaned the sills as I don't think they had seen the light of day since the car was new!

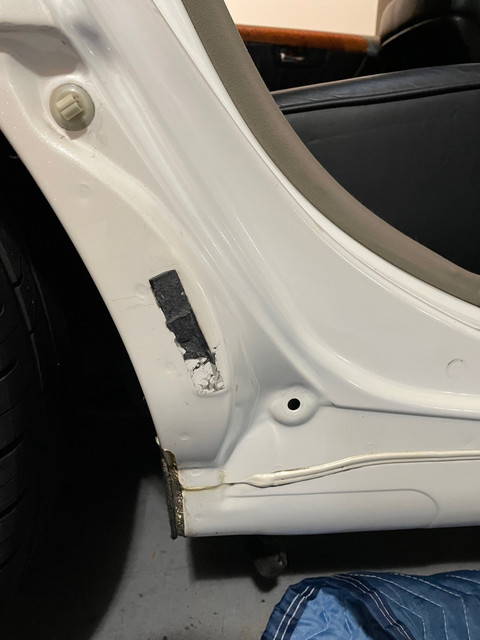
Removed the old tape residue and replaced it with 3M double-sided tape:
I this installation to be as clean and OEM as possible so purchased new clips for underneath the car.

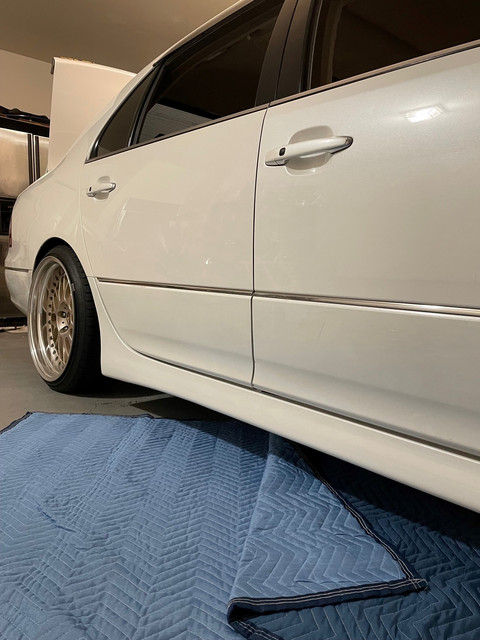
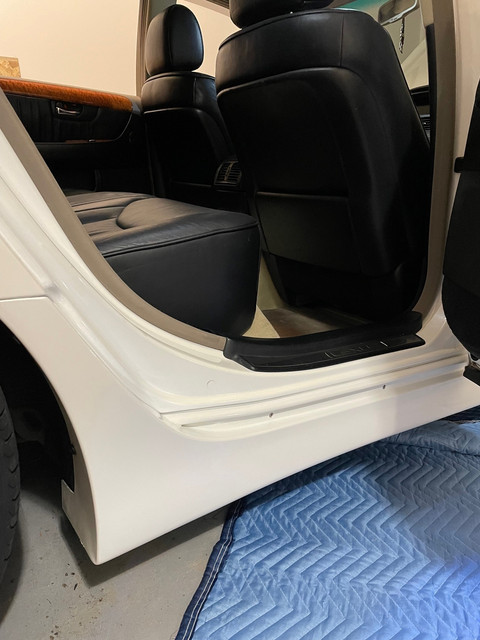
Passenger side skirt is on - it was a really easy process with everything lining up perfectly!
Driver side is next + front lip!
Thanks.
The time has finally come to install the JDM Celsior lip kit!
Started by removing the oem sideskirts bolts
Cleaned the sills as I don't think they had seen the light of day since the car was new!
Removed the old tape residue and replaced it with 3M double-sided tape:
I this installation to be as clean and OEM as possible so purchased new clips for underneath the car.
Passenger side skirt is on - it was a really easy process with everything lining up perfectly!
Driver side is next + front lip!
Thanks.
Thread Starter
Intermediate
Joined: Jan 2014
Posts: 355
Likes: 180
From: GA
Celsior Kit - Part 2
Hello,
The front lip install was also pretty straight forward:
I Started by removing the old rubber gasket and decided that I also wanted to purchase a new rubber gasket but Toyota didn't sell it so after a lengthy online search I purchased an OEM Grey Honda rubber gasket.
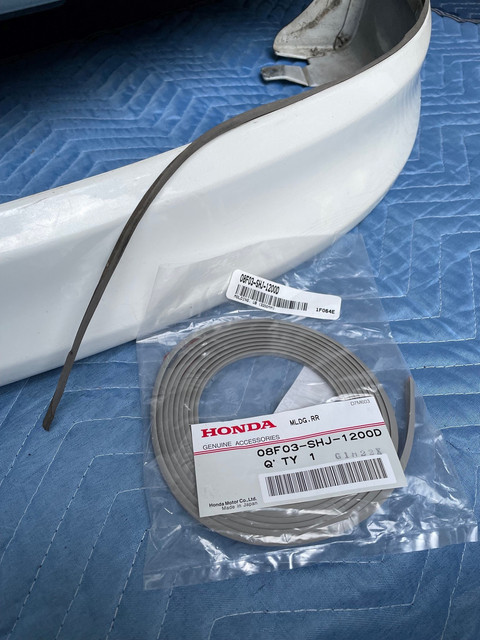
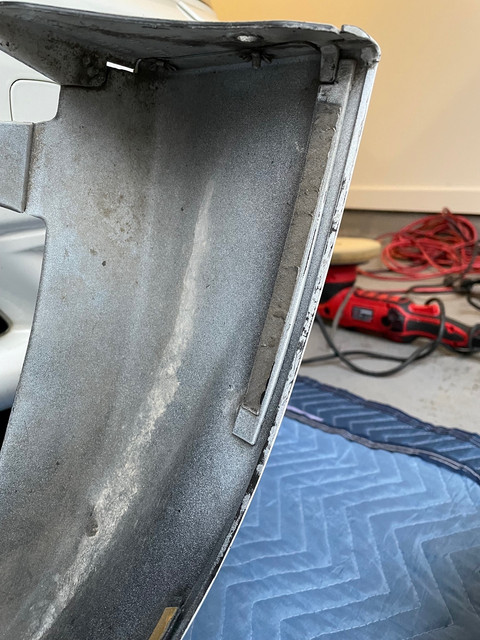
Scrapped off the old glue residue
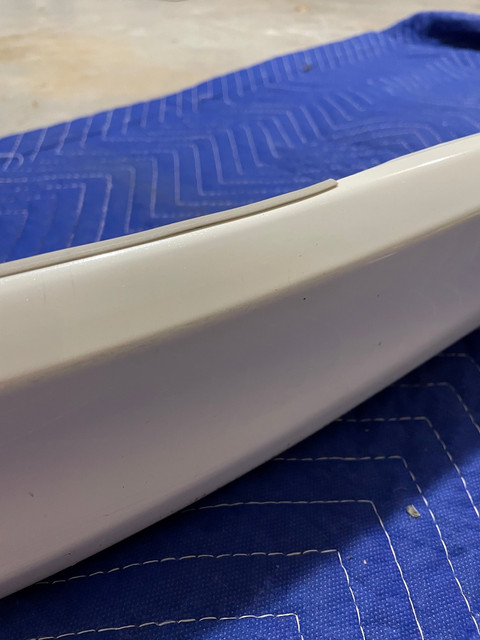
Fitted the new rubber gasket
Applied the new 3M double-sided tape to the follow areas:
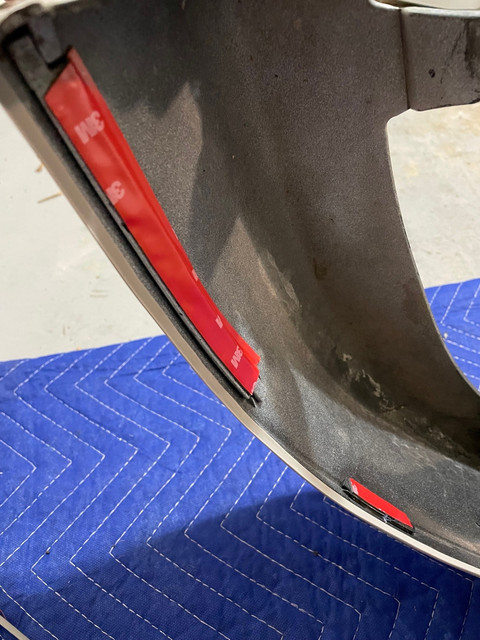
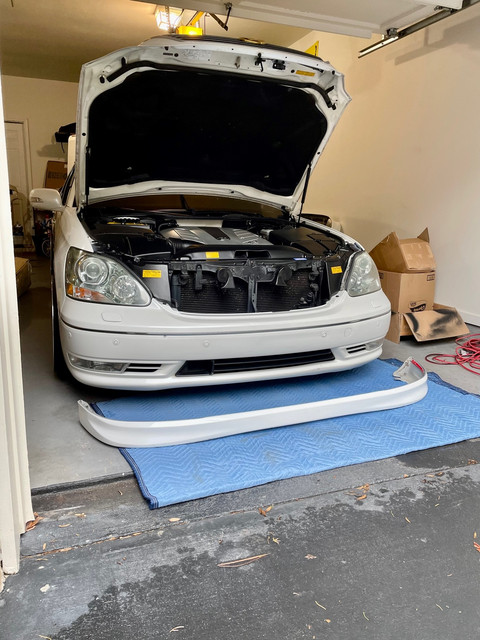

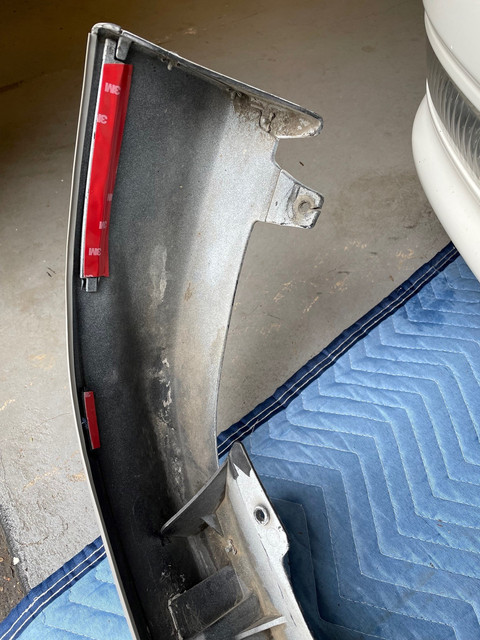
Finished product:
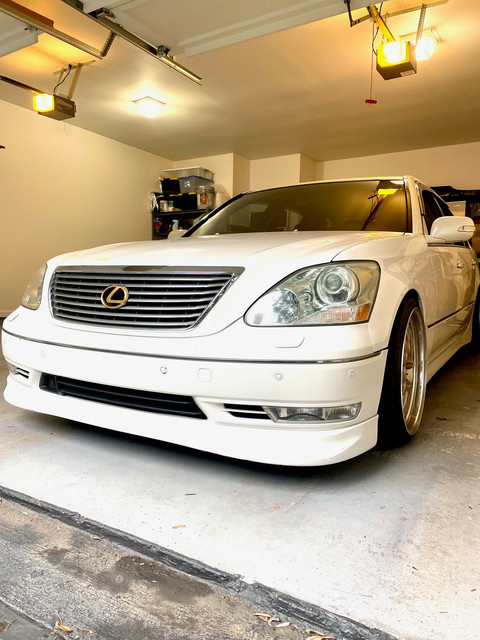

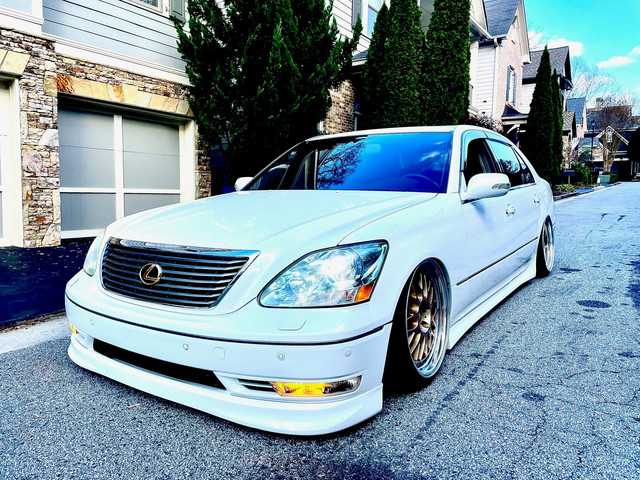
Next up will be the installation of the rear lip which is more involved as you need to drill several holes in the bumper.
Thanks,
Yann.
The front lip install was also pretty straight forward:
I Started by removing the old rubber gasket and decided that I also wanted to purchase a new rubber gasket but Toyota didn't sell it so after a lengthy online search I purchased an OEM Grey Honda rubber gasket.
Scrapped off the old glue residue
Fitted the new rubber gasket
Applied the new 3M double-sided tape to the follow areas:
Finished product:
Next up will be the installation of the rear lip which is more involved as you need to drill several holes in the bumper.
Thanks,
Yann.

