48 cubic in., 3,000 psi HPA (High Pressure Air) nitrogen/ compressed air tank with pressure regulated hose. Used for paintball. both parts new cost ~45$ from ebay.com .This will be used for the future recharging of my shocks. A local air compressor shop quoted me $20 to fill this tank. Considering a shock is only charged to 150 - 300psi max, and has a small area for gas internally, this should last me a long time.


![Estimated Results: Same Revalve dyno & internals but with a gas charge pressure of 150psi. This is an educated guess based off of previous successful dyno results. These results seem to be better suited for a 14kg/mm to 16kg/mm spring. Yes as low as an 8kg or 10kg spring can be used(The results [in rebound] may be pretty decent with these at the lower click settings).](https://cimg3.ibsrv.net/gimg/www.clublexus.com-vbulletin/220x165-1/80-11a63e39_1afb_4bbe_a900_5e32e86af0c1_c5b21767562051da290e48f643bb46c0f5c25fd9.jpg)


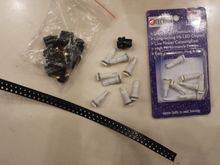

![Depending on which LED you purchase from digikey.com or radioshack you can enter the LED's forward current rating (in milliamps [ma]), and the gauge cluster's supply voltage (9.9volts or 10.9volts...see pic above) into this resistor value calculator located here - http://led.linear1.org/1led.wiz.](https://cimg7.ibsrv.net/gimg/www.clublexus.com-vbulletin/220x165-1/80-led_needle_resistor_value_e0f2e7c66c6cc26ccf0bf225cfdd58ed96e6e846.png)


