When you click on links to various merchants on this site and make a purchase, this can result in this site earning a commission. Affiliate programs and affiliations include, but are not limited to, the eBay Partner Network.
Here's the easiest way and the federal standard. Mark the lens height (small dot on the lens) on a wall. Roll back 25ft from the wall and your lights should no less than 3" below that line. Your two steps / J slopes should be aligned and level as well.
so I followed said instructions, and aimed them too high, so when I readjusted them back down, it stopped going down after a while.. so I just said "good enough!" then when I put everything back together the auto leveling stopped working on the one side that wouldn't adjust anymore.. did I break it and cost myself a headlight?
On my 2005 the connecting rod and housing is missing on both headlights. Is it only for comfortable adjusting of low-beam and high-beam or will the adaptive light not work without it? Thanks a lot.
Just bought my 01 Ls430 a few days ago and this light has been driving me insane, on my car it was in the passenger footwell fuse panel, fuse 28, middle row 2nd from the top, mine was a 5a, I just manually adjusted the headlights, using info from this post, thanks, not worried about auto leveling
Just for future reference when someone like me needs this thread (helped a ton, thank you to all who contributed!):
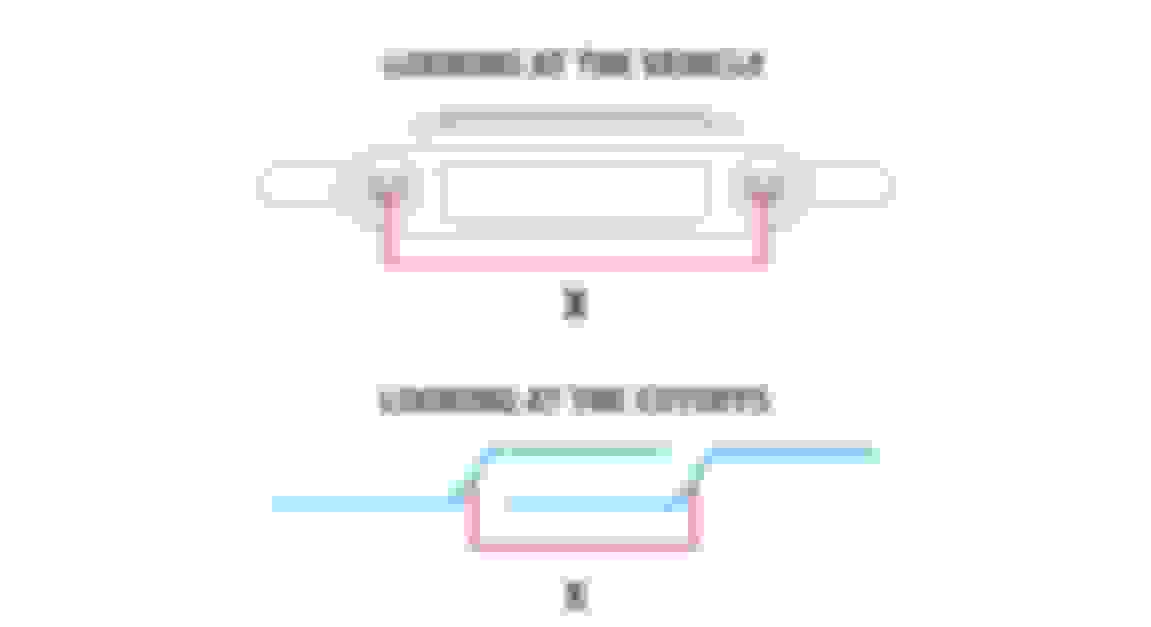
In order to avoid stripping the connecting rod gears when doing the vertical adjustment you need to turn both the high and low beam vertical adjustment screws at the same time in the same direction!
Just for future reference when someone like me needs this thread (helped a ton, thank you to all who contributed!):
In order to avoid stripping the connecting rod gears when doing the vertical adjustment you need to turn both the high and low beam vertical adjustment screws at the same time in the same direction!
source: the sticker on my headlights
My rod and gear assembly on my R side is toast, likely due to the PO's attempt at adjustment. Once I get a better look at the damage I'll buy a used assembly to get the parts I need. My lenses look like new.
My rod and gear assembly on my R side is toast, likely due to the PO's attempt at adjustment. Once I get a better look at the damage I'll buy a used assembly to get the parts I need. My lenses look like new.
I have a good passenger headlight from an 02. PM if interested.
In order to avoid stripping the connecting rod gears when doing the vertical adjustment you need to turn both the high and low beam vertical adjustment screws at the same time in the same direction!
I love Lexus, but why would they do this *****? Terrible design decision. So glad I read this post before adjusting my driver side low beam back down. I'll just leave it as-is.
Here we go. Once again, a few of us are having to adjust our headlight's aim and not many could do it. Thanks to GS3Tek for his diagram and Carmelstev on his insights, I'm going to do a short pictorial. Turns out its not really that difficult, and if I had to do it again, it may take 10 minutes.
Alright, I'm amending the method of doing the adjustment as REV-01 has brought up an excellent point. You should be able to adjust using a 10mm socket in where there is an opening in the back of the cover. Just stick a thin wall 10mm socket into the opening and turn to adjust. This will lessen the time considerably of making the adjustment. Note, this method will adjust both low and high at the same time. If you want to adjust independently which can be for some cases, then follow the direction below. edit 12/9/2008 2:25pm
Using the 10mm socket, remove this bolt and unclip it on the rear side. Attachment 439510
There should be enough slack wiring for you to do this. Attachment 439511
There are 4 phillips screws you need to remove from this housing. Hardest is the one in the far right as its a blind corner and you have to do by feel. This is where you use the long phillips bit and socket wrench. Note: be very carefully not to drop any of the screws as I'll bet it'll be a b'otch retrieving it. Note there is a circular opening on the right of the gray plastic. You should be able to put a 10mm socket into that hole to adjust without having to remove this cover. Attachment 439512
Once you remove the housing, you should see this. Make a mental note here to see where the position of the connecting screw drive rod goes. Attachment 439513
You should now be able to remove the connecting rod to adjust each lights by turning the gears(low beam is on the left of the picture above and high beam is on the right) Attachment 439514
For my opinion, you should use a sharpie and mark a line in the 12'oclock position so you can keep track with more accuracy how many turns you have done. To raise the headlight, you should turn clockwise. It will take several full turns to really see it move up. Do the same with the one. Note: Make the adjustments with your headlights on so you can see it move. Attachment 439515
Once you are satisfied with the heights, put the connecting rod back but make sure you it have the right way. THEY ARE DIRECTIONAL. Failure to do this right will not only strip the rods but your auto leveling is not going to work. (If I recall, I believe mine had a red marking on the end going towards the engine).
Put all 4 screws back, drop the fuse box back down, clip and re-bolt and you are done. Good Luck. Dave.
Stupid question...when u mean turn clock wise to raise...
Do u mean...clockwise using your hand directly on the wheel...
Or insert the screw driver. Turn the screw driver clock wise..which means the wheel goes counter clockwise..
I've been trying to do this and cannot get the Stupid headlight to rise. Too much light is pooled in the front.


 so you can see it move.
 Good Luck. Dave.