When you click on links to various merchants on this site and make a purchase, this can result in this site earning a commission. Affiliate programs and affiliations include, but are not limited to, the eBay Partner Network.
No, but again, it's not always the belt that could fail and cause problems (as a general rule). Could be a water pump, and idlers, tensioner, or a leak where coolant gets onto the belt that can cause issues....my .02.
And this is very true. The tensioner may fail without warning even if the belt still looks new and end up letting the belt slip a few teeth and catastrophically damaging the engine. Or the idlers or water pump may fail resulting in the same less than desirable outcome. Either way, it's always better safe than sorry.
Again DIY is a no-brainer, but if you have to pay an indie, if it's $900 at the high end, I prefer to say, well if you pushed it 30k more, how much cost was avoided, maybe $300? How much peace of mind was received by replacement? So I would prefer to replace...and you know you really got more than peace of mind, you got new parts and coolant. In other words it isn't like you wasted something by having the job done...
After lot of contemplation I decided to do this on my own. This is my first time doing TB/WP ever.
I took my own time and have come to the point of turning the crank to check for timing marks.
I did align timing marks before, then turned 50 degrees, removed the belt, transferred the marks, and then installed the belt. Belt is pre-marked as well and all those perfectly aligned.
I then installed the crank pulley and turned the crank slowly. Do you have to have spark plugs out to do this? Mine are still on.
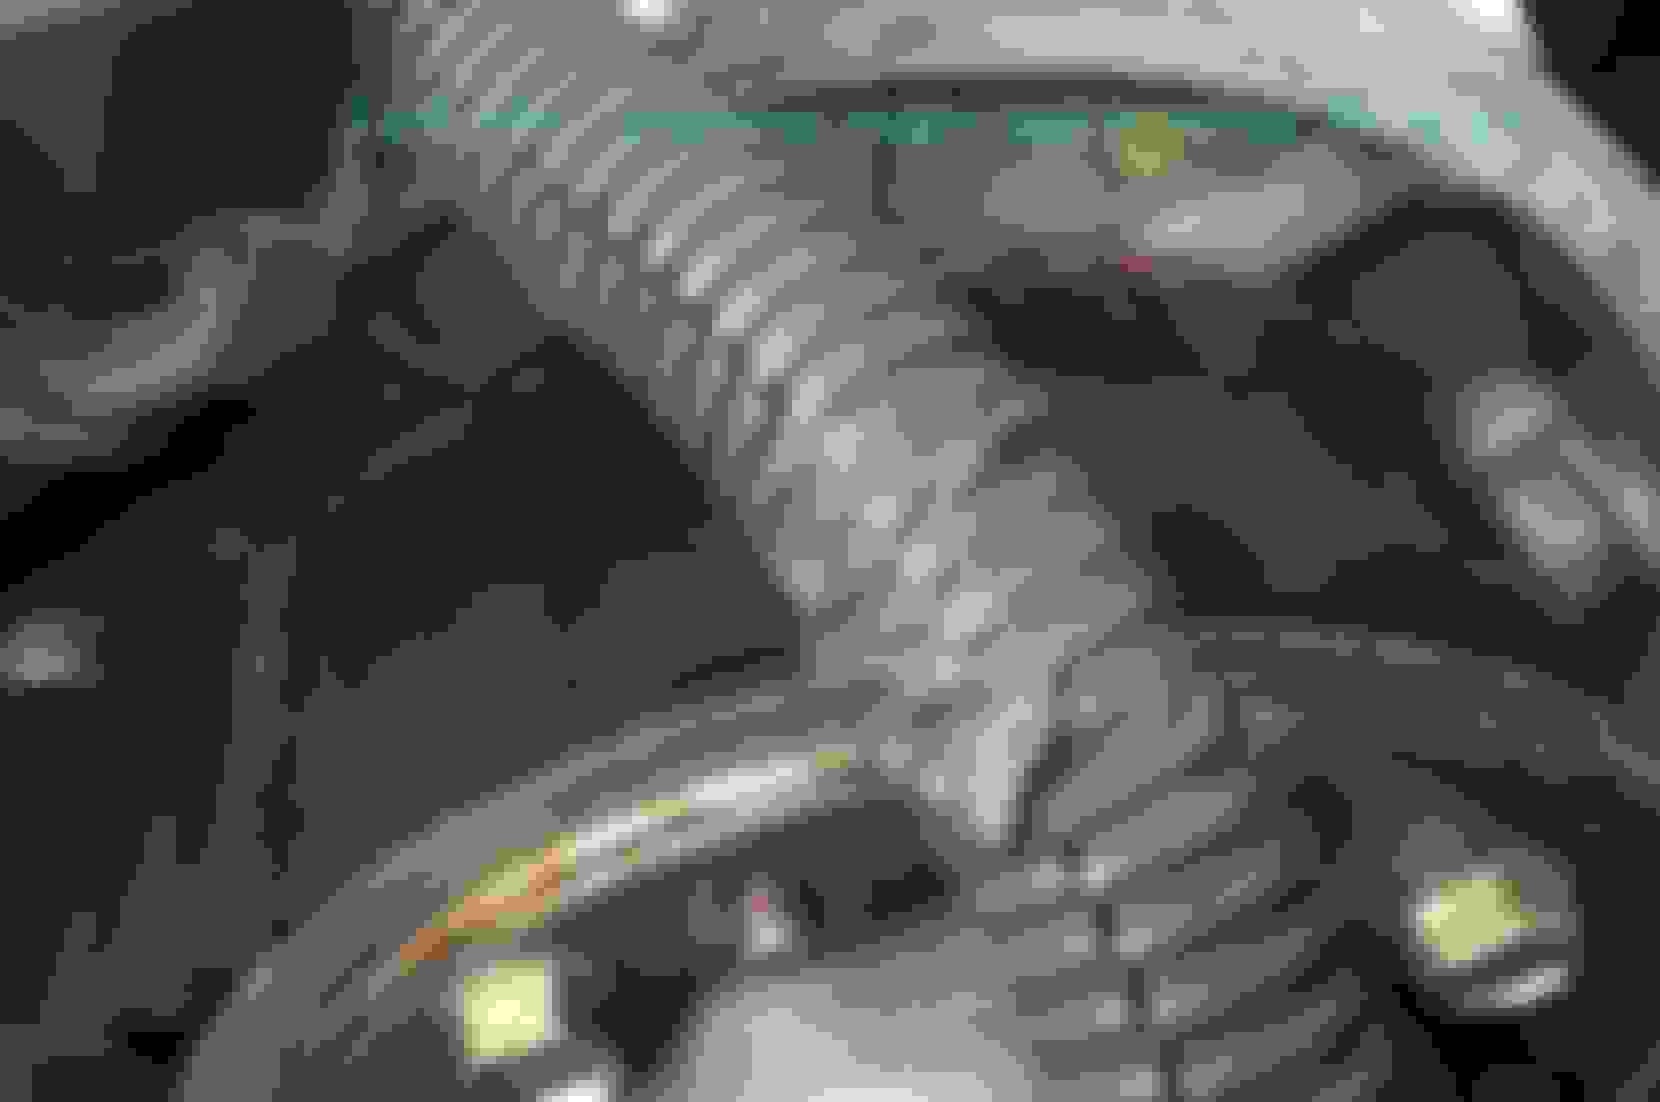
Anyways, see photos below and tell me if there is any problem. Marks on the belt did align perfectly with my previous belt marks and all three left, right, crank. After rotating engine if I ignore the marks on belt (white) and my own marks (orange) then all these three continue to match all the time. I think I have go this correctly installed but would like to take an expert opinion.
Once you rotate the engine the marks on the belt don't line up with anything.
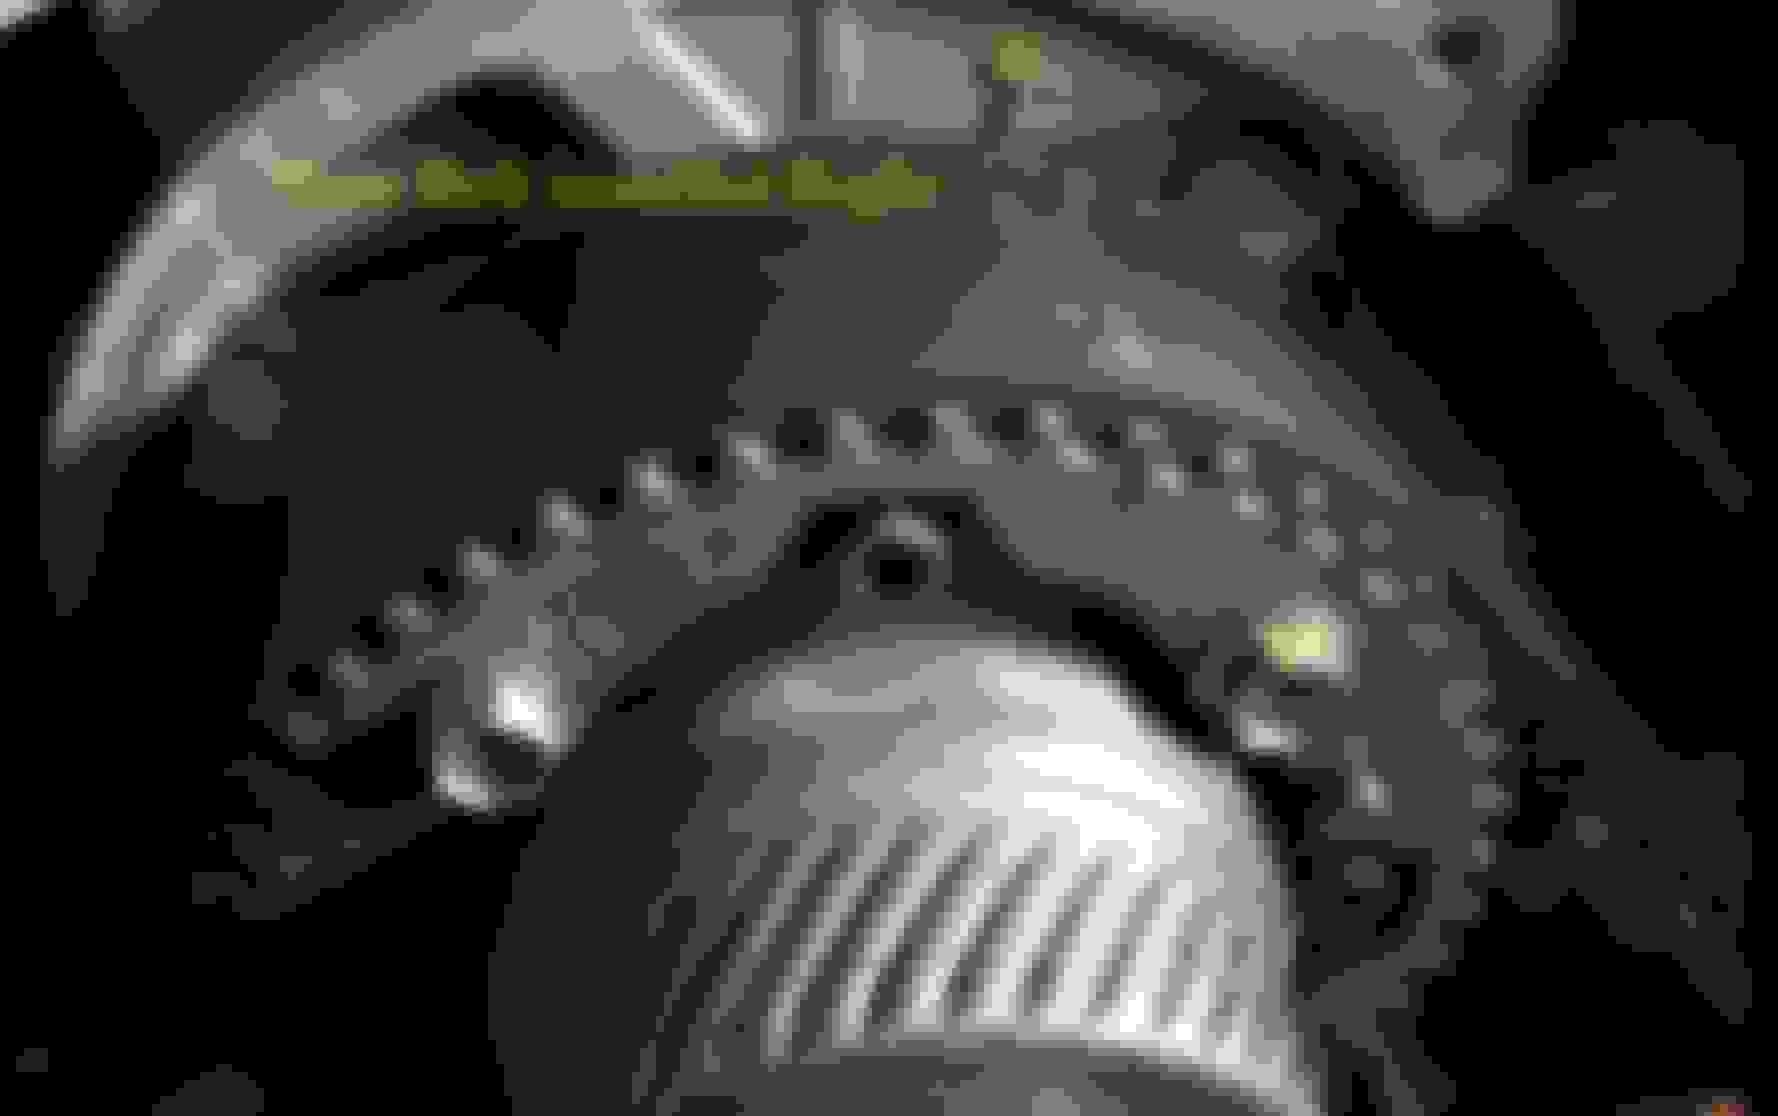
Line the notch on the crank pulley up with the pin that sits behind it (the 50 degree pin). The notches on the front of both timing pulleys should then line up with the "T" marks on the rear covers.
From what you are saying you are good to go.
Thanks! That was helpful.
Coincidently after few rotations even the belt marks aligned. That gave me even more confidence. I know it doesn't matter but still.
Now everything is buttoned, almost.
I missed replacing the small water pump gasket. Water pump was already installed and I think it would have done more harm than good if I took out the WP again.
I put one of the bolt with embedded nut at wrong hole on the WP. I realized after I was trying to get the top center timing belt cover on and it wouldn't go all the way back. I didn't want to start dismantling things again.
Based on condition of the old WP gasket, I feel confident that the WP won't leak. If it leaks, I might go back.
Few more tips if they haven't been covered already.
I drained engine block as well by loosening nuts on both sides. My car was on ramps and there was no option to remove wheels to get to the bolt. Nice thing is, you just need to loosen the bolt and there is a tap kind of part where you can connect a tube. No mess.
I put coolant in the engine block after installing water pump. This was to make sure there are no obvious leaks from the water pump as well as avoid bubbles as much as possible. Most people put coolant in the end but this can help.
I Did it over 5 days. I think it took me about 20 hours total but who is counting. There was more time learning about each step. I stopped as soon as I felt like stopping. I do it as a hobby therefore I really don't care about time it takes.
One trick I've learned to keep the bolts in the correct position is as I remove them I put them in the same position on the new pump. When the old pump is off I transfer the bolts from the new pump to the old pump and then install them on the new pump on the engine.
Thanks! That was helpful.
Coincidently after few rotations even the belt marks aligned. That gave me even more confidence. I know it doesn't matter but still.
Now everything is buttoned, almost.
I missed replacing the small water pump gasket. Water pump was already installed and I think it would have done more harm than good if I took out the WP again.
I put one of the bolt with embedded nut at wrong hole on the WP. I realized after I was trying to get the top center timing belt cover on and it wouldn't go all the way back. I didn't want to start dismantling things again.
Based on condition of the old WP gasket, I feel confident that the WP won't leak. If it leaks, I might go back.
Few more tips if they haven't been covered already.
I drained engine block as well by loosening nuts on both sides. My car was on ramps and there was no option to remove wheels to get to the bolt. Nice thing is, you just need to loosen the bolt and there is a tap kind of part where you can connect a tube. No mess.
I put coolant in the engine block after installing water pump. This was to make sure there are no obvious leaks from the water pump as well as avoid bubbles as much as possible. Most people put coolant in the end but this can help.
I Did it over 5 days. I think it took me about 20 hours total but who is counting. There was more time learning about each step. I stopped as soon as I felt like stopping. I do it as a hobby therefore I really don't care about time it takes.
Nice job! 100% I share your attitude that some of these jobs we are DIY as a hobby! (the opposite would be say if the car were a taxi and being down is $$$$$)
The marks on the belt are only for installation. Once you rotate the engine they won't line up again. As long as after installing and releasing the tensioner, the notches on the pulleys are the only thing that will line up.
The marks on the belt are only for installation. Once you rotate the engine they won't line up again. As long as after installing and releasing the tensioner, the notches on the pulleys are the only thing that will line up.
Then I don't see the notch on the pulleys line up on the pics above ?
In the second picture you lined up the markings on the belt. Once the engine is rotated you must completely ignore the markings on the belt and go by the notches in the pulleys, like your first picture. As long as both pulley notches are lined up with the line on the rear covers and the crank pulley shows "0"on the timing tab, you are good. If you line up the notches with the "T" marks on the back cover the crank pulley will read "50" and line up with the pin on the cover.


 There was more time learning about each step. I stopped as soon as I felt like stopping. I do it as a hobby therefore I really don't care about time it takes.


