GX - 2nd Gen (2010-2023) Discussion topics related to the 2010 + GX460 models

Replacing scratched center #console - upper panel

Thread Tools
 
Search this Thread
 
Old Jun 13, 2017 | 07:11 AM
  #1  
User21c's Avatar
User21c
Thread Starter
Pit Crew
 
Joined: Apr 2017
Posts: 241
Likes: 22
From: CA
Question Replacing scratched center #console - upper panel

All,
The center console in my 2015 has some small scratches from the prior owner.
(this is the "metal look" sprayed plastic piece in the parts link below)
https://www.lexuspartsnow.com/parts/...821-60381.html

Has anyone here ever replaced the scratch prone part?
Is it a simple snap off/on, or is every switch, etc attached to it from the bottom?

Thanks for any tips.
Reply
Old Jun 13, 2017 | 11:45 AM
  #2  
tecman's Avatar
tecman
Lead Lap
 
Joined: Aug 2013
Posts: 4,872
Likes: 1,431
From: GA
Default

Looks like it is just clips and Phillips-head screws to remove everything. Please let us know how it goes.

Put the GX in neutral and remove the shift ****. pull up the rear and slide the piece back.
Reply
Old Jun 13, 2017 | 03:06 PM
  #3  
Acrad's Avatar
Acrad
CL Community Team
5 Year Member
Liked
Loved
Community Favorite
 
Joined: Mar 2017
Posts: 9,317
Likes: 3,977
From: USA
Default

This video might help too.


Last edited by Acrad; Nov 1, 2018 at 03:27 AM.
Reply
Old Sep 18, 2018 | 09:43 AM
  #4  
Yona's Avatar
Yona
Rookie
 
Joined: Jul 2018
Posts: 31
Likes: 10
From: North Carolina
Default

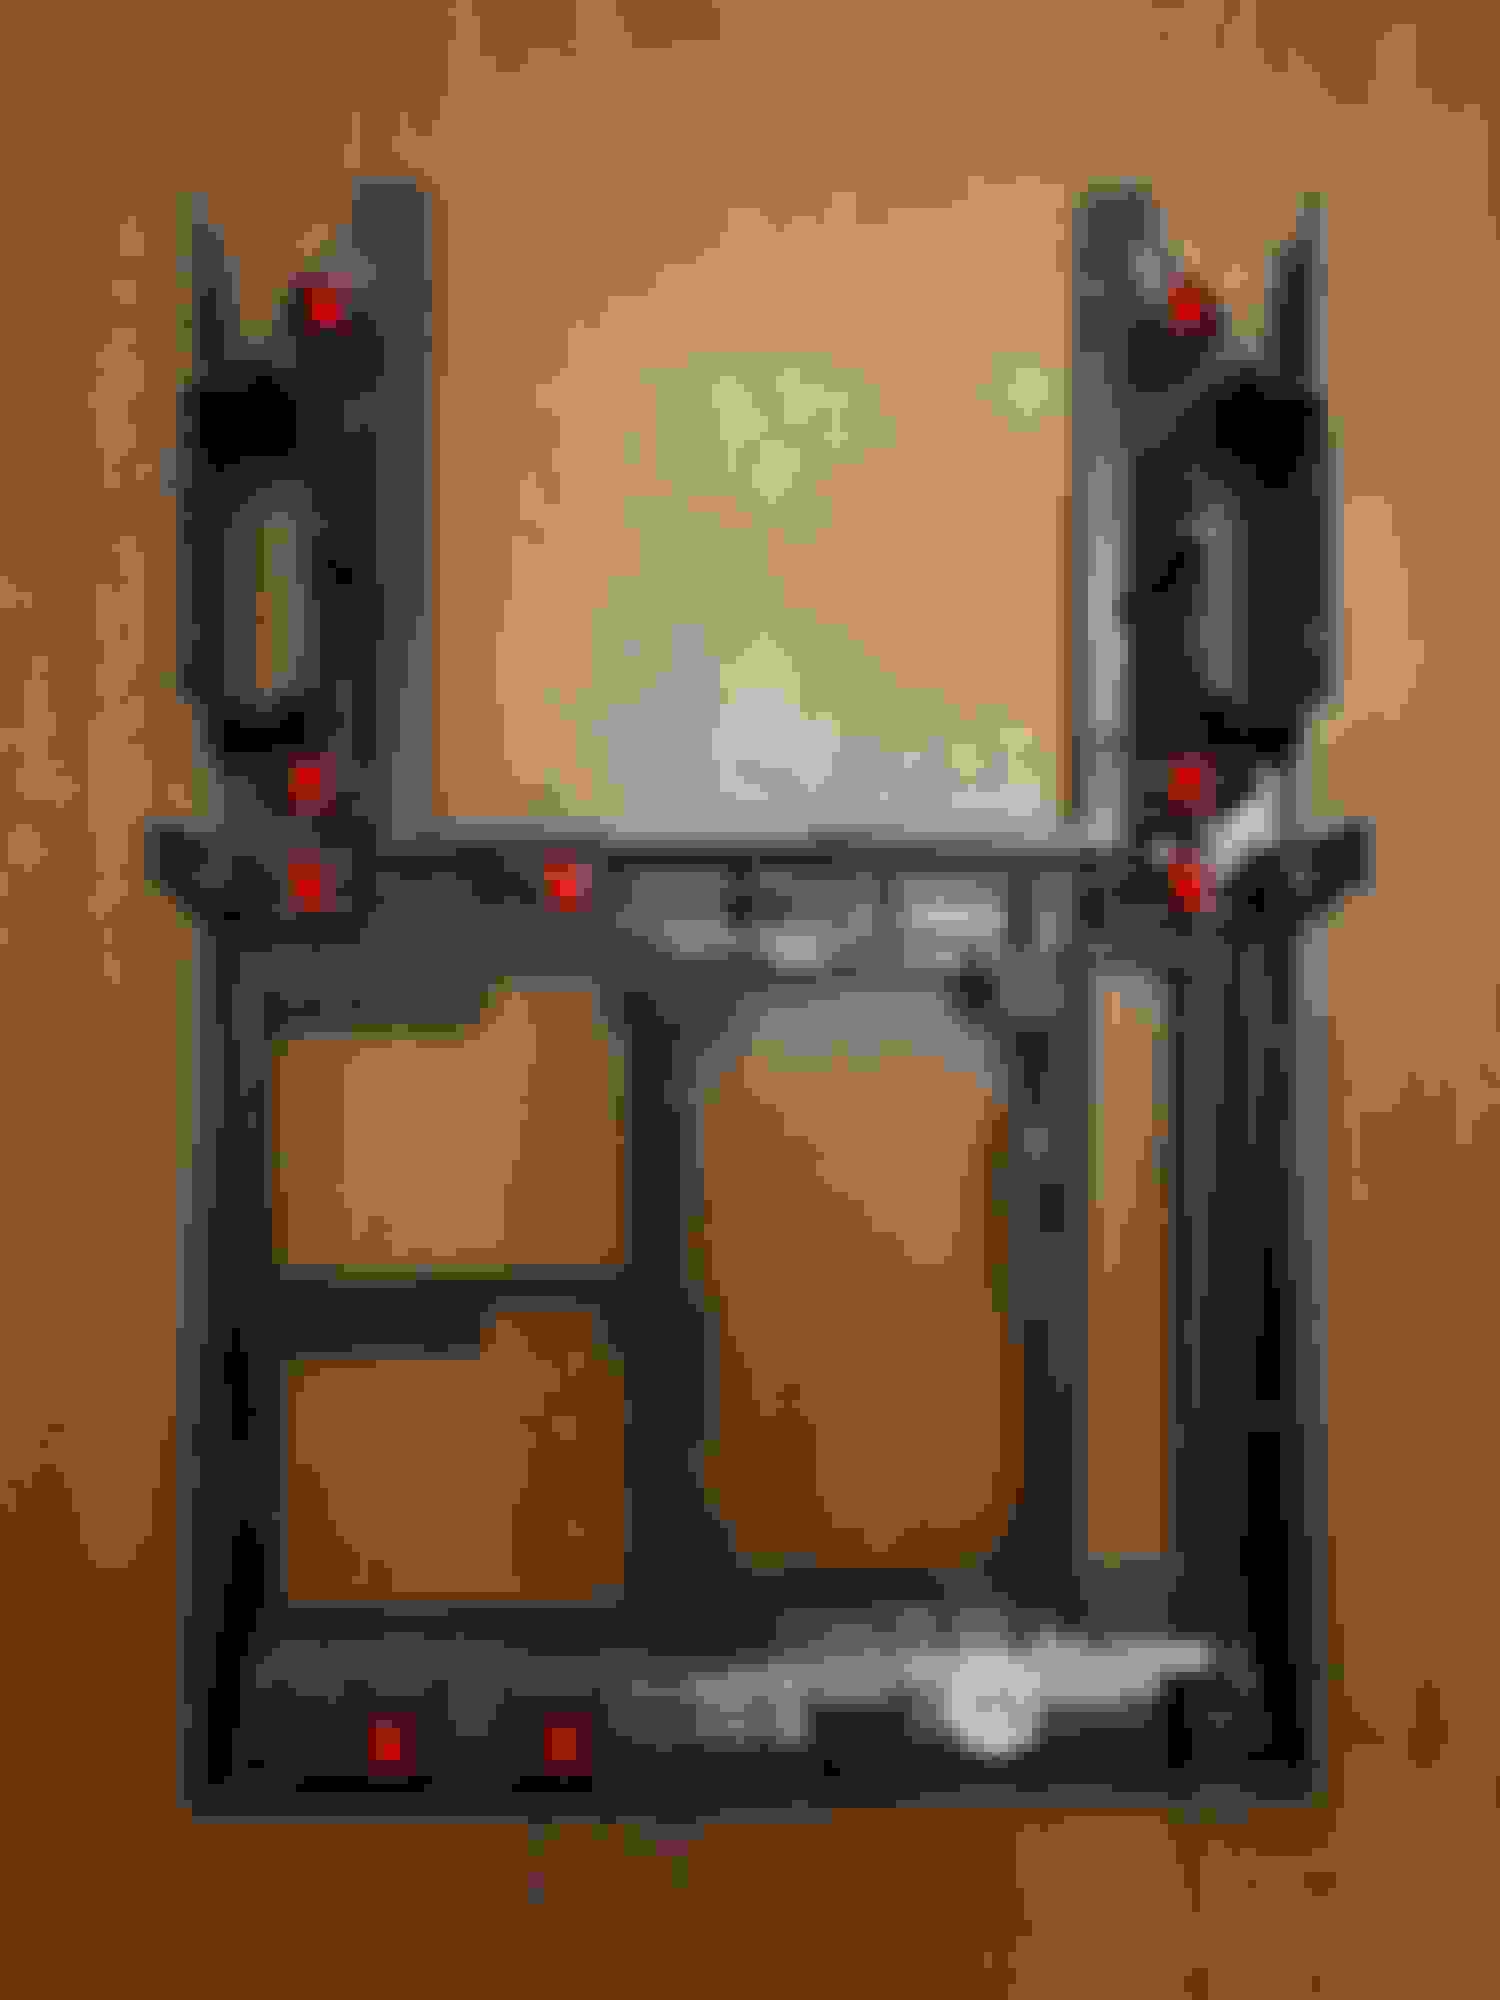
I swapped mine out last night. It was very simple, the only tools I needed were a trim remover and phillips screwdriver. There are 9 screws that need to be removed. The locations are marked below.

The shift boot looked a little tatty so I cleaned and conditioned it while everything was disassembled. I also used
this plastic polish kit this plastic polish kit
to remove scratches on the shift indicator. The entire project took about 90 minutes.


Last edited by Yona; Sep 18, 2018 at 09:50 AM.
Reply
Old Aug 15, 2020 | 12:38 PM
  #5  
Acrad's Avatar
Acrad
CL Community Team
5 Year Member
Liked
Loved
Community Favorite
 
Joined: Mar 2017
Posts: 9,317
Likes: 3,977
From: USA
Default

Replaced mine today as something scratched mine up pretty good a month ago. I will add... actually 11 screws. You really want to take the wood piece off or you risk damaging it installing the new trim. It will make sense once you are at that point of disassembly. Once the two screws are removed the wood trim will slide forward.

EDIT: I didn't replace the wood.. just showing you need to remove this piece to replace part this thread is about.

PN: 58821-60381


Last edited by Acrad; Aug 15, 2020 at 06:22 PM.
Reply
Old Nov 26, 2020 | 02:41 PM
  #6  
Acrad's Avatar
Acrad
CL Community Team
5 Year Member
Liked
Loved
Community Favorite
 
Joined: Mar 2017
Posts: 9,317
Likes: 3,977
From: USA
Default

Reply
Old Jun 5, 2022 | 07:29 AM
  #7  
sfuad's Avatar
sfuad
Pit Crew
15 Year Member
Photogenic
Liked
Top Answer: 1
 
Joined: May 2007
Posts: 248
Likes: 51
From: Jacksonville, FL
Default 2015 GX 460 center wood tray

This morning as I was cleaning my 2015 GX 460 interior. The center tray was open. so I pushed it to close. Once I wiped the surface clean, I pushed it back to open again and for some reason it is not locking in. I think its not going back all the way to engage the lock.
Is there a simple fix for this?

Thanks on advance


Attached Files
File Type: mov
IMG_1879.MOV (8.32 MB, 19 views)
Reply
Old Jun 5, 2022 | 08:00 AM
  #8  
Seanzky's Avatar
Seanzky
Intermediate
 
Joined: Oct 2021
Posts: 353
Likes: 211
From: TX
Default

Have you tried unplugging your charger, letting the thing close fully before trying to push it back open again?
Reply
Old Jun 5, 2022 | 09:06 AM
  #9  
sfuad's Avatar
sfuad
Pit Crew
15 Year Member
Photogenic
Liked
Top Answer: 1
 
Joined: May 2007
Posts: 248
Likes: 51
From: Jacksonville, FL
Default

Originally Posted by Seanzky
Have you tried unplugging your charger, letting the thing close fully before trying to push it back open again?
Yes I did. I let it close completely before wiping it and now it does not go all the way back to lock
Reply
Old Jun 5, 2022 | 10:22 AM
  #10  
hzhao's Avatar
hzhao
Racer
25 Year Member
Liked
Loved
Top Answer: 1
 
Joined: Apr 2001
Posts: 1,985
Likes: 1,045
From: Northeast Ohio
Default

Originally Posted by sfuad
Yes I did. I let it close completely before wiping it and now it does not go all the way back to lock
since the entire cover only held by clips, you can just pry it up from the cup holder edge where meet the shifter. As soon as you pup up the center piece, just pull towards you a little bit, you will have enough room to inspect the door mechanism. The chance is one of the wire from the wire harnesses caught in the track of the door that reverted the door to lock in position. Just push the wires out and you should be ok. Of cause, there is possible that door lock spring is either broken or out of place.. either way, take the center cover piece out is not difficult at all. Should you need to take it out completely, just take the shifter ****, put shifter in either N or R, lift the entire piece, disconnect the harnesses for seat heater, shift indicators, etc.
Reply
Old Aug 11, 2024 | 04:43 PM
  #11  
Mantutuli's Avatar
Mantutuli
Driver
 
Joined: Jul 2024
Posts: 59
Likes: 3
Default

Originally Posted by Acrad
Replaced mine today as something scratched mine up pretty good a month ago. I will add... actually 11 screws. You really want to take the wood piece off or you risk damaging it installing the new trim. It will make sense once you are at that point of disassembly. Once the two screws are removed the wood trim will slide forward.

EDIT: I didn't replace the wood.. just showing you need to remove this piece to replace part this thread is about.

PN: 58821-60381


Do you remember how to access those screws/from where? For the life of me, I couldnt see the screws. I took two very very small screws out from a lace it seemed like the screwed into the wood lid, but the piece wouldnt budge

Reply
Old Aug 11, 2024 | 04:48 PM
  #12  
Acrad's Avatar
Acrad
CL Community Team
5 Year Member
Liked
Loved
Community Favorite
 
Joined: Mar 2017
Posts: 9,317
Likes: 3,977
From: USA
Default

Vaguely remember that door had to be open at certain position to see the screws but long enough back I can’t remember for certain.

Reply
Old Aug 11, 2024 | 04:50 PM
  #13  
Mantutuli's Avatar
Mantutuli
Driver
 
Joined: Jul 2024
Posts: 59
Likes: 3
Default

Originally Posted by Acrad
Vaguely remember that door had to be open at certain position to see the screws but long enough back I can’t remember for certain.
thank you!!
Reply
Related Topics
Thread
Thread Starter
Forum
Replies
Last Post
lobuxracer
IS F (2008-2014)
25
Oct 3, 2017 04:39 PM
AL13NV8D3R
GS - 4th Gen (2013-2020)
6
Jan 14, 2016 02:01 PM
Zinda
IS - 2nd Gen (2006-2013)
3
Jun 2, 2014 05:55 AM
hahahaf
IS F (2008-2014)
8
Apr 18, 2014 04:38 AM
snook
SC - 1st Gen (1992-2000)
3
Nov 15, 2009 06:48 PM


All times are GMT -7. The time now is 08:12 AM.