Center Console Disassembly and Clean Up




 Center Console Disassembly and Clean Up
So you just got your quad shot latte and you've put it safely in the center console cup holder. As you pull away, some blind fool comes out of nowhere and you hit the brakes. Hard. Latte is now covering the console and threatening to soak into something really expensive and delicate. Joy.
There's only so much you can do from the top. To really get this clean, you need to remove the center console and give everything a nice soapy bath with a soft sponge (don't want to scratch the carbon fibre now...)
Here's how to do this, with pics:
First, you'll need to remove the side panels and the shift ****. Start at the thin pointed end of the side panel and gently lift just enough so you can get a grip under the edge, then pull backward toward the rear of the car. They will snap out. Unscrew the shift **** (this is the easiest part of the whole job!)

You should now see this:

Gently lift the front edge of the console. Once it raises, slide your fingers underneath the sides to lift the rear portion of the console.

When you raise up the console from the rear (don't try to lift from the front!), you'll see two electrical connectors holding the console. Remove them and the console will be completely free of the car.

Flip the console over on a soft surface (to avoid scratching our expensive carbon fibre) and remove the four screws holding the cup holder.

Now we can see the coffee encrusted cup holder alone

Side panels cover the mechanism you'll need to access
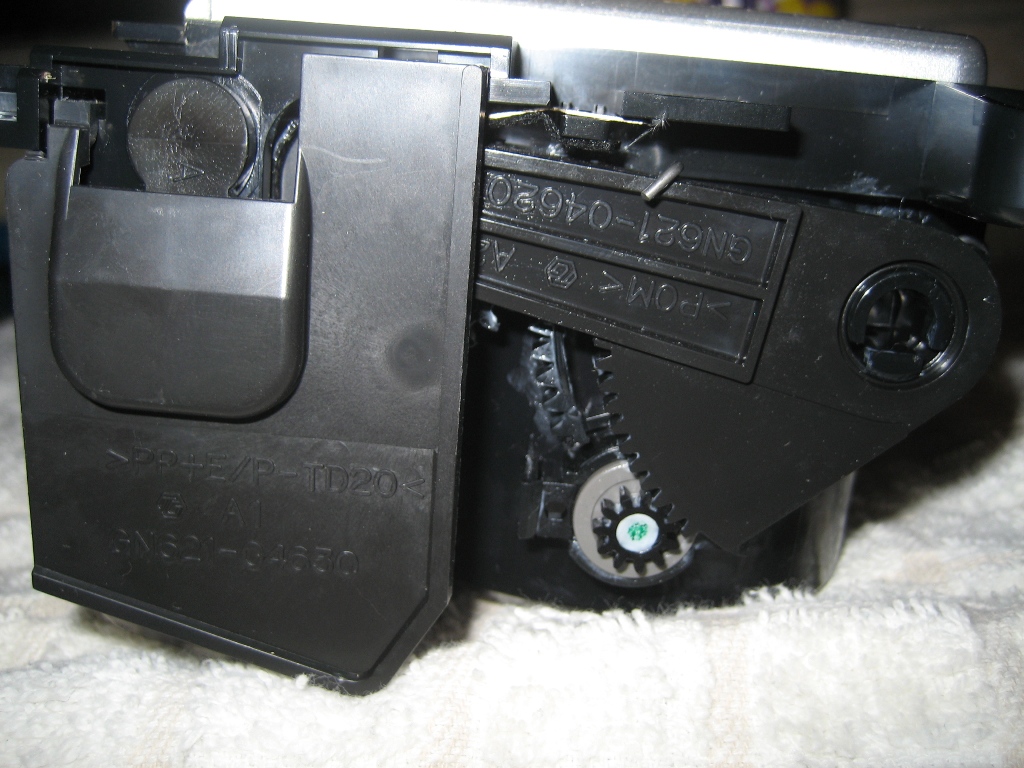
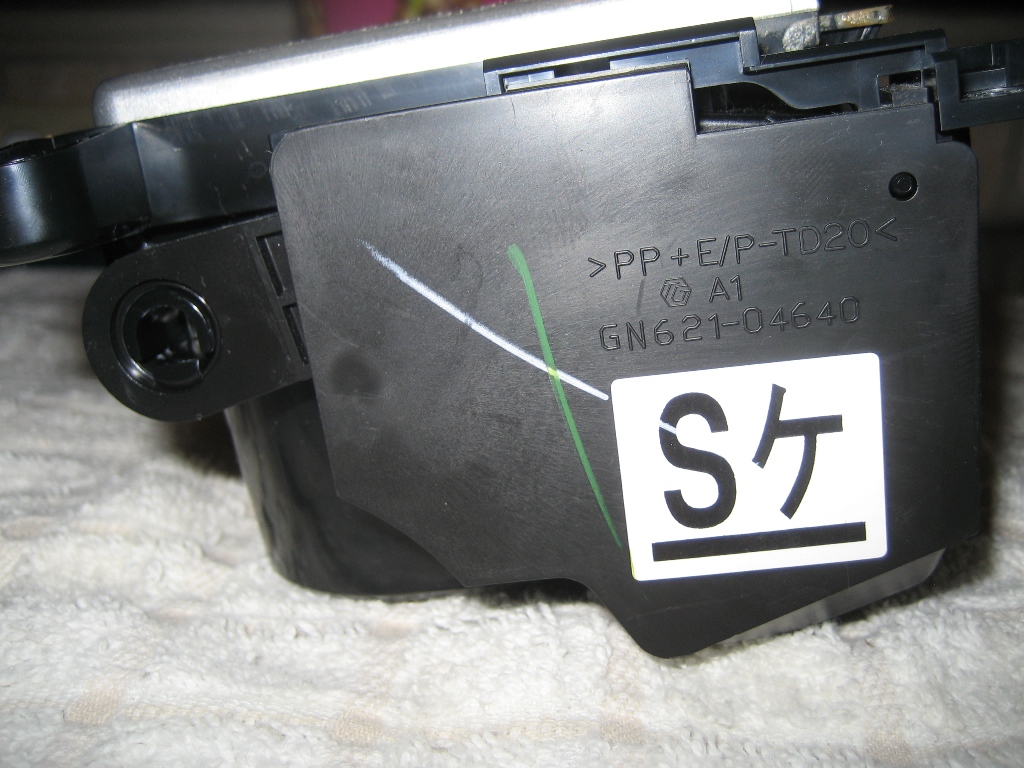
Two tabs hold the top of the side panel

With the tab pushed up, the panel releases top front
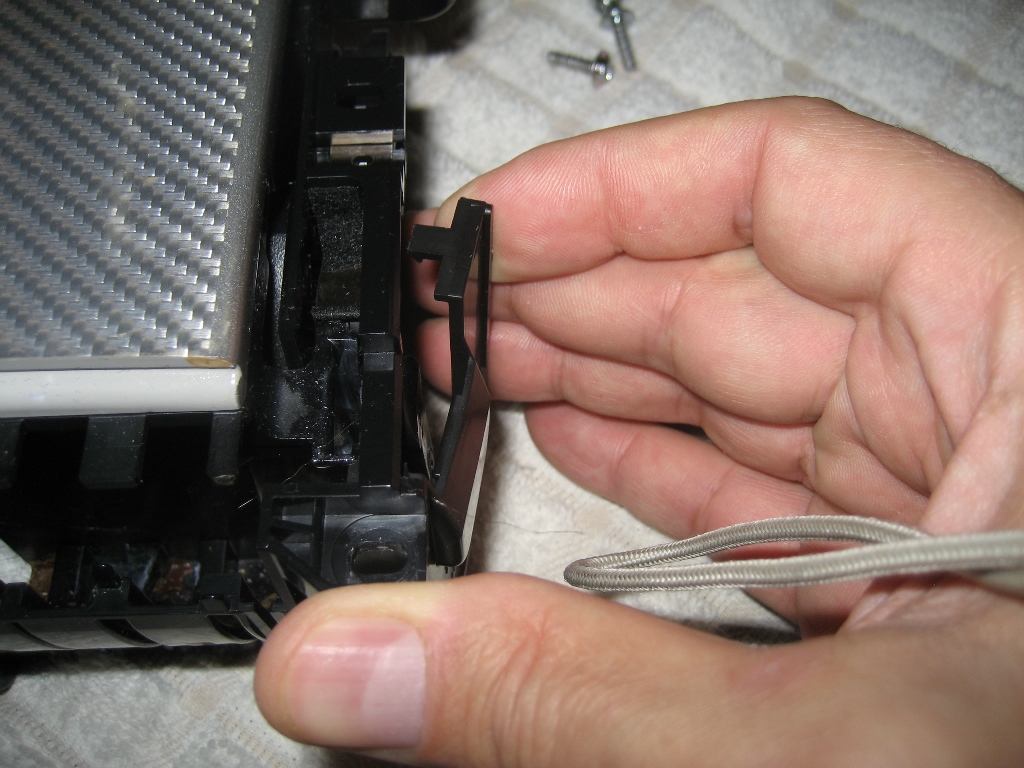
And top rear

And the panel comes off of the big tab in the back. You'll need to do this on both sides...

See all the nasty old coffee???

Other side image with more coffee! Note the pivot point for the end of the arm - the tab at the bottom is the retainer, so you'll want to push this gently toward the center of the pivot while lifting the arm off the pivot shaft (both sides need this)

Now open the top door fully, then rotate the small end of the arm to align the tabs and remove the arm from the door.


Remove the metal tab from the side of the assembly

Then remove this little fellow by aligning the tabs - it will be pretty obvious looking at the parts

Finally, lift the top door off the base

You now have a collection of parts for the cup holder assembly

Now it's time to get busy with an old toothbrush and a sponge. Clean everything to your satisfaction. Assembly is the inverse of our disassembly with one key important thing to address - the gear teeth on the door must align with the top of the rack when you snap on the arm. Like this on both sides.

It is possible to get the gears and racks off and the door won't want to open or close. Get it right and it's buttery smooth for open and close. Look at the pictures to see how the springs are set up. One side pushes open, the other pushes closed. They're not too hard to get set up as long as you have the gear and rack engagement correctly aligned.
If you still have questions, post them here.
There's only so much you can do from the top. To really get this clean, you need to remove the center console and give everything a nice soapy bath with a soft sponge (don't want to scratch the carbon fibre now...)
Here's how to do this, with pics:
First, you'll need to remove the side panels and the shift ****. Start at the thin pointed end of the side panel and gently lift just enough so you can get a grip under the edge, then pull backward toward the rear of the car. They will snap out. Unscrew the shift **** (this is the easiest part of the whole job!)
You should now see this:
Gently lift the front edge of the console. Once it raises, slide your fingers underneath the sides to lift the rear portion of the console.
When you raise up the console from the rear (don't try to lift from the front!), you'll see two electrical connectors holding the console. Remove them and the console will be completely free of the car.
Flip the console over on a soft surface (to avoid scratching our expensive carbon fibre) and remove the four screws holding the cup holder.
Now we can see the coffee encrusted cup holder alone
Side panels cover the mechanism you'll need to access
Two tabs hold the top of the side panel
With the tab pushed up, the panel releases top front
And top rear
And the panel comes off of the big tab in the back. You'll need to do this on both sides...
See all the nasty old coffee???
Other side image with more coffee! Note the pivot point for the end of the arm - the tab at the bottom is the retainer, so you'll want to push this gently toward the center of the pivot while lifting the arm off the pivot shaft (both sides need this)
Now open the top door fully, then rotate the small end of the arm to align the tabs and remove the arm from the door.
Remove the metal tab from the side of the assembly
Then remove this little fellow by aligning the tabs - it will be pretty obvious looking at the parts
Finally, lift the top door off the base
You now have a collection of parts for the cup holder assembly
Now it's time to get busy with an old toothbrush and a sponge. Clean everything to your satisfaction. Assembly is the inverse of our disassembly with one key important thing to address - the gear teeth on the door must align with the top of the rack when you snap on the arm. Like this on both sides.
It is possible to get the gears and racks off and the door won't want to open or close. Get it right and it's buttery smooth for open and close. Look at the pictures to see how the springs are set up. One side pushes open, the other pushes closed. They're not too hard to get set up as long as you have the gear and rack engagement correctly aligned.
If you still have questions, post them here.