Lexus RX: How to Replace Serpentine Belt
The serpentine belt powers the accessories, alternator, and water pump. Learn how to replace it at home preemptively to avoid disaster and labor charges.
This article applies to the Lexus RX (2007-2014).
Traditionally, a serpentine belt goes around all the different pulleys on the front of the motor, thus giving it it's name from the serpentine route it takes. However, the Lexus RX's are a bit different and have two different belts: one for the power steering and one for the alternator. The positive side to this is that the power steering belt can break and still leave your car in driving condition, whereas if you break a serpentine belt you lose the key component your car needs to run: the alternator. The downside is that having two belts makes changing them out more of a headache due to the extra work required. The process for changing the serpentine belt differs depending on the model year of Lexus RX. This guide covers the RX 350 and RX 450h first. The older RX 300 and RX 330 guides will follow.

Materials Needed
- 12mm socket
- 14mm socket
- Cheater bar
- 5mm bi-hexagon wrench
- 12mm open ended wrench
- 14mm open ended wrench
- Phillips head screwdriver
- Stretched-out coat hanger
RX 350 / RX 450h
Step 1 - Remove passenger side wheel
Loosen the lugs on the front wheel and put the vehicle on jack stands. Finish removing the lug nuts and remove the wheel.
(Related Article: How to Change a Tire - ClubLexus.com)

Step 2 - Remove serpentine belt panels
Remove the panels from the fender well to gain access to the pulleys. The panel is held in by bolts, but also by the panel directly to the right. Continue working around the fender well, removing trim pieces until the serpentine belt panel is out of the way.
Step 3 - Loosen serpentine belt tensioner
Relax the tensioner by turning the center nut counter-clockwise. Use a long, flat handled socket wrench to get leverage. Once the tensioner has been relieved, place a 5mm bi-hexagon wrench through the bottom hole to keep it from moving.
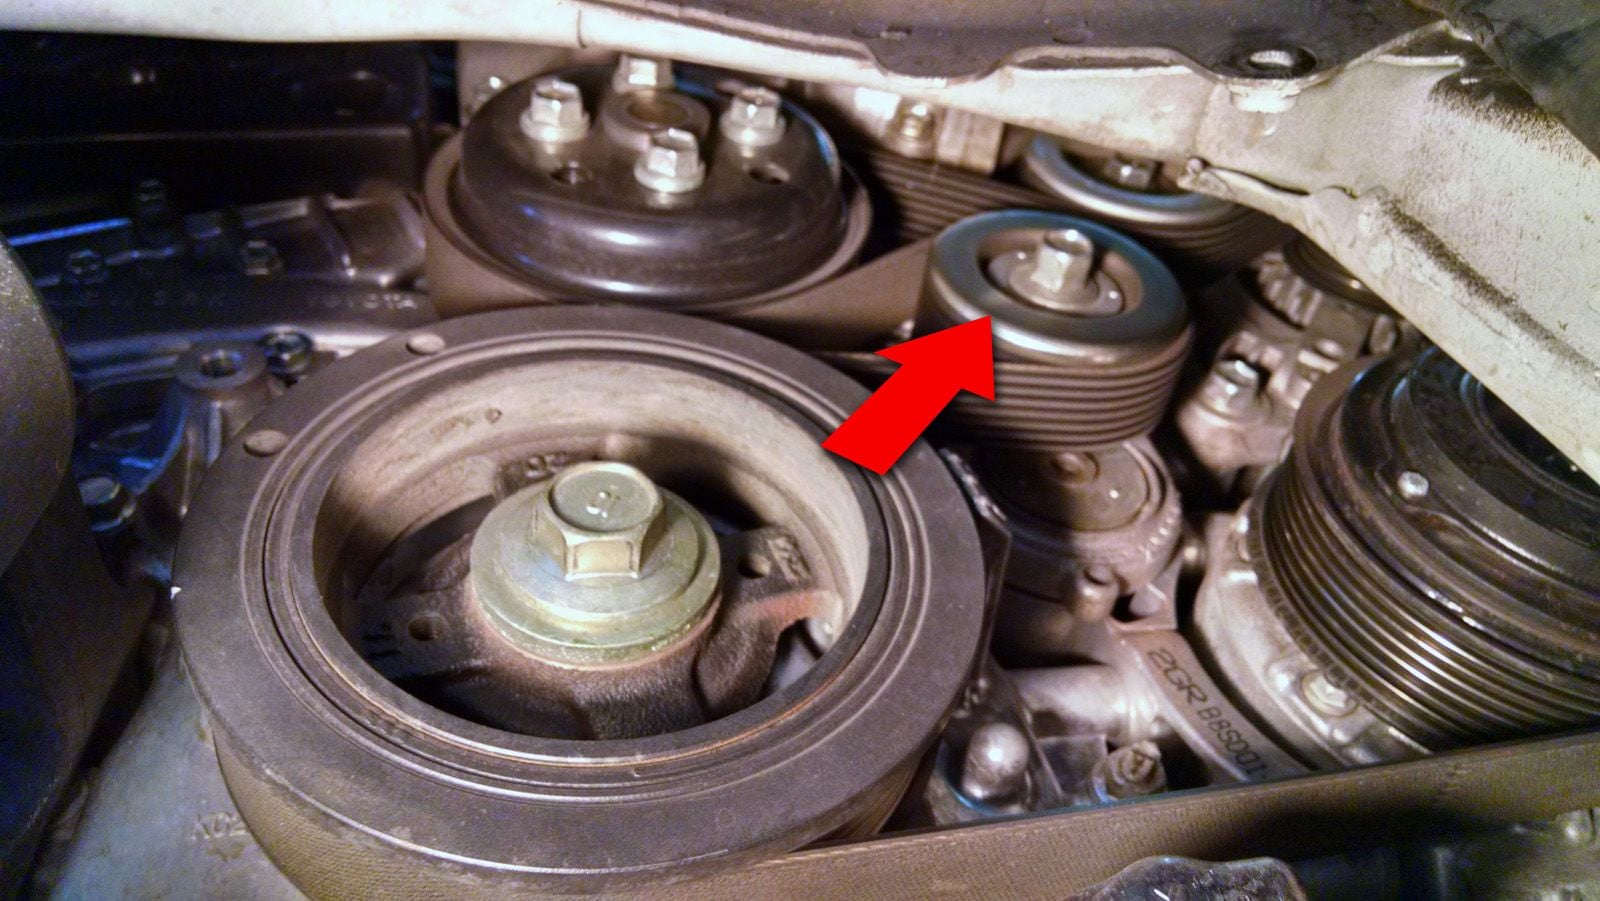
Figure 3. Turn this pulley counter-clockwise to release tension. 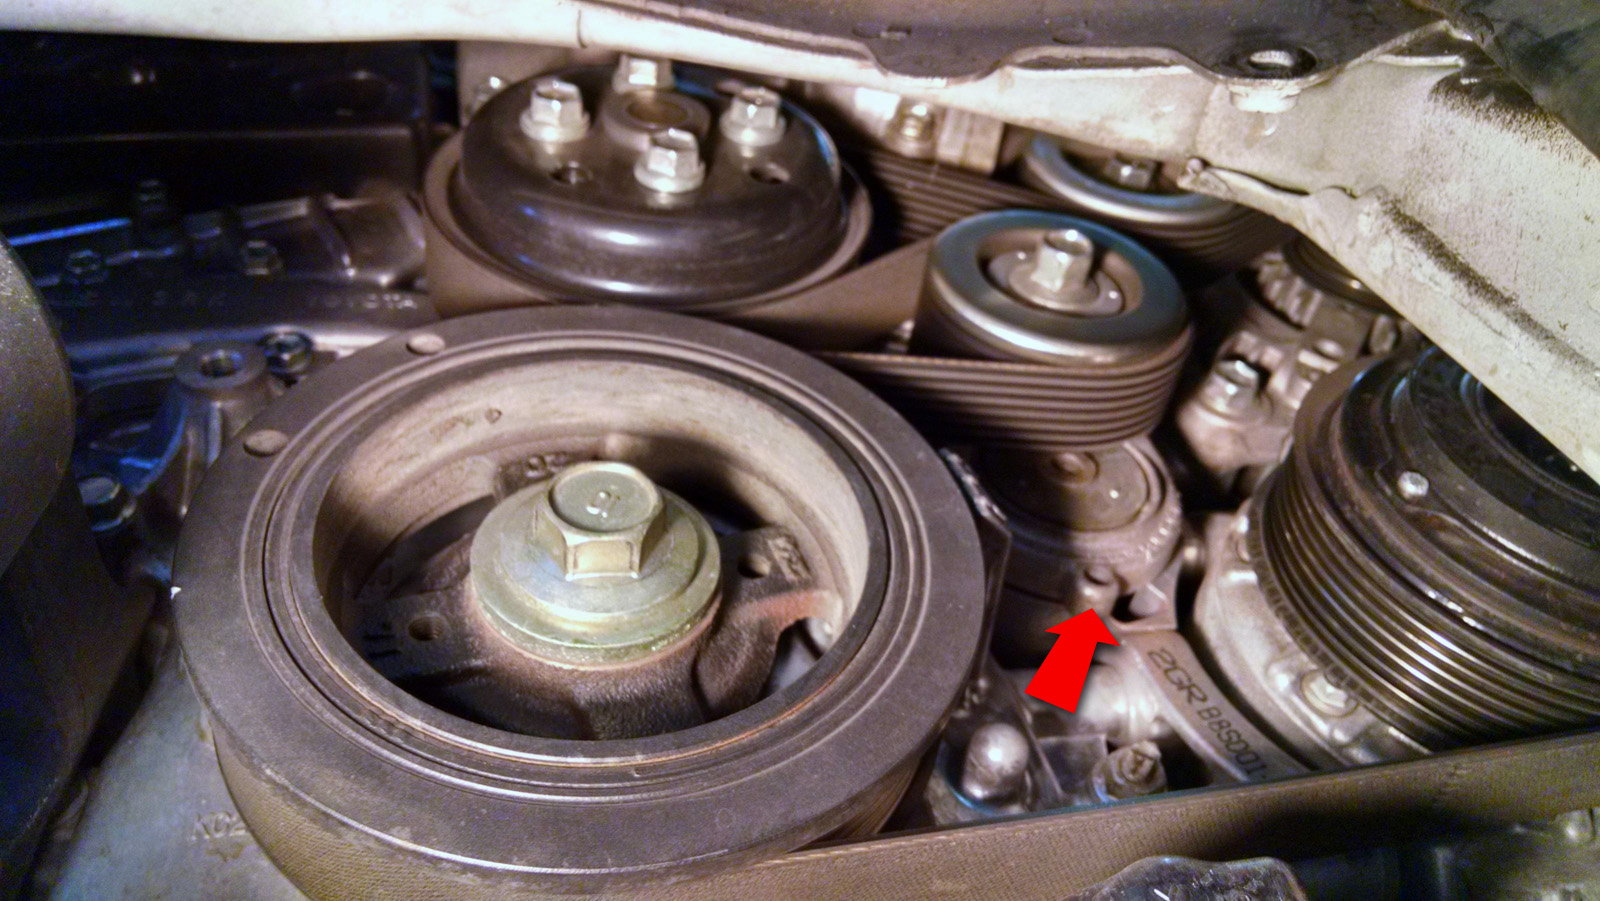
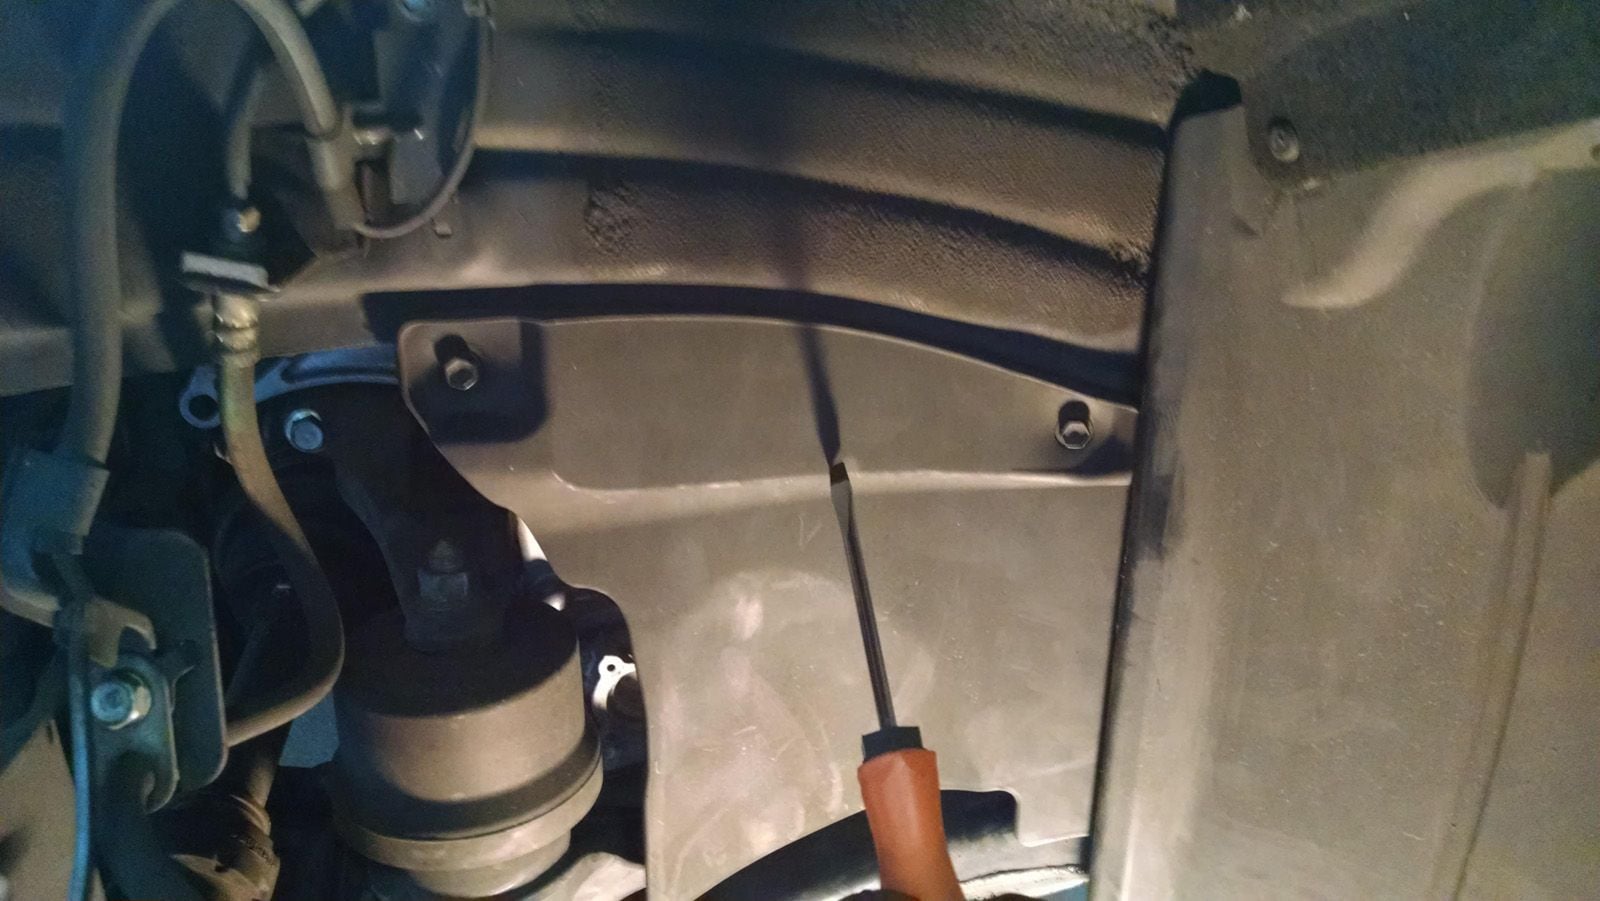
Figure 4. Place a 5mm bi-hexagon wrench here to hold tensioner.
Step 4 - Replace belt
Pull the belt from the pulleys and route the new one according to the diagrams below. Have a stretched-out coat hanger handy to pull the belt up and over some of the upper pulleys if necessary. When finished, twist the tensioner counter-clockwise and remove the 5mm hex wrench. Re-install the various fender well panels and wheel, and lower the vehicle.
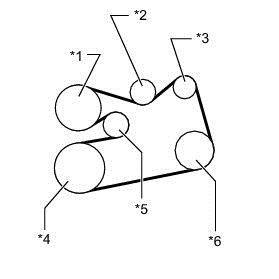
Figure 5. Lexus RX 350 V-belt diagram. 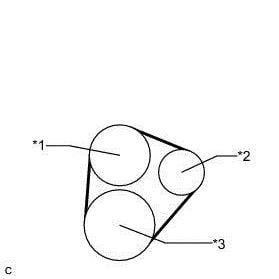
Figure 6. Lexus RX 450h V-belt diagram.
RX 300 / RX 330
Step 1 - Alternator/Air condition belt removal
Even if you're only replacing the power steering belt, this belt needs to be removed to gain access to it.
- You'll be working from above for this step, so you'll need to remove the plastic covering on the top. Remove it by unscrewing the plastic screw holding each of the panels in.
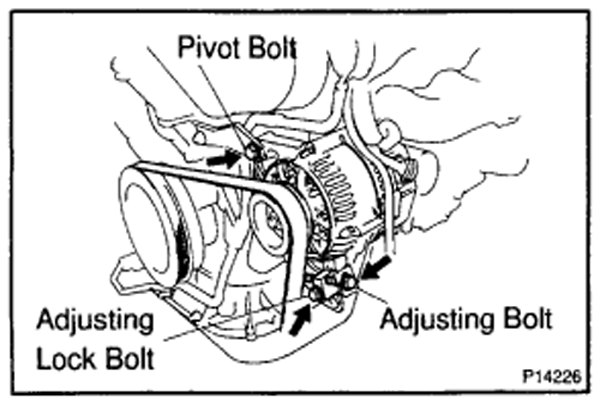
- The alternator will have three bolts on it that'll need to be loosened and removed. Going from top to bottom, these bolts are the pivot bolt, adjusting bolt, and the adjusting lock bolt. Refer to Figure 7 for their locations. These aren't exactly easy to reach, so you'll be alternating between your open ended wrench and socket. Take care not to force the bolts; overtime they rust and you can break a head off.
- Start by loosening the pivot bolt, but don't completely remove it.
- Loosen but don't remove the adjusting lock bolt.
- Remove the adjusting bolt.
- At this point you can test if the other two bolts need to be removed or not. If you can move the alternator enough to undo the belt, then you can remove the belt and you're done. Otherwise you'll need to loosen the pivot and adjusting lock bolt more until you can undo the belt.
Pro Tip
Some people have found it easier to remove the windshield wiper fluid reservoir, upper radiator hose, or the fuse box to gain more access to the bolts. This is optional, but may be necessary if you have larger hands.
Step 2 - Remove the power steering belt
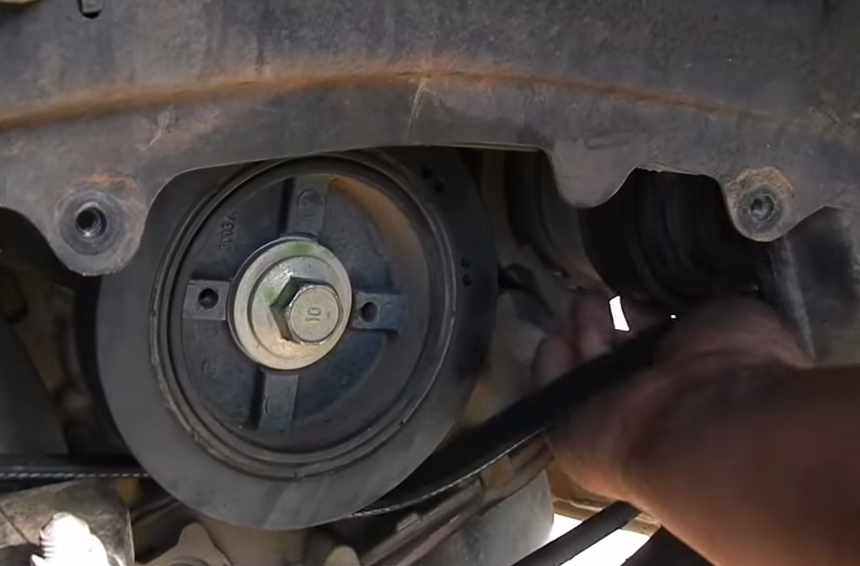
This belt is the hardest to remove due to the lack of access and the power steering pump tending to lock itself in place. Depending on the year of your car and your size, gaining access to it can vary. You'll need to put the front of the car onto jack stands so that you can comfortably work under it. You'll also need to remove any plastic covers that block your access to the belt; they'll unscrew with a Phillips head screwdriver.
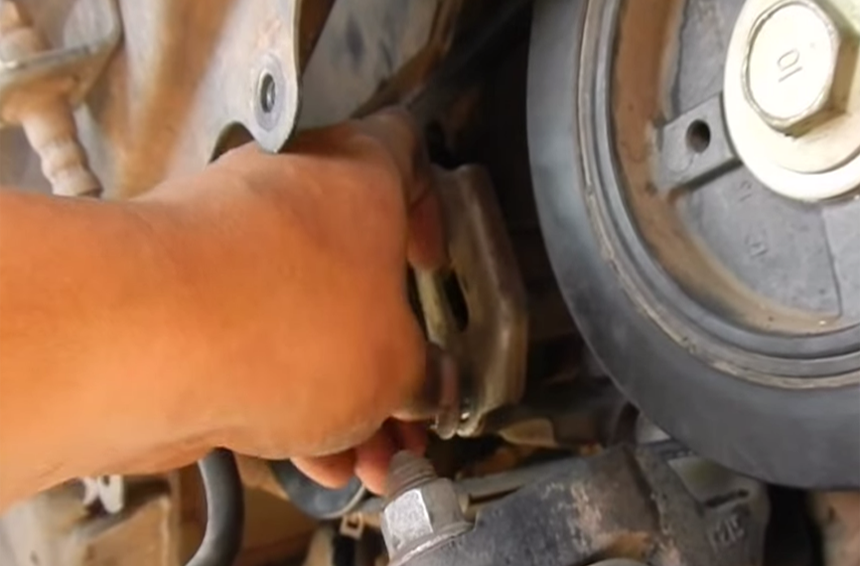
On the power steering tensioner bracket, there will be two bolts; depending on the year of your car, they may be 12mm or 14mm. You'll need to alternate your socket and open ended wrench to be able to unscrew them. Refer to Figure 8 for their locations.
- Loosen both of the bolts on the bracket; they don't need to be removed.
- Depending on how many miles it's been, there are multiple approaches you may need to take to move the pump.
- Try to squeeze the belt together in the middle, which should cause the pump to rotate up and release the tension. Otherwise, you'll need to use a cheater bar and a screwdriver or something similar to pry up the pump.
- Once the pump is rotated up, you can remove the belt.

Step 3 - Install power steering belt
With the pump still rotated up, it should be easy to slip the new belt on. Getting the pump back into place to hold tension on the belt can be tricky and usually requires prying it back down. Once the belt is on, you'll need to make sure it has proper tension on it. To test the tension you can hold one side of the belt in the middle between the two pulleys. You should be able to twist it right at about at 90 degree angle; anymore and it's too loose. If it's too loose, you'll need to pry the pump down farther. Once the tension is good, you can tighten down the two bolts and re-install all the plastic coverings you removed to gain access.
Step 4 - Install alternator belt
This belt is much easier to install. Once you have it in place on the pulleys, you'll need to push it into position and then begin to tighten the pivot and adjusting lock bolt. With these bolts close to tight and the tension set, you can tighten down the adjusting bolt and then finish tightening down the other two bolts.
Step 5 - Finishing up
It's important to listen for any belt slipping when you start the vehicle after changing the belts. Any noise can be a sign of too much or too little tension. About 1,000 miles after changing the belt, you'll want to go back and check the tension one more time because the belt will stretch out some.
Featured Video: How to Replace the Serpentine Belt on Lexus RX
Related Discussion
- Lexus 3RX Serpentine Belt Removal DIY - ClubLexus.com