Keeping your Lexus IS cool is your water pump's main job. Fixing a failing one yourself will keep your car from overheating and your wallet from taking a beating.
This article applies to the Lexus IS 250, IS 350, and IS-F (2004-2014).
The water pump in your Lexus is designed to push coolant from the radiator into the engine block and over the heads to cool them down. The heated water is returned to the water pump and pushed back into the radiator. The air that blows through the grill and fins cools the fluid further. This system is what prevents the car from over heating and causing severe engine damage. The water pump is the heart of this system; without it, fluid does not move and the engine will almost immediately overheat and potentially seize. If your water pump fails, you need to replace it immediately; otherwise, you should change it at the manufacturer's recommended time.
Tools Needed
3/8" ratchet
1/2" breaker bar
Torque wrench
10mm, 12mm, and 14mm socket wrenches
5 and 10 mm Allen or hex wrenches
Channel lock pliers
SST 09216-00041 (special pulley holder tool)
Step 1 - Remove plastic engine covers
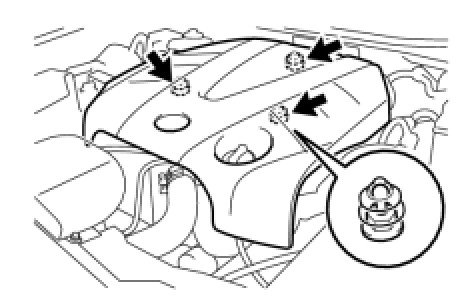
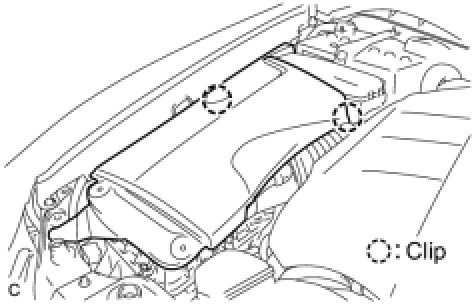
Pull off the plastic engine covers. The large plastic front cover is held in with 11 clips. It's found on top of the radiator facing the front grill. Remove the V-bank cover sub assembly, which covers the main engine, centered under the hood. The scoop faces the front grill just over the radiator.
Figure 1. Remove clips from this cover.
Figure 2. There's another clip near the front.
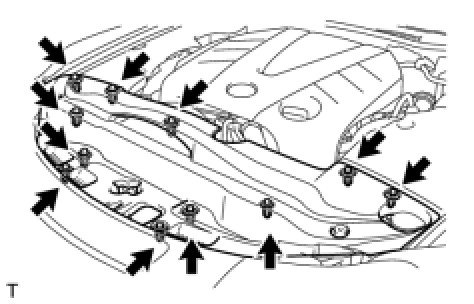
Figure 3. Remove all 11 clips from the front cover.
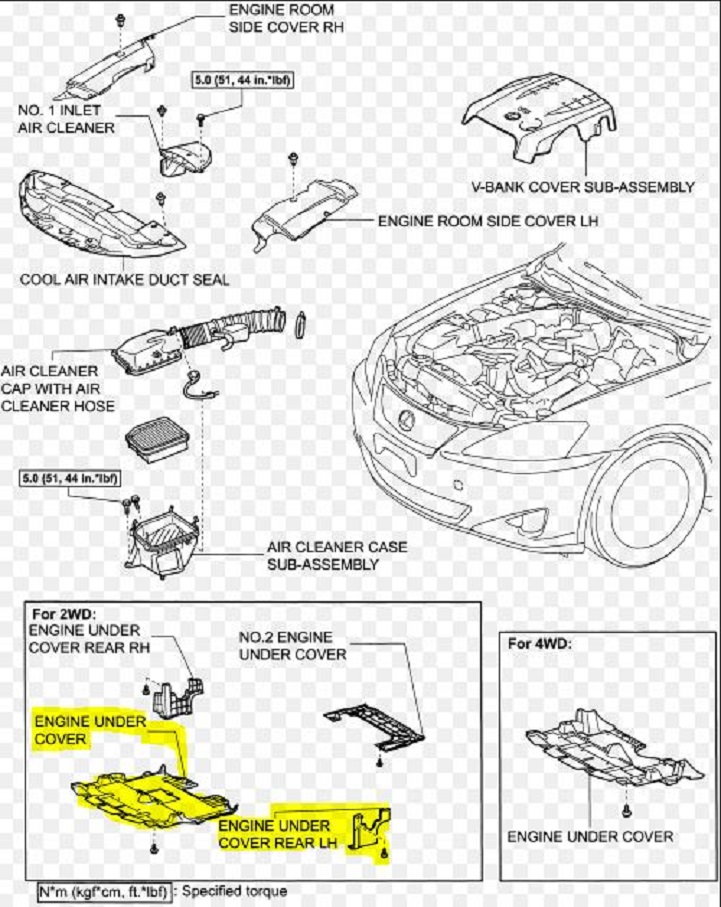
There are only a couple of bolts that hold these parts together. You do not need to remove the engine under cover RH or the No. 2 engine under cover.
Figure 4. Engine under cover and rear LH under cover.
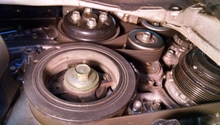
Step 2 - Loosen water pump bolts
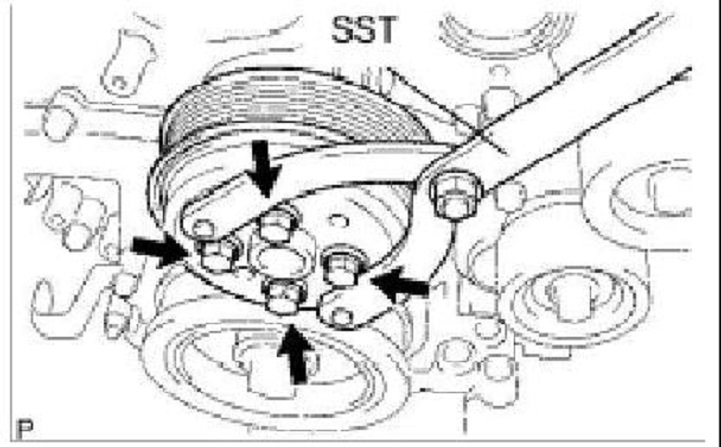
Loosen the four bolts holding the water pump pulley in place before removing the serpentine belt. The tension from the belts will help keep the pulley in place while unbolting it. This can be done later if the special pulley holder tool (SST 09216-00041) is available, but it's not necessary to do it this way.
Figure 5. Four bolts on water pump pulley.
Step 3 - Remove the v-ribbed belt
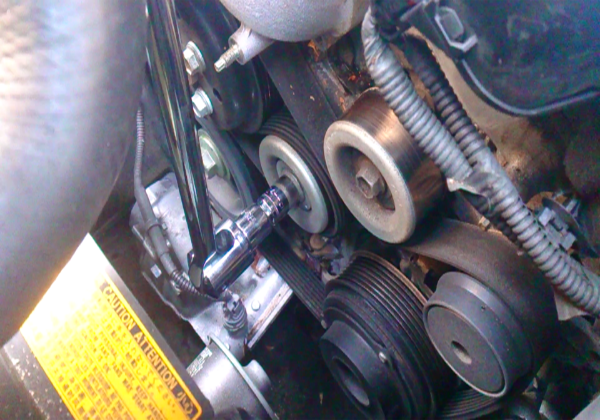
Turn the bolt on the tensioner clockwise just enough to loosen the belt and remove it. Use a breaker bar and a 14 mm socket to get leverage.
Figure 6. Torque this tensioner to free the serpentine belt.
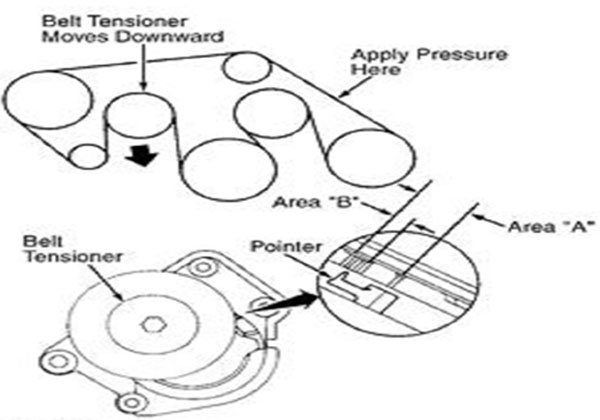
Figure 7. Serpentine belt diagram.
Step 4 - Remove serpentine belt tensioner assembly
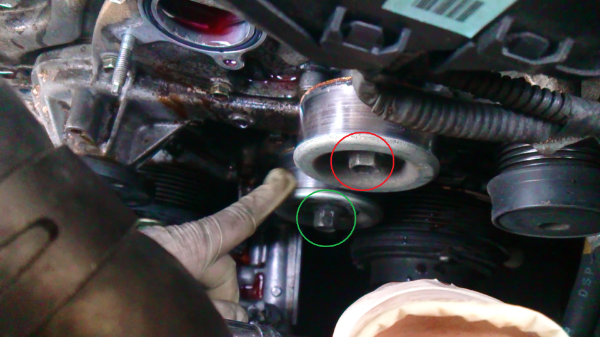
Finish removing the four bolts on the water pump pulley to remove it completely. Next, remove the belt tensioner pulley and the idler pulley. The tensioner pulley (green circle, figure 8) is left-hand threaded, so turn right to loosen. The other pulley (red circle, figure 8) is normal thread, so turn left to loosen.
Figure 8. Serpentine belt and tensioner assembly.
Step 5 - Drain engine coolant
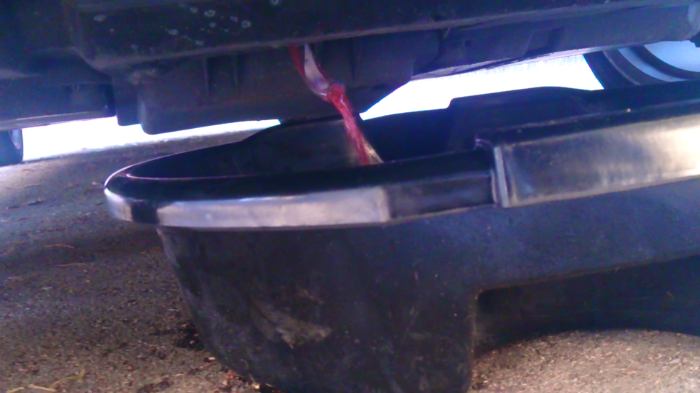
Attach 3/8" vinyl tubing to the petcock valve at the bottom of the radiator. You'll need to twist the white nut to open the valve and drain the radiator coolant. Unscrew the radiator cap to help the coolant flow more smoothly.
Figure 9. Draining radiator fluid.
Step 6 - Remove coolant reservoir
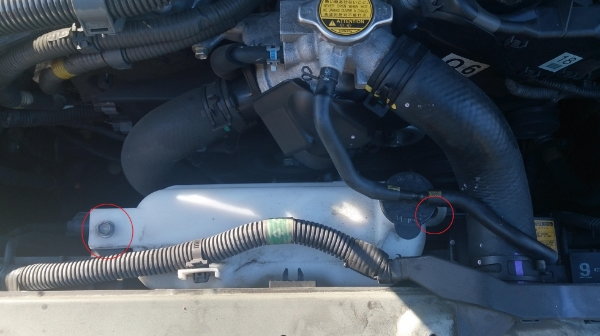
Remove water reservoir by removing the two 10mm bolts. Pull off the the two hoses connected to the cap as well.
Figure 10. Remove 10mm bolts circled.
Step 7 - Disconnect hoses from water inlet
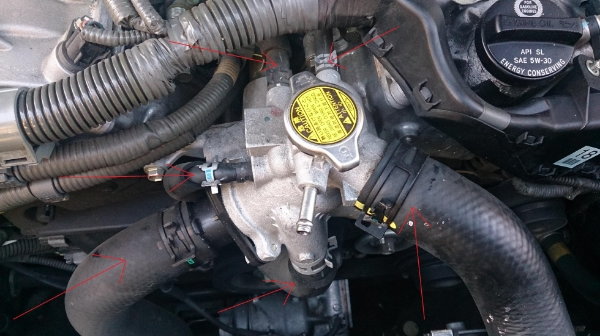
Disconnect the clamps holding the six hoses to the water inlet. Use pliers to relax the clamps holding them on.
Figure 11. The red arrows point towards hoses needing to be removed.
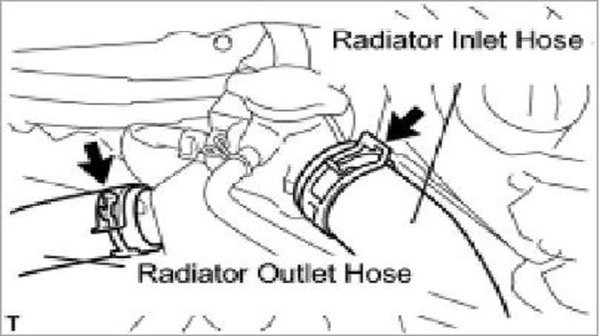
Figure 12. Radiator inlet and outlet hoses.
Step 8 - Remove water inlet
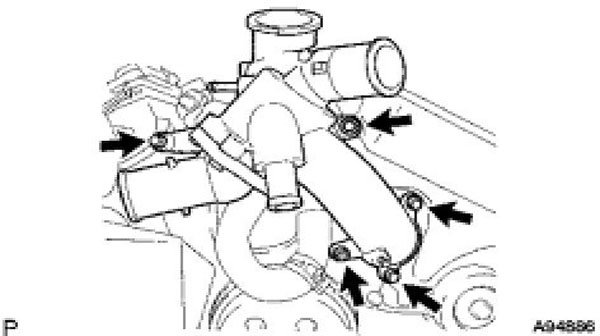
Disconnect the five hoses, four bolts, nut, and water inlet. Remove the water inlet housing gasket and water outlet pipe O-ring.
Figure 13. Unbolt the water inlet at these four points.
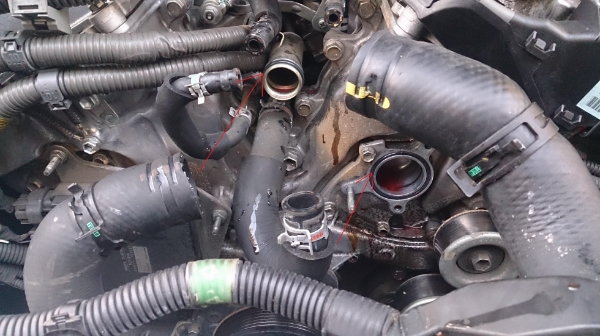
Figure 14. The red arrows point to O-rings needing to be replaced.
Step 9 - Remove injector driver
Remove the three 10mm bolts holding the injector driver and move it to the side. Unplugging the box is not necessary.
Figure 15. Bolts that remove injector driver.
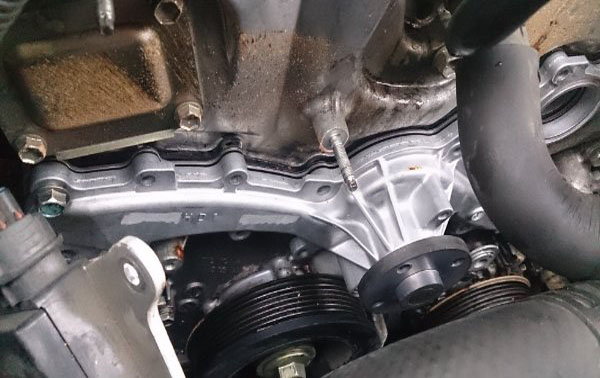
Step 10 - Remove water pump assembly
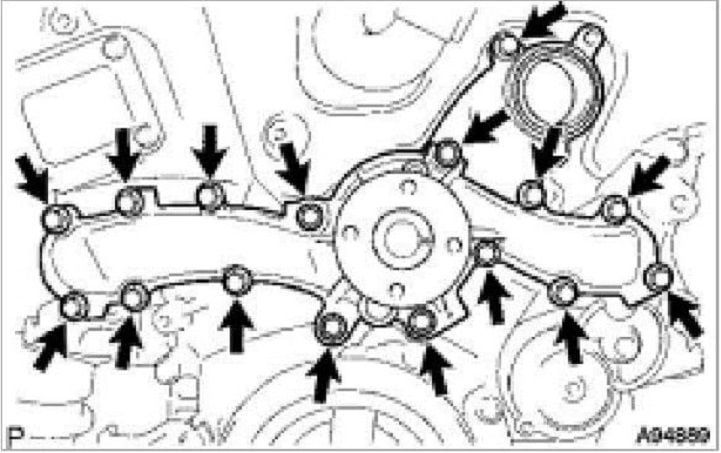
Remove the 16 bolts (12mm) on the water pump. There are three different sized bolts securing the water pump, so work smart and keep the different bolt sizes together. Be prepared for a waterfall of coolant to flush out after removing the water pump. Get a bunch of rags ready and cover the floors, cover the pulleys, etc.
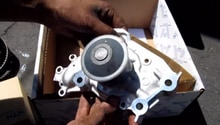
Figure 16. Water pump assembly.
Step 11 - Install new water pump
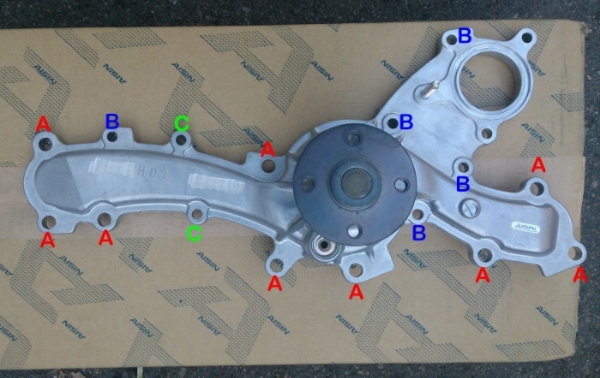
Hopefully, those bolts from the last step have been organized, as they'll need to be re-installed. Refer to figure 17 for the location of the large bolts (A), medium bolts (B), and short bolts (C). Torque large bolts to 21 Nm (214 kgf-cm, 15 ft. lbs.). Medium and short bolts must be torqued to 9.1 Nm (93 kgf-cm, 6.5 ft. lbs.)
Figure 17. Large (A), medium (B), short (C) bolt locations.
Figure 18. Water pump installed.
Step 12 - Re-Install water inlet
Be sure to replace the O-rings mentioned in Step 8 or else there will be leaky water pump problems. Torque the four bolts to 7 ft-lbs.
Step 13 - Re-install pulleys, belts
Re-install the water pump pulley and the other two pulleys that were removed. Tightening them to their recommended specification of 15 ft-lbs is difficult without the serpentine belt on. Tighten enough so that you can put the serpentine belt on, then tighter to specification.
Step 14 - Re-install remaining hoses and cover
Re-install the coolant reservoir and the remaining radiator hoses, and re-attach the plastic engine cover.
Step 15 - Finishing up
Refill the radiator with Toyota Super Long Life Coolant and let the car run until it's warm. Check for leaks and continue adding through the radiator cap until the coolant level is correct.
Featured Video : How to Replace Water Pump in Lexus IS
How to Replace Water Pump
Scott Deuty
Replace that whining water pump at home with this guide.
This article applies to the Lexus ES, RX (2005-2013).
Replacing the water pump on your Lexus ES or RX is intensive ...
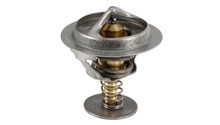
How to Replace Thermostat
Is your RX running hot? A new thermostat might be the cure to your Lexus' fever.
This article applies to the Lexus RX (2007-2014).
An overheating engine can be one of the most damaging ...
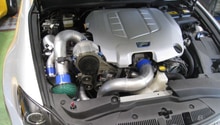
How to Install Supercharger Kit
ISboost300
Supercharging your motor is one of the most effective ways to add more power to your car.
This article applies to the Lexus IS (2001-2005).
Going to forced induction can ...
How to Replace Serpentine Belt
Worn accessory belts squealing like a banshee? Replace them yourself on the Lexus RX with this guide.
This article applies to the Lexus RX (2007-2014).
Traditionally, a serpentine ...
How to Replace Water Pump
Replacing the water pump on your Lexus ES will prolong the life of your car by maintaining more than just the cooling system.
This article applies to the Lexus ES ...
How to Replace Thermostat
Is the thermostat on your Lexus ES in need of replacement? We've got a complete, step-by-step guide on how to get the job done, no matter what your skill level.
This article applies to ...