Lexus IS: How to Install Supercharger Kit
Installing a supercharger is a surefire way to make any Lexus IS faster.
This article applies to the Lexus IS (2001-2005).
Going to forced induction can allow you to gain a lot of power by adding a supercharger to your motor. This article will cover the install of a LMS Procharger kit, which roughly adds around 40-60 HP at the rear wheels. Before attempting to do this yourself, it is highly suggested that you read the instructions, both here and the ones with the kit, multiple times to see if you're up for the task. This process requires a lot of engine work, so you'll be running the risk of damaging your motor if it's not installed and set up properly.
Supercharging and turbocharging kits are nearly non-existent for the Lexus IS 250 and 350. The locked ECU makes tuning for the extra air and fuel prohibitively difficult. The few supercharger kits available are from LMS and HKS, which both cost around $6,000. The HKS kit must be imported from Japan and the LMS kit can be found on eBay or in forum classifieds. This article focuses on the LMS kit for the (far more tunable) Lexus IS 300. While the engines are different, the procedure will be similar for superchargers of the same type.

Materials Needed
- Full socket set
- Flathead and Phillips head screwdrivers
- Pliers
- 3" hole saw
- Various size drill bits
- Cheater bar
- Torque wrench
- Box cutter
- Drain pans
Pro Tip
Air tools or powered tools are highly recommended. Otherwise, unbolting old bolts will be considerably more difficult.
Step 1 – Draining fluids
-
Disconnect the negative battery cable and then the positive battery cable.

Figure 1. Locations of the negative and positive cables. -
Remove the splash guard underneath by unbolting all the bolts along the bumper and then removing all the push clips holding it in place.
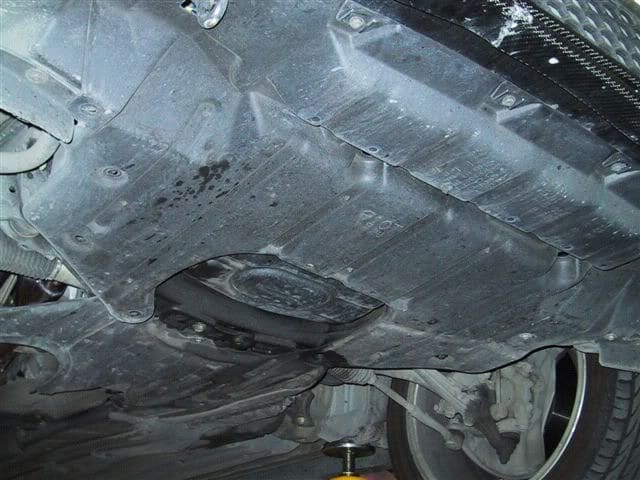
Figure 2. Splash guard. -
Remove the radiator cap. Then, drain the engine coolant into the drain pan by turning the petcock to open the valve.
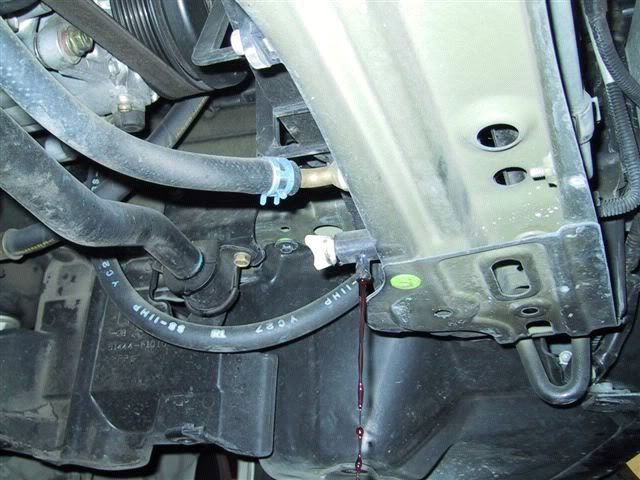
Figure 3. Draining the coolant. -
Remove the transmission cooler lines on both sides by squeezing the clip together with pliers and then sliding it back. Be prepared to catch any fluid with another drain pan.
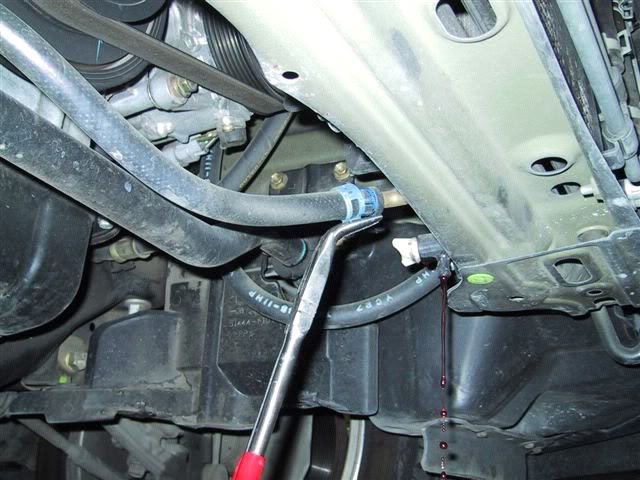
Figure 4. Removing transmission cooler lines. -
Remove the lower radiator hose and unplug the coolant temperature switch, which is located next to it.

Figure 5. Lower radiator hose, electrical connector, and transmission line.
Step 2 – Radiator removal
- Remove the air box assembly by unbolting it from the body and disconnecting the hoses.
- Remove the top engine cover by unbolting it and popping it off.
- Remove the radiator support brackets by unbolting them from the support (Figure 6).
- Remove the upper radiator hose by loosening the clip and sliding it off the hose.
- Remove ECU vent hose by popping it off.
- Unhook the cooling fan electrical connections (Figure 7).
- Remove any other bolts still holding the radiator assembly in place and remove it. It is suggested getting help because it's rather large and awkward.

Figure 6. Remove radiator support brackets. 
Figure 7. Upper radiator hose, ECU vent hose, and cooling fan electrical connections removed.
Step 3 – Pulley removal
- Remove the top timing belt cover by unbolting it.
-
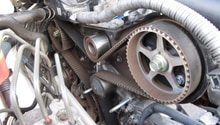
Remove the serpentine belt. You'll need to use a 14mm socket on the tensioner to be able to release the tension and pull the belt off.

Figure 8. Serpentine belt removed. -
Remove the power steering pulley (furthest to the right) by removing the nut in the center.
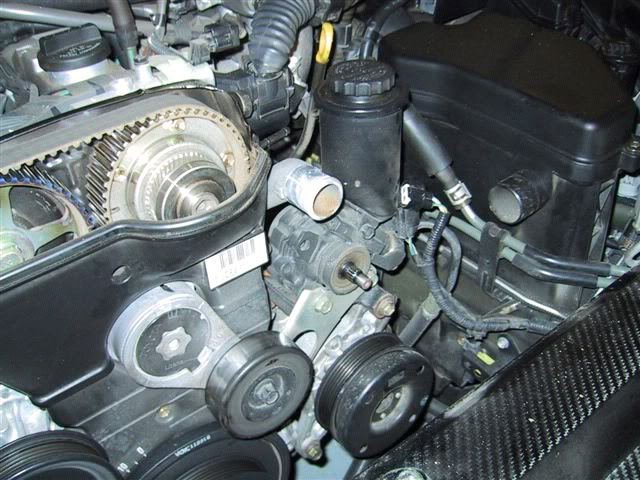
Figure 9. Power steering pulley removed. -
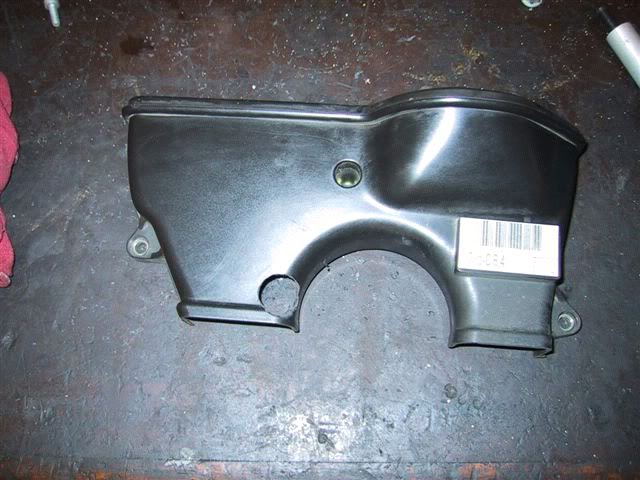
Remove front (lower) timing belt cover and the bolt on the passenger side of the belt tensioner bracket.
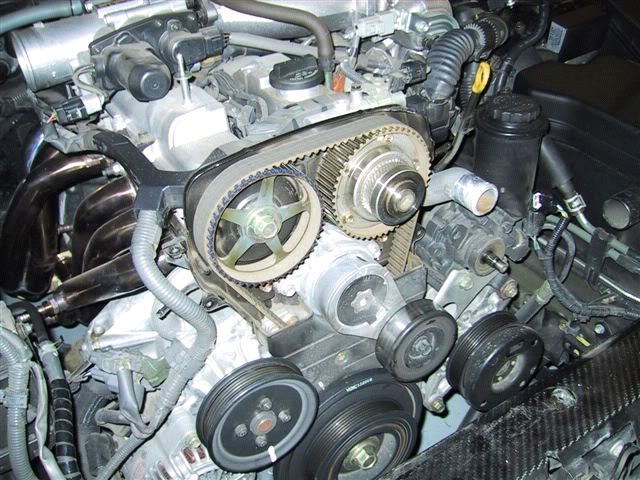
Figure 10. Front timing belt cover removed. -
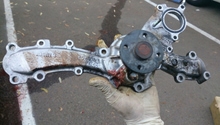
Remove the water pump pulley by taking out the four nuts in the center.

Figure 11. Water pump pulley removed from center of image. -
Remove the bolt holding the alternator in place.
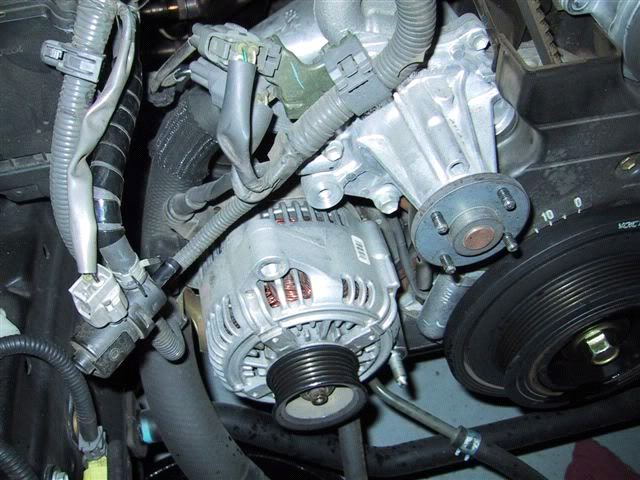
Figure 12. Alternator bolt removed. -
Remove engine crank bolt. You'll need something to keep it from spinning as you unbolt it.

Figure 13. Removing crank bolt.
Step 4 – Engine parts removal
- Remove the throttle body by disconnecting all vacuum lines and electrical connections, and removing the two bolts on the front of it.
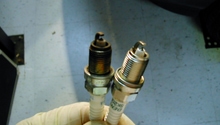
- Remove the old spark plugs.
Step 5 – Timing belt cover modification
You'll need to drill a large hole in the timing belt front (lower) cover to allow for it to pass through. Refer to your specific install instructions for the exact location and size.
Step 6 – Upper engine install
- Install new spark plugs.
- Re-install the throttle body with the LMS heat shield bracket underneath (Figure 15).
- Re-install the modified front timing belt cover (Figure 16).

Figure 15. Throttle body re-installed with heat shield bracket. 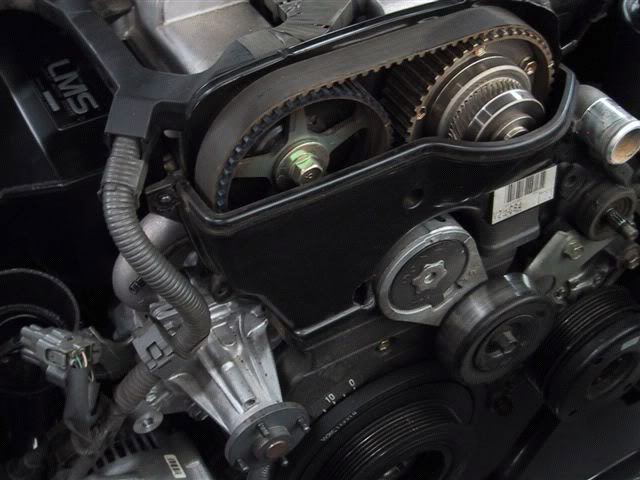
Figure 16. Modified timing belt cover.
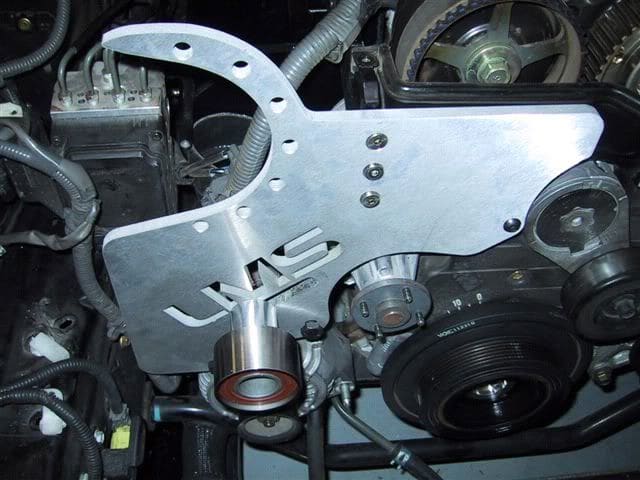
Step 7 – Bracket install
You shouldn't fully tighten down the brackets until you have them all in place. Also, you may have to slightly bend some wires or vacuum lines out of the way for bracket clearance.
-
Loosely install the rear support bracket to the main bracket.
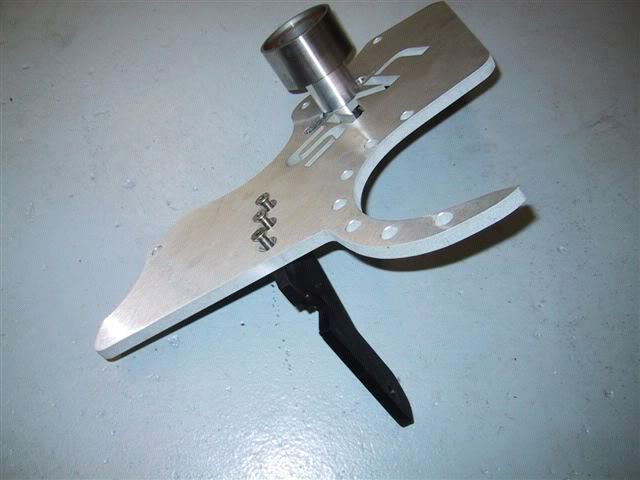
Figure 17. Brackets loosely mated together. -
Install main bracket spacer into the hole in the modified timing belt cover.
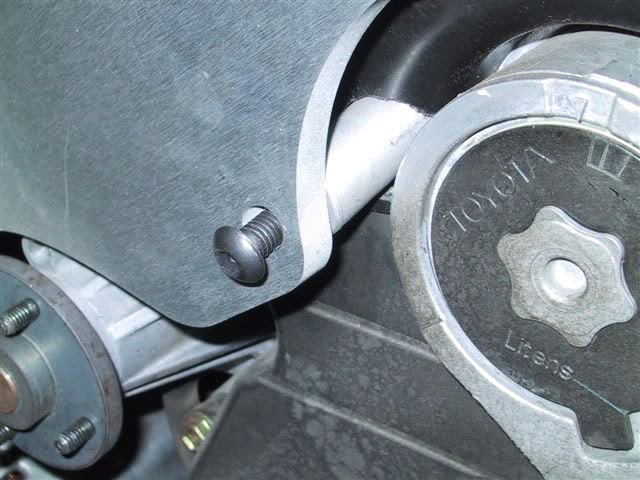
Figure 18. Main bracket spacer 'A' installed. -
Install main bracket spacer above the alternator.

Figure 19. Main bracket spacer 'B' installed. -
Install the main bracket spacer onto the alternator bolt hole.
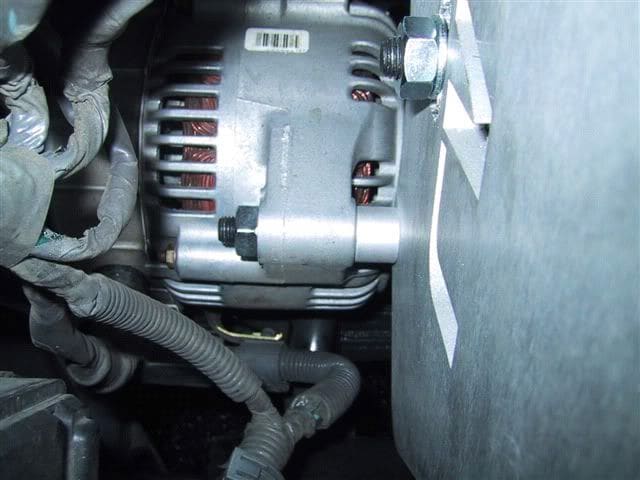
Figure 20. Main bracket spacer 'C' installed. -
Bolt in the rear support bracket using the bolt that was originally removed from the alternator.

Figure 21. Rear support bracket. - Tighten down all the bolts of the bracket to make sure it's secure.
Step 8 – Pulley install
- Install crank pulley using the alignment spacers and the original crank bolt (Figure 23).
- Re-install the original water pump and power steering pulley.
- Install the supplied serpentine belt onto the original pulleys (Figure 24).
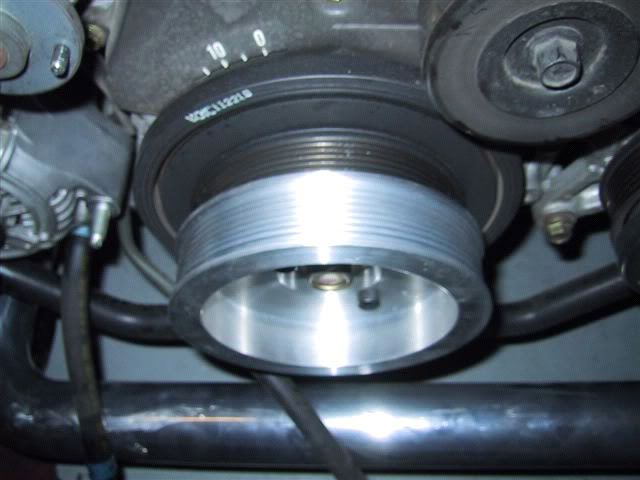
Figure 23. New crank pulley installed. 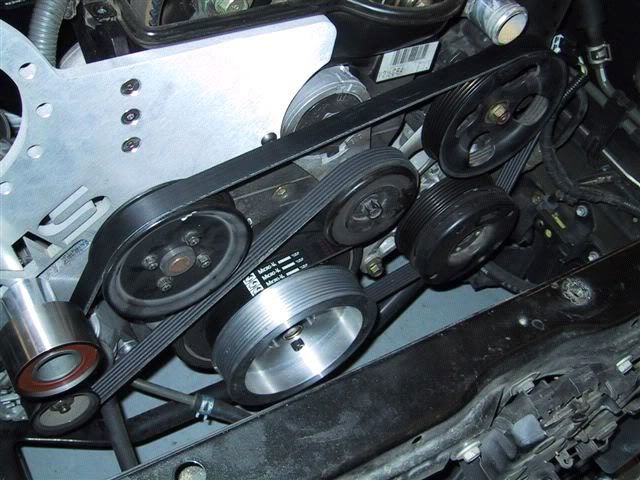
Figure 24. New serpentine belt installed.
Step 9 – Supercharger install
-
Install the supercharger into the main bracket using the bolts and spacers.
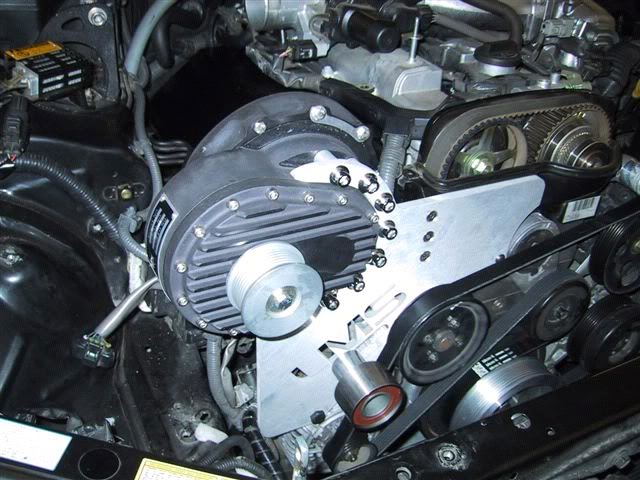
Figure 25. Supercharger installed. -
Remove the ABS bracket. You can re-install it into a new hole, which is a few inches back towards the firewall from its original location.
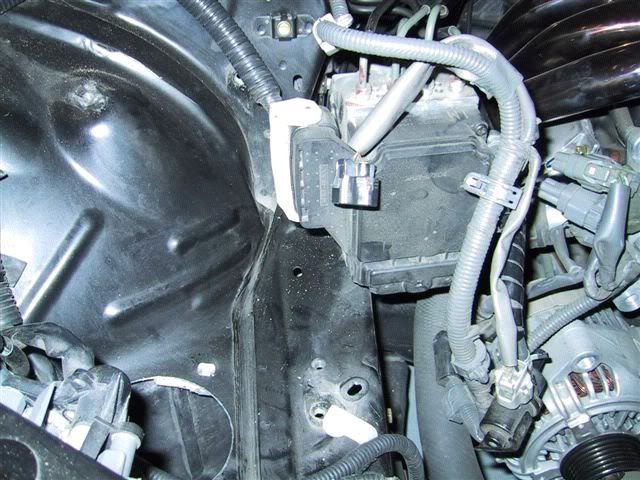
Figure 26. ABS bracket removed. - Install the Charcoal Canister CCV to the frame rail and attach the vacuum hose.
-
Using the 3" hole saw, drill a hole behind the passenger headlight to allow for tube routing.

Figure 27. Drilling upper hole. -
Using the supplied short run of vacuum line, cut down the middle to open and use it to cover the sharp edges in the hole you just made.
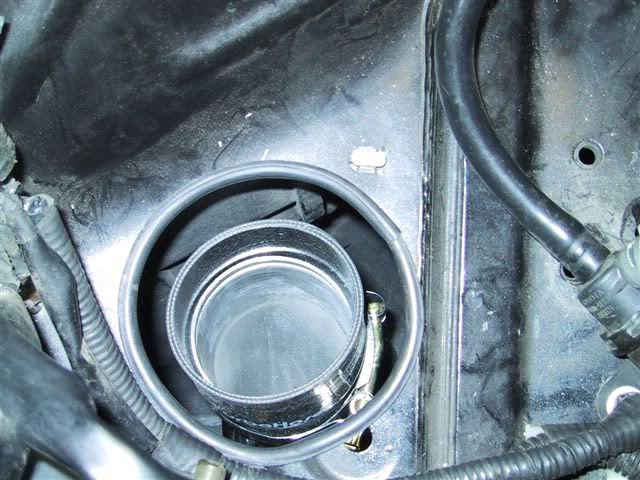
Figure 28. Vacuum line covering rough edges. -
You can now route the upper intercooler hose through the opening.
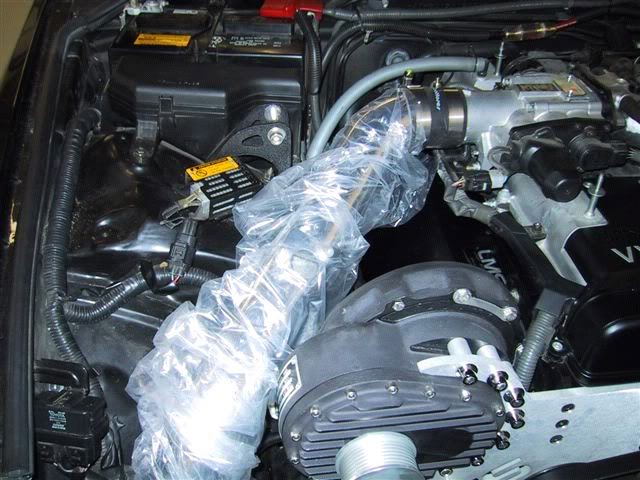
Figure 29. Upper intercooler hose.
Step 10 – Intercooler install
- Remove the front bumper and front bumper support brace (Figure 30).
- After centering the intercooler onto the brace, drill a hole through the intercooler mount into the support brace.
- Screw the intercooler to the support brace (Figure 31).
-
Re-install the support brace with the intercooler attached (Figure 32).

Figure 30. Front bumper and support brace removed. 
Figure 31. Intercooler mounted to support brace. 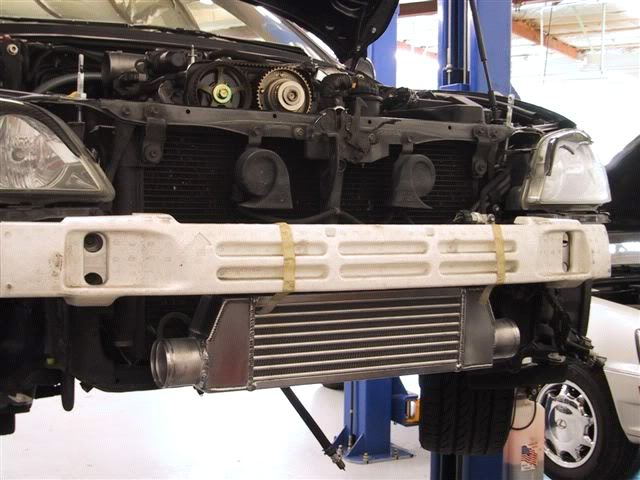
Figure 32. Intercooler installed.
Step 11 – Intercooler pipe routing
-
Using the 3" hole saw, drill a hole in the driver's side fender lining to allow the pipe to pass through. It is suggested mocking up the piping to get the location as exact as possible.

Figure 33. Lower hole drilled. -
Install the 2 3/4" coupler on the passenger side of the intercooler.
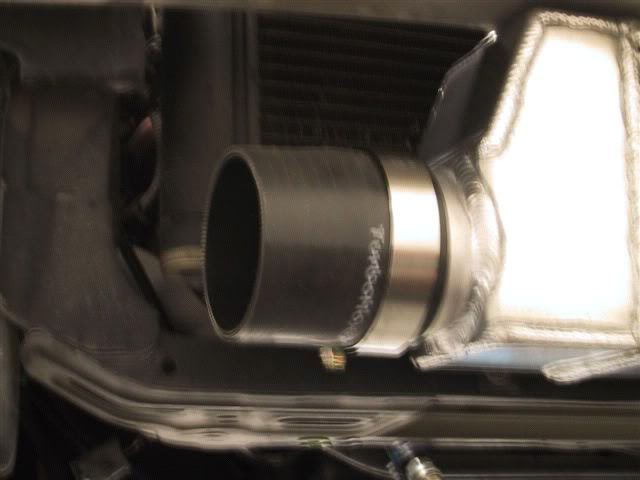
Figure 34. Coupler installed. - Install the 2 3/4" to 2 1/2" transition coupler on the driver side of the intercooler.
-
Route the 'S' shaped pipe through the hole you drilled previously, so that the short end goes to the driver side of the intercooler and the long end runs behind.

Figure 35. Intercooler 'S' pipe installed. - Install the blow off valve on the outlet pipe.
-
Install the outlet pipe to the passenger side of the intercooler and to the pipe coming in from above.
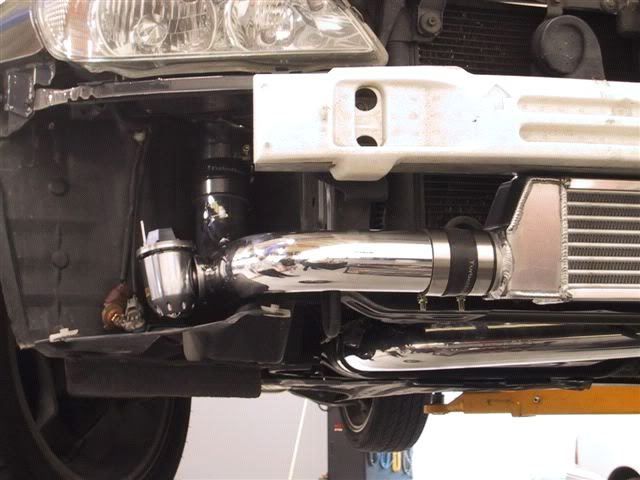
Figure 36. Blow off valve installed on outlet pipe. -
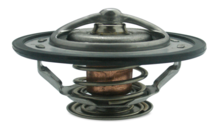
Rotate the thermostat housing 180 degrees to allow clearance for the intercooler pipe.

Figure 37. Thermostat housing rotated. -
Install the short angled pipe to go from the 'S' pipe to the bottom of the supercharger.

Figure 38. Angled pipe installed.
Step 12 – Miscellaneous install
-
Install vacuum line from blow off valve to the intake port behind the supercharger bracket.
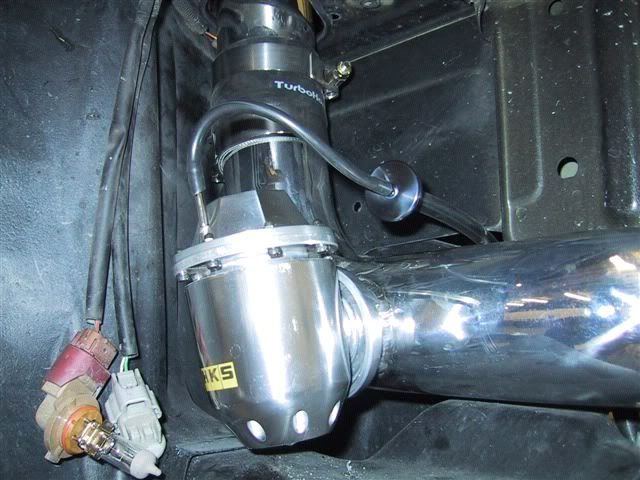
Figure 39. Vacuum line installed to blow off valve. -
Installed the new 8-ribbed belt from the supercharger to the new crank pulley.

Figure 40. 8-ribbed belt installed. - Re-install the radiator and radiator support brackets.
-
Re-install the transmission cooler lines. You'll need to turn them to allow for clearance.

Figure 41. Transmission lines turned. -
Install PCV hose from the valve cover.
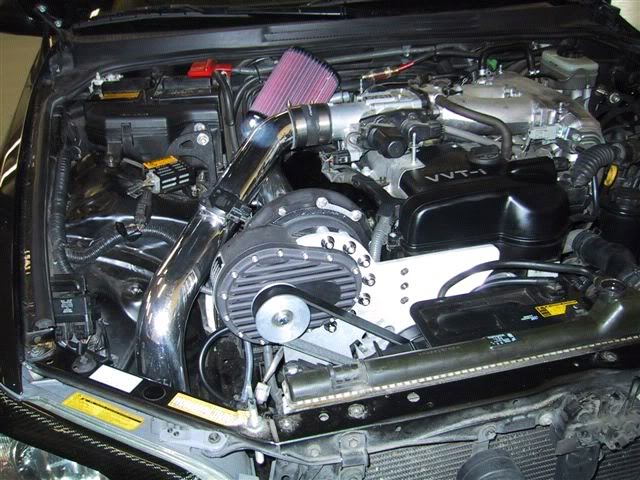
Figure 42. PCV hose installed. -
Install vacuum line from intake pipe to the charcoal canister.

Figure 43. Charcoal canister vacuum line.
Step 13 – Everything else
- Re-install the top timing belt cover.
- Re-install all radiator hoses and the radiator cap.
- Fill up the coolant.
- Top off the transmission fluid.
- Reconnect the positive battery cable, followed by the negative battery cable.
Step 14 – Testing
Before starting the motor, double check that everything is fully tightened down so that nothing falls apart once it starts up. During the initial start up, check for leaks in the intercooler, intercooler piping, coolant hoses, and transmission lines. Rev the motor to check if the blow off valve is functioning properly and there are no boost leaks. If everything looks good, you can go ahead and re-install the plastic engine cover and the front bumper.
Related Discussions and Site
- LMS Supercharger Kit Instruction (Lexus IS 300) - My.IS
- LMS Supercharger Kit Example - ClubLexus.com
- Supercharger LMS Install/Dyno/Photos - ClubLexus.com
- Custom Built Procharger - ClubLexus.com