When you click on links to various merchants on this site and make a purchase, this can result in this site earning a commission. Affiliate programs and affiliations include, but are not limited to, the eBay Partner Network.
HOLY SMOKES, IT WORKS!!!04-09 RX330/350 can DIRECTLY bolt up an LSD!!! Like I thought, all you need is 99-00 RX300 axles, the Torsen T2 LSD and the hardware for the CV axles (2x retaining washers & cotter pin) and side flanges (x8 M10x1.25 nuts and washers)!!! NO more leaky open diff, she friggin' hooks! The Torsen stays subtle until you huck it into a corner! Can't wait to try it in some deep snow or in the summer with some stickier tires!
Remove the two lateral links from the knuckle-side so you don't ruin your alignment, this gives you enough room to move the knuckle so the CV axle has enough clearance to slip out. You only have to do this on one side, but I chose to do it on the pass side as the exhaust is in the way and more clearance is appreciated
- Bolts get torqued to 131 ft lbs with a 19mm socket. You will need to jack up the knuckle to get them to align
After freeing the knuckle by removing the lateral link bolts. pop the CV out with a quick yank with the pry bar to disengage the splines and snap ring, and it'll shoot out! Use one foot to push the knuckle, and shove the CV out of the way, then use a punch on the axle nut side to free it up, and slip it out! I took off the pass side of the differential brace as well and just let it slide out, as the driver side is blocked by the gas tank
GOODBYE, OPEN DIFF!!
Bench press that sucker in place! It helps to have two people, but it is totally possible to do it alone, I am by no means a powerhouse either!
Once you've got some bolts started, the diff will hold itself in place. You'll see the 99-00 RX300 axles are easier to slip in place, because of the side flange design that our cars don't have anymore from the factory. Use an extension and give it some light taps to help get the axle seated on the studs, I probably had to do this because I put on too much paint! lol
2x 90179-A0005 flag nuts from the 3rd gen RX, these guys are half the price and the "flag" portion is way thicker so it shouldn't fold over! They are a little shorter but it still fits perfectly! Torque these upward bolts to 100 ft lbs! 76 ft lbs for the single diff brace bolt and 70 ft lbs for the three large bolts that hold the cover of the diff to the subframe via bushings. These are 17mm hex head
After this, I needed some assistance. Someone had to press the brake so I could torque the CV axle nuts and pinion flange nut. Now the spec for the axle nut is 217 ft for an 04-09 RX rear, vs. 159 ft for the RX300 rear. I decided to follow the higher spec as this is the 04+ wheel bearing. Pinion flange nut gets torqued to 80 ft lbs, and must be staked
These axle nut retainers cleaned up NICE!
The only fitment issue was the cotter pin didn't want to slide in very easy. That may have been my aftermarket cotter pins or the difference in the 04+ hubs, but it still fit at the end of the day. (Yes, I know my parking brake adjust rubber plug is missing, it's because I have IS350 rear rotors and it won't line up anymore
Filled up with 1L of 75W90 non-LSD oil (helical LSDs don't require the additives) and the Torsen T2 was fully-done! The sheer girth of the 99-00 RX300 CV axles made installing my 24mm transfer case hex fill plug a major ordeal, so I may have to find a lower profile tool or change out to different plugs. I'll worry about that in a few years though! In the meantime, I'm going to ENJOY this sucker!
I'm from Ontario, Canada. Also, you can do it!!! If you can set aside a weekend or so with a buddy, it's totally possible! Thankfully nothing gets really seized on this job as the bolts are high up and out of the way of the salt spray vs. the lower control arm bolts (on frame side only, which you don't even need to remove for these axles).
It's nearing Christmas and I'm going to give my RX a Merry Christmas Torsen soon!
Just finished painting the 99-00 RX300 cv axles, diff flange, side shafts, drain & fill plugs and the first half of the diff today! The rear diff cover got four coats of high temp engine enamel. Everything else received two thin coats of corroseal except the axles, and one thick coat of rust paint
Not bad for a rattle can job!
Those same 2nd gen RX rear wheel bearings I had from the junkyard happened to be the perfect ballast to help me paint those axles! Since they were new, the inner joint was tight enough to hold the entire axle up vertically. Make sure to mask off the tone ring so you don't get paint all over it
You've got to paint these GSP cv axles. They fit nicely, work well and are cheap - but they come without any sort of protection whatsoever!
You'll also need the 99-03 RX300 / 01-03 Highlander rear CV axle nuts, nut retainer and cotter pin. My CV axles came with the nuts, but did not come with the spindle nut retainer or cotter pin which was annoying to say the least. I had sold my original 01-03 axles so I had to track these down again. Due to the outrageous price of the stock axle nut retainers and lack of aftermarket support for them, I will be repainting the stock ones
All that's left to do is wait a bit, flip the diff around, paint the other side, reseal the cover and then throw it into the car!! Stay tuned!
matt, You'lve did all that work & installed it in the wrong rx......It wanted to go in a rust free rx w/ more powwwerrr..........
Tell me about it! Everything here is just pure rust. Thankfully my RX is pretty clean in comparison, a lot cleaner than our '14 even with less than half the KMs. That's okay, though! I'm DOUSING it in rust proofing and washing it regularly so it doesn't end up like my poor Highlander that is getting new frame rails this spring
The RX has undergone a LOT in a short period of time! Forged 19x8.5" Rays wheels, 255/45R19 Pilot Sport AS 4s, Viofo A229 front & rear dashcam, coilovers and more!
April 4th, 2025 - Pilot Sports arrived!
April 13th, 2025 - Prepping the RX for the Rays 19" wheels and Pilot Sports. I painted all four of my brake calipers (went thru one can), installed extended wheel studs and put the GR Corolla (42615-12010) 10mm slip on spacers in the rear. You'd ideally want to use 100-7718 ARP 60mm wheel studs (largest you can fit in the back without hub removal) to run these spacers, but it wasn't in the budget at the time so I used 90942-02078 60mm Toyota OEM studs instead, which work but you MUST use spacers with these, because their shoulder isn't threaded behind the spacer. I used 50mm GR Corolla (90942-02098) studs in the front. The front hub can accept any length you want, as there is no length restriction to fit them in
Perfect time to clean the hub when the studs are out! Quick hit with the SS wire wheel on my grinder
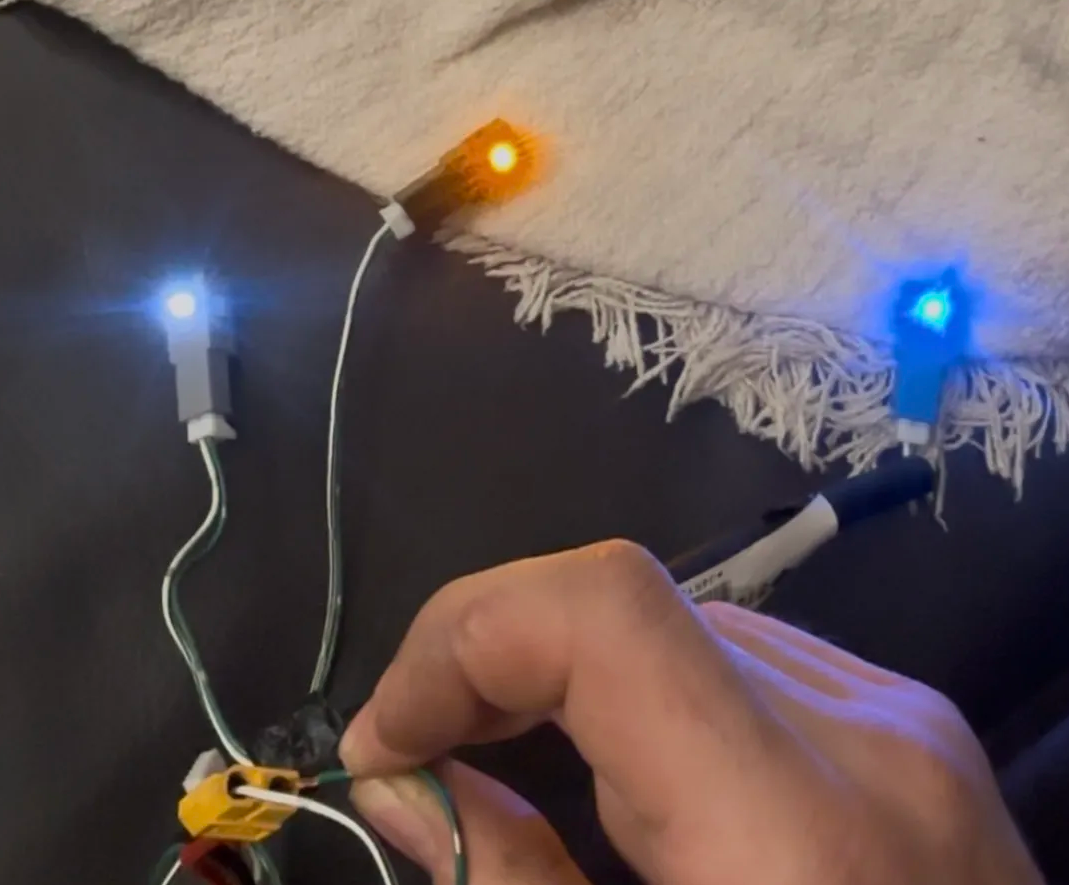
April 19th, 2025 - Decided to finally get the proper 2007-2009 LS460 heated steering wheel clockspring, so the setup is more robust and easily swappable to other Toyota/Lexus cars I may own in the future. While I was in there, I threw in a PERFECT new signal & wiper stalk I found in the junkyard from a clean 2012 Lexus CT200h
Setup uses the wheel for ground and is easily removable, and fully P&P with the LS460 clockspring
I used an insulated spade connector for easy removal & reinstall!
Bit of clearancing to get that CS in, it's a big unit! You won't see that with the wheel back on
Added a 20k ohm resistor to my heated steering switch, it was way too bright! Now it's similar to my Toyota Avalon illuminated mirror switch
PART 2:
April 22nd, 2025 - My coworker's RX330 on BC coilovers! He was planning on selling the car, so I asked if he would mind swapping back to the stock struts, so I could I'd buy them off him
April 26th, 2025 - FINALLY got my Rays 19" and Pilot Sports on - first time this car has ever seen real tires! The RX has never handled better in its life - but I'm sitting here laughing now at that statement today... You'll see why soon!
BIG day for the RX! I finally got coilovers! My coworker sold his RX, and he was a man of his word and got them off for me! The Eibachs performed VERY well for the years I had them, especially for the price! However, onto better things!
I liked the height of his RX, so I kept the coilovers at the same height
At first, I had the compression & rebound adjustment set in the middle (15 clicks), but today I drove to work on 10 clicks from soft, the softer setting makes the car feel less undersprung & overdamped, but the body roll is the same. I thought the 6k front and 4k springs were going to be too soft on a heavy RX, but they're not even much softer than my Eibachs it seems - although the dampers are MUCH beefier and sportier w/ less travel vs. the Sachs! The system feels much better and controls the body well. There's less nose dive and squat, although before it was still really good with the Eibach/Sachs setup.One day I may try 8k front and 6-7k rear for fun, although I'm happy with this setup for now!
Of course after all this, my alignment was SCREWED! I had to get an alignment asap!
The BCs as they sat before installation. Dust boots need some TLC and I had to clean the threads w/ a tap for the ABS wire and brake line (M6 and M8-1.25 respectively), they are in good shape!
For anyone wondering. The front dust boots are 150mm long and have a 50mm OD and a 22mm ID for the rod, the rears are also 150mm long and have a 20mm ID. Bump stops are 40mm long and have a durometer rating of 70a as measured. It seems that most of the individual pieces are sold by BC, but the rear springs are special as they're not a universal coilover spring and they reuse the stock rear mounts. The fronts are 62-240-6 (62mm ID, 240mm length, 6k spring rate), the rears are 280mm long and are 62mm ID at the base, but get progressively wider near the top to match the contour of the strut mount. I want to make some custom all-steel rear mounts that use a straight 62mm spring, to open up my options for other springs and to match the stiffness of the front solid mounts!
Rear BC vs. Eibach / Sachs combo
Front BC vs. Eibach / Sachs combo
Oof! CV axle is tilted SLIGHTLY up a little! The control arms are almost parallel with the ground, obviously the roll center has changed from stock. I'll raise them up if I ever make a custom rear subframe in the future!
Front's a little worse! The control arm is actually pointing a bit up now vs. down, same with the tie rods and CV axle. I may switch to the FWD Camry knuckles to lower the tie rod mounting point, and I ordered the 02-06 Camry Hardrace 8789 roll center adjustment kit to see if I can improve this a bit. I'm SOL on the CV axle, those may become a bit of a consumable in the future - such is life when you mod your cars I guess!
This kit lowers the ball joint by 20mm, to help put your front lower control arms back into an optimal angle
Onto the alignment rack she goes! After a bit of Frankensteining & other various mods plus a brake job on my good friend's Chrysler 300 5.7, I "demanded" some one-on-one hoist time with proper 4-wheel alignment! If you have a mechanic buddy, treat him well!
Like I mentioned previously, the alignment was SCREWED BAD! The toe in was super high on both the front tires, and you could feel it fighting you going down the road. God forbid you had to turn. Steering was super sloppy, light, imprecise and just made me cringe. Thankfully I only had to drive a short distance like this...
Remember to adjust caster (our cars and most I've seen can't adjust this), camber THEN toe in order! The tricky part about older Buicks (Regal, Century etc), Subarus, Camrys, Highlanders and these RXs, is if you've got camber adjustment bolts on the struts (I'm running 2-dot Toyota front and 3-dot Toyota rear), you need to adjust the camber with the wheels IN the air as the tire has to be off the ground to loosen the strut bolts. This is definitely tricky, and is basically a two man job! My buddy was holding the wheel with a pry bar, while I loosened the tightened the strut bolts. Push the knuckle in for more negative camber, pull it in for more positive. A thing I learned (the hard way) is that you're ball-parking the camber adjustment a bit. I had set the rears to -0.8 deg on both sides, but after putting the car down, it went to -2 on both sides. Loosening the bolts themselves is also a bit of an ordeal. I've got the big 17mm bolts, so those suckers are torqued to 180 ft lbs and are TIGHT! With little access in the rear, this is hell to deal with.
Get yourself an extension, a 22mm wrench, a big 22mm swivel socket or a 22mm socket with a swivel attachment, and a BIG impact gun and dugga those suckers until they're loose. You can use it on the bolt or nut side - and don't be shy, those suckers ARE NOT breaking, especially the 17mm ones on the later cars. Next, have a helper hold the wheel and DUGGA those suckers back on, with a 22 wrench on one end and a 22 socket on other. Do the top first, then the bottom and you're done! Then repeat until you're ready to adjust the toe.
**WARNING** - The RX is WAY too spicy for a daily driver at this moment! Too much oversteer! I'm going to have to play with it some more, but I'm probably going to dial back the front negative camber to -1.5. So far I've put the rear shocks 5 clicks more towards soft vs. the front, and decreased the front tire pressure by 3 psi vs. the rear! There are some undulations at low speed while on the highway that I need to figure out as well. The springs being a bit on the soft side may be a factor. It feels like they're having a hard time keeping up with the dampers.
Quick hack for ya! - Nissan Armada / Pathfinder and Infiniti QX80 alignment bolts fit! Same 40mm cam size and 80mm length! Half the price of Toyota, and zinc-plated! Win-win!
The toe adjustment is infinitely easier than camber on these. With the wheels back on the ground, I just held the "cam" side with a 22mm breaker bar, and my friend with a 19mm wrench reefed on it until it was tight. Spec is 80 ft lbs. Make sure to load up the shaft with anti-seize so these bolts don't seize to the bushing collar, which EVERY one of these here has fallen victim to. I decided to take off the SPC greasable ones, as they worked fine for years, but the 37mm cam size (They're for Hyundai / Kia vehicles) bothered me a bit as it wasn't as snug of a fit in the subframe as the 40mm stock Toyota / Nissan & Infiniti ones. I'll find a purpose for them somewhere else. They worked great though! The grease got in them and coated the insides very well.
After that, it was onto the front which is very straight forward! Loosen tie rod jam nut, and spin the inners until you're in spec. I personally like about 0 toe up front, and a tiny bit of toe in at the back. These cars have about 3 deg positive caster in front, which I was hoping would go up a bit with the coilovers. In the future, I want to try to get my RX to about 6-7 deg of positive caster. I love the steering feel of cars with some more positive caster, although these cars do well with 3 for what they are
WOW, LOOK AT THE BEFORE! HOLY CRAP!
I'm deciding to try negative 3 degrees of camber in the front and seeing how I like it. For years, I ran -2 on my 2002 Highlander and loved it. We'll see how the tires hold up - 2 deg was fine in that regard! As it sits, it feels very stable and controllable on the highway, not twitchy at all - but turn in is very crisp and the car is eager to rotate at your command! MAN, I cannot believe I have been missing out for this long. The RX has never had a proper alignment in the 3 years I've had it and it is showing now more than ever, the handling before was a JOKE compared to now! Get friendly with your alignment guy and get it done the way you want! This was aligned on a NICE new Hunter machine and the results speak for themselves! Now with the culmination of all the suspension & wheel / tire mods, the RX feels more nimble and fun than ever! I wasn't too concerned with aligning the front camber to -2 or -2.5 in the front, as I'll be getting it done again soon when I get the poly front control arm bushings and geometry correction kit in
What's next?
BIG BRAKES!
Camaro SS FMSI 1053 brake pads fit the IS F rotor TOO WELL! Meant to be!
I know an RX350 doesn't "need" huge brakes, but it doesn't need big sway bars w/ custom rear beefy mounts and coilovers either! Neither does any car, but I want them anyway dammit! The plan is to run 360x30mm front IS F rotors and 345x28mm rear IS F rotors...
My RX350 has already proved that the 310x18mm IS350 vented rear rotors fit the stock rear AWD hubs, and since the IS F shares the hubs with the IS350... (You see where I'm going). These massive metal saucers add some unsprung weight to the car, but the dual piston 3rd gen RX cast iron front calipers while they work very well - are absolute boat anchors, and I'm sick of lubing the sliding pins and hardware all the time. I want some nice BEEFY 4-pot aluminum calipers on my RX! I'm not after more braking power, which I doubt this will provide (much of, at least), I want some more fade resistance, lighter nice calipers that are easy to source out, and some nice looks! I was hoping I could find some blank rotors, but all I could find were drilled on Rockauto!
Unlike the IS350 rotors which require the 08-13 Highlander / 09-15 Venza rear dust shield (as seen on this knuckle), the IS F rotors sit on top - so who cares about swapping the shields over? That's your cue to go bigger!
The IS F front rotors fit the stock RX knuckle, at the cost of the stock dust shield. Hardly a price to pay for such MASSIVE chonk brakes
360x30mm Big CHONK front rotor at about 26.8 lbs! About 7.5 lbs heavier than the stock 319x28mm rotor or 6 lbs heavier than the 328x28mm 3rd gen RX rotor! That's quite a bit! Hopefully the aluminum calipers make up for it! The stock RX calipers esp the 3rd gens are HEAVY!
345x28mm Rear rotor sitting at about 21.3 lbs! That's about 7.5 lbs heavier than the IS350's 310x18mm vented, 8.3 lbs heavier than the 08-13 Highlander 309x10mm solid, and probably over 10 lbs heftier than the tiny crap 288x10mm stock rotor! Now THAT'S a rotor!You're going to be gaining some caliper weight here, but you're also going from a single piston to a 4-pot!
Front caliper I want to run - J55 GM caliper from the Camaro, CTS etc. Brembo big 4-pot, 4x 42mm pistons - cheap as dirt and everywhere
Rear caliper I want to run - These guys are used on Chargers / Challengers, Jeep Cherokee SRT, Camaro SS, Tesla Model S and WAY more! These are even more common and dirt cheap! Two 32mm pistons, and two 28mm pistons!
That's the plan for now. Gotta get some brackets made and try to get these babies on! These calipers have the brake line in a similar place to stock, and use an M10-1.0 banjo bolt, so here's to hoping I don't need to get custom brake lines, although I doubt it. The caliper pistons sizes will play nice with the 7/8" master cylinder our cars come with, or in my case the Scion tC one I swapped on. I could always upsize to the GR Corolla 15/16" if I want a bit less pedal travel, although I enjoy the extra modulation of 7/8". It's what I'm used to from the E46 M3 as well, which has the stock MC with some beefy Stoptech ST40 calipers.
My RX350 has been down for almost two weeks, but I finally got her back now. It was from a "choice" I decided to make almost four years ago when I got the car. At the time, I didn't have a lot of money, and a lot of that reason was because I spent a bunch of it getting the RX! So, my decision was to get aftermarket valve cover gaskets, spark plug tube seals etc. Well, going down that route ended up being a costly and labour-intensive mistake! On the way home from work, I lost cylinder #1. I heard a rumbling, terrible noise and thought it was the clapped-out ricebox beside me, but by the next intersection I realized it was ME that was making that racket! It's impressive how well the 2GR can get off the line even with 5 cylinders. Felpro was the brand - name and shame 'em! Never again with that garbage...
By the time I reached the highway, I wasn't sure if I was going to make it home. The 2GR was VERY upset and rough at that point, but somehow still keeping up with traffic at 60 mph / 100 kmh. I was able to limp it home and there it sat for two weeks... I made a point not to screw around this time. My pockets were deeper and I've learned a lot in four years. I got ALL NEW OEM EVERYTHING. Spark plug tubes, VC gaskets, you name it:
I also decided to do something I should have done four years ago when I got the car - reseal and clean the injectors! The bottom o-rings were completely rock solid and were leaking for a long time. You can tell as there was a faint fuel smell and you could see dirt accumulating where the o-ring seats in the lower intake manifold.
Old, nasty o-ring filter bucket (I had to use a slide hammer to get these suckers out!)
New, clean filters. Tap them in with a small brass hammer if you can
After that, I started tearing down the RX and remembered how BAD the rear valve cover is to take off and install on this car. You can tell they never planned to put a 2GR-FE in this chassis, and it shows. Rear access is GARBAGE! The earlier 2GR-FE wiring harness and lines running at the back near the firewall also don't help. Once the rear valve cover was off, I got to see the carnage
OUCH!
Note: No spark plugs were harmed in the making of this forum post
The "Felpoop" spark plug tube seal was the culprit and was just coming apart and all swollen. The valve cover gaskets themselves while kind of a loose fit vs. OEM, were still okay. However, their VVT-i "8"-shaped ones and circular ones that go into the head were the opposite of the swollen, overly soft spark plug tube seals - ROCK hard like a brick! One of the other Felpro spark plug tube seals had a small leak, but still looked overall okay at least from a first glance. I never liked the way these fit into both the valve cover and tube itself. They were extremely tight and that resulted in the VC being hard to install. As for the rest of the gaskets, they were all swollen too - and I wasn't going to take a chance having to redo this damn job for a third time. I have smaller hands and it's still a nightmare for me! 1/4" high tooth count flexhead ratchet and deep socket are a must for this!
While I was here, I also fixed some small things that bugged me since I got the car. For one, I removed the corrosion on the metal cowl, and rivnutted the oil catch can to it, as well as drilled out one of the snapped cowl bolts and installed a rivnut so that side could be tightened down again too. Another thing was fixing a brittle VVT-i solenoid connector up front that also had the sheathing from the wires coming off resulting in exposed wiring. I couldn't get the Toyota connector in time, so I got a GM one instead # 88988460. Well, it turns out the GM one was not only a direct fit and cheaper, but it feels a lot more solid and easier to unclip vs. the annoying Toyota one!
Perfection!
Another thing I did was work towards getting the RX fully back together after the bodyshop fiasco (see here: https://www.clublexus.com/forums/rx-...for-now-2.html). Using rivnuts, I re-installed the fuel door and now it is adjustable and easily removable in the future! No more dumb permanent rivnuts that Toyota decided to use for some reason!
Now that's hot!
Another thing I should have done four years ago - replace the rear bank (bank 1) "ventilation hose" that goes from the rear valve cover to the intake. Mine was extremely hard and brittle, cracked on both ends and split down the middle where it connects to the intake. Now if you know, you know - this hose is EXTREMELY expensive! I was contemplating making one up myself, but I was too damn tired to do it and just bought one, but not without "playing the system" a little. Instead of getting the stock one # 12262-31080, I decided to go with 12262-31100 from the 2012-2017 Camry V6, 2013-2018 ES350 and 2014-2017 Highlander V6. This one is not only cheaper, but in my opinion fits a lot nicer than the original one
Wow, it was meant to be! Junkyard science to the rescue!
Now for the fun stuff!
While I was in there, I also decided to port the lower intake manifold for a 5+ whp gain (As documented by MR2 owners with 2GR-FE swaps). Had a spare intake lying around from the junkyard years ago and finally did the job and installed this. If your RX is older and high mileage, be prepared to do a LOT of cleanup work on the old intake unit and the surface where it sits on the car. There was a lot of crud and old gasket left behind! It's not going to blow your socks off, but it's an appreciated power gain for a relatively low amount of effort
Ported intake as documented on the Wilhelm Raceworks blog
I also wanted to try some brighter trunk lights. They don't advertise these for our cars, but any of the ones you see marketed towards a MK5 (2019-2025) RAV4 or Prius are a direct fit for our cars and many other Toyota / Lexus.
WOW! It's as bright as an ambulance in here, now! Probably too bright, but these assemblies are a lot more simple and solid than the stock flimsy ones. The LEDs don't seat well in the stock one and that makes the switch sometimes turn off by itself as it's connected to the contacts itself
And SADLY, one of my Chinesium fog lights already kind of crapped itself! The passenger side / right side light just got dim and won't come back to full brightness. Not impressed as it has only been two months, I expected at least a couple years out of these things. However, I am not surprised as they were cheap and mostly just to fill a gap where my stock fog light was destroyed in the accident! My recc: DO NOT buy these and just stick with stock!
Brake stuff
LOOK AT THIS HUNKS OF METAL! Rear brake pads (4-pot Brembo) as seen at the top, and front brake pads (6-pot Brembo) as seen at the bottom. I think the RX is going to have NO issues stopping multiple times after this, not that it had any problems before with the already nice dual-piston sliders!
The rear 4-pot Brembo calipers were a PERFECT fit on the 2008-2014 IS F rear 345x28mm rotor! The rears are going to be 100% possible with an adapter bracket, but sadly the fronts are going to be some more work and experimentation...
Finding a beefy enough caliper to fit the massive front 360x30mm IS F has been darn near impossible. I actually decided to go to 6-pots in the front from a 2018-2021 Subaru STI. These are THE IS F caliper in nearly every way (pistons, pads, caliper body), except with mounting ears that can actually be made to fit our knuckles, vs. the IS F with the offset holes (350phi already tried to get these IS F calipers to fit our knuckles without success).
Good bolt pattern! Sadly, there's where the "good" ends...
AGHHHHH!!! TOO GOOD TO BE TRUE! I wasn't going to get it easy, this time it seemed. The Subaru caliper's ears are a bit shorter than the IS-F caliper, so the caliper contacts the IS F rotor, so the swept area cannot reach the bottom of the rotor surface. I do have a plan B, though...
The IS-F 360x30mm rotor is going out of the equation, sadly. I just cannot find another caliper that I can make fit both our knuckle and the car at the moment, but... There may be an alternative.
Found this gem at work!
The 2022-2025 Nissan Pathfinder / QX60 may have the answer I need to this brake situation! 350x30mm BIG-AZZ rotor, easy to find, cheap and actually nearly as beefy as the IS F one!
More than enough swept area! (2mm more than IS F, doesn't hurt to have a bit more)
9mm plates and 30mm overall thickness! That's the same as the IS F!
The hub looks like it'll fit too and it has a 5x114 bolt pattern like our cars. The only downside is that like my Infiniti G35 wheels, it has a 66.1mm center bore vs. 60.1mm for our cars. I'll have to make rotor centering rings, but I think that small disadvantage is a minor compromise. Once I get my hands on one of these rotors, I'll provide an update!
That's all for now, but there's way more plans in the making, this post is getting pretty long now, but hopefully I'll have some cool stuff to show soon!
AliExpress parts: - 90980-11986 (Connector for heated steering wheel module)
- x3 81080-48010-equivilant LED assemblies (x2 for footwell lights, x1 for glovebox)
- F-Sport style dead pedal / footrest pad (Tried to find this OEM, but to no avail)
- x2 7282-5845 (Male connector for footwell light)
- x2 7283-5845 (Female connector for footwell light)
Did the 81080-48010 equivalent bulbs for the glove box and footwells hold up and provide brighter light compared to the super dim orange OE colored bulbs?
Yes, they're bright white vs. the orange with a larger LED chip and way more output. These are part number "81080-22040" and can be found in 2006+ newer Lexus IS/GS/LS and others at the junkyard. They also fit the center console, but you need to disassemble the entire thing to get it out, which I had to do anyway to put in my aftermarket stereo, but it's quite the job as you need to pull a seat out to get proper clearance to unbolt it. There is also 81080-33280 which appears to use an even larger chip but is more blue-ish white, this is found on 2017+ Toyota
For the glovebox light, you will need the assembly from an RX300, 1st gen Highlander or early 2004-2006 RX. That's a pocket gift at the junkyard. 81260-33030 or 81260-22160 assembly will work for that, plus a bright LED type 74 bulb of your choice.
The lights seen from left to right: 81080-22040 (white), 81080-48010 (orange - stock), 81206-48020 (blue - used in front cupholders)
Sadly the 18-21 Subaru STI calipers and the rear Tesla / Camaro SS / CTS-V / Charger SRT calipers weren't going to work. I even tried the 2012-2017 Jeep Grand Cherokee / Durango SRT ones - the only of which that have different (narrower) spacing, and those didn't fit either! The Subaru caliper was never going to properly fit the knuckle, maybe even after chopping it up - which would be a crime for a set of calipers so expensive. At least I could say I tried, and was able to sell them off locally to a friendly Subaru enthusiast for what I paid for them, so nothing was lost there. The rear 4-pots were really cheap so I'm not too sad about them, I'm sure I could sell them off eventually, but the info those provided me as well was priceless. After this upsetting discovery, I figured I was going to have to cave in and get some radial-mount calipers, as our knuckles are a PAIN to retrofit to clearly
No way in hell to make these fit! TOO BAD! (SRT Cherokee / Durango on left, common wide 120mm spacing on right)
My stubborn self spent a whole hour theorizing making a bracket to fit these: Spoiler alert - it ain't happening!
The SRT SUV ones wouldn't even slip behind the knuckle! No way is that going to work! Plus, the spacing is off too
I really like the IS F and 18-21 Subaru STI front calipers - I wanted a nice, cheap, lightweight 6 pot to replace them with. I wanted something with a smaller swept area to fit the IS F rotors, as I have decided I don't go down the route of having rotor centering rings and all that bs. Was my plan of having cheap, big brakes slipping past me - would I have to give up? Well, not really, actually! Something PERFECT was waiting locally for me to pick up for stupidly cheap...
14-19 Maserati Ghibli 6-pot front calipers! These use 30/34/38mm pistons like the IS F and Subaru, and they were HALF THE PRICE and in way better shape! OMG!!!
Want to know the best part? You can use the cheap IS F brake pads, brake hardware and rebuild kits on these! I was even able to swap the top "pin" over, all of which are available cheap on Rockauto! Nothing shows up as being cross-compatible for the Maserati application, but it's all the same stuff! The LS430 bleeder screws and caps fit these too! WOOW! There's only one small downside, these use M10-1.0 bubble flares for the brake hose, so some custom brake hoses will have to be made. Not a big deal
Now this is definitely doable with a radial mount bracket!
360x30mm IS F rotor and the 6 pots clear the 19" RAYS wheels with plenty of room to spare
It's a REAL tight fit, but it even clears my 2016-2022 RX base 18" wheels as well!
Then, I found some radial-mount gems for the rear brakes. Guess the car? Another Maserati! In this case, a 2007-2019 GranTurismo S M145
These are going to require an offset bracket, but they should work as well. Another amazing part? I got lucky with the pads and hardware again! These can use the common CTS-V / Camaro SS etc pads and hardware, despite no compatibility listed! BONUS!
Now I can get away with using common pads and hardware for the front and rear, which was a critical part of this project. These calipers are also not too rare and expensive like the STI ones, so you won't be crying if one is damaged beyond repair. Like the fronts, rebuild kits are readily available from Brembo or others. These also use an M10-1.0 bubble flare like the fronts, but sadly the pistons are not the common 28 / 32mm sizes used on most of these. They're bigger at 32 / 36mm. This makes finding the rebuild kits a little harder and more expensive, but it throws the brake bias more towards the rear.
With a 64mm front piston and 41mm rear piston, the RX's stock bias was 71% F, 29% R, that's pretty front-biased, even for a vehicle like this, but that is common for Toyota to do such a thing, even on the sporty IS F itself (73F, 27R - albeit with pretty close rotors sizes). With the current setup I have now with the dual piston fronts and euro RX450h rears, it's at 73% F, 27% - even worse! (Still, the larger rear rotors make up for this, as the stock 288mm rear RX rotors are pathetic). The 30/34/38mm 6 pot fronts and 28/32mm 4 pot rears would bring the bias to a cool 66% front, 34% rear. However, with the 32/36mm rears it goes down to 60% F, 40% R. Even a bias like that isn't common on most cars with a 50/50 weight distribution. We're going to have to see how that feels and how the car's EBD will handle that. In the meantime, I am looking for some other radial calipers that share these pads but have smaller pistons (Aston Martin & Jaguar share these too).
Fits nicely over the rotor, eating up almost all the swept area!
Common CTS-V / Charger SRT brake pads and hardware fitting as if they belonged! Gotta love how easy it is to do pads on these calipers
On the 17th, me and some of my American buddies were supposed to meet up in Detroit for the Detroit Auto Show and to hang out for a few days! We had planned this three weeks in advance, and I had a LOT of stuff I had to do on the RX to get it ready! First of all, the bad alignment was still there from the bent knuckle and possibly more after that driver hit me months ago and almost killed my damn car! https://www.clublexus.com/forums/rx-...n-for-now.html
Not only that, there was a whole bunch of stuff I had planned on doing, and I stupidly decided to try and finish it all in a short span, even the not so essential stuff - probably giving myself a few gray hairs in the process!
- Install 10-14 Subaru Legacy autodim mirror
- Install 2008 RX400h door sills
- Install new transmission cooler
- Install power steering cooler
- Reinstall roof trim & seam seal roof to stop leaks
- Install solid steering shaft
- Install new (used) 2010-2014 Subaru legacy blower motor
- Wire glovebox light to always be on
- Remove idiot lights from cluster (TPMS and Brake Warning Light)
- Install aftermarket headunit and amp - bypassing the factory units - THIS ONE WAS BRUTAL
I started with an easy one - the Subaru auto dim mirror. This is a newer Gentex 455, which is what the 07-09 RXs already come with. However, this one is improved with a hidden compass, faster dimming / undimming, and the ability to shut its dimming off when you're in reverse. I initially didn't have the reverse function hooked up, but I did eventually enable it when I wired in my reverse camera for my aftermarket head unit
Next, it was time to replace my aging and rusted transmission cooler with a new old stock one from a 2010-2012 RX350. I didn't want any problems on this 7 hr round trip, so I elected to replace it before the trip. While I had the bumper off, I decided to add the OEM style power steering cooler too - because why not? While I was there, I also disabled the finicky, washer fluid wasting headlight washers which I never cared for, I also re-drilled my plate bracket hole that a dumb salesperson mis-drilled back in 2007/2008, and re-wired my chinese fog lights from the now dead yellow colour to white.
After this, I gave myself a break and did a 5-minute job. Replacing my yellow standard 2004-2009 RX door sills with the elusive blue ones from a 2008 RX400h. These are much brighter and use a total of 2x 3528 LED chips (1 per corner) vs. the crummy 3mm dim yellow bulb. I also replaced the brake fluid reservoir cap with the 2006-2008 RX400h one, which has yellow text to make it easier to spot in your engine bay
I was on a roll, so I decided to finally tackle the solid steering shaft mod I had wanted to do for years. You need an 06-08 RX400h intermediate shaft, and 1992-1998 Corolla steering coupler. The Corolla's coupler is 1" shorter than the stock one with the rubber puck, which is why you need the RX400h's 1" longer shaft, otherwise you won't be able to re-attach your steering to the column. This provided a nice little boost in road feel / feedback for the steering
Next, I didn't want to drive all the way to Detroit on a bad alignment, so it was time to address the damaged components and get this thing driving the way it used to again before that lady hit me. I was worried at first about my recently-acquired BC coilovers being damaged, or that 2001-2003 Highlander steering rack that took a whole day to put in. However, thankfully just the knuckle itself was bent! I elected to try something different and go with Camry / Sienna FWD knuckles to try and correct my tie rod geometry after lowering my car by 2". It turns out, the Camry / Sienna FWD has a tie rod mount that is exactly 1.9" lower, so this corrected the geometry near perfectly! It still doesn't address my ball joint / control arm angle though, which I will have to figure out sometime in the future.
This one gave me some gray hairs as I figured out afterwards that I needed a longer outer tie rod to compensate for the tie rod being lower, therefore further away from the rack (therefore requiring said longer tie rod). The solution? 2004-2011 Camry outer tie rods. If you have a 2001-2003 Highlander steering rack and are still running the 2001-2003 Highlander inner tie rods (instead of the 2004-2009 RX inners - which DO fit), you'll need 2012-2017 Camry outer tie rods instead.
Finally, it was time for the WORST JOB by far! One that I definitely shouldn't have even ATTEMPTED before such a trip on short notice! Let me tell you, I almost wanted to burn the car down trying to figure this crap out! The RX is a wonderful car, but it FRIGGIN' SUCKS to put an aftermarket headunit in, especially compared to my 2002 Highlander. My stock amplifier kicked the bucket a while back, and I wanted to upgrade to a nice headunit and bypass the stock amp with an aftermarket one, but I wanted to use all the factory wiring without cutting or splicing ANYTHING. Also, I wanted a reverse camera and easy navigation on the way over there, as well as hands-free calling and a good excuse to show the whole thing dang off! Excuse a guy for wanting his car to be perfect! - Famous last words
Full detailed post coming soon!
Getting to this point took 15 minutes, what ensued took 15 DAYS of pure hell!
I'm not a crazy audiophile, or someone who wants to blast music really loud in their car. However, I was a music student in school and can appreciate some good sq. The goal here was to have as clean and as unobtrusive of a setup as possible. No cutting wires, stock amp location, fully P&P, no drilling holes, etc. I wanted it to be as OEM+ as possible, so retaining all steering controls, the dimming function, the AM/FM radio (via the antenna amplifier) and all 8 speakers.
Well, knowing me, I went WAY too far being a perfectionist and had to have EVERYTHING working perfectly before this trip! That was where the brutality comes in! I wanted the phone for Apple Carplay / Android Auto to plug in where the storage cubby is in the center console, so the console had to come out. While the console was out, I had to of course take the entire dang thing apart and clean it, plus put in some newer lights from an IS350, plus put a NICE flush mount USB port there, plus make the lower accessory port illuminated, plus put another USB port where the heated seat switches are, PLUS change all the climate unit lights as some were burned out, but of course upgrade them to LEDs with silicone caps on top to eliminate light bleeding etc. You know how it goes! WAAAY overkill! Anyway, this was a massive upgrade for the RX, as well as a massive learning experience and I filled that gap that was missing that the Highlander had for 8 years (I put a headunit in it back in 2018).
And finally, before the road trip - I had to quench the 2GR's thirst! A nice oil change! Valvoline Restore & Protect is finally available here, and it's cheap at Walmart. I got a few jugs of 5-30 and fed it to the beast! Let's see if it can pull out some more gunk out of this poor neglected 2GR!
DISGUSTING! 4 yrs later and still pulling out sludge! Mobil 1 0W40 Euro Formula is amazing at cleaning! I haven't found an oil that the 2GR likes as much as this since! Helps keep the VVT-i rattles down on cold start and is buttery smooth and quiet at idle. Let's see how it likes R&P!
Get yourself one of these cheap Toyota thread-in funnels. No more spills, and it was only 8 bucks!
With all of that craziness done, was the RX ready in time for the trip?! YES!!!! I barely was able to make it in time, but I just had enough time to make it work! The trip was a blast - one that is definitely going down as one of the most fun three days ever - plus the RX handled it like a champ!
What trip would it be if I didn't get to visit one of my favourite places? A scrapyard! Michigan has some REALLY, and I mean REALLY good junkyards!
I'm looking for the same solution as you! Unfortunately, the only ones that directly fit up front are 2001-2007 Highlander seats. I'm tempted to take the driver seat from an older IS or GS as they're a little lower and have a longer bottom cushion for us taller guys. Another part of me wants to just get a pair of aftermarket bucket seats for the front and take out the stock front seats that are stupidly heavy and are awful to remove from the car to clean the carpet (very easy to scratch the paint off your door jambs due to their shape).
Ideally, I'd want some seats that are:
- Manual adjust (Simpler and less weight, I wouldn't mind wiring in power seats but I prefer manual adjust seats)
- Heated (If not, I can always add the heating element myself)
- Lightweight (Ideally 40 lbs or less - over half the weight of the stock 83 lbs EACH front seats)
- More bolstering (The stock seats don't hold you enough to match the car's handling now, so you get thrown into the door panel if you take any corners)
I have a gutted stock front junkyard seat in storage, so I will probably be making some custom brackets based on those stock seat rails. I also need to figure out a solution for armrests or decide if it's not worth it, as most Toyota & Lexus seats and most seats in general don't have integrated armrests, most of the time they are built into center console. Such is the case with the next generation RX.
BIG day for the RX! I finally got coilovers! My coworker sold his RX, and he was a man of his word and got them off for me! The Eibachs performed VERY well for the years I had them, especially for the price! However, onto better things!
I liked the height of his RX, so I kept the coilovers at the same height
At first, I had the compression & rebound adjustment set in the middle (15 clicks), but today I drove to work on 10 clicks from soft, the softer setting makes the car feel less undersprung & overdamped, but the body roll is the same. I thought the 6k front and 4k springs were going to be too soft on a heavy RX, but they're not even much softer than my Eibachs it seems - although the dampers are MUCH beefier and sportier w/ less travel vs. the Sachs! The system feels much better and controls the body well. There's less nose dive and squat, although before it was still really good with the Eibach/Sachs setup.One day I may try 8k front and 6-7k rear for fun, although I'm happy with this setup for now!
Of course after all this, my alignment was SCREWED! I had to get an alignment asap!
The BCs as they sat before installation. Dust boots need some TLC and I had to clean the threads w/ a tap for the ABS wire and brake line (M6 and M8-1.25 respectively), they are in good shape!
For anyone wondering. The front dust boots are 150mm long and have a 50mm OD and a 22mm ID for the rod, the rears are also 150mm long and have a 20mm ID. Bump stops are 40mm long and have a durometer rating of 70a as measured. It seems that most of the individual pieces are sold by BC, but the rear springs are special as they're not a universal coilover spring and they reuse the stock rear mounts. The fronts are 62-240-6 (62mm ID, 240mm length, 6k spring rate), the rears are 280mm long and are 62mm ID at the base, but get progressively wider near the top to match the contour of the strut mount. I want to make some custom all-steel rear mounts that use a straight 62mm spring, to open up my options for other springs and to match the stiffness of the front solid mounts!
Rear BC vs. Eibach / Sachs combo
Front BC vs. Eibach / Sachs combo
Oof! CV axle is tilted SLIGHTLY up a little! The control arms are almost parallel with the ground, obviously the roll center has changed from stock. I'll raise them up if I ever make a custom rear subframe in the future!
Front's a little worse! The control arm is actually pointing a bit up now vs. down, same with the tie rods and CV axle. I may switch to the FWD Camry knuckles to lower the tie rod mounting point, and I ordered the 02-06 Camry Hardrace 8789 roll center adjustment kit to see if I can improve this a bit. I'm SOL on the CV axle, those may become a bit of a consumable in the future - such is life when you mod your cars I guess!
This kit lowers the ball joint by 20mm, to help put your front lower control arms back into an optimal angle
Onto the alignment rack she goes! After a bit of Frankensteining & other various mods plus a brake job on my good friend's Chrysler 300 5.7, I "demanded" some one-on-one hoist time with proper 4-wheel alignment! If you have a mechanic buddy, treat him well!
Like I mentioned previously, the alignment was SCREWED BAD! The toe in was super high on both the front tires, and you could feel it fighting you going down the road. God forbid you had to turn. Steering was super sloppy, light, imprecise and just made me cringe. Thankfully I only had to drive a short distance like this...
Remember to adjust caster (our cars and most I've seen can't adjust this), camber THEN toe in order! The tricky part about older Buicks (Regal, Century etc), Subarus, Camrys, Highlanders and these RXs, is if you've got camber adjustment bolts on the struts (I'm running 2-dot Toyota front and 3-dot Toyota rear), you need to adjust the camber with the wheels IN the air as the tire has to be off the ground to loosen the strut bolts. This is definitely tricky, and is basically a two man job! My buddy was holding the wheel with a pry bar, while I loosened the tightened the strut bolts. Push the knuckle in for more negative camber, pull it in for more positive. A thing I learned (the hard way) is that you're ball-parking the camber adjustment a bit. I had set the rears to -0.8 deg on both sides, but after putting the car down, it went to -2 on both sides. Loosening the bolts themselves is also a bit of an ordeal. I've got the big 17mm bolts, so those suckers are torqued to 180 ft lbs and are TIGHT! With little access in the rear, this is hell to deal with.
Get yourself an extension, a 22mm wrench, a big 22mm swivel socket or a 22mm socket with a swivel attachment, and a BIG impact gun and dugga those suckers until they're loose. You can use it on the bolt or nut side - and don't be shy, those suckers ARE NOT breaking, especially the 17mm ones on the later cars. Next, have a helper hold the wheel and DUGGA those suckers back on, with a 22 wrench on one end and a 22 socket on other. Do the top first, then the bottom and you're done! Then repeat until you're ready to adjust the toe.
**WARNING** - The RX is WAY too spicy for a daily driver at this moment! Too much oversteer! I'm going to have to play with it some more, but I'm probably going to dial back the front negative camber to -1.5. So far I've put the rear shocks 5 clicks more towards soft vs. the front, and decreased the front tire pressure by 3 psi vs. the rear! There are some undulations at low speed while on the highway that I need to figure out as well. The springs being a bit on the soft side may be a factor. It feels like they're having a hard time keeping up with the dampers.
Quick hack for ya! - Nissan Armada / Pathfinder and Infiniti QX80 alignment bolts fit! Same 40mm cam size and 80mm length! Half the price of Toyota, and zinc-plated! Win-win!
The toe adjustment is infinitely easier than camber on these. With the wheels back on the ground, I just held the "cam" side with a 22mm breaker bar, and my friend with a 19mm wrench reefed on it until it was tight. Spec is 80 ft lbs. Make sure to load up the shaft with anti-seize so these bolts don't seize to the bushing collar, which EVERY one of these here has fallen victim to. I decided to take off the SPC greasable ones, as they worked fine for years, but the 37mm cam size (They're for Hyundai / Kia vehicles) bothered me a bit as it wasn't as snug of a fit in the subframe as the 40mm stock Toyota / Nissan & Infiniti ones. I'll find a purpose for them somewhere else. They worked great though! The grease got in them and coated the insides very well.
After that, it was onto the front which is very straight forward! Loosen tie rod jam nut, and spin the inners until you're in spec. I personally like about 0 toe up front, and a tiny bit of toe in at the back. These cars have about 3 deg positive caster in front, which I was hoping would go up a bit with the coilovers. In the future, I want to try to get my RX to about 6-7 deg of positive caster. I love the steering feel of cars with some more positive caster, although these cars do well with 3 for what they are
WOW, LOOK AT THE BEFORE! HOLY CRAP!
I'm deciding to try negative 3 degrees of camber in the front and seeing how I like it. For years, I ran -2 on my 2002 Highlander and loved it. We'll see how the tires hold up - 2 deg was fine in that regard! As it sits, it feels very stable and controllable on the highway, not twitchy at all - but turn in is very crisp and the car is eager to rotate at your command! MAN, I cannot believe I have been missing out for this long. The RX has never had a proper alignment in the 3 years I've had it and it is showing now more than ever, the handling before was a JOKE compared to now! Get friendly with your alignment guy and get it done the way you want! This was aligned on a NICE new Hunter machine and the results speak for themselves! Now with the culmination of all the suspension & wheel / tire mods, the RX feels more nimble and fun than ever! I wasn't too concerned with aligning the front camber to -2 or -2.5 in the front, as I'll be getting it done again soon when I get the poly front control arm bushings and geometry correction kit in
What's next?
BIG BRAKES!
Camaro SS FMSI 1053 brake pads fit the IS F rotor TOO WELL! Meant to be!
I know an RX350 doesn't "need" huge brakes, but it doesn't need big sway bars w/ custom rear beefy mounts and coilovers either! Neither does any car, but I want them anyway dammit! The plan is to run 360x30mm front IS F rotors and 345x28mm rear IS F rotors...
My RX350 has already proved that the 310x18mm IS350 vented rear rotors fit the stock rear AWD hubs, and since the IS F shares the hubs with the IS350... (You see where I'm going). These massive metal saucers add some unsprung weight to the car, but the dual piston 3rd gen RX cast iron front calipers while they work very well - are absolute boat anchors, and I'm sick of lubing the sliding pins and hardware all the time. I want some nice BEEFY 4-pot aluminum calipers on my RX! I'm not after more braking power, which I doubt this will provide (much of, at least), I want some more fade resistance, lighter nice calipers that are easy to source out, and some nice looks! I was hoping I could find some blank rotors, but all I could find were drilled on Rockauto!
Unlike the IS350 rotors which require the 08-13 Highlander / 09-15 Venza rear dust shield (as seen on this knuckle), the IS F rotors sit on top - so who cares about swapping the shields over? That's your cue to go bigger!
The IS F front rotors fit the stock RX knuckle, at the cost of the stock dust shield. Hardly a price to pay for such MASSIVE chonk brakes
360x30mm Big CHONK front rotor at about 26.8 lbs! About 7.5 lbs heavier than the stock 319x28mm rotor or 6 lbs heavier than the 328x28mm 3rd gen RX rotor! That's quite a bit! Hopefully the aluminum calipers make up for it! The stock RX calipers esp the 3rd gens are HEAVY!
345x28mm Rear rotor sitting at about 21.3 lbs! That's about 7.5 lbs heavier than the IS350's 310x18mm vented, 8.3 lbs heavier than the 08-13 Highlander 309x10mm solid, and probably over 10 lbs heftier than the tiny crap 288x10mm stock rotor! Now THAT'S a rotor!You're going to be gaining some caliper weight here, but you're also going from a single piston to a 4-pot!
Front caliper I want to run - J55 GM caliper from the Camaro, CTS etc. Brembo big 4-pot, 4x 42mm pistons - cheap as dirt and everywhere
Rear caliper I want to run - These guys are used on Chargers / Challengers, Jeep Cherokee SRT, Camaro SS, Tesla Model S and WAY more! These are even more common and dirt cheap! Two 32mm pistons, and two 28mm pistons!
That's the plan for now. Gotta get some brackets made and try to get these babies on! These calipers have the brake line in a similar place to stock, and use an M10-1.0 banjo bolt, so here's to hoping I don't need to get custom brake lines, although I doubt it. The caliper pistons sizes will play nice with the 7/8" master cylinder our cars come with, or in my case the Scion tC one I swapped on. I could always upsize to the GR Corolla 15/16" if I want a bit less pedal travel, although I enjoy the extra modulation of 7/8". It's what I'm used to from the E46 M3 as well, which has the stock MC with some beefy Stoptech ST40 calipers.
Stay tuned!
Fantastic set of posts of your thread you have here! So much valuable information so thank you very much. The BC racing coil overs, do you know if they are the standard ones or if they are the extreme low variant? Doing research today and it’s hard to find much information on other builds with the type of coil overs they have. I love the look of your RX but with the standard shock body do you think it would be possible to get the fender to sit flush with the top of the tire?
Toyota and Lexus Join Mille Miglia For The First Time
Slideshow: A five-car lineup spanning more than five decades of Toyota performance and engineering will tackle one of Italy's most celebrated automotive routes.