
How to remove rear side trim -

Thread Starter
Driver


Joined: Oct 2021
Posts: 63
Likes: 8
From: Or
Working my way through the rear of my '06 400h trying to find the major water leak - (alrdy sealed the roof rack bolts & seams on top of the hatch) - Now narrowing down to the door hatch connectors, or the tail lights, or maybe even rear-side triangle windows?
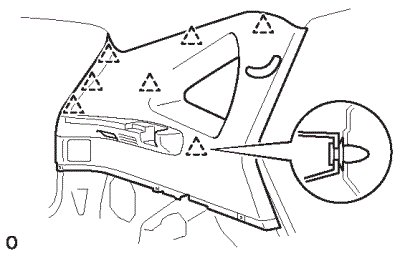
? = How do I remove these 2 rear side panels?
The smaller one on the bottom & larger one on top. Also prob will need to drop the rear headliner, too if you have suggestions. Not looking fwd to it 😩
T. I. A.


? = How do I remove these 2 rear side panels?
The smaller one on the bottom & larger one on top. Also prob will need to drop the rear headliner, too if you have suggestions. Not looking fwd to it 😩
T. I. A.


Here's some info from Chilton's
32. REMOVE CENTER PILLAR LH GARNISH
34. REMOVE DECK SIDE TRIM LH COVER
36. SEPARATE REAR NO.1 SEAT OUTER LH BELT ASSEMBLY
38. REMOVE REAR SEAT SIDE LH COVER
40. REMOVE REAR FLOOR FINISH SIDE LH PLATE
42. REMOVE ROPE HOOK
45. REMOVE ROOM LIGHT ASSEMBLY NO.2
48. REMOVE TELEVISION BASE (W/ TELEVISION DISPLAY)2006 MY RX400H [03/2005 - ]; AUDIO / VISUAL: TELEVISION DISPLAY: REMOVAL+
49. REMOVE TELEVISION DISPLAY ASSEMBLY (W/ TELEVISION DISPLAY)2006 MY RX400H [03/2005 - ]; AUDIO / VISUAL: TELEVISION DISPLAY: REMOVAL+
50. REMOVE ASSIST GRIP SUB-ASSEMBLY
52. REMOVE ROOM LIGHT ASSEMBLY NO.1
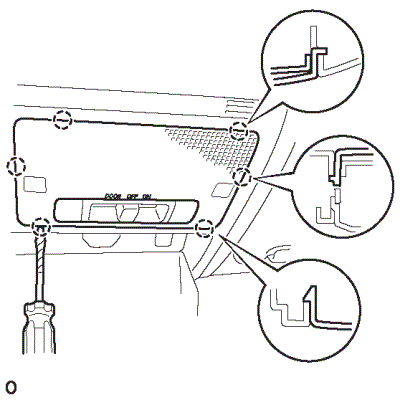
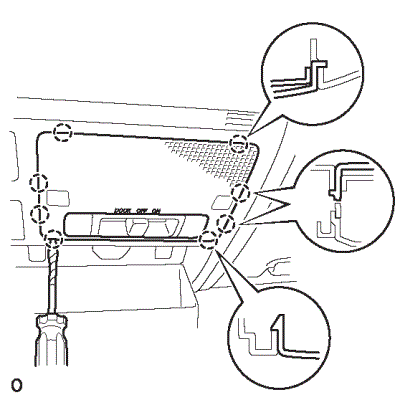
56. REMOVE VISOR HOLDER
- Disengage the 3 claws and 2 clips, and remove the center pillar garnish lower.
32. REMOVE CENTER PILLAR LH GARNISH
- Remove the 2 screws.
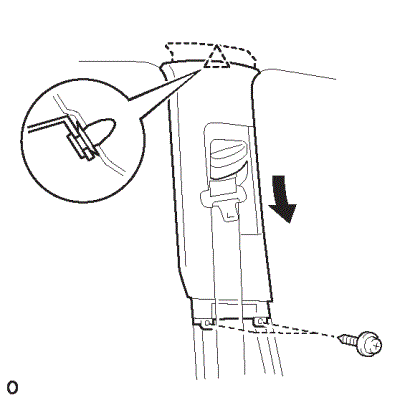
- Disengage the clip and remove the center pillar garnish by pulling it down.
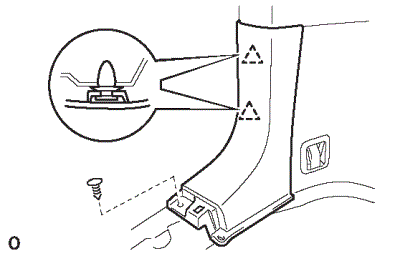
34. REMOVE DECK SIDE TRIM LH COVER
- Using a moulding remover, disengage 3 claws (A).
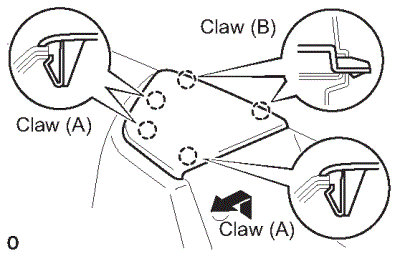
- Disengage 2 claws (B) and remove the deck side trim cover by pulling it to inside the vehicle.
36. SEPARATE REAR NO.1 SEAT OUTER LH BELT ASSEMBLY
- Remove the bolt and separate the rear No.1 seat outer belt assembly.
38. REMOVE REAR SEAT SIDE LH COVER
- Using a clip remover, remove the 3 clips.
- Disengage the 4 clips and remove the rear seat side cover.
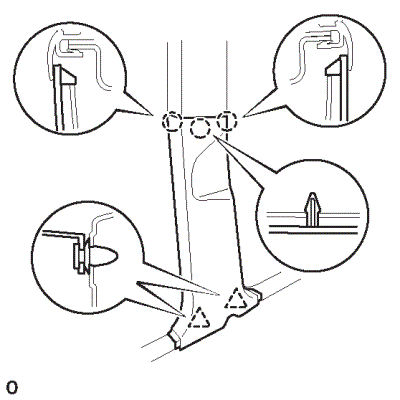
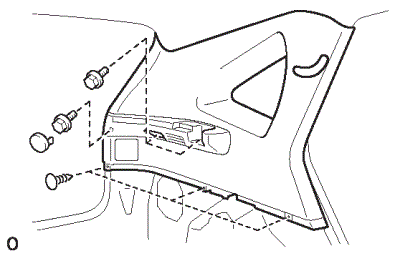
40. REMOVE REAR FLOOR FINISH SIDE LH PLATE
- Using a clip remover, remove the clip.
- Disengage the 2 clips and remove the rear floor finish side plate.
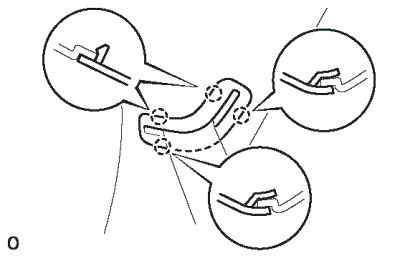
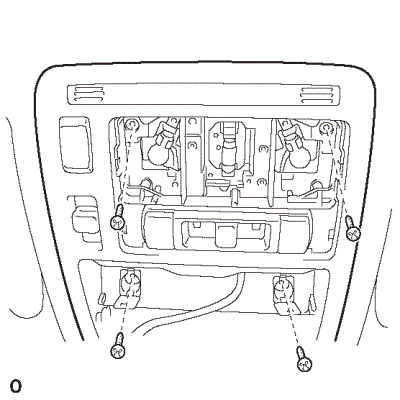
42. REMOVE ROPE HOOK
- Remove the 2 bolts and 2 rope hooks.
NOTE
HINT:
Use the same procedure to remove the other side.
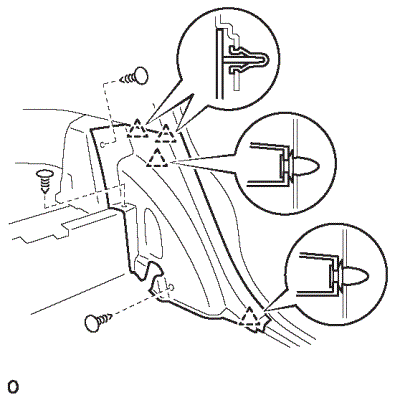
- Using a clip remover, remove the 4 clips.
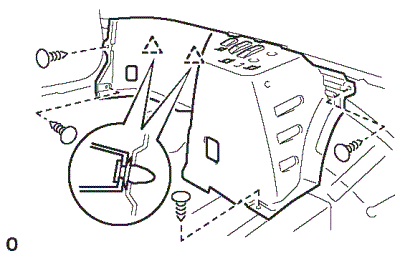
- Disengage the 2 clips and remove the deck trim side panel assembly.
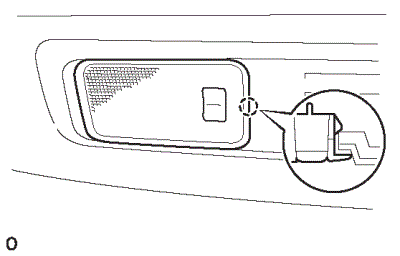
45. REMOVE ROOM LIGHT ASSEMBLY NO.2
- Using a screwdriver, disengage the claw and remove the room light assembly No.2.
NOTE
HINT:
Tape the screwdriver tip before use.
- Disconnect the connector.
- Using a screwdriver, remove the tonneau cover holder cap.
NOTE
HINT:
Tape the screwdriver tip before use.
- Remove the 3 bolts.
- Using a clip remover, remove the 3 clips.
- Disengage the 7 clips and remove the roof side garnish assembly inner.
- Disengage the 4 claws and separate the seat belt bezel.
48. REMOVE TELEVISION BASE (W/ TELEVISION DISPLAY)2006 MY RX400H [03/2005 - ]; AUDIO / VISUAL: TELEVISION DISPLAY: REMOVAL+
49. REMOVE TELEVISION DISPLAY ASSEMBLY (W/ TELEVISION DISPLAY)2006 MY RX400H [03/2005 - ]; AUDIO / VISUAL: TELEVISION DISPLAY: REMOVAL+
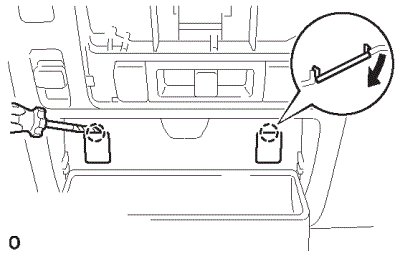
50. REMOVE ASSIST GRIP SUB-ASSEMBLY
- Using a screwdriver, disengage the 3 claws and remove the 2 assist grip covers.
NOTE
HINT:
Tape the screwdriver tip before use.
- Remove the 2 screws and assist grip sub-assembly.
NOTE
HINT:
Use the same procedure for the other 3 assist grips.
52. REMOVE ROOM LIGHT ASSEMBLY NO.1
- Using a screwdriver, disengage the 4 claws and remove the lens cover.
NOTE
HINT:
Tape the screwdriver tip before use.
- Using a screwdriver, disengage the 2 springs, as shown in the illustration.
NOTE
HINT:
Tape the screwdriver tip before use.
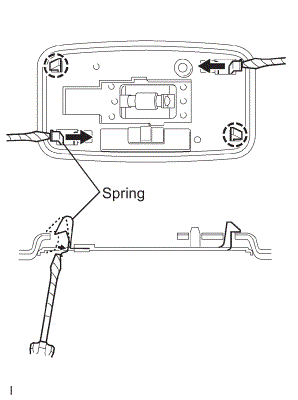
- Disengage the 2 claws and remove the room light assembly No.1.
- Disconnect the connector.
- w/o Sliding roof:
Using a screwdriver, disengage the 6 claws and remove the lens cover.
NOTE
HINT:
Tape the screwdriver tip before use.
- w/ Sliding roof:
Using a screwdriver, disengage the 8 claws and remove the lens cover.
NOTE
HINT:
Tape the screwdriver tip before use.
- Using a screwdriver, disengage the claws and open the 2 caps, as shown in the illustration.
NOTE
HINT:
Tape the screwdriver tip before use.
- Remove the 4 screws and map light.
- Disconnect the connector.
- Using a moulding remover, disengage the 4 claws and remove the visor bracket cover.
- Remove the 2 screws and visor assembly.
- Disconnect the connector.
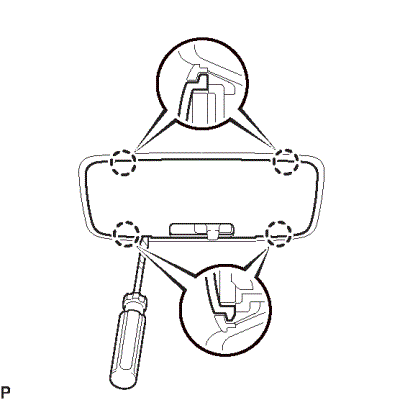
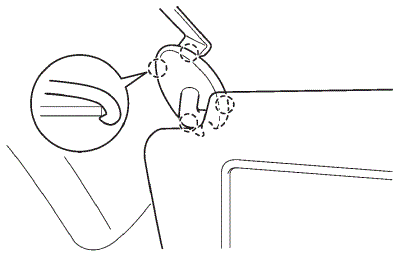
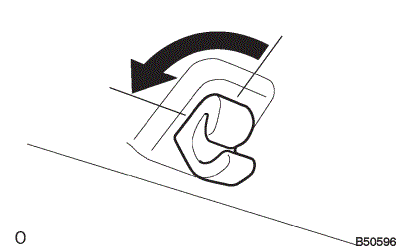
56. REMOVE VISOR HOLDER
- Remove the visor holder by turning it counterclockwise.
NOTE
HINT:
Use the same procedure to remove the other side.
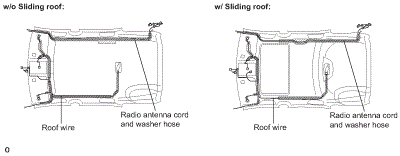
- Disconnect the roof wire connector and disengage the clamps from the front pillar LH.
- Disconnect the washer hose. Remove the bolt and disconnect the radio antenna cord connector and disengage the clamps from the front pillar RH.
- Disconnect the washer hose. Disconnect the radio antenna cord connector and disengage the clamps from the rear quarter pillar RH.
- Disconnect the sliding roof drive gear connector. (w/ sliding roof)
- Remove the sunroof opening trim moulding. (w/ sliding roof)
- Disengage the 2 fasteners and 3 clips. (w/o sliding roof)
- Disengage the 3 clips. (w/ sliding roof)

- Remove the roof headlining from the vehicle through the back door side.
- Remove the roof wire, radio antenna cord and washer hose from the roof headlining assembly.
Thread Starter
Driver
Joined: Oct 2021
Posts: 63
Likes: 8
From: Or


Thank you for the attachment - I already have everything removed except for THIS panel - I can't seem to find the clip attaching it. It needs to slide Down otherwise it will bend the headliner above the rear passenger door.
Any hints?
Need to get it removed TODAY bc it's going to start raining tomorrow and need to seal whatever leak there is.
T. I. A. 🙂

Thread Starter
Driver
Joined: Oct 2021
Posts: 63
Likes: 8
From: Or
Thanks - It must be the clip next to the triangle window that I can't pop. Not much working space there and I'm afraid I'll break something 😣
The possible leak areas are WEIRD.
Definitely not the tail light gaskets, but water coming in below them on either side.
Also water dripping above the seams in a place that looks like the wheel wells.
Side Triangle windows? Bumper?
I've sealed the roof rack bolts (roof rack removed) ; A few weld points at the seems in the channels of the roof rack ; Around the hinges for the lift gate.
Trending Topics
Thread Starter
Driver
Joined: Oct 2021
Posts: 63
Likes: 8
From: Or

Thread
Thread Starter
Forum
Replies
Last Post
flash9
GS - 2nd Gen (1998-2005)
6
Jan 2, 2019 11:34 PM