


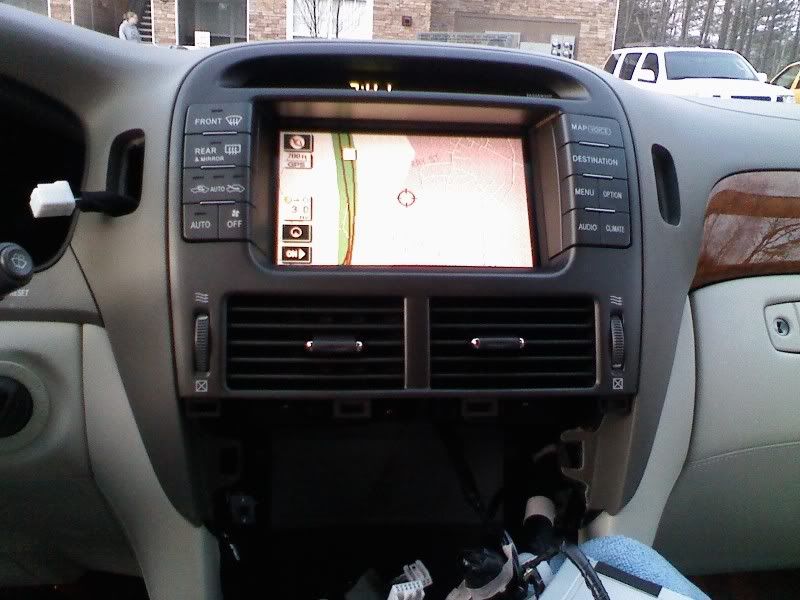
Question?? Installing Vaistech SL2Vi w/pics
I know there is a similar thread on this topic but it didnt go into enough detail on the whole installation. I purchased sli2vi from vaistech and have been doing the installation on my own. I've gotten stuck a couple of times because I felt like I was gonna break something. One of the vaistech connectors connects to the back of the factory cd/tape player that was the easy one. The other connector connects to the back of the nav, this is the hard part.
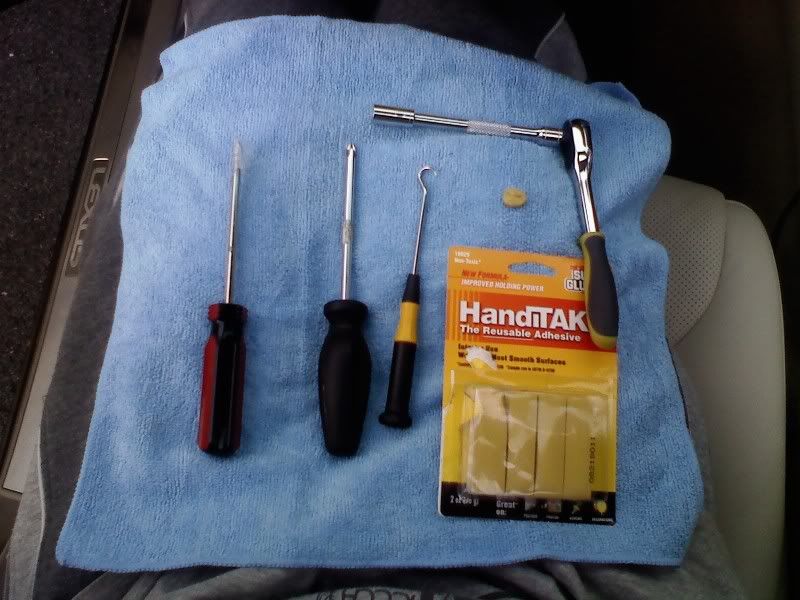
These are the tools you will need for the install.
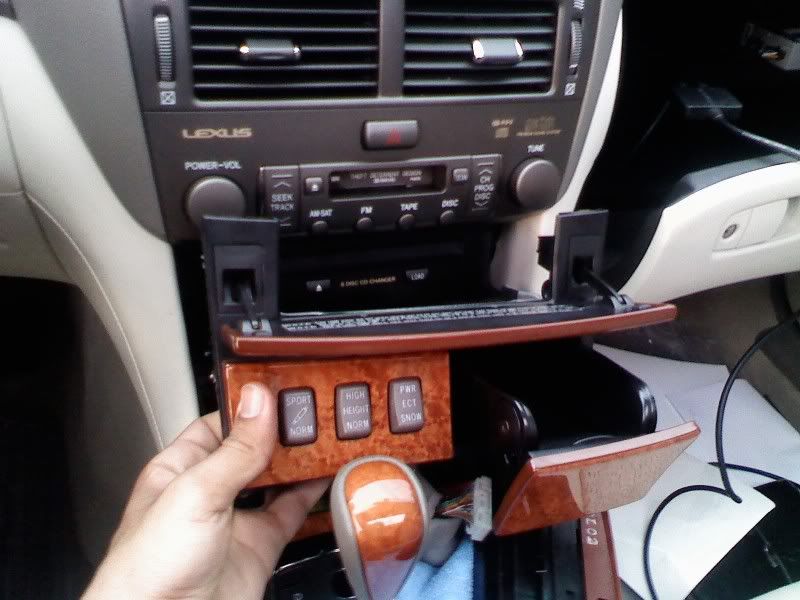
The lower section with the heat seater controls pulls out. You might have to remove the small drawer above it to get a good grip. Once thats out your left with the section above it with the PWR and suspension buttons. This section has 3 screws 1 left, 1 right and 1 back in the middle. After unscrewing those this section also pulls out.
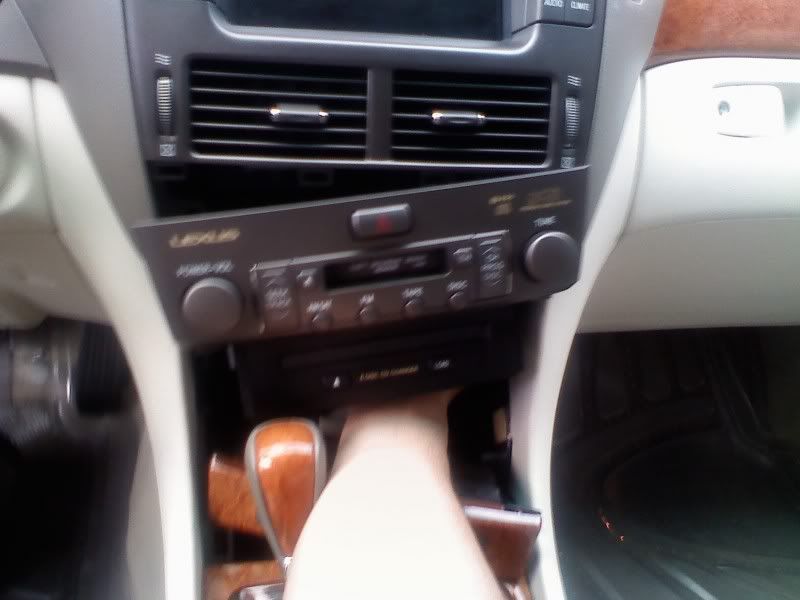
The cd/tape deck has 10mm bolts in it on the left and right. Once you unscrew those this pulls out as well.
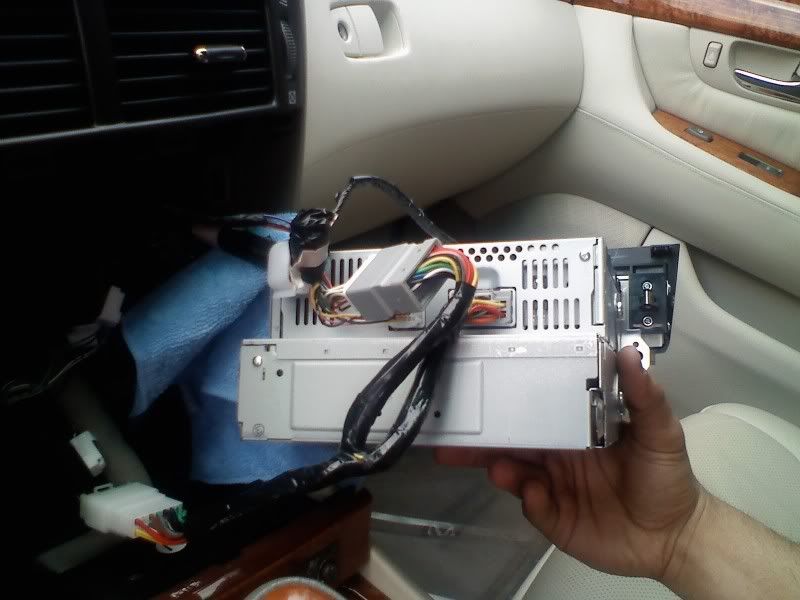
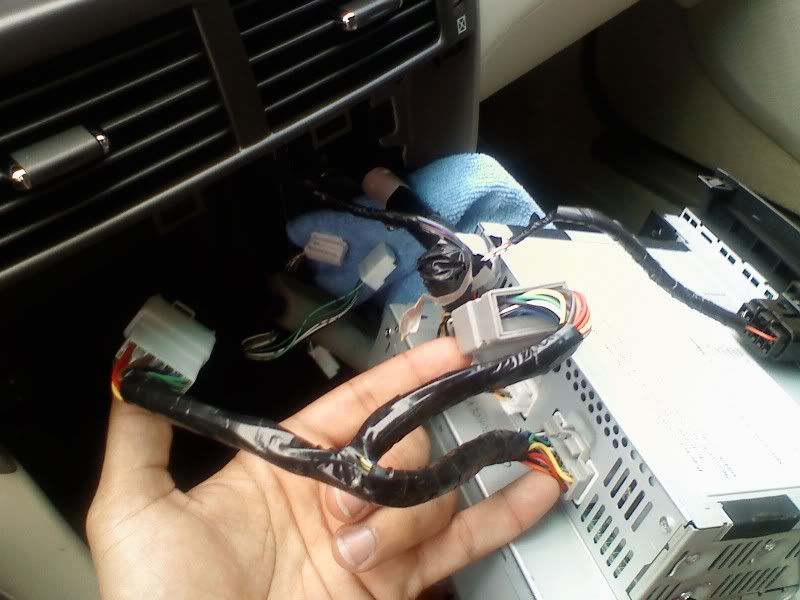
Back of cd/tape deck
The pieces on my finger tips is the "Y" vaistech wiring harness.
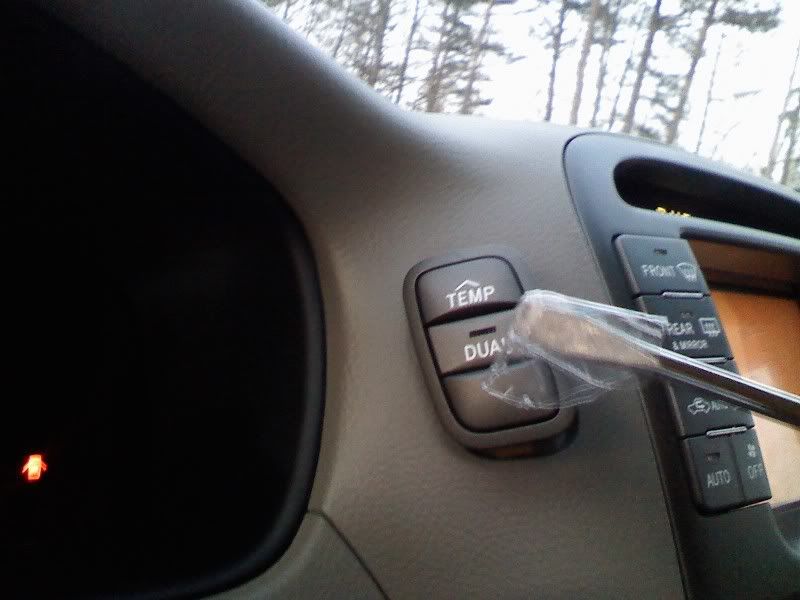
I removed the heater controls on the right and left of the nav using a screw driver with tape on it.
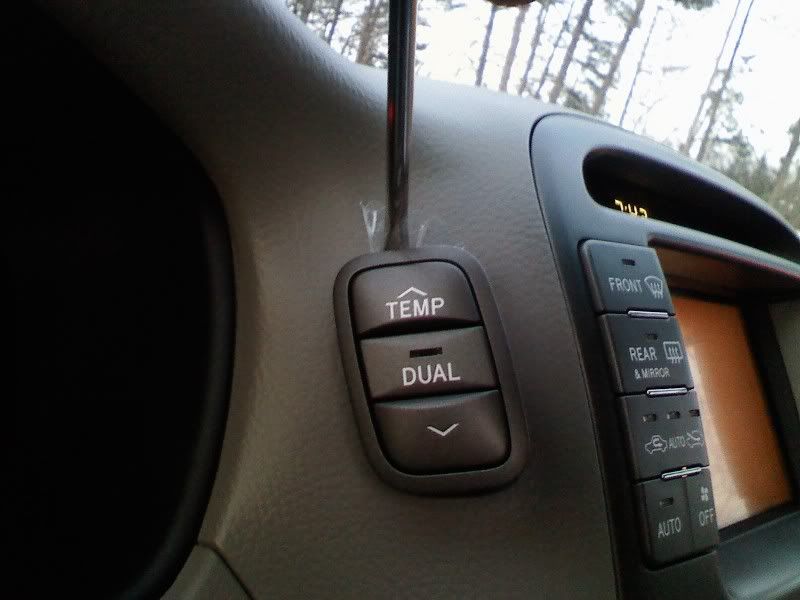
You have to get behind the clip and pull kinda hard.
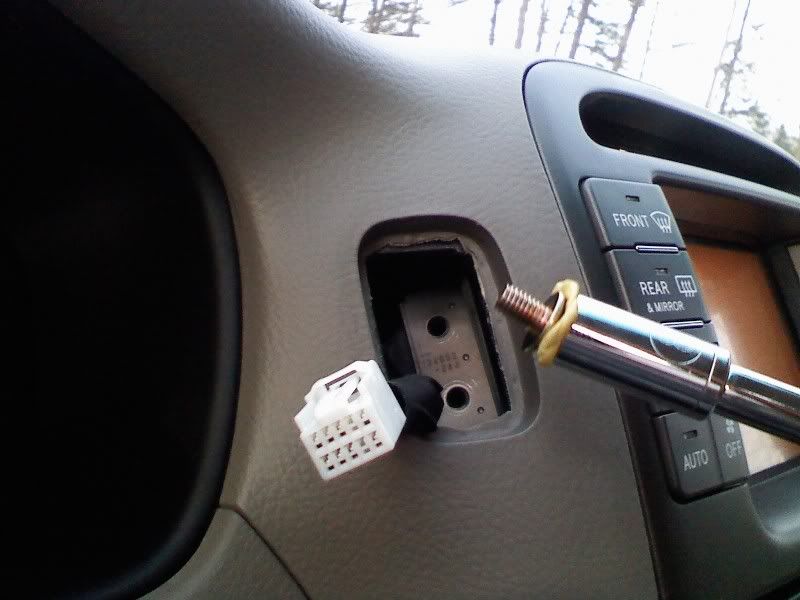
I used poster board putty (as someone recommended in another thread) to remove the screws because they can easily fall and they might not be easy finding.
I got both sides out and dont know what to do next, Is the bezel suppose to come off some how? I pulled under the vents a little but its not moving at all. Please help if you know what I should do next.
These are the tools you will need for the install.
The lower section with the heat seater controls pulls out. You might have to remove the small drawer above it to get a good grip. Once thats out your left with the section above it with the PWR and suspension buttons. This section has 3 screws 1 left, 1 right and 1 back in the middle. After unscrewing those this section also pulls out.
The cd/tape deck has 10mm bolts in it on the left and right. Once you unscrew those this pulls out as well.
Back of cd/tape deck
The pieces on my finger tips is the "Y" vaistech wiring harness.
I removed the heater controls on the right and left of the nav using a screw driver with tape on it.
You have to get behind the clip and pull kinda hard.
I used poster board putty (as someone recommended in another thread) to remove the screws because they can easily fall and they might not be easy finding.
I got both sides out and dont know what to do next, Is the bezel suppose to come off some how? I pulled under the vents a little but its not moving at all. Please help if you know what I should do next.
Last edited by LRoy430ul; Apr 10, 2009 at 06:11 PM.
Thanks for the response. I guess I'll try again, it just seems like something else is holding it in place. So it all comes out in one big piece? (nav, vents, bezel)
Last edited by LRoy430ul; Apr 10, 2009 at 11:40 AM.

Rookie
Joined: Aug 2008
Posts: 60
Likes: 0
From: Virginia
I need some advice on getting the stereo piece out under the vents like you did above. I am getting a lot of creaking noise from back there and want to see if I can pull it out and try to dampen the noise. I have never pulled it out and don't want to just start yanking things but it looks like it may not be too difficult. Any help / pictures would be much appreciated. Thank you.

Driver School Candidate
Joined: Mar 2009
Posts: 31
Likes: 0
From: tx
Thanks for posting pics.
Do you know which wire needs to be cut to enable bluetooth dialing while driving? I think it would also enable enter new destinations into the nav. If so, please take a picture of it. I read the wire was behind the nav screen.
Do you know which wire needs to be cut to enable bluetooth dialing while driving? I think it would also enable enter new destinations into the nav. If so, please take a picture of it. I read the wire was behind the nav screen.
Trending Topics
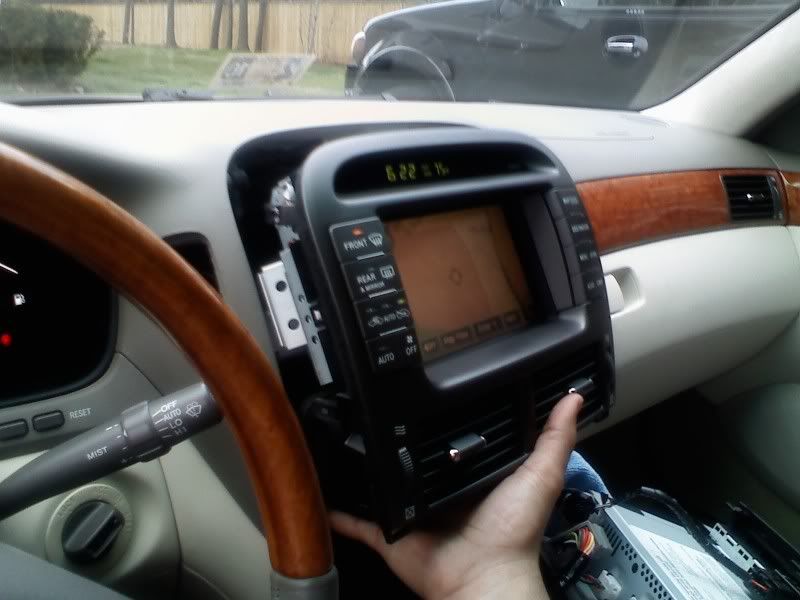
After pulling for a while I got the nav out. I put my fingers in the two heater control holes and pulled on the bracket that had both screws in it. (might be hard if your fingers are big)
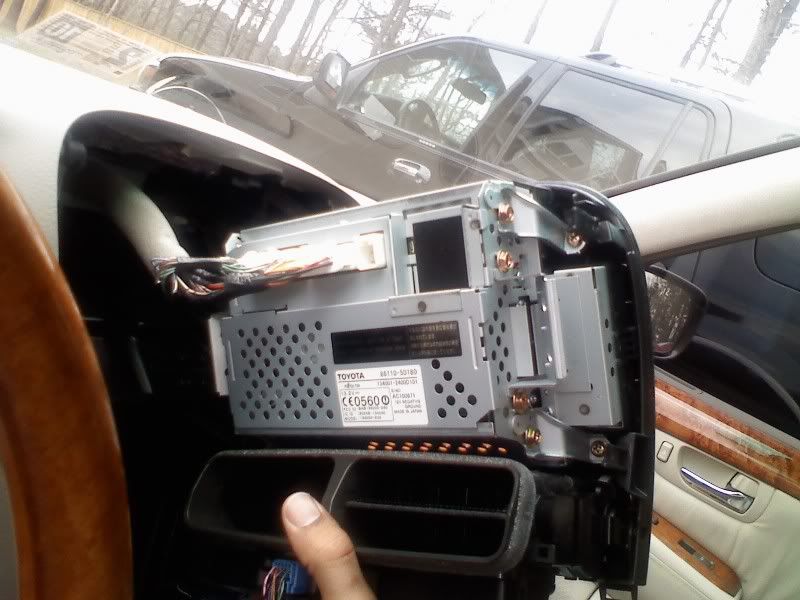
Back of the nav. The multi-unit display connector (blue) goes in the empty spot.
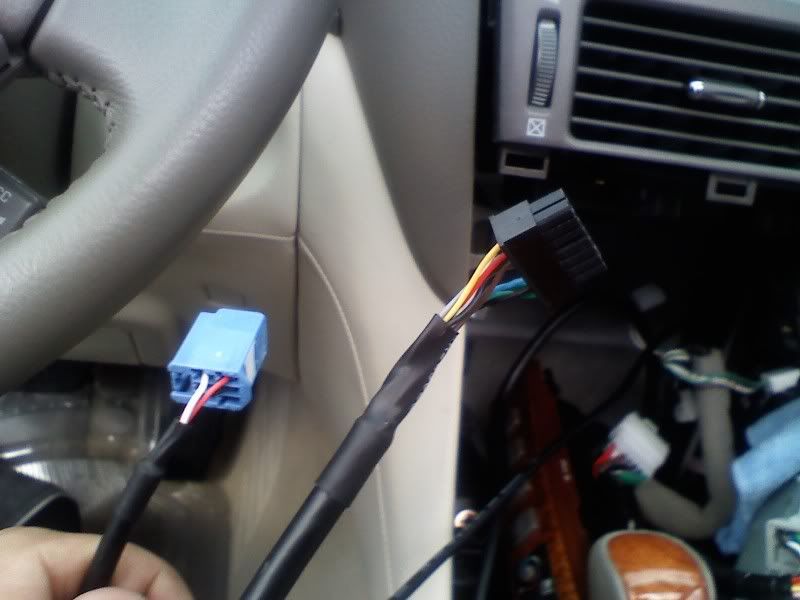
These are the two vaistech connectors that I fed thru the glove box. The black one goes in thru the console and out of the glove box. The blue one goes in thru the glove box and thru the console to the nav. (this was all my preference)
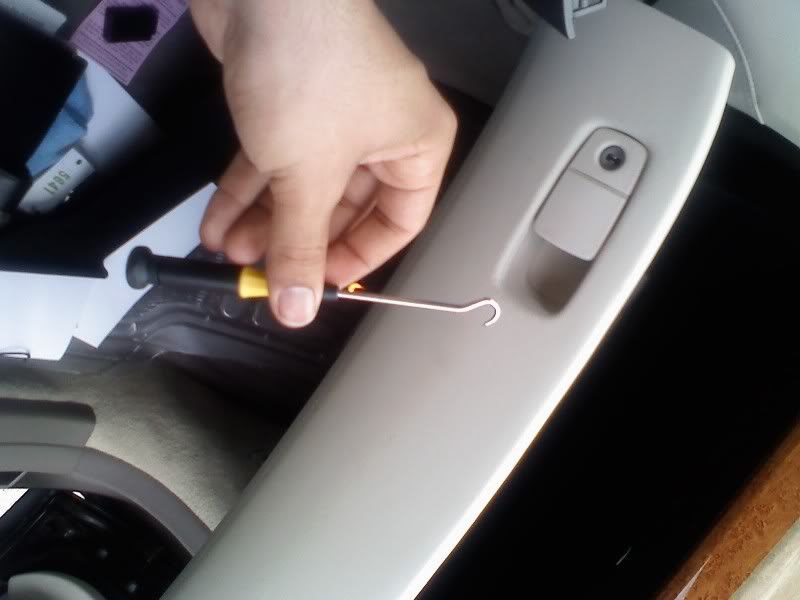
This hook tool helped move the cords thru. It takes some time since the opening is small
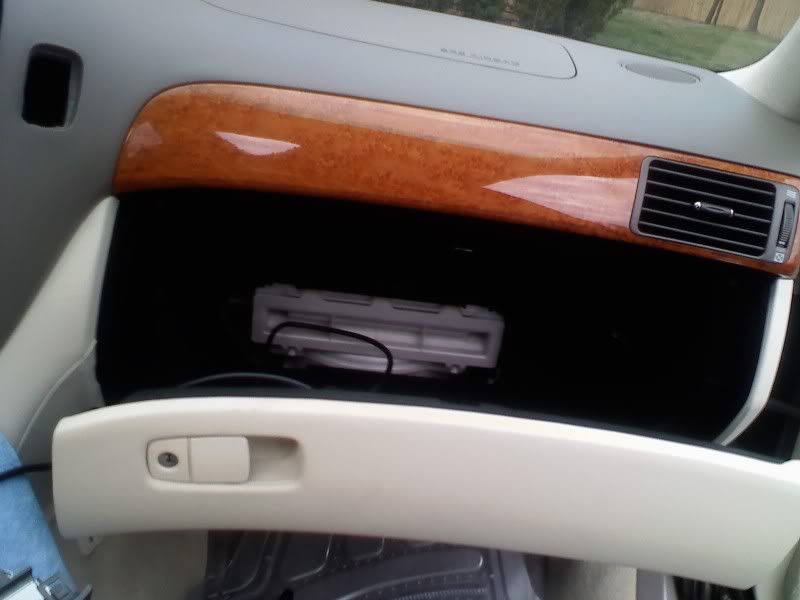
Glove box has an opening in the back once you pull the piece with the clips. (Also the white thing is the air filter, open it up and clean it out if you havent before.
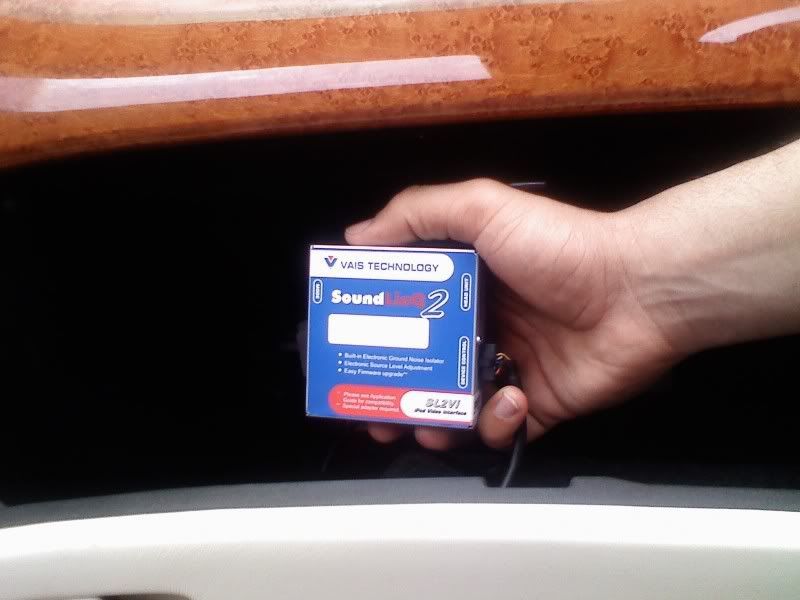
I put the vaistech unit in the glove box.
Back of the nav. The multi-unit display connector (blue) goes in the empty spot.
These are the two vaistech connectors that I fed thru the glove box. The black one goes in thru the console and out of the glove box. The blue one goes in thru the glove box and thru the console to the nav. (this was all my preference)
This hook tool helped move the cords thru. It takes some time since the opening is small
Glove box has an opening in the back once you pull the piece with the clips. (Also the white thing is the air filter, open it up and clean it out if you havent before.
I put the vaistech unit in the glove box.
Last edited by LRoy430ul; Apr 10, 2009 at 06:16 PM.
ClubLexus Stories
Celebrating Lexus & Toyota from Around the Globe

8 Tips for Improving Your Hybrid or Plug-in Hybrid's Efficiency!
Michael S. Palmer
10 Best Lexus Models No One Remembers
Joe Kucinski
TRD Off-Road Premium: Best 2026 4Runner, Except This One Thing
Michael S. Palmer
Top 10 Lexus & Toyotas to Drive Before You Die!
Joe Kucinski
Top 10 Lexus/Toyotas With The LEAST 5-Year Depreciation
Joe Kucinski
Lexus LC500 Convertible Auction: A Preview of Rising Values?
Brett Foote
GX 550 vs TX 550: Best 3-Row Luxury Lexus Family Hauler
Michael S. Palmer
9 Best Lexus Models You Can Buy for Half Price (And 1 You Shouldn't!)
Joe Kucinski
2026 Lexus NX Buyer's Guide: Models, Features, Prices & More!
Brett FooteIm not sure about this. Someone else in here might know though.

Driver
Joined: Jun 2007
Posts: 145
Likes: 0
From: New York
The main comment I would have is that you really should not be trying to do this with your battery cable still connected, let alone your ignition on! Don't try this unless you have disconnected your battery.
Also, I just left the Vaistech unit right behind the lower center panel, right behind the seat heat switches. Lots of space back there, no wonder you had a hard time pulling those cables through! I just pulled the iPod cable into the glove box.
Also, I just left the Vaistech unit right behind the lower center panel, right behind the seat heat switches. Lots of space back there, no wonder you had a hard time pulling those cables through! I just pulled the iPod cable into the glove box.
Thanks for the pictures LRoy430ul 
I wanted to order a radio harness that feeds sound through the AM-SAT port and the seller hasn't answered the email.
Do you know if there's an extra slot back there that's not plugged in?
I might have to pull the radio out to find.
I wanted to order a radio harness that feeds sound through the AM-SAT port and the seller hasn't answered the email.
Do you know if there's an extra slot back there that's not plugged in?
I might have to pull the radio out to find.
Rookie
Joined: Aug 2010
Posts: 70
Likes: 1
From: MI
This thread originally got me started on a similar Vaistech install on my 2006 LS430 with Mark Levinson & navigation, installing both an SL2s Sirius controller (with SCC1 Sirius tuner) and an SL2i-UP iPod controller.
Here is a link to the thread with my pictures and description, including the antenna install and wire routing:
https://www.clublexus.com/forums/ls4...avigation.html
Here is a link to the thread with my pictures and description, including the antenna install and wire routing:
https://www.clublexus.com/forums/ls4...avigation.html
Last edited by MDEC; Apr 7, 2011 at 07:22 PM.

Thread
Thread Starter
Forum
Replies
Last Post
Chin
GS - 2nd Gen (1998-2005)
21
May 7, 2007 07:17 PM