
DIY Instrument Cluster Dashboard Removal

Alright... so... didn't see a DIY... needed it... took my time and forever... but realistically... could be done in 10 minutes.... so here ya go.
To just start off... I took these pictures while putting things back together....hopefully you all will still find it helpful.
There are some missing pics but hopefully I'll be able to walk you through it without pictures
You'll need a Phillips screwdriver and a 8mm socket preferably an extension instead of just a wrench.
1. Turn on the car and tilt your steering wheel furthest away from the cluster... so back and down.
2. For convenience drop your seat all the way back as well
3. Head to the trunk and I personally took off the negative battery wire terminal shutting down the car locking the steering column where it sits.
(If you have the carista app I believe you could just set it so that the auto tilt steering wheel will not move once you turn off the car which will allow you to not remove the battery wire)
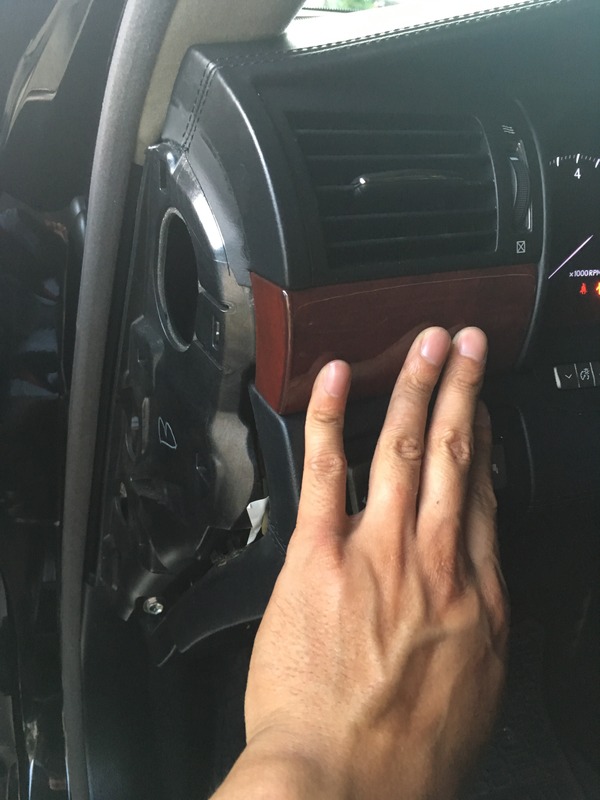
4.Remove the side panel with the air socket hole by pulling outward
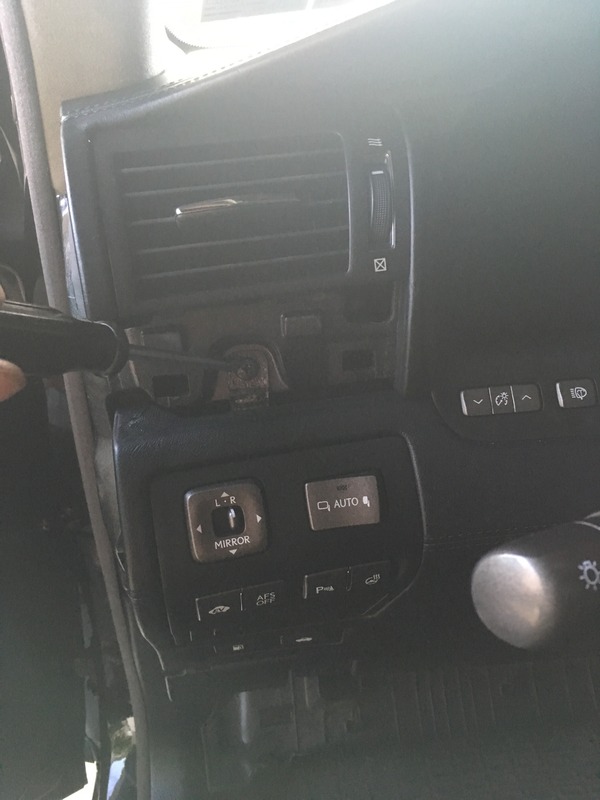
5. Remove the wood corner trim adjacent to it
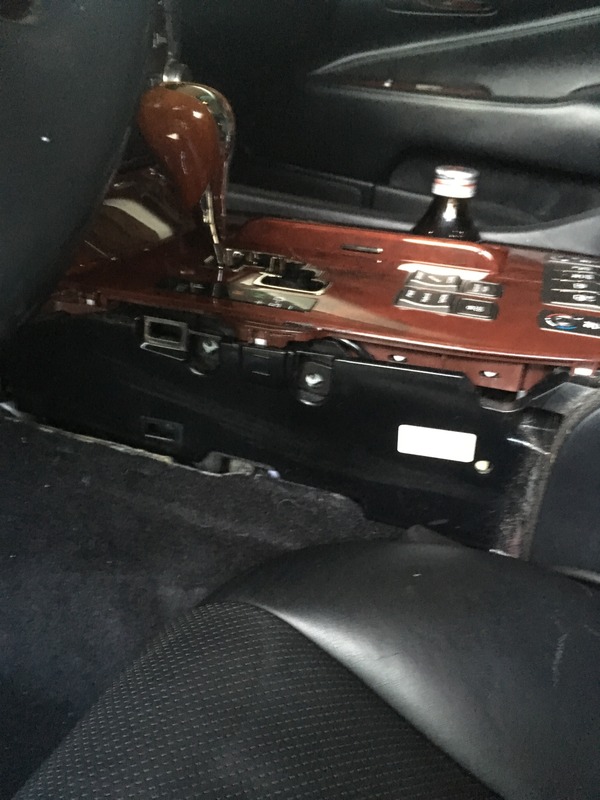
6. Remove the center console panel (start from the front of the panel to the rear)
7. Unscrew 2 black screws below the steering wheel under your knee airbags
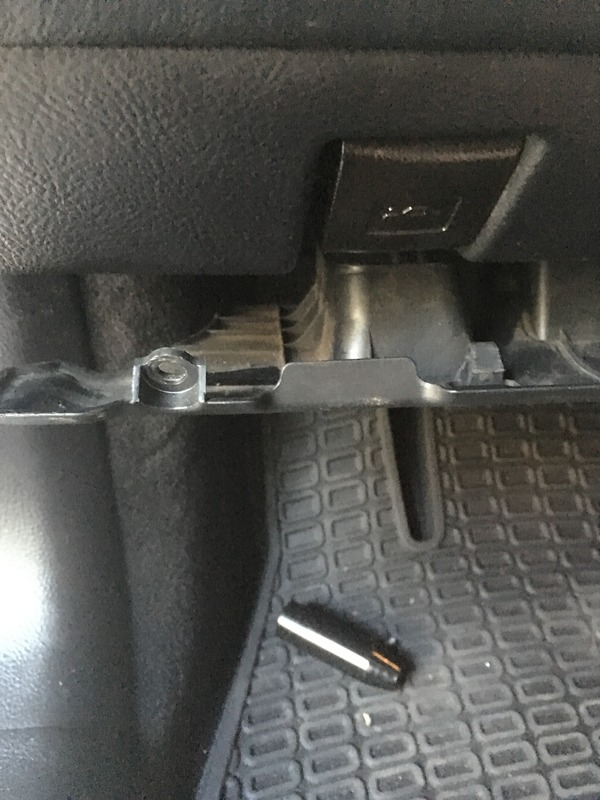
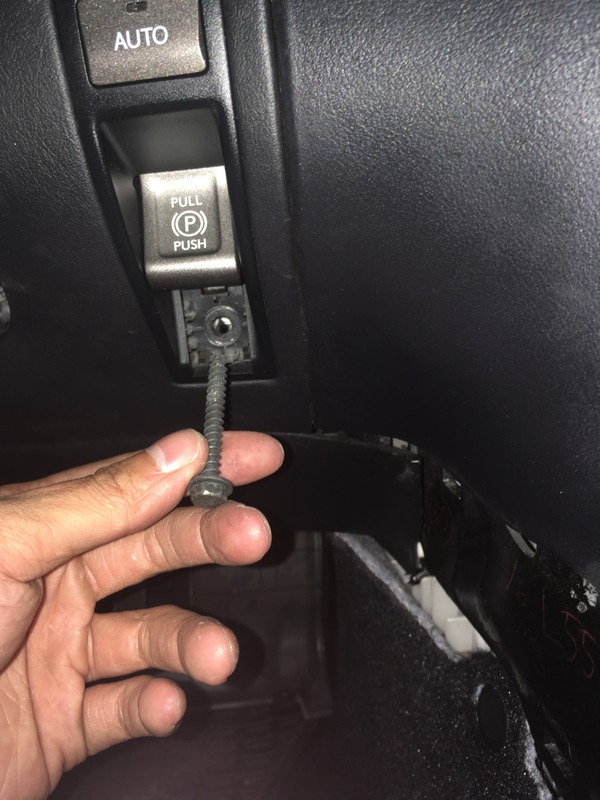
8. Pop out the plastic piece under the E-brake and unscrew the bolt
9.Behind the Wood trim is a screw that you'll need to remove
10. I don't have pictured but the knee air bags... there are 2 silver bolts holding this together... one on the left and one on the right. The one on the left theres actually two silver bolts, top and bottom... you'll only need to remove the bottom bolt on the left side.
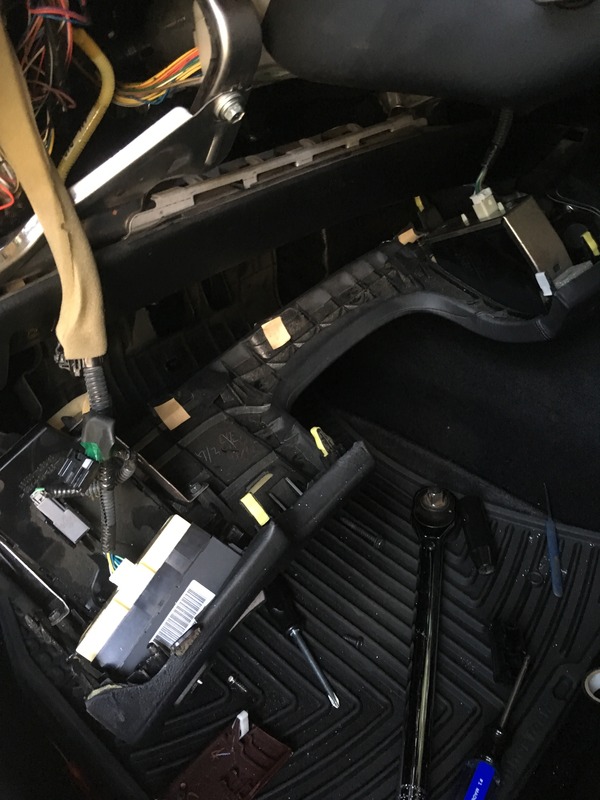
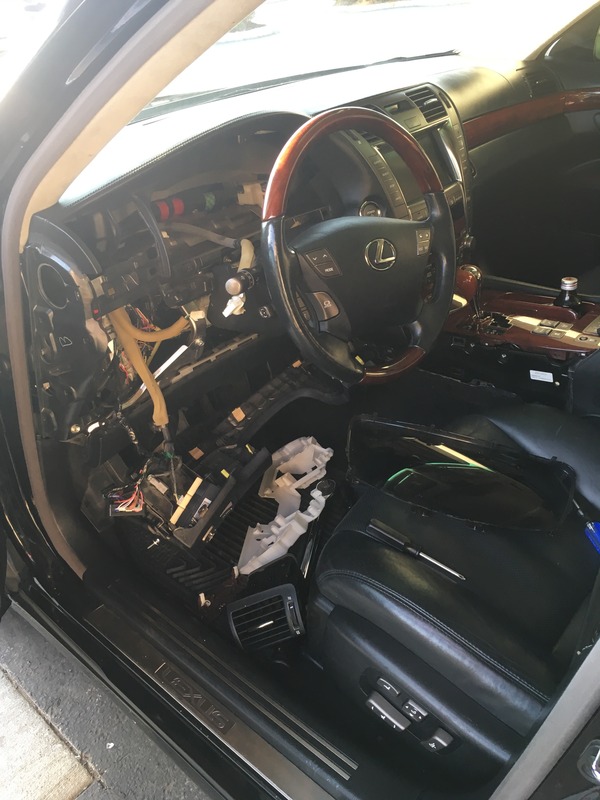
11.Once you have these bolts removed... everything else is clips... pull directly out starting with the plastic trim below your knee airbags (holding your OBDII connectors) then your knee airbags, then the middle trim holding your E parking brake/ AFS buttons etc. I DID NOT DISCONNECT ANY WIRES AT THIS POINT.... OBDII connectors, knee AIRBAGS, E BRAKE, HOOD HATCH ALL STILL ATTACHED
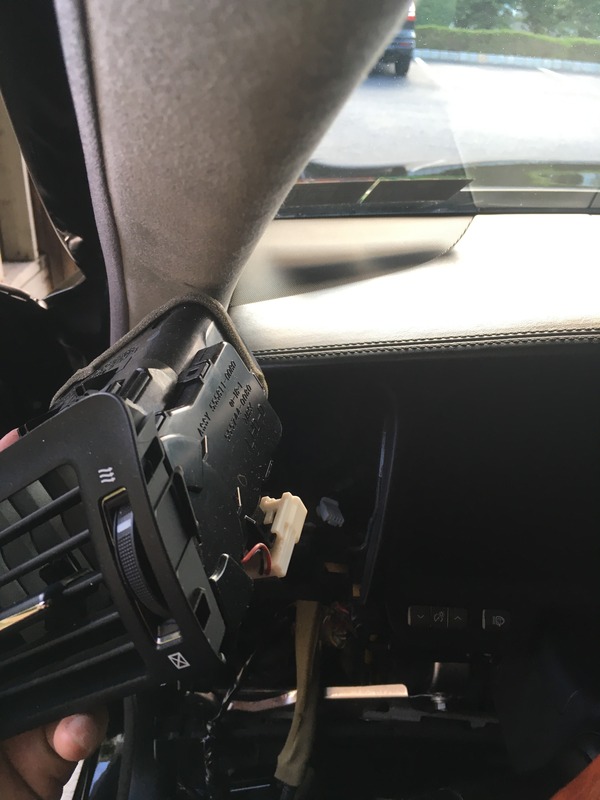
12. I removed the side airvent but thinking back now... I'm not sure if that was totally necessary. it gave me the ability to look inside to try and figure out how to remove stuff but there is a wire attached to it... if you do remove it just keep that in mind.
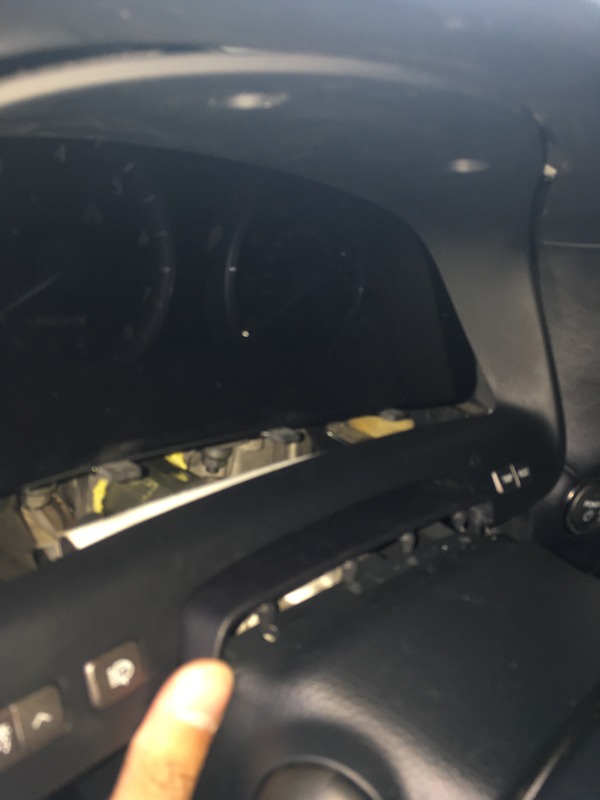
13. The plastic frame around the cluster has 2 black screws on top you'll need to remove those. you should be able to pull directly out... and then detach the two wires one on the left and ride side which is like your trip reset buttons and cluster dimmer. I had to remove the wires first and I left the screws for last because they were giving me a hard time.
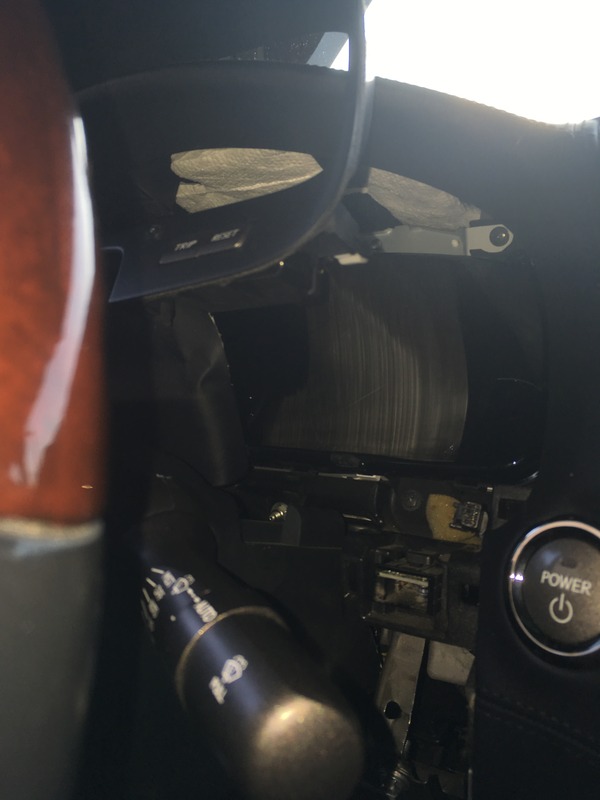
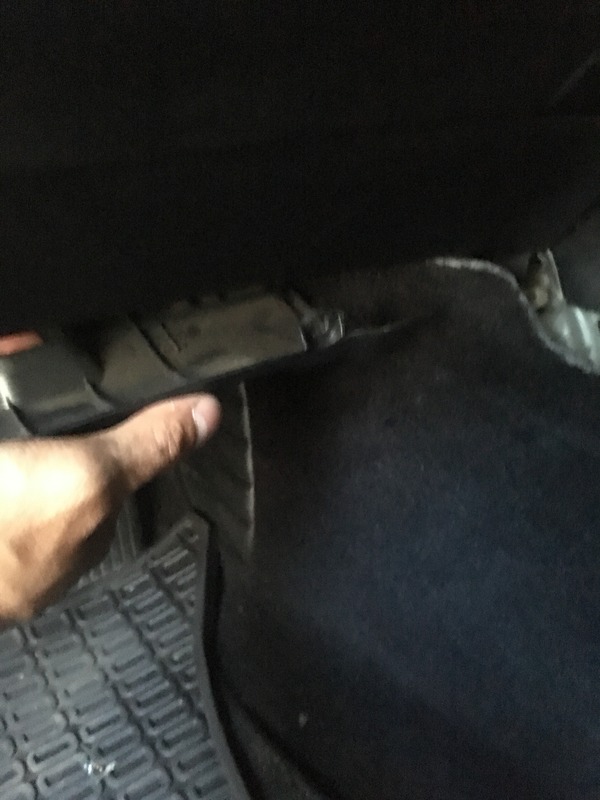
14. When pulling the frame out on the bottom of the frame theres actually a leather flap that attaches to the steering column... it pops off easily but I took a picture to show you what to expect
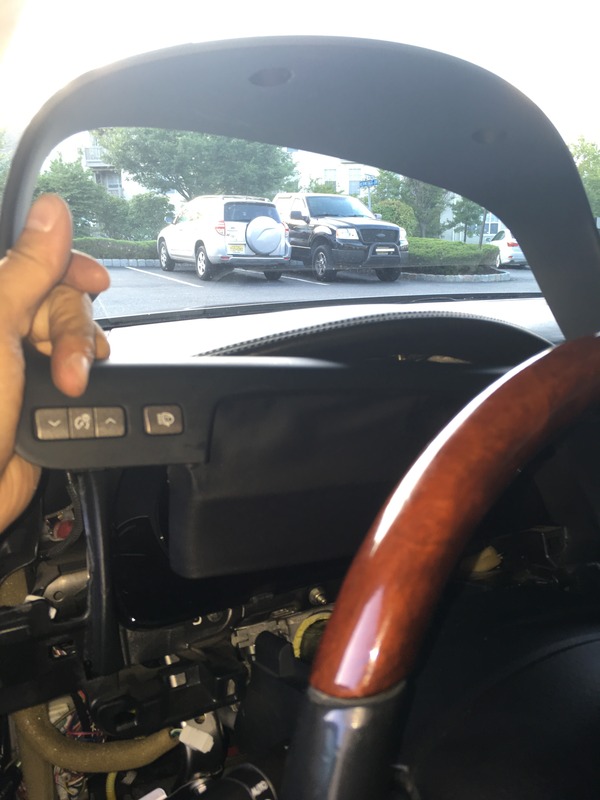
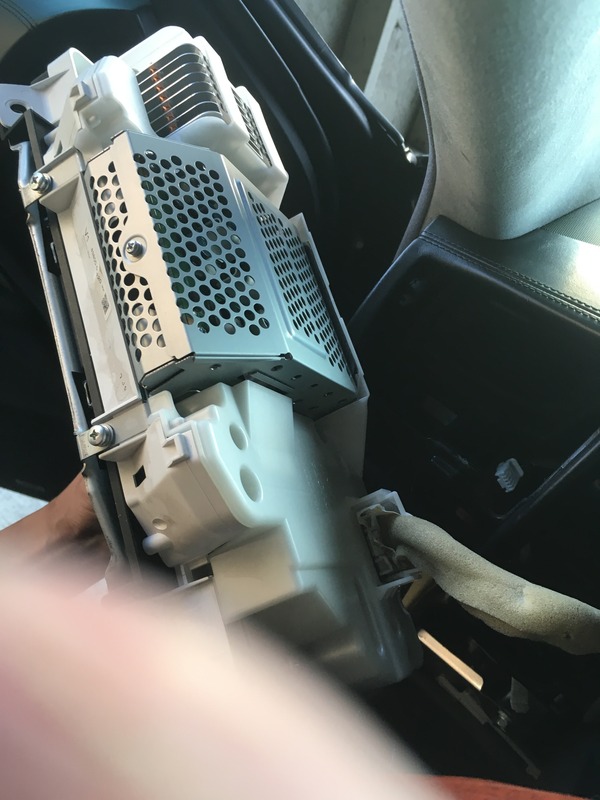
15. Remove the 4 black screws one on each corner holding the cluster
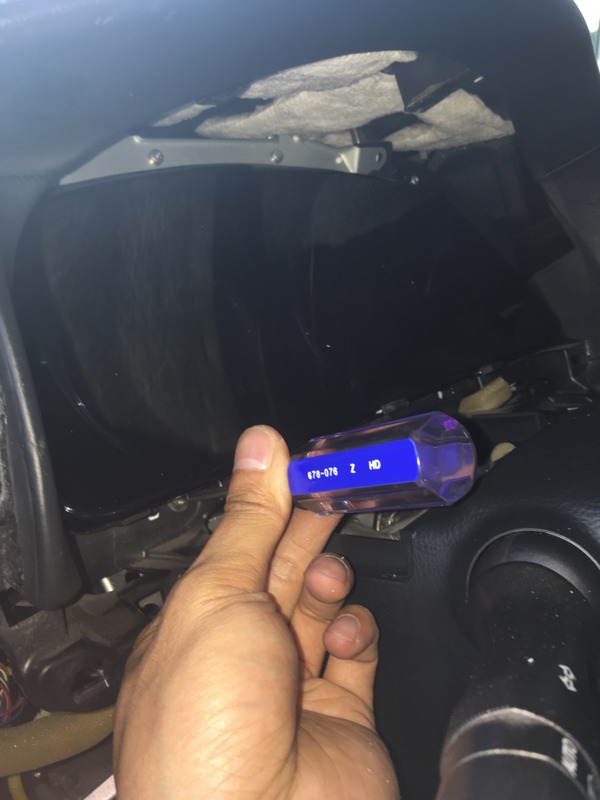
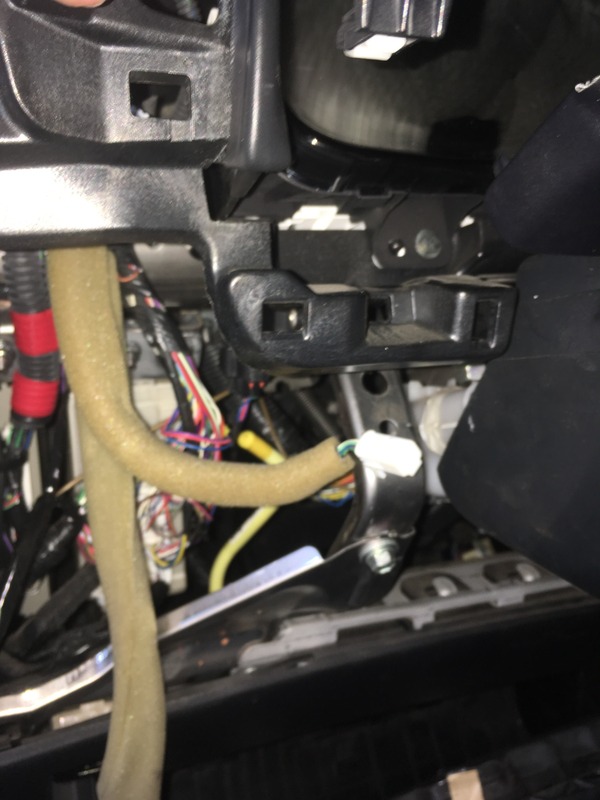
16. Pull cluster out, its a tight fit obviously and I would recommend trying to slide it to the left. There is a wire connected on the back... with a flap helping it stay in place... pull flap down and work on removing that plug
Life's good
Put everything back together and don't let any screw or tab left unused.
Any questions feel free to reach out
To just start off... I took these pictures while putting things back together....hopefully you all will still find it helpful.
There are some missing pics but hopefully I'll be able to walk you through it without pictures
You'll need a Phillips screwdriver and a 8mm socket preferably an extension instead of just a wrench.
1. Turn on the car and tilt your steering wheel furthest away from the cluster... so back and down.
2. For convenience drop your seat all the way back as well
3. Head to the trunk and I personally took off the negative battery wire terminal shutting down the car locking the steering column where it sits.
(If you have the carista app I believe you could just set it so that the auto tilt steering wheel will not move once you turn off the car which will allow you to not remove the battery wire)
4.Remove the side panel with the air socket hole by pulling outward
5. Remove the wood corner trim adjacent to it

6. Remove the center console panel (start from the front of the panel to the rear)

7. Unscrew 2 black screws below the steering wheel under your knee airbags


8. Pop out the plastic piece under the E-brake and unscrew the bolt

9.Behind the Wood trim is a screw that you'll need to remove

10. I don't have pictured but the knee air bags... there are 2 silver bolts holding this together... one on the left and one on the right. The one on the left theres actually two silver bolts, top and bottom... you'll only need to remove the bottom bolt on the left side.
11.Once you have these bolts removed... everything else is clips... pull directly out starting with the plastic trim below your knee airbags (holding your OBDII connectors) then your knee airbags, then the middle trim holding your E parking brake/ AFS buttons etc. I DID NOT DISCONNECT ANY WIRES AT THIS POINT.... OBDII connectors, knee AIRBAGS, E BRAKE, HOOD HATCH ALL STILL ATTACHED

12. I removed the side airvent but thinking back now... I'm not sure if that was totally necessary. it gave me the ability to look inside to try and figure out how to remove stuff but there is a wire attached to it... if you do remove it just keep that in mind.

13. The plastic frame around the cluster has 2 black screws on top you'll need to remove those. you should be able to pull directly out... and then detach the two wires one on the left and ride side which is like your trip reset buttons and cluster dimmer. I had to remove the wires first and I left the screws for last because they were giving me a hard time.


14. When pulling the frame out on the bottom of the frame theres actually a leather flap that attaches to the steering column... it pops off easily but I took a picture to show you what to expect


15. Remove the 4 black screws one on each corner holding the cluster

16. Pull cluster out, its a tight fit obviously and I would recommend trying to slide it to the left. There is a wire connected on the back... with a flap helping it stay in place... pull flap down and work on removing that plug

Life's good

Put everything back together and don't let any screw or tab left unused.
Any questions feel free to reach out


P1084 engine code which I believe boils down to o2 sensors of sorts. Took to a lot of my standalone car shops and they all didn't want to touch my car because it's a hybrid... they said going to Lexus is going to cost a pretty penny just so that you can take the engine light off. for a 8 year old car I figured I'll just wait until something happens that forces me to take it to the dealership.. Not the best approach either but that was the decision and In the meantime I wanted a quick fix because there's something about having an engine light on that irritates me... And it evidently irritated me enough to take the whole thing a part. The car rides perfectly, no hard idles nothing.... And I know we have warning lights for a reason and I should suck it up and take it in to the dealer... Probably will eventually just trade it in for a newer model... I hate using the auxiliary cable to play music from my iPhone...
but that's the reason.... Wish I could help you answer your reprogramming cluster question but I dunno
Last edited by Batmobile; Aug 5, 2016 at 06:38 PM.


i could if I had one which I'll need to get my hands on a carista as I believe that was one of the features... But I'd have to do it every time... And I guess this one and done was a bit more appealing
Carista is definitely worth it. You should at least get the app then message Carista on here to give you the back door to get the lifetime subscription for $20 instead of having to pay the yearly subscription. You can get the adapter after.
yeah... Read a lot of good things about it on here... Will do...Thanks man...
Trending Topics
Lexus Fanatic
Joined: Jan 2014
Posts: 5,371
Likes: 526
From: BC Canada
Did you already try to clear the codes to see if they'd return? Sometimes a code is set, but then won't return after resetting it. The other thing to consider now is if you get another unrelated SES code. If you do, you won't realize it until it's potentially too late and do more damage.
I'll add a +1 to the Carista App. I was the Beta tester for it here at CL, and can vouch for the extraordinary value it gives.
I'll add a +1 to the Carista App. I was the Beta tester for it here at CL, and can vouch for the extraordinary value it gives.

Pole Position
Joined: Oct 2014
Posts: 2,561
Likes: 365
From: New Hampshire
That's pretty awesome that you were able to remove the dash, I've got to admit I laughed at why you did it. I guess my question is...if you're talented enough to pull the dash apart, I'd think you could replace an O2 sensor...or all of them. I didn't think the car being a hybrid would change anything regarding an O2 sensor? I could be wrong. If the car is driving fine...no misfires, loss of fuel economy, limp mode, etc...I imagine that it's your post catalytic converter O2 sensor. All it does is monitor the efficiency of the cat, it doesn't do anything to the fuel trim. I'd find out which sensor needs replacing and just change it.
One misconception is that O2 sensors start to "wear out" become "lazy". I took a class from Bosch and they said that's 100% false when dealing with the modern O2 sensors (A/F ratio sensors). They don't wear out, they just fail.
One misconception is that O2 sensors start to "wear out" become "lazy". I took a class from Bosch and they said that's 100% false when dealing with the modern O2 sensors (A/F ratio sensors). They don't wear out, they just fail.
Lexus Fanatic
Joined: Jan 2014
Posts: 5,371
Likes: 526
From: BC Canada
yeah I tried resetting multiple times... And I understand that's the risk involved by doing what I did.. I'll keep a close eye on it appreciate the feed back


Pole Position
Joined: Mar 2016
Posts: 2,598
Likes: 300
From: Missouri
You are a warrior. Good luck bud!!
That's pretty awesome that you were able to remove the dash, I've got to admit I laughed at why you did it. I guess my question is...if you're talented enough to pull the dash apart, I'd think you could replace an O2 sensor...or all of them. I didn't think the car being a hybrid would change anything regarding an O2 sensor? I could be wrong. If the car is driving fine...no misfires, loss of fuel economy, limp mode, etc...I imagine that it's your post catalytic converter O2 sensor. All it does is monitor the efficiency of the cat, it doesn't do anything to the fuel trim. I'd find out which sensor needs replacing and just change it.
One misconception is that O2 sensors start to "wear out" become "lazy". I took a class from Bosch and they said that's 100% false when dealing with the modern O2 sensors (A/F ratio sensors). They don't wear out, they just fail.
One misconception is that O2 sensors start to "wear out" become "lazy". I took a class from Bosch and they said that's 100% false when dealing with the modern O2 sensors (A/F ratio sensors). They don't wear out, they just fail.
Grab some black electrical tape..... not that it matters but if you wanted to know the cluster screen is already tinted a very dark black.... the inside of the cluster is a matt black... so instead of going out buying a shiny electrical tape... you should buy the matt black ones to match...
regardless though... you wont be able to tell anything is there once its on...
Hope this helps if you're going to do it yourself
Last edited by Batmobile; Aug 7, 2016 at 04:59 PM.