
DIY: Replace Headlight Ballast WITHOUT Taking Apart Headlight


Thread Starter
Driver School Candidate
Joined: Nov 2008
Posts: 27
Likes: 3
From: virginia
I saw the DIY with missing pics, and had no clue how to take apart the headlight so I can get the ballast out. so I took apart the ballast, and kept the connector in place and just replaced the ballast itself.
IMO this is a lot easier and faster and works 100%:
Reason I am changing both my Ballasts is that they would shut off randomly, I'd have to turn off the headlights to keep the headlights on. It would happen at random times at night, either left/right would go out.
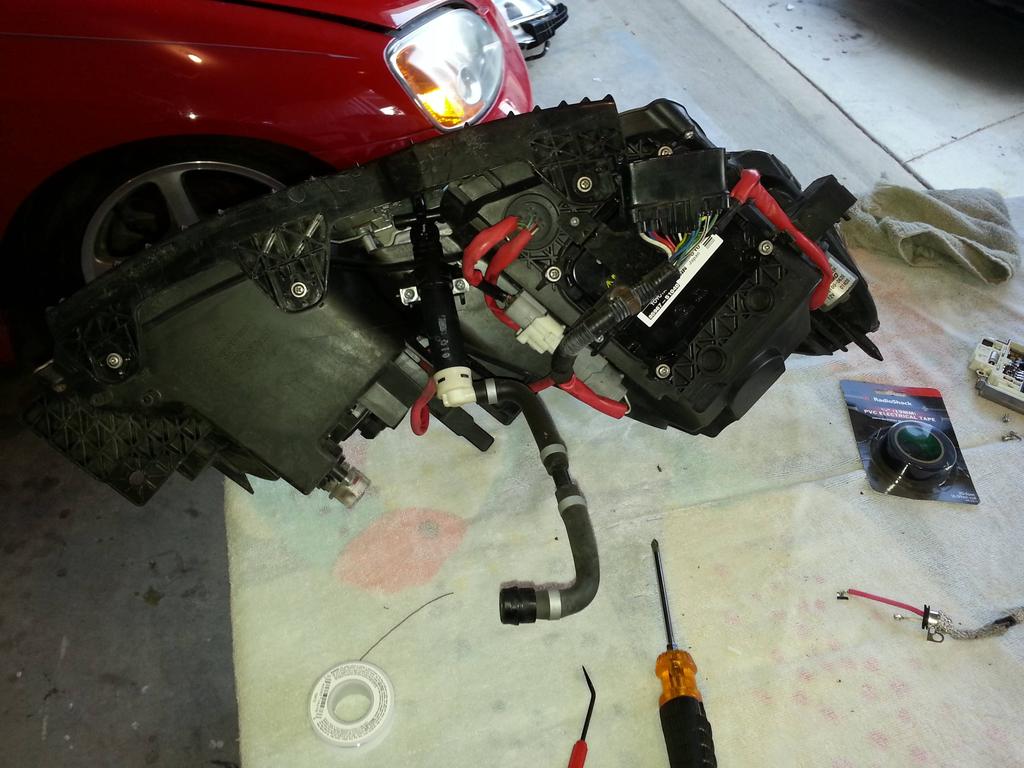
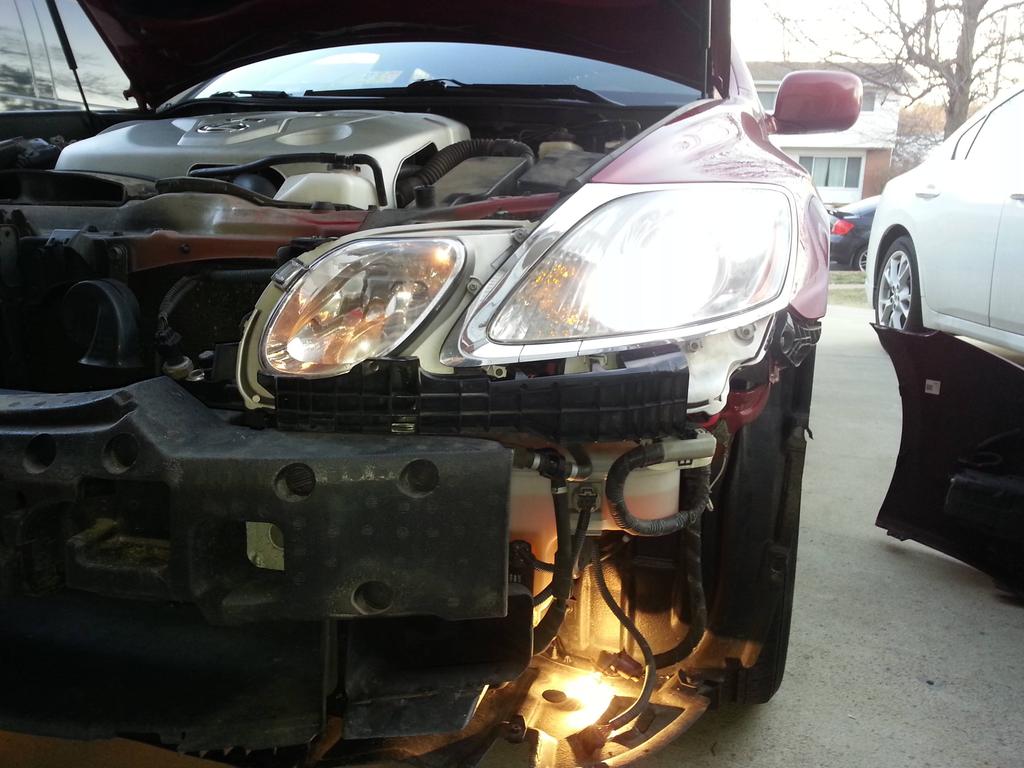
First take off the bumper and headlights from the car, do a search for that, there's a DIY on here already for that.
I bought Ballasts off eBay for 50-60 shipped to me (USED). One was from an IS350, the other from an LS460. Its the same model# KDLT003
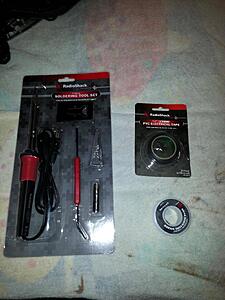
These are the tools I bought from Radio Shack, Didn't end up using the electrical tape, though.
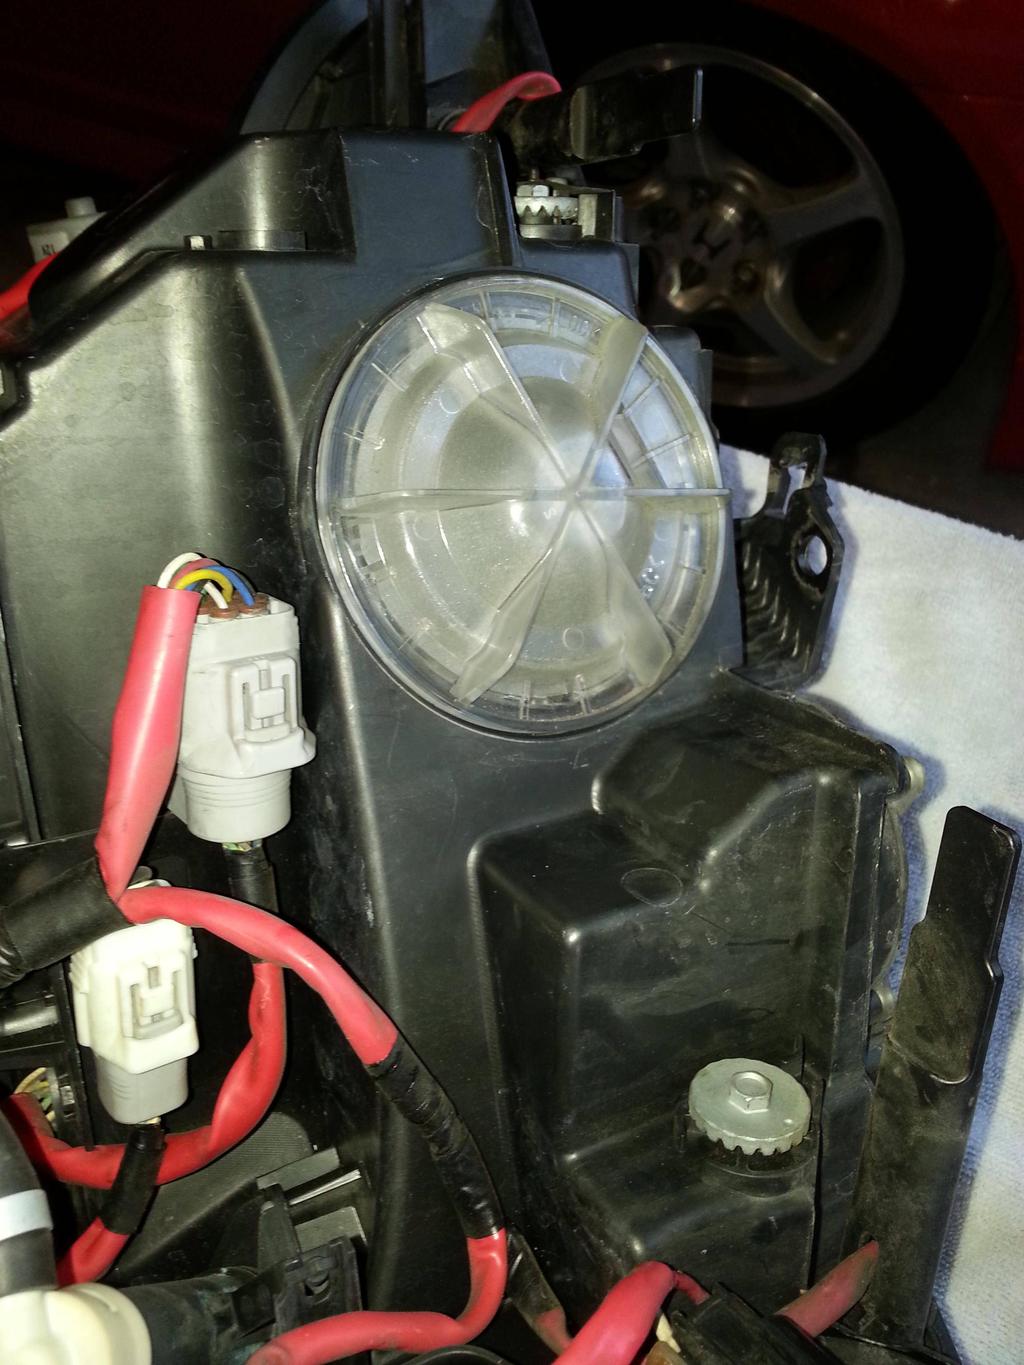
Once you have the Headlight out, you'll see Ballast on the underside. WIth a Phillips Screwdriver take out the screws holding the harness in place, on drivers side there was 3 screws, passenger had 2 screws.
Now you'll have the Ballast free and accessible. Take off the 4 Phillips screws holding the Ballast to the headlight housing.
Now you can remove the Ballast from the housing (kind of)

Take off the clear plastic piece covering the bulb:
Turn the bulb cover counter clockwise to free the grey connector (this will give you the extra slack needed to solder the old harness to the new ballasts with ease):
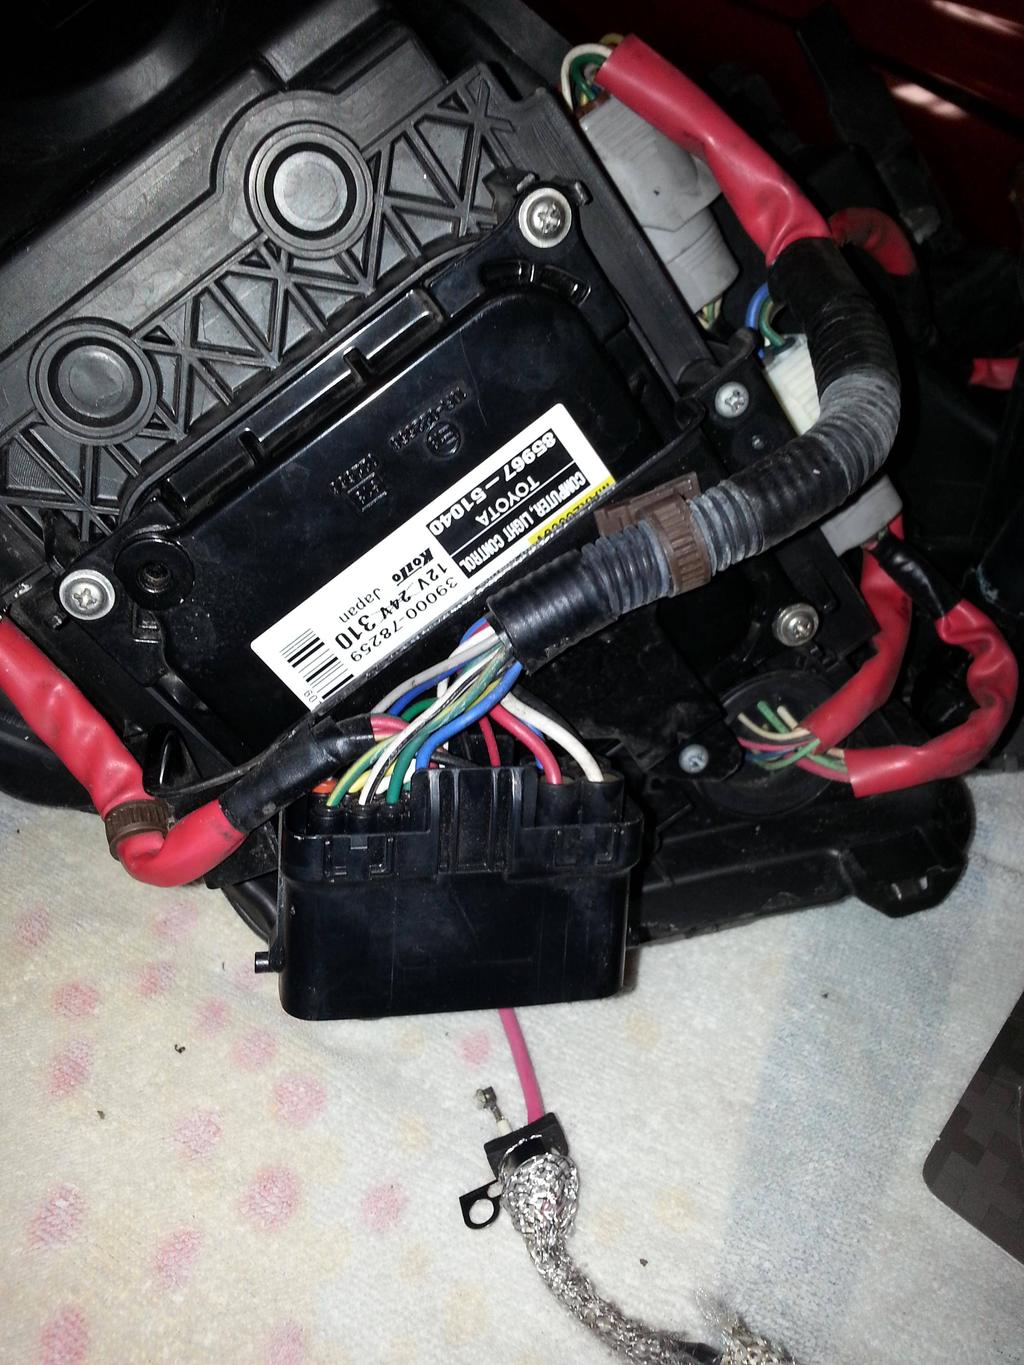
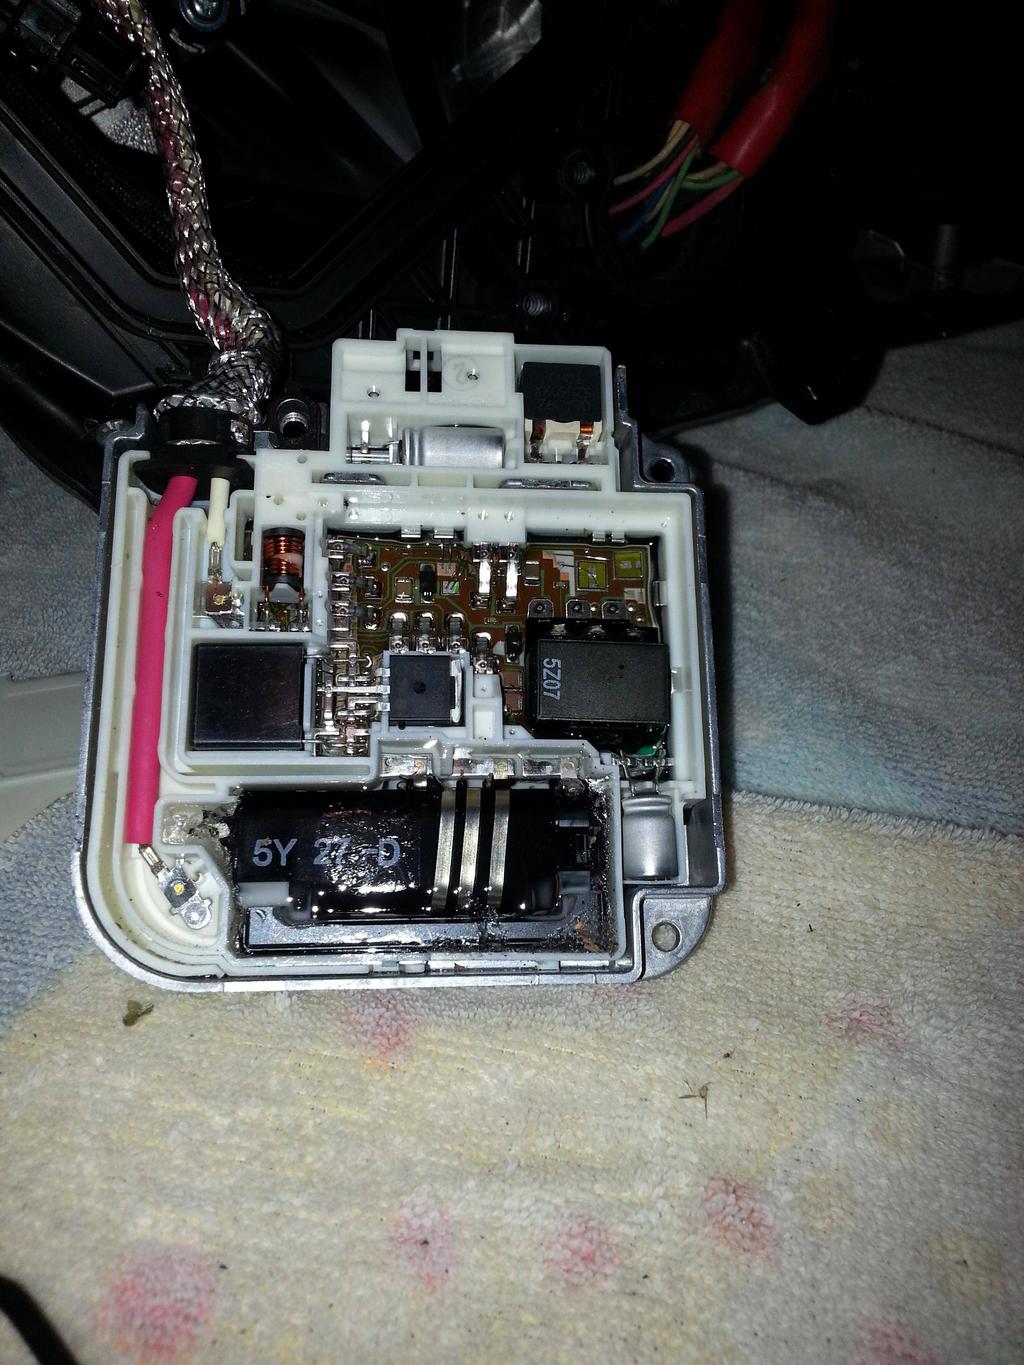
Take out the Black power connector and take out the three Phillips screws and remove the ballast from the black metal housing:
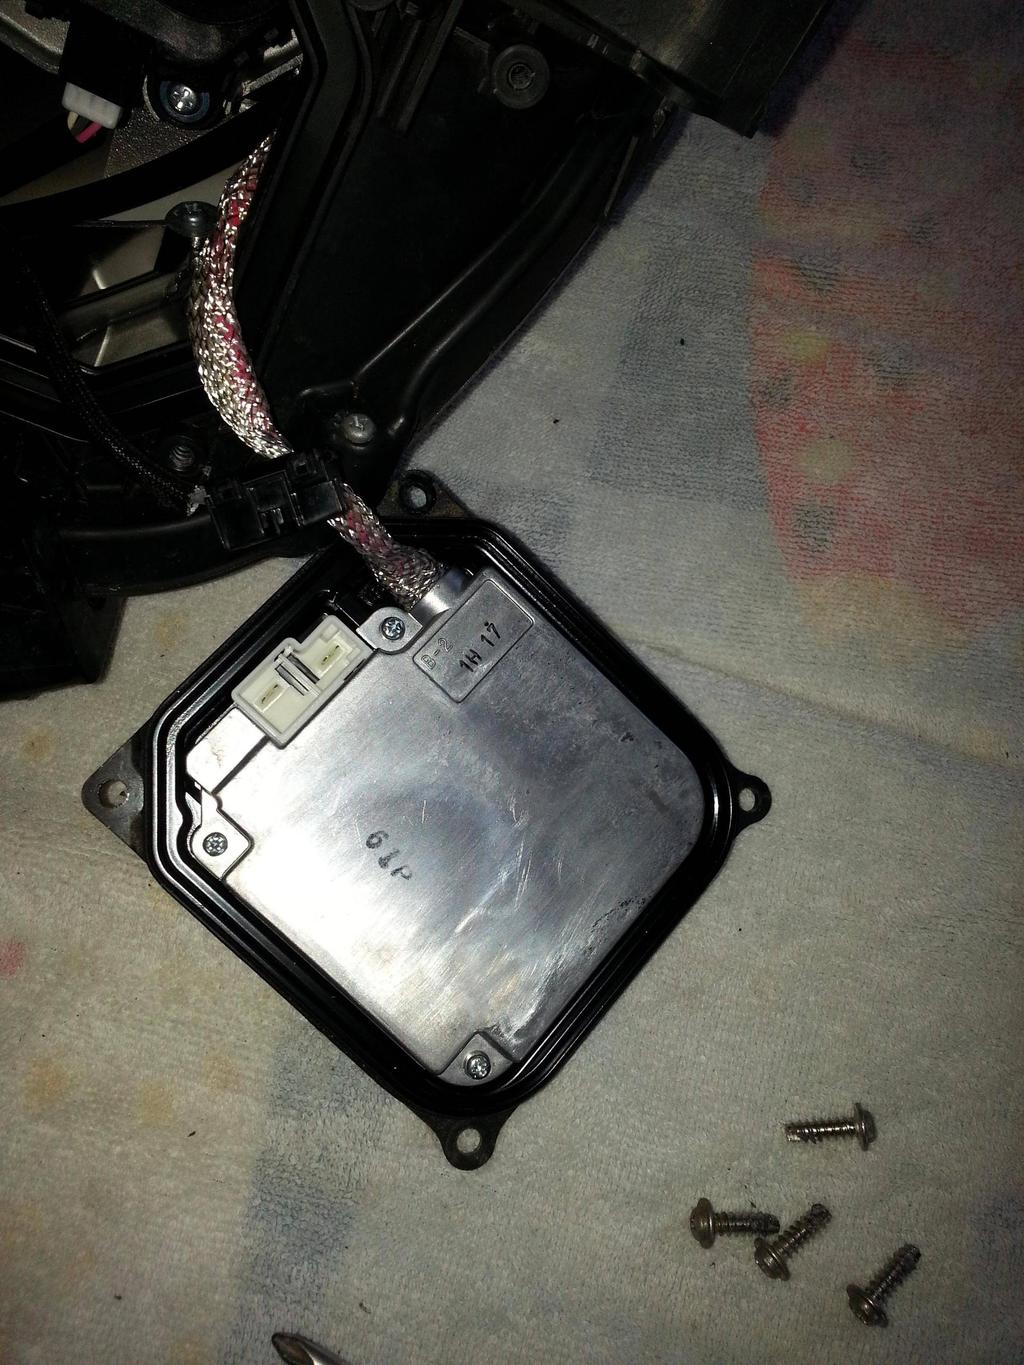
Turn it over, you'll see this:
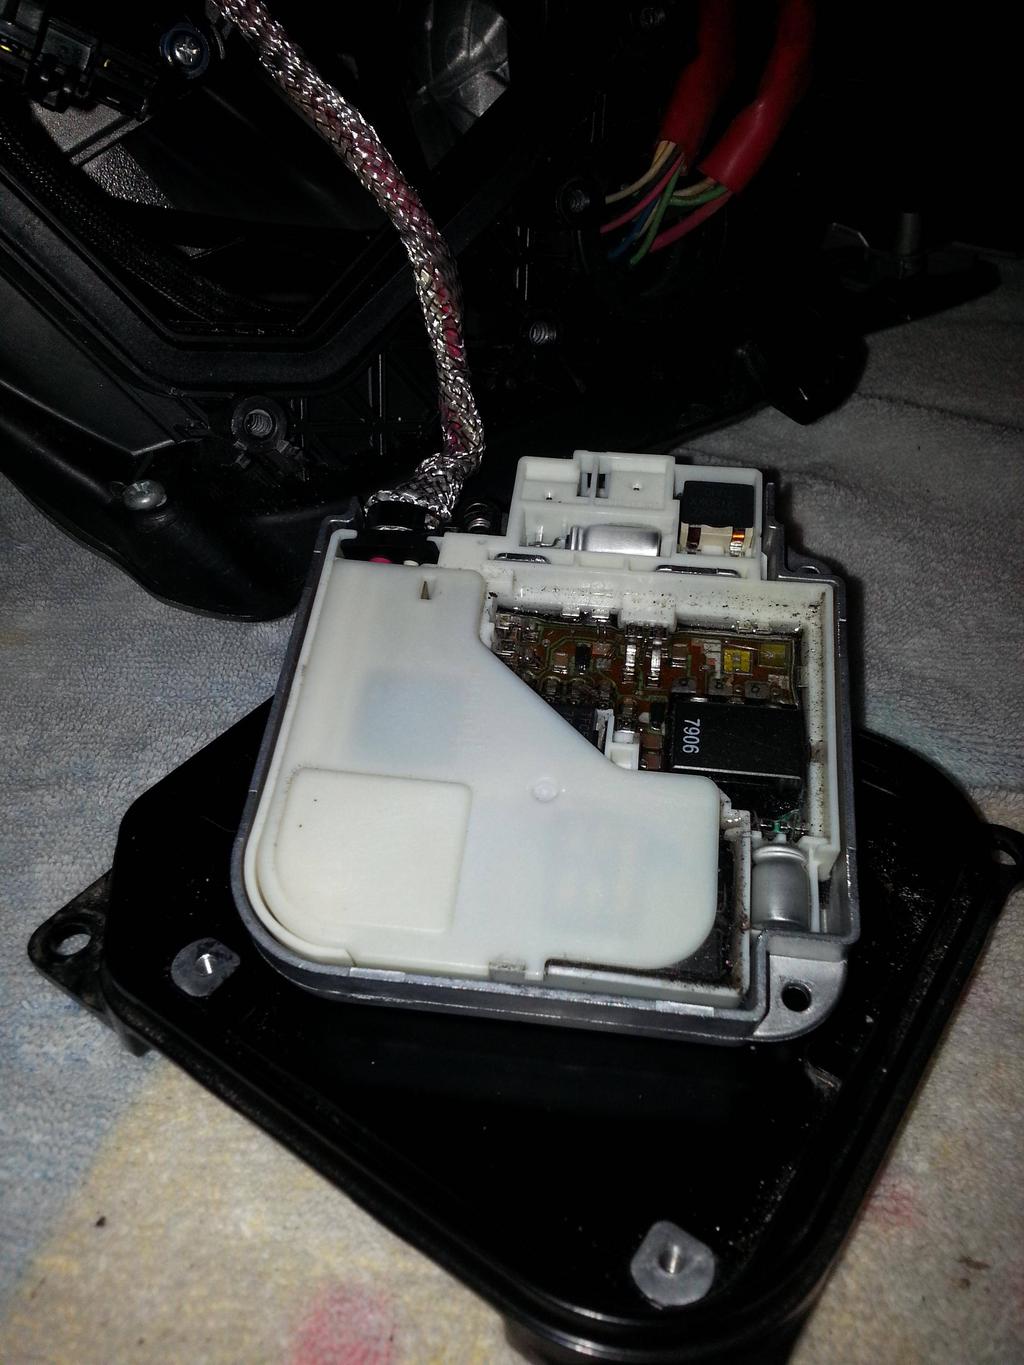
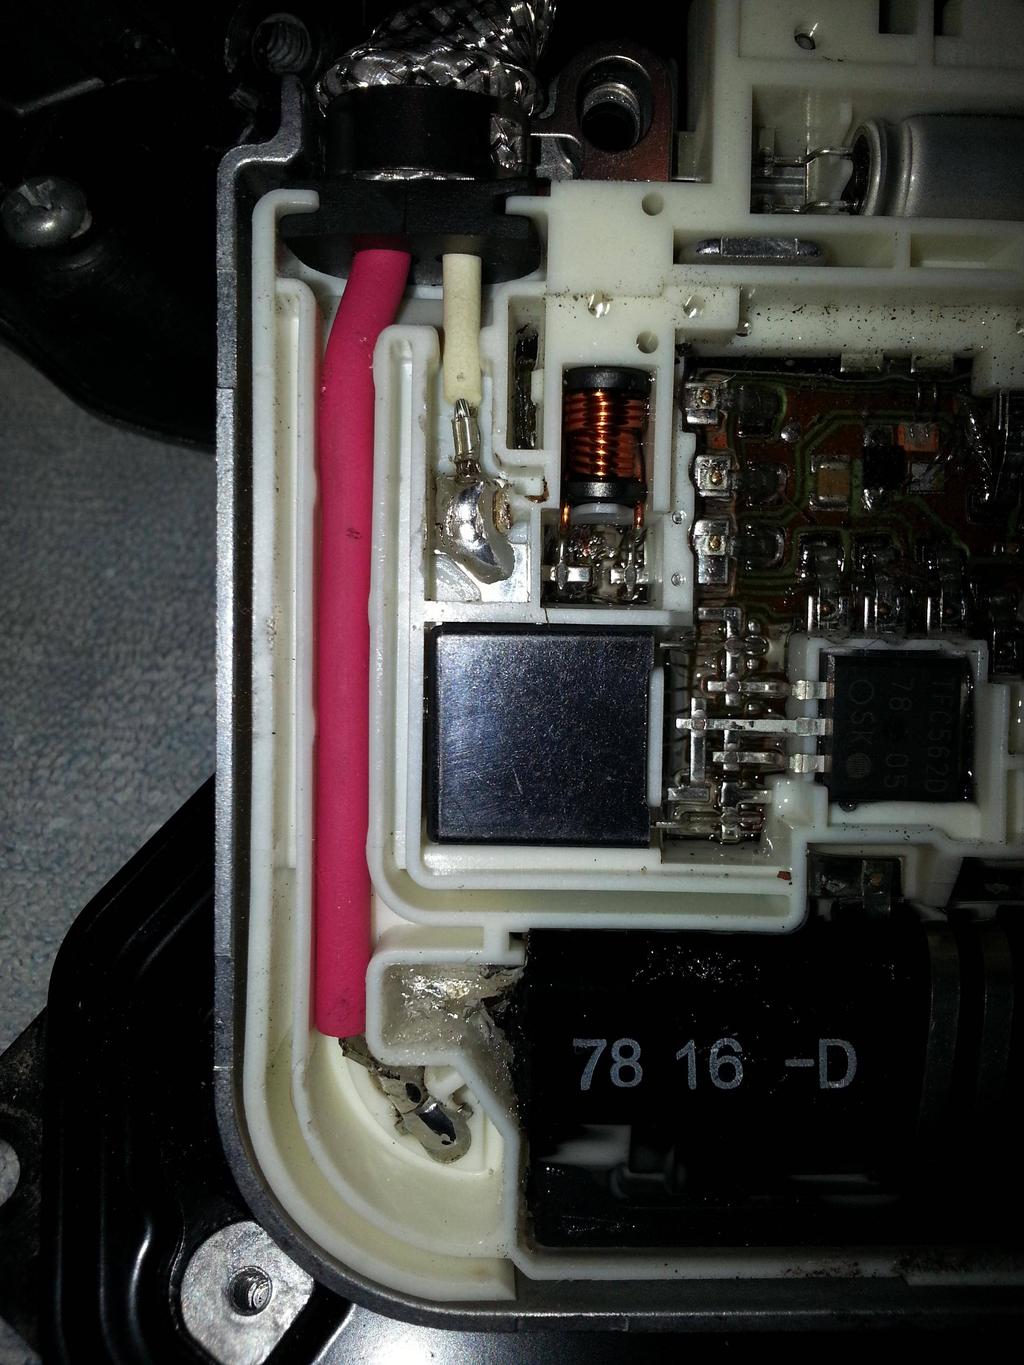
Remove the white cover with a flathead screw driver, pry it out and expose the part where the harness is connected to the Ballast:
There's the white and pink cable, attached to the points on the ballast. Wiggle those out with a flathead screw driver, until they both come off, it may or may not come out complete, no worries,
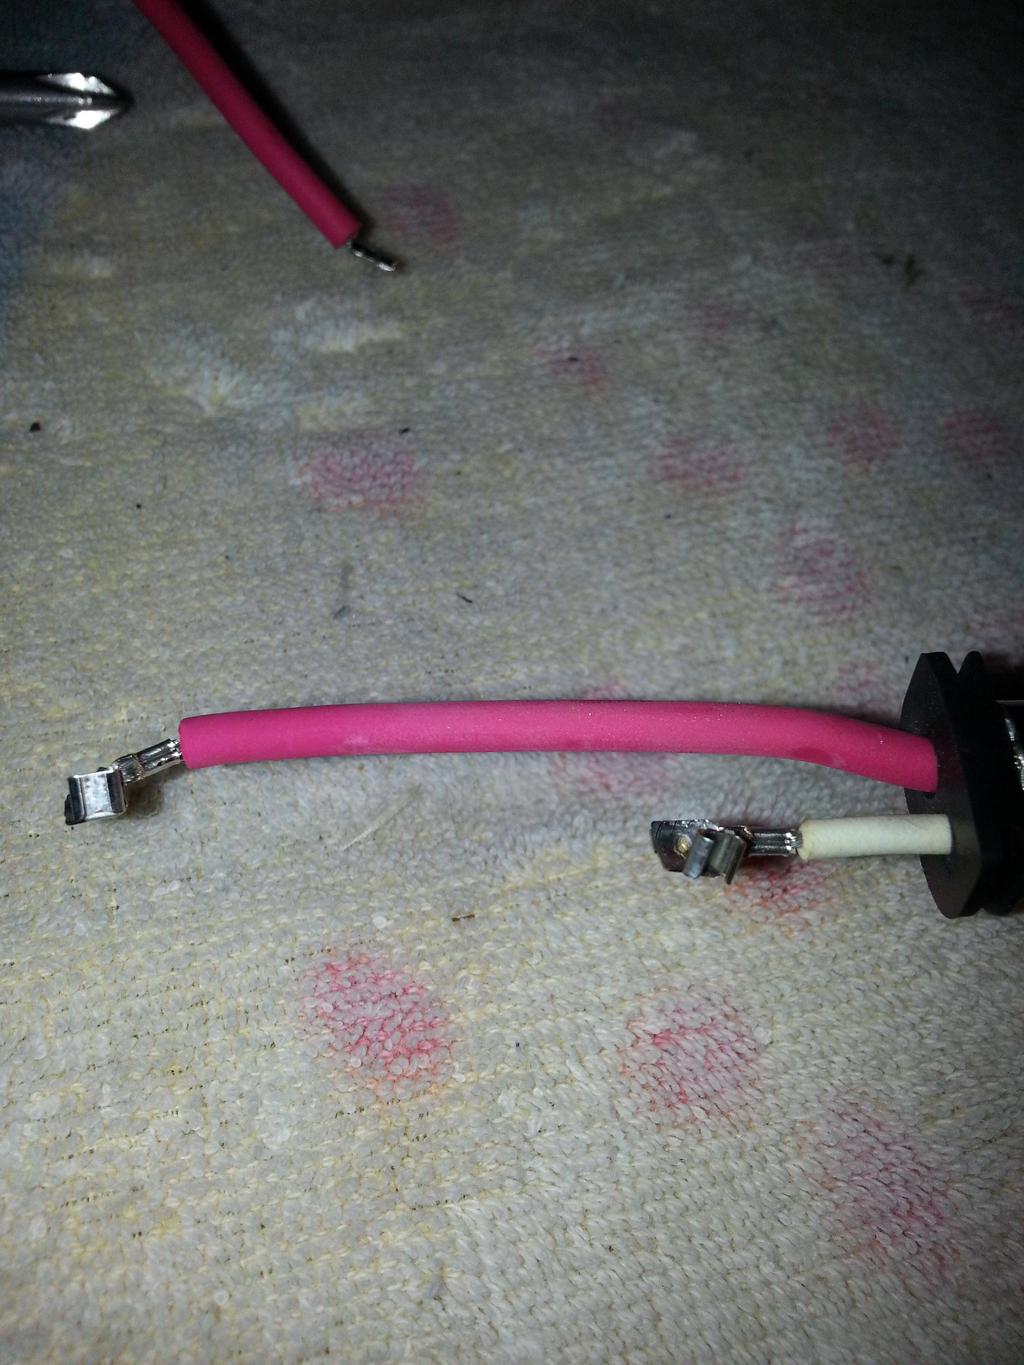
Now you have the old Ballast free, get to your NEW Ballast, remove the pink/white cable as you did up until this point on the old/broken Ballast.
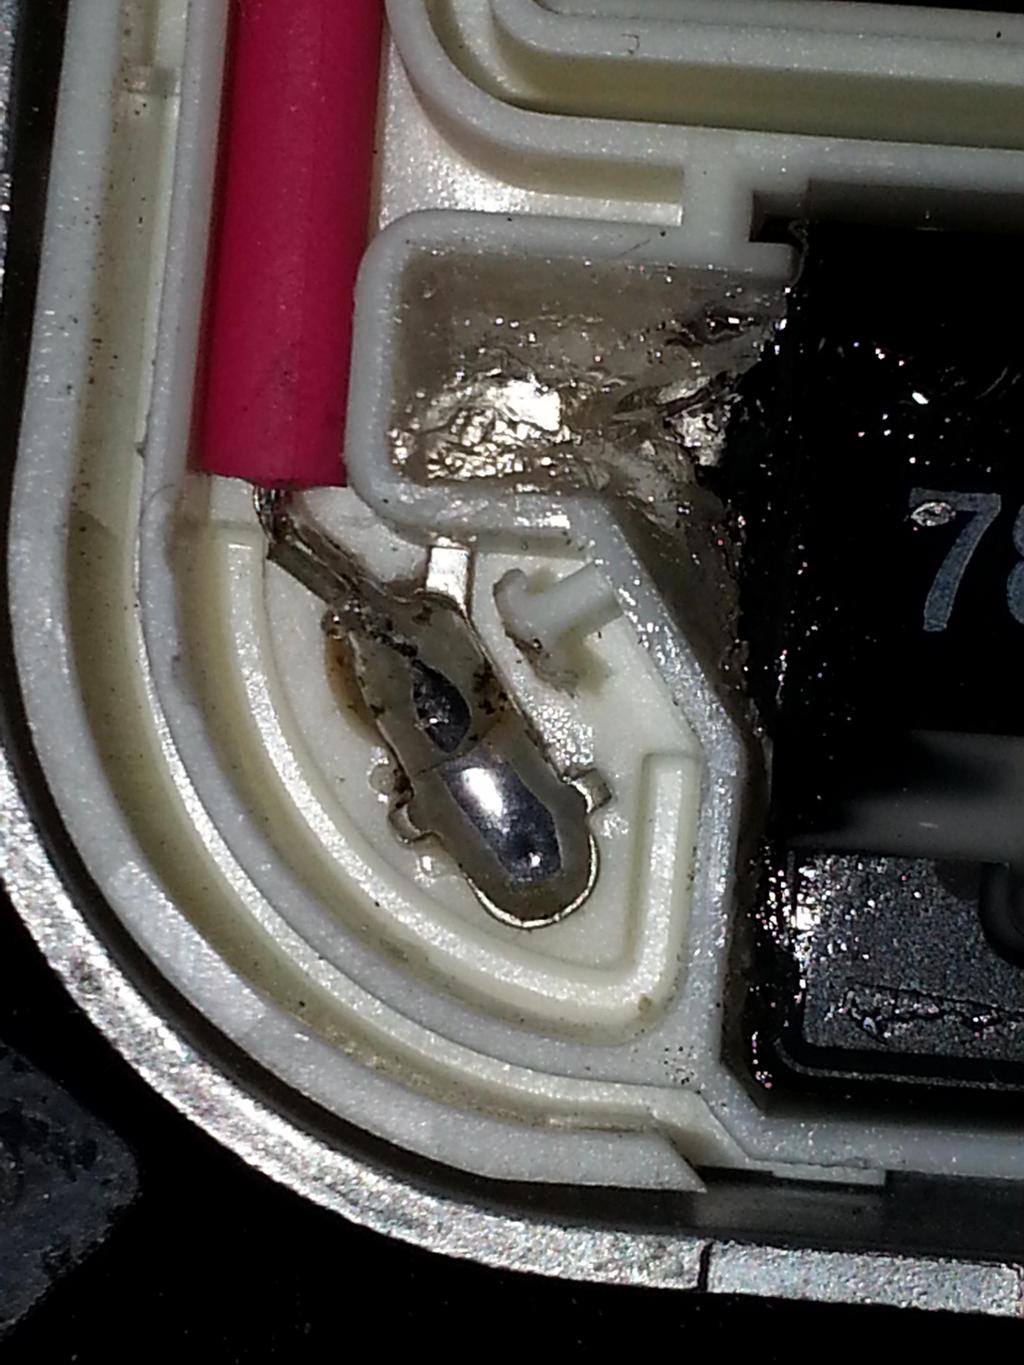
You're ready to SOLDER - Don't worry, very simple, I havent soldered in at least 8 years, and this was very simple. Here's how mine turned out, I used a lot of solder, so I made sure both points were on very well and would never come off. A bit messy but it works.
Now put the white plastic cover on the ballast, put the ballast back to its black metal housing, and put the ballast back on the headlight, and basically reassemble everything:
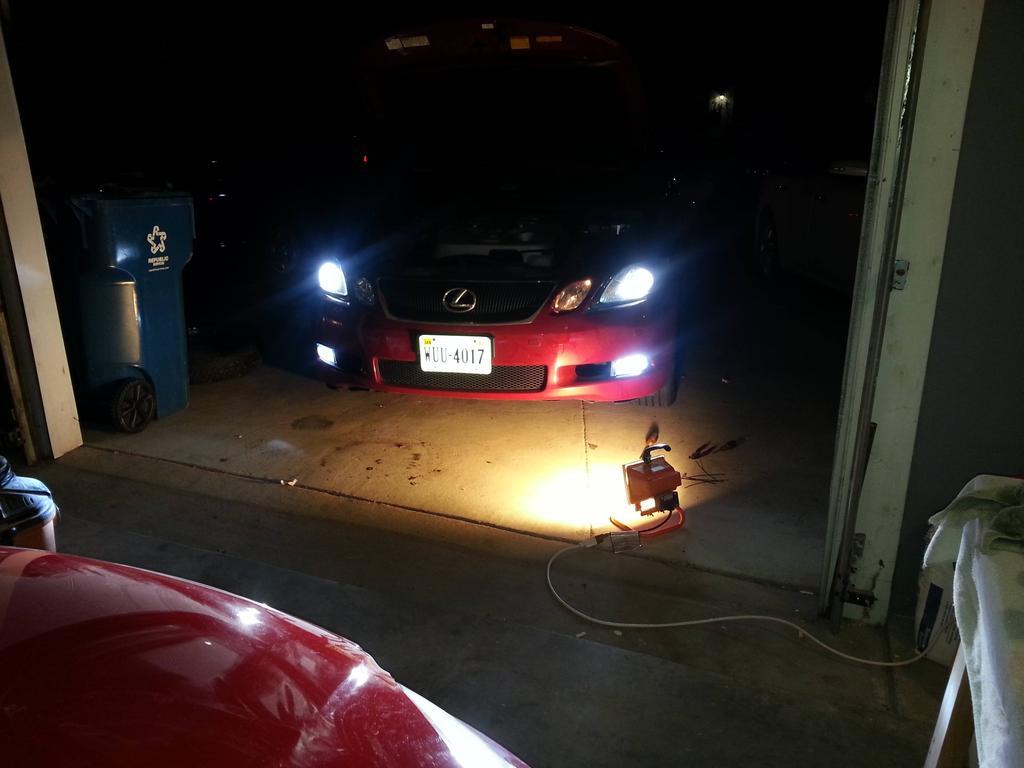
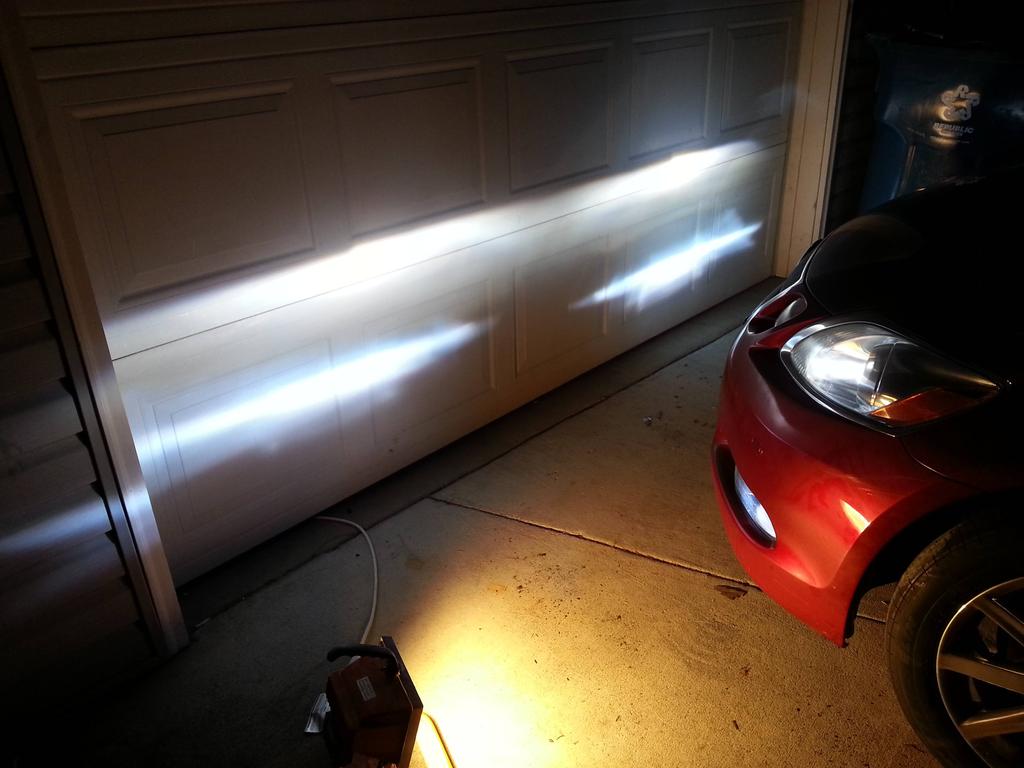
I also took advantage that the bumper was out and I installed 6000k foglights, they don't match my 6000k headlights so i'll be looking at maybe gettin 5000k for fogs.
Hope this helps, I know this will work for all IS250/350 who need to have their headlights taken apart to get the ballast out.
There is a different model# for our cars also, as long as the label says 35watt, you're good to go.
IMO this is a lot easier and faster and works 100%:
Reason I am changing both my Ballasts is that they would shut off randomly, I'd have to turn off the headlights to keep the headlights on. It would happen at random times at night, either left/right would go out.
First take off the bumper and headlights from the car, do a search for that, there's a DIY on here already for that.
I bought Ballasts off eBay for 50-60 shipped to me (USED). One was from an IS350, the other from an LS460. Its the same model# KDLT003
These are the tools I bought from Radio Shack, Didn't end up using the electrical tape, though.

Once you have the Headlight out, you'll see Ballast on the underside. WIth a Phillips Screwdriver take out the screws holding the harness in place, on drivers side there was 3 screws, passenger had 2 screws.
Now you'll have the Ballast free and accessible. Take off the 4 Phillips screws holding the Ballast to the headlight housing.

Now you can remove the Ballast from the housing (kind of)
Take off the clear plastic piece covering the bulb:
Turn the bulb cover counter clockwise to free the grey connector (this will give you the extra slack needed to solder the old harness to the new ballasts with ease):
Take out the Black power connector and take out the three Phillips screws and remove the ballast from the black metal housing:
Turn it over, you'll see this:
Remove the white cover with a flathead screw driver, pry it out and expose the part where the harness is connected to the Ballast:
There's the white and pink cable, attached to the points on the ballast. Wiggle those out with a flathead screw driver, until they both come off, it may or may not come out complete, no worries,
Now you have the old Ballast free, get to your NEW Ballast, remove the pink/white cable as you did up until this point on the old/broken Ballast.
You're ready to SOLDER - Don't worry, very simple, I havent soldered in at least 8 years, and this was very simple. Here's how mine turned out, I used a lot of solder, so I made sure both points were on very well and would never come off. A bit messy but it works.
Now put the white plastic cover on the ballast, put the ballast back to its black metal housing, and put the ballast back on the headlight, and basically reassemble everything:
I also took advantage that the bumper was out and I installed 6000k foglights, they don't match my 6000k headlights so i'll be looking at maybe gettin 5000k for fogs.
Hope this helps, I know this will work for all IS250/350 who need to have their headlights taken apart to get the ballast out.
There is a different model# for our cars also, as long as the label says 35watt, you're good to go
.


Thread Starter
Driver School Candidate
Joined: Nov 2008
Posts: 27
Likes: 3
From: virginia

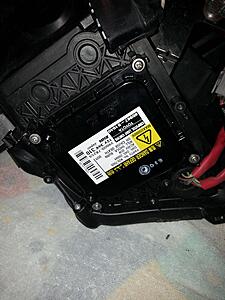
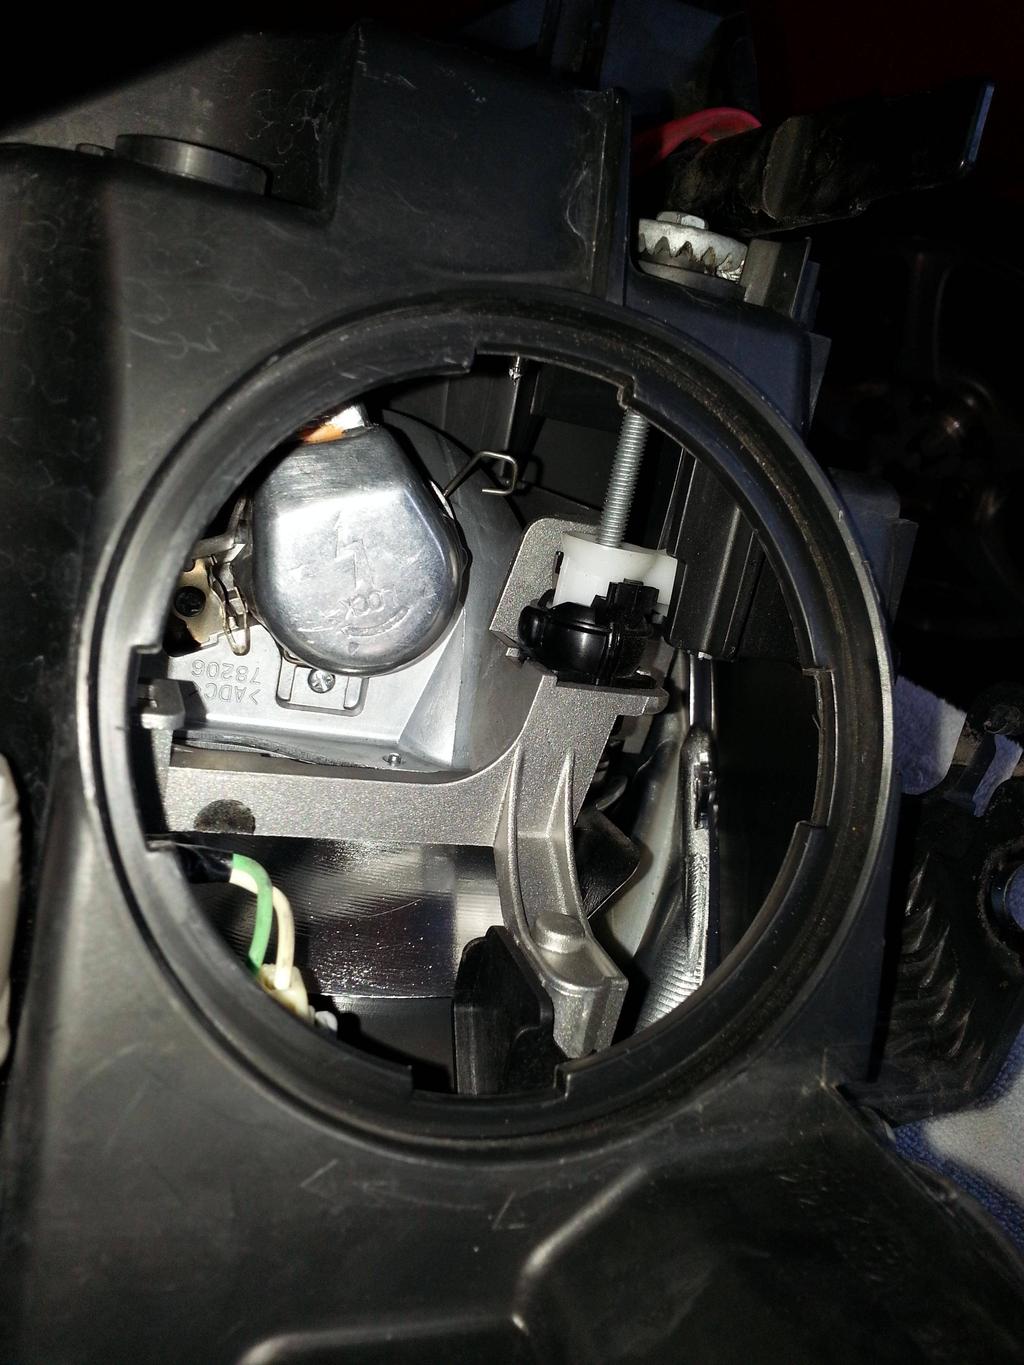
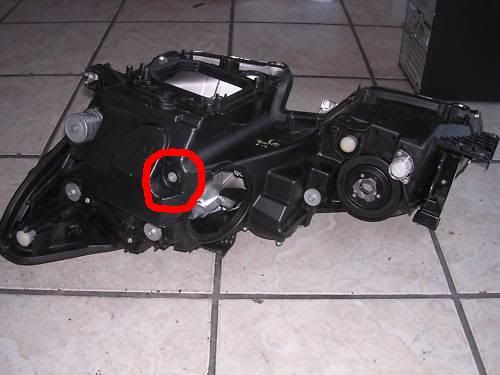
awesome write up but for anyone nervous about taking apart the actual ballast, theres no need too. the connector for the ballast the plugs into the light is too big to fit through the opening (circled in red)
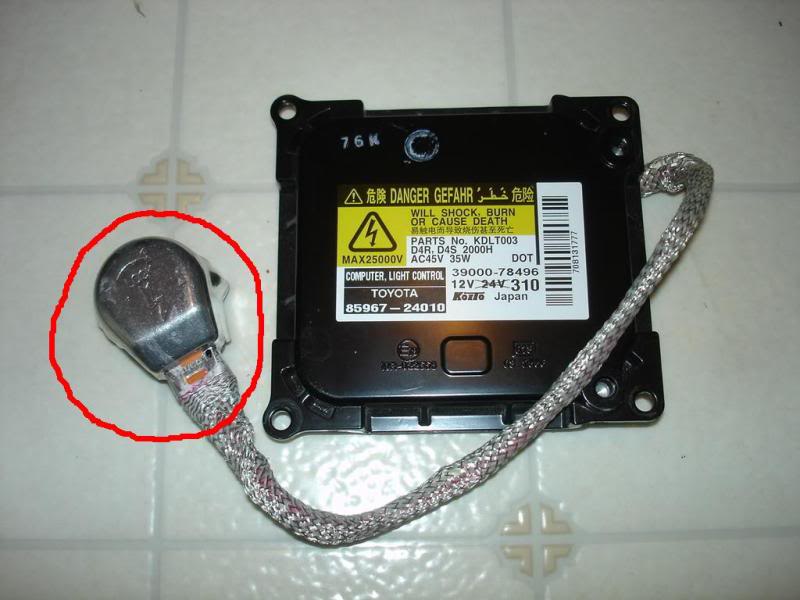
all you need to do is remove the little gray lever which i have circled in red. once thats removed, you can remove the whole ballast without having to take it apart.

all you need to do is remove the little gray lever which i have circled in red. once thats removed, you can remove the whole ballast without having to take it apart.
Trending Topics

Yes, perfect. I need to do this. If the is and ls have the same part number, shouldnt they be seeing the same issue? I think these ballasts are prone to fail and hopefully they are different/better in newer models.
either route will be difficult. changing the ballast will throw a bunch of error codes, but you probably could get it to work with a relay harness, though I bet with the error codes, itll probably flicker or do something weird. You could retrofit a lense from another cut, maybe get a different cutoff line but thats not going to make anything brighter. best bet is to level your headlight up a couple notches and get some hid fogs and youll be set.
either route will be difficult. changing the ballast will throw a bunch of error codes, but you probably could get it to work with a relay harness, though I bet with the error codes, itll probably flicker or do something weird. You could retrofit a lense from another cut, maybe get a different cutoff line but thats not going to make anything brighter. best bet is to level your headlight up a couple notches and get some hid fogs and youll be set.
Pit Crew
Joined: Sep 2003
Posts: 170
Likes: 6
From: Arkansas
awesome write up but for anyone nervous about taking apart the actual ballast, theres no need too. the connector for the ballast the plugs into the light is too big to fit through the opening (circled in red)

all you need to do is remove the little gray lever which i have circled in red. once thats removed, you can remove the whole ballast without having to take it apart.
all you need to do is remove the little gray lever which i have circled in red. once thats removed, you can remove the whole ballast without having to take it apart.
I have a 2009 IS350. The back of the headlight area looks different than my headlight. I have a small square door with warning labels in the same area you have a circular opening. It might be nothing.
I gotta do this swap this week and i'm running out of time to get my car inspected. (just bought it used and the ballast failed two weeks after legally owning the car. sucks.
MemphisDave
you dont need to follow all the steps above. ive done a ballast swap and those 2 pics are from when i did mine. once the headlight is off the car, just remove that little lever and then take the 4 screws (one in each corner) that attach the ballast to the bottom of the headlight housing and your done.
Pit Crew
Joined: Sep 2003
Posts: 170
Likes: 6
From: Arkansas
you dont need to follow all the steps above. ive done a ballast swap and those 2 pics are from when i did mine. once the headlight is off the car, just remove that little lever and then take the 4 screws (one in each corner) that attach the ballast to the bottom of the headlight housing and your done.
You just saved my nightmare process 1-2hrs this week! Looking forward to the swap if its the problem.
MemphisDave
Thanks man! So....No headlight lens removal or extra solder required. I might make a timelapse video of my process and post it up for everyone that doesn't feel comfortable removing their lens.
You just saved my nightmare process 1-2hrs this week! Looking forward to the swap if its the problem.
MemphisDave
You just saved my nightmare process 1-2hrs this week! Looking forward to the swap if its the problem.
MemphisDave

Driver School Candidate
Joined: Feb 2002
Posts: 9
Likes: 0
From: Ventura County
I think it should also be noted that little screw is a female pentagon screw and of course I don't have the right pentagon screwdriver! Does anyone know if there'll be error codes when I finish?