Lexus RX: How to Replace Vanity Light
Here's how to replace the vanity light in the Lexus RX in a fast and simple way.
This article applies to the Lexus RX (2005-2013).
Some owners are understandably hesitant to change their vehicle's vanity lights, fearing that they may scratch or damage the plastic cover or surrounding area in the process. It's a good idea to be extra cautious when working in this area, especially when handling the covers and wires. Using a small screwdriver or similar tool can help.Here's a closer look at what you can expect when replacing your vehicle's vanity lights. The professional cost is free if your Lexus is under warranty.

Materials Needed
- Small screwdriver
- Needlenose pliers for removing bulbs (optional)
- Replacement light bulb(s)
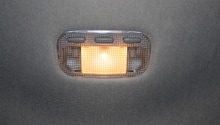
Step 1 – Locate the plastic lighting cover(s)
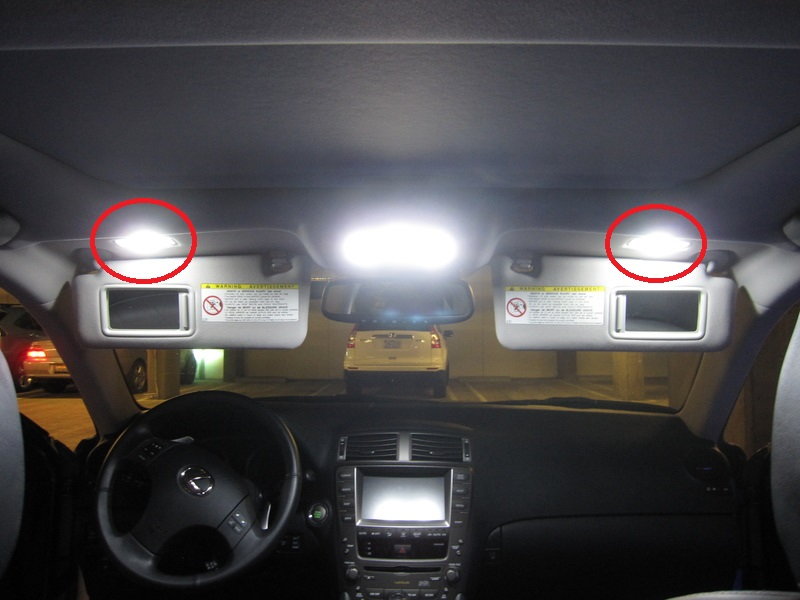
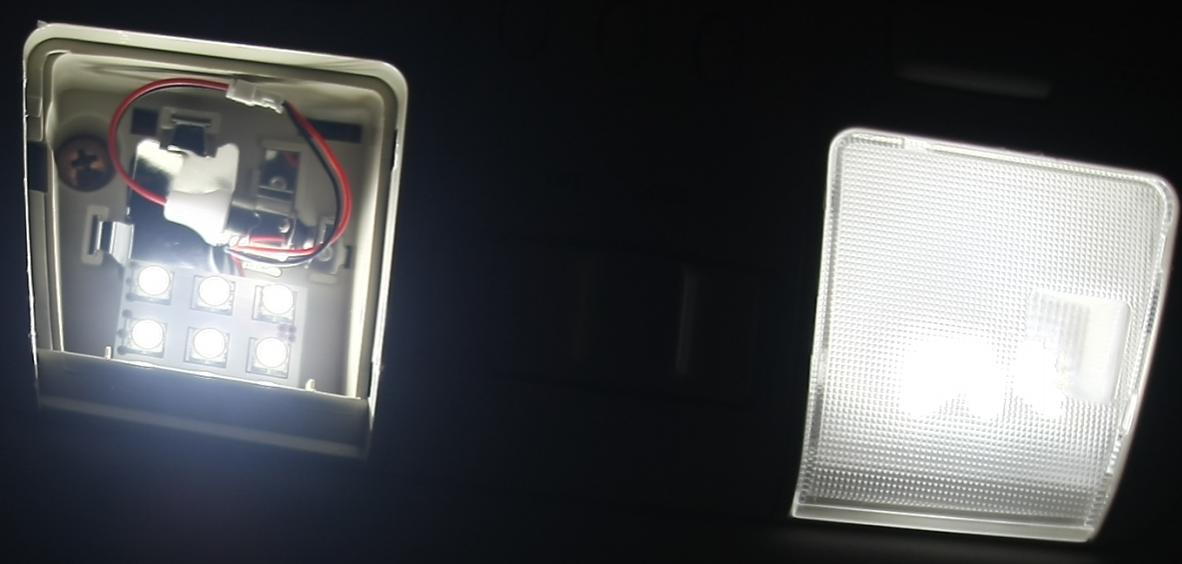
The vanity lights are protected by a plastic lighting cover on the inside of each mirror. You will need to carefully remove this cover to access and change the bulbs inside.
Step 2 – Remove the plastic light cover
Pry off the plastic light cover using a small flat screwdriver or a similar tool. Although you'll want to apply enough force to remove the cover, it's important to avoid using too much force as this can damage or break the light cover. Once the cover is sufficiently loose, gently pry it off with your hands.

Step 3 – Replace existing bulbs
Once the cover is off, you should be able to remove the bulb(s) by carefully pulling on its wires. The goal is to loosen up the bulb as much as possible for easy removal. Gently take off the existing bulb and replace it with the new one.
Pro Tip
There should be a plastic cage around the existing bulb. You'll need to leave it in place to fit an LED bulb, which is often larger than the stock bulb.
Step 4 – Screw cover back on
Now that the bulb is in place, it's time to screw the cover back on. Simply reverse the process in Step 1, using a small screwdriver to replace the screws.

Related Discussions
- Having Trouble with Visor LED Replacement - ClubLexus.com
- Foot Light and Vanity Lights? - ClubLexus.com