Lexus RX: How To Install a Headrest DVD Player
How about some in-car entertainment? And no, not the oldies station that you love so much. Let's look into what it takes to get some visual entertainment functioning for your passengers.
This article applies to the Lexus RX (2003-2014).
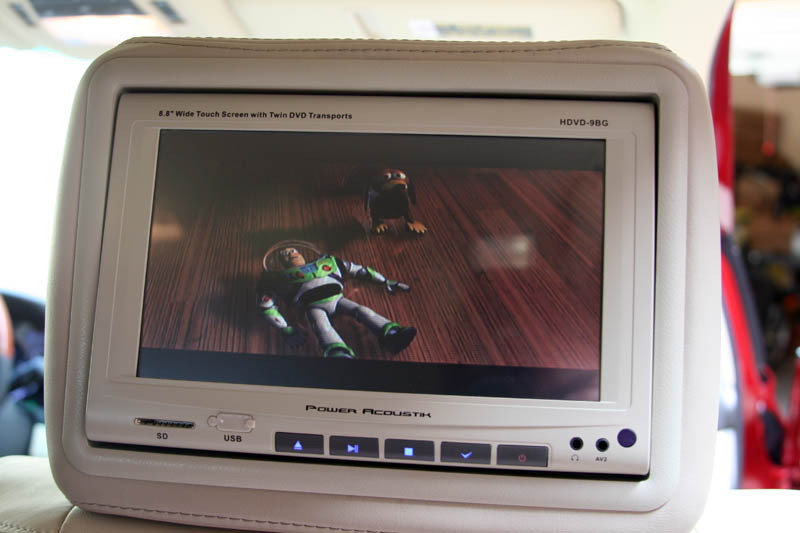
Not many vehicles come standard with DVD systems installed into the rear headrests. Dealers provide these options, but at a premium price tag. With the right equipment and basic know-how of electrical components, you can enjoy the same luxury at a fraction of the cost. This is especially useful for families with children. An in-car entertainment system is great for longer drives when kids get restless.
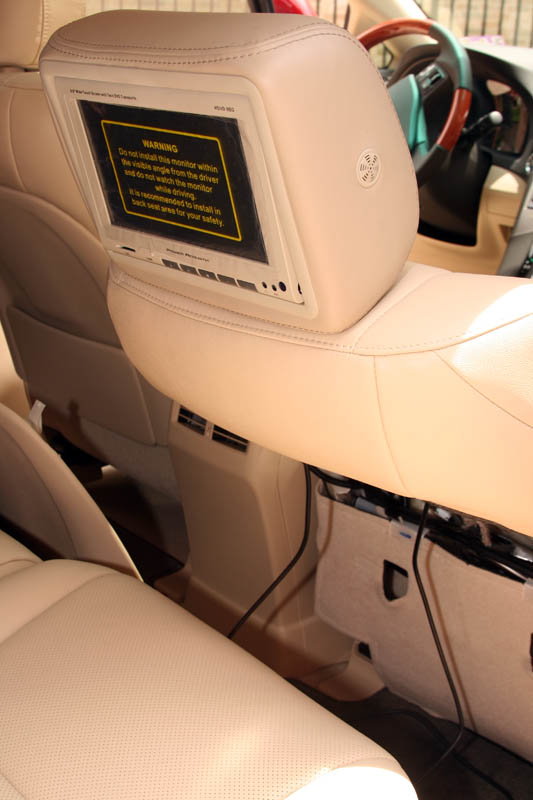
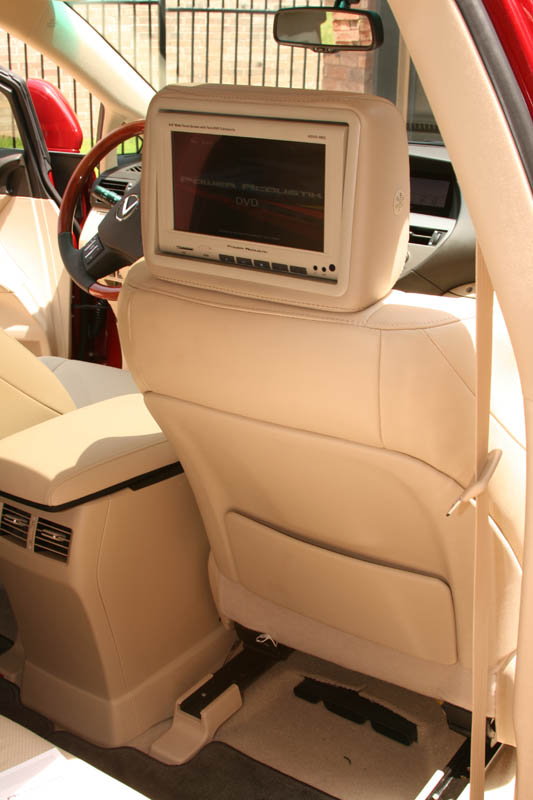
Adding a DVD system to your seats means that you will be replacing your factory-installed headrests with new headrests with the DVD players already installed. This also means that the color/fabric your new digital headrests may not match the rest of your interior. Pay attention to the installation instructions that were sent along with the headrest monitor. Depending on the unit, it will likely have specialized instructions for wiring and installation. Always be sure to remove the negative terminal from the battery when working with wiring.

Materials Needed
- Philips screwdriver
- Wire strippers
- Ratchet and 14mm socket
- Soldering pen/iron/torch
- Solder
- Electrical tape
- Multimeter
Step 1 - Disassemble seat backs
In order to install the new headrests and wire them, you will need to gain access to the existing wiring harness that runs under the carpeting and through the seat back.
- Press the tabs on the base of the headrest and pull it out.
- Reach beneath the seat back to un-clip the two elastic straps holding it tight. See Figure 1a.
- Unscrew the two Phillip screws holding the bottom of the seat back in place. Shown in Figure 1b.
- By placing your hand behind the top of the seat back, pull down at the top of the seat and remove. See Figure 1c.
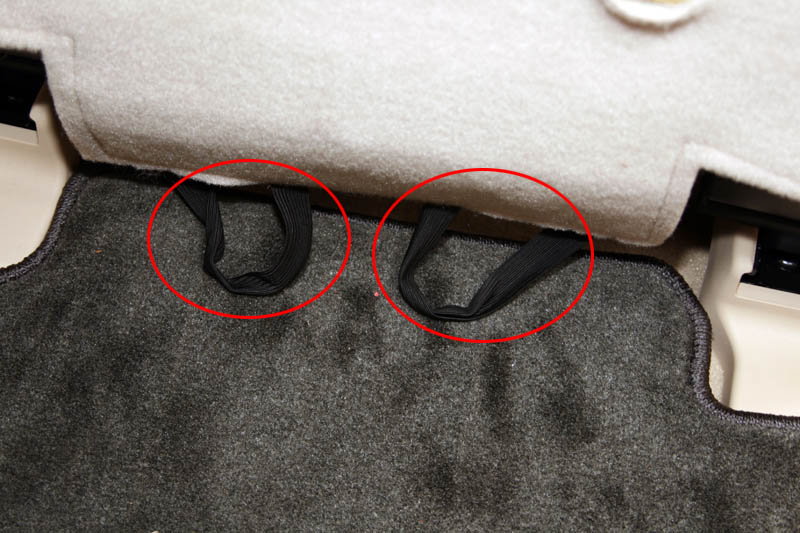
Figure 1a. The two elastic rings secure the seat back to the seat. Reach underneath and remove them. 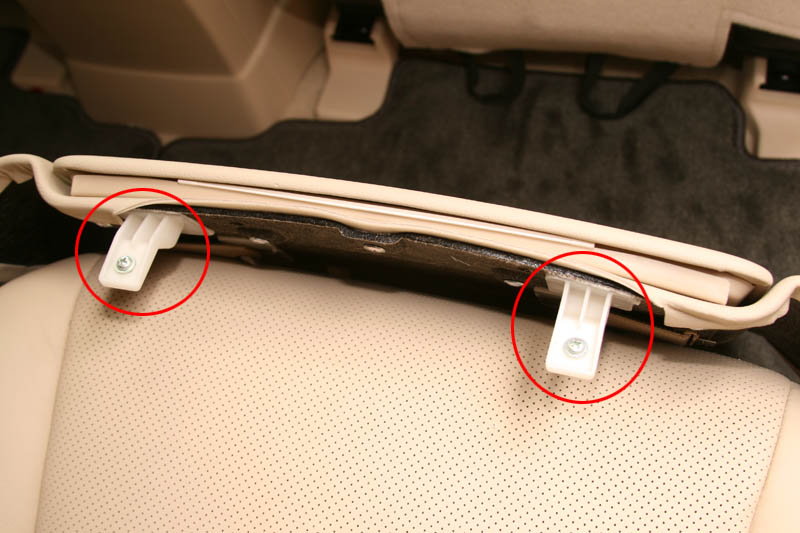
Figure 1b. Unscrew these to remove the seat back. 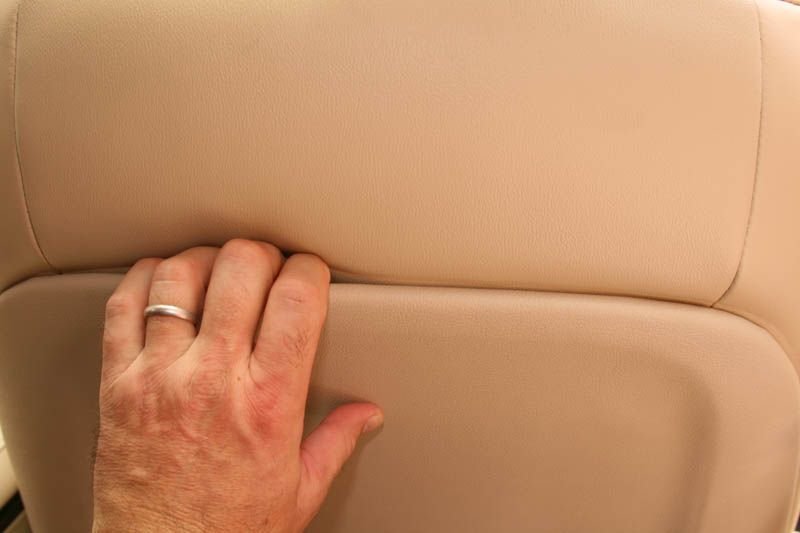
Figure 1c. Push down on this panel to un-clip it and pull it toward you to remove.
Pro Tip
On the passenger side, there are two elastic loops holding the bottom clip of the seat back in place. On the driver's side, there is an elastic strap with plastic hooks on the end.
Step 2 - Snake headrest wiring
With the seat backs exposed and the seat positioned up right, you will be able to install the new headrests and run the wiring.
- Snake each input and output cord through the holes at the top of the seats.
- Push the headrests down to secure into place.
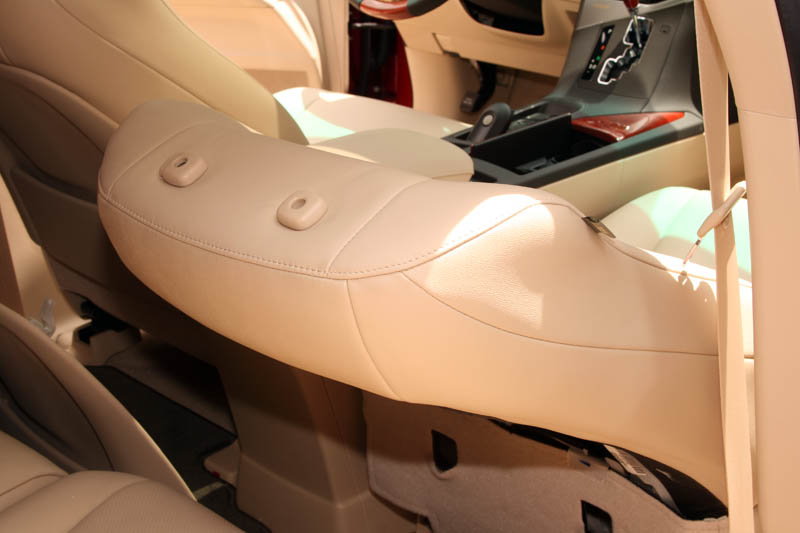
Figure 2a. View of the headrest removed. 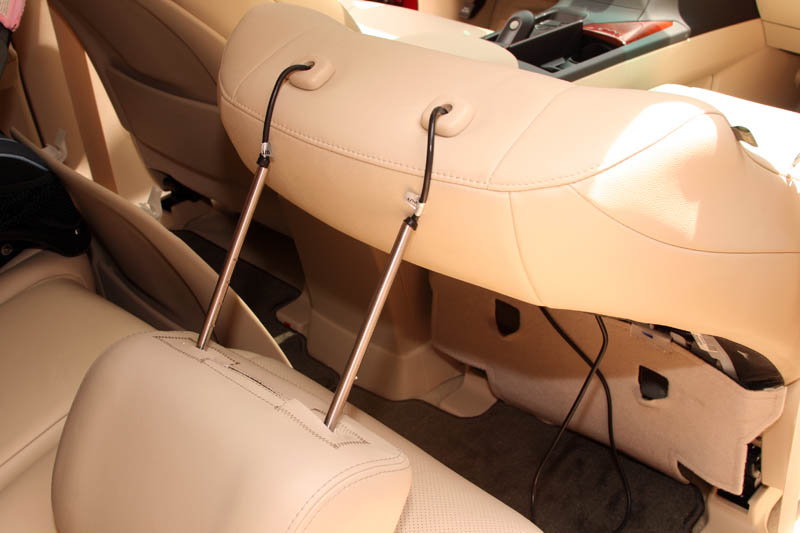
Figure 2b. View of the wiring set up.
Pro Tip
Input wire runs on the inner most side of the seat back, closest to the center console.
Step 3 - Wiring power
The new headrests will need a continuous source of 12V power. The existing harness, within the seat back, contains a source you can tap into.
- Locate harness under the seat and remove sheath.
- Locate red wire (switched power) and splice.
- Solder new connection and secure with electrical tape.
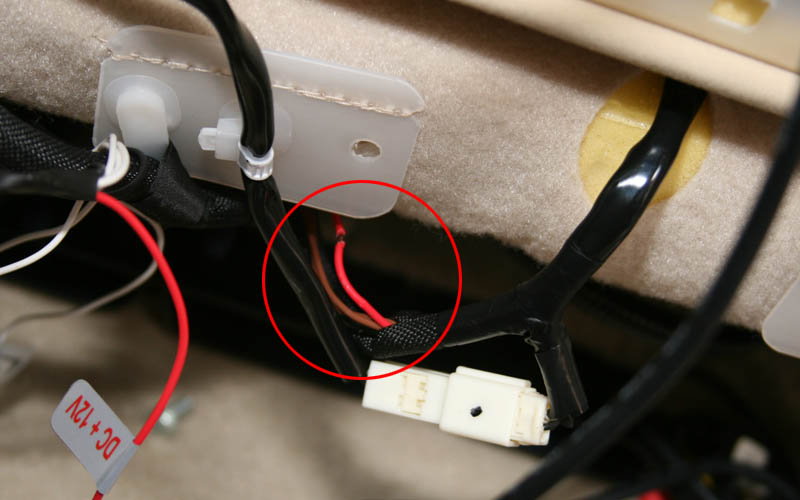
Figure 3a. Tap into the 12V power via wire shown. 
Figure 3b. Spliced wires.
Step 4 - Wiring ground
To complete the continuous circuit, you will need to ground your wiring. There is a 14mm bolt located at the rear of the seat rail that can be used.
- Remove plastic cover for seat rail.
- Loosen the 14mm bolt.
- Run ground wire along side of the rail and secure with electrical tape.
- Loop the stripped end under the washer of the 14mm bolt and secure down.

Pro Tip
Be sure to run enough wire because the seat will not be in its normal position while performing this install. Also, make sure the wire is clear of where the seat moves back and forth so it doesn't get pinched.
Step 5 - Plug in power harness and test
At this point, you should be ready to test the system.
- Plug the power harness into INPUT side.
- Push the start button twice (without pressing the brake) to put the vehicle into Accessory mode.
- Press the power button on headrest unit.
Pro Tip
Insert a DVD and test playback. If there are any issues with fading or output, go through all the connections again.
Step 6 - Re-install seat backs
Once you have completed testing both sides, you can re-install the seat backs.
- Remove slack on cables and position accordingly.
- Re-install lower carpeting.
- Re-install seat back panel.
Featured Video: DVD Headrest Monitor Installation
Related Discussions and Site
- Vizualogic DVD Headrest Installation-Full Writup - ClubLexus.com
- DVD Headrest Install How-to With Pics - ClubLexus.com
- DVD Headrests With Wireless Headphones - Amazon.com