Lexus: How to Install JDM LED Turn Signal Mirrors
Adding in LED signals to your side mirrors is a simple, great upgrade you can do at home when in just a few hours.
This article applies to the Lexus IS, ES, GS, LS, and RX (2005-2013).
Changing the side mirror's lightbulb to LED can give the Lexus a unique look. The process isn't the easiest, but it can be done by closely following these steps. You will need to remove a few components and run the wires under the carpet to complete the job.

Materials Needed
- 10mm socket with 3 inch extension
- Phillips head screwdriver
- Flat head screwdriver
- Electrical tape
- Wire strippers
- Metal coat hanger
- New mirrors
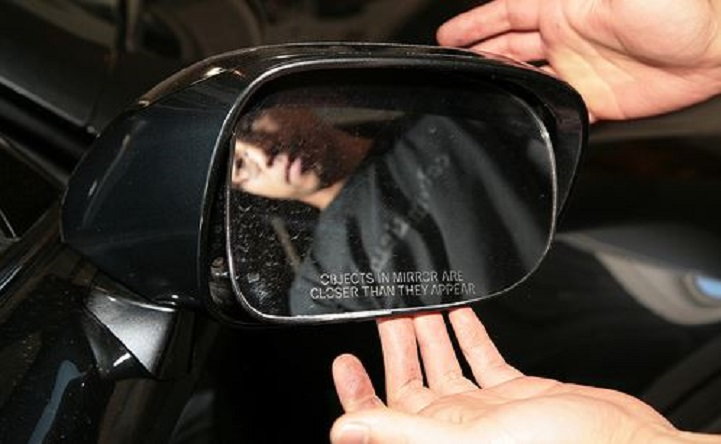
Step 1 - Remove the side mirrors
Remove the side mirrors carefully by first turning them as far outward from the car as they will go, then point the glass mirror up as far as possible so that it's reflecting the sky. Grab the bottom of the mirror and pull up and towards your body. The mirror should come completely out from the housing or cover.
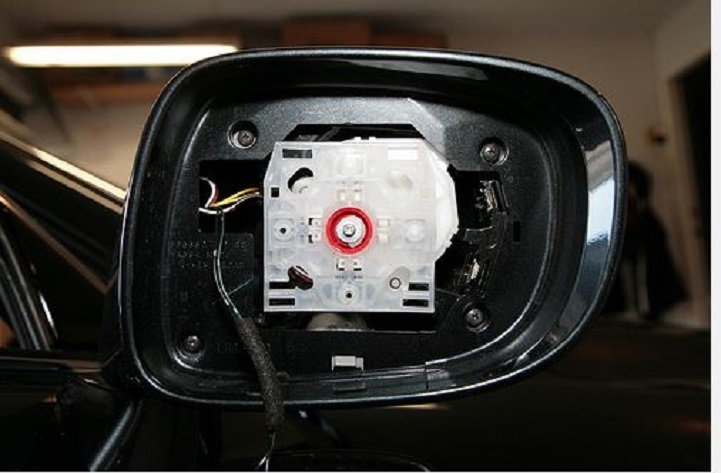
Step 2 - Remove the four bolts
After the mirror comes out, you'll see four bolts, one in each corner. These bolts need to be removed with a Phillips head screwdriver. When replacing these screws, do not over-tighten as they are only set into plastic fitments.
Step 3 - Pull apart the side mirror covers
Separate the front from the rear side mirror covers by gently prying them apart.

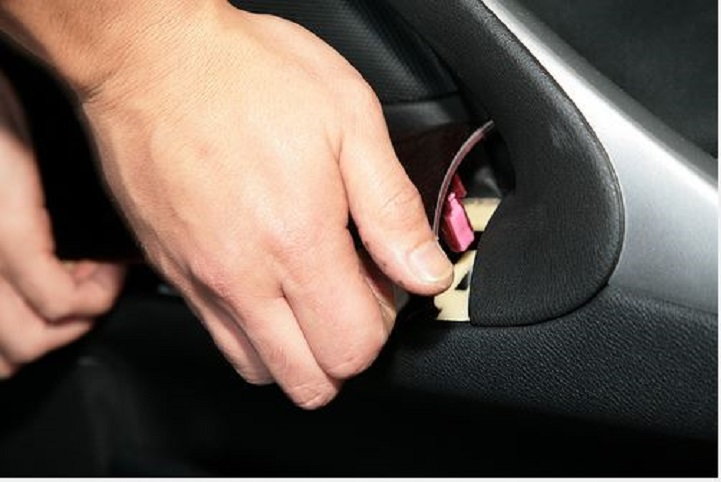
Step 4 - Remove door panels
The door panels will need to be removed at this point. This is not as daunting as it may sound; however, you do need to take your time and work carefully. The first step in removing the door panels is to pop out the plastic piece that sits recessed behind the door handle. This is done quite easily with a flat head screwdriver. Once this piece is removed, you'll have access to a screw that is seated dead center behind the handle. Remove this screw with the Phillips head screwdriver.

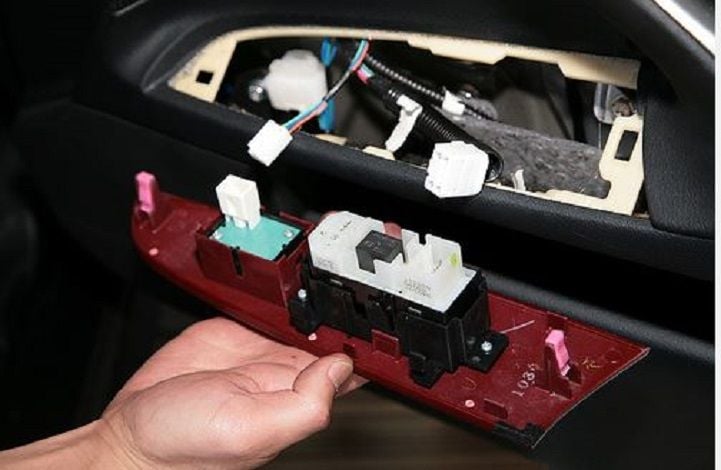
Step 5 - Remove the window trim control unit
Grab at the bottom and pull upward and towards your body. Be careful not to break any of the plastic tabs.
Step 6 - Disconnect the two wiring harnesses
Be careful to not pull too hard when removing the window trim control unit as it will be tethered to the door frame by two wiring harnesses. Disconnect these two harnesses by gently pulling them apart .
Pro Tip
When you reconnect these wires, be sure to operate your window to the up and down positions for a few cycles in order to get the auto up/down feature to start working again.
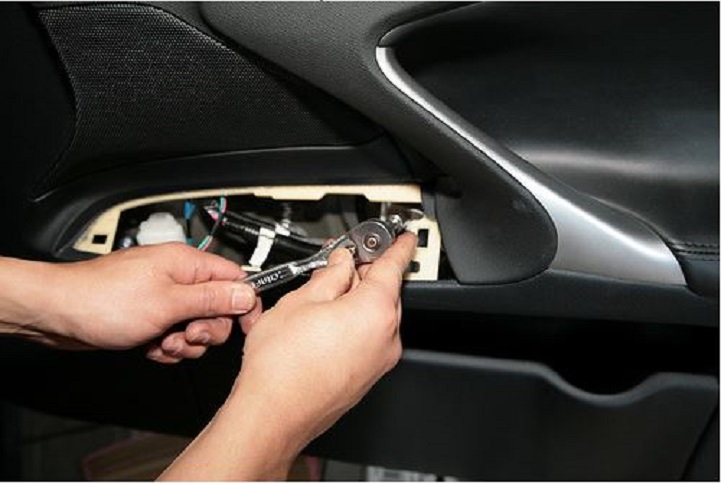
Step 7 - Remove the single bolt inside the window control panel
Once the control panel is removed, you'll see a 10mm bolt holding this controller to the door frame. This can be removed with a screwdriver or a ratchet with a 3 inch extension and 10mm socket.
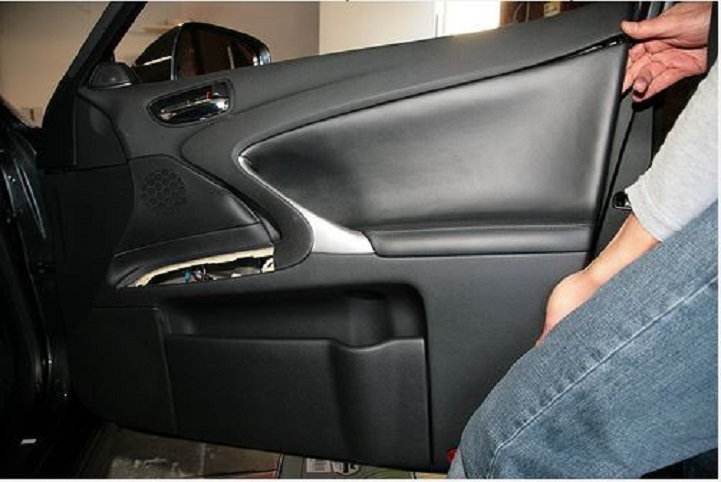
Step 8 - Remove door panel
Start from the bottom and pull inward and upward. You will need to use a little force, but don't just haphazardly start yanking. There are plastic tabs holding the door panel in place. They are a pain to remove, but costly to replace. Once the bottom is disconnected, lift up from the outside edge of the door panel to disengage the rest of it. Once the panel is completely freed from the door frame, you'll see that there are still some wires that are tethering it to the door frame. You do NOT need to disconnect these other wires, but have something in place to lay the panel on without stressing them.
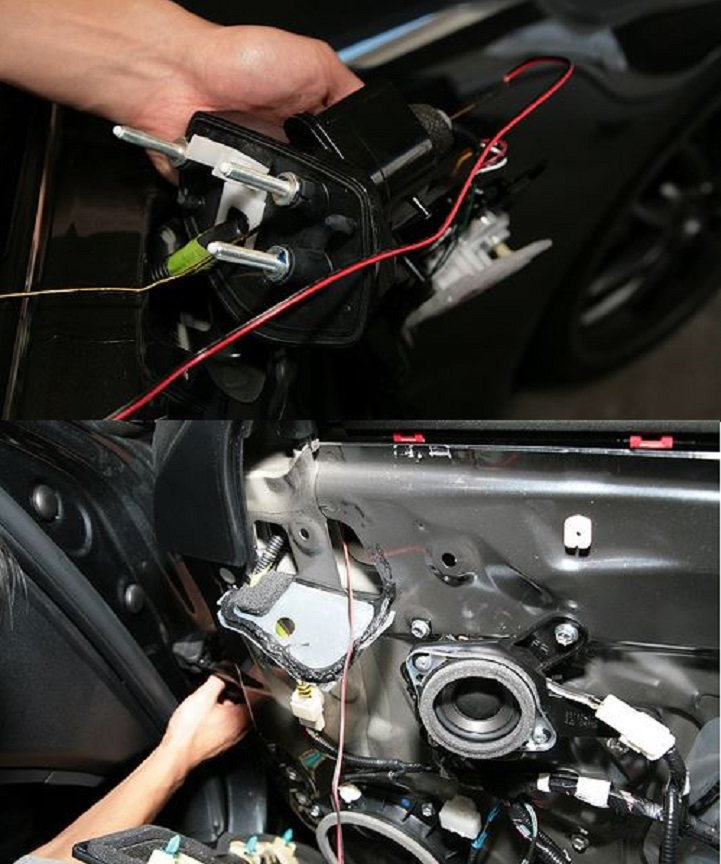
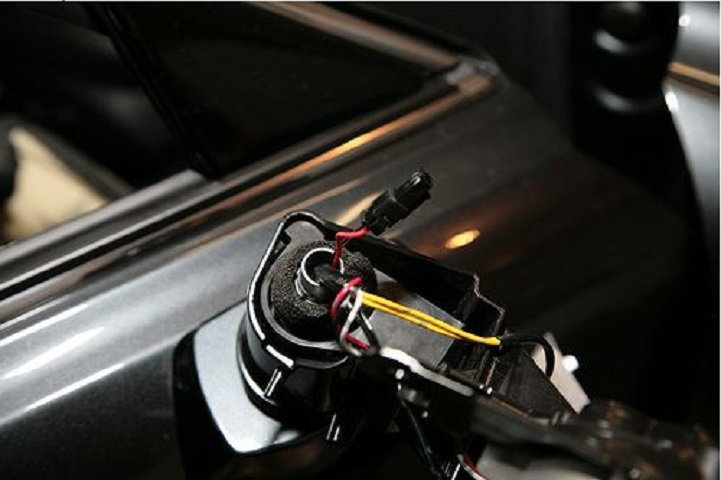
Step 9 - Remove side mirror
There are a few things to do before you can get the mirror off. The first thing is to remove the white piece of plastic that is behind the door panel on the frame directly under the mirror. Removing this will give you access to the three nuts that are holding the side mirror onto the door. Be very careful not to drop any of these nuts down into the door frame or you will then have to remove the speakers to get to them. Once those three nuts are removed, the mirror can come off.

Step 10 - Use coat hanger to thread wires
From the base of the mirror, use a straightened metal wire coat hanger to poke it up and out to the opening of the other end. Use electrical tape to secure the wires from the LED cover to the end of the hanger and pull it through. You will then pull the wires through the door frame and out the hole that you created when you removed that white plastic piece behind the door panel and directly under where the mirror is mounted.
Step 11 - Remount side mirror
Remount the side mirror back onto the door. Again, be careful with the nuts so you don't drop them down into the door frame.
Step 12 - Feed wires through door and into chassis
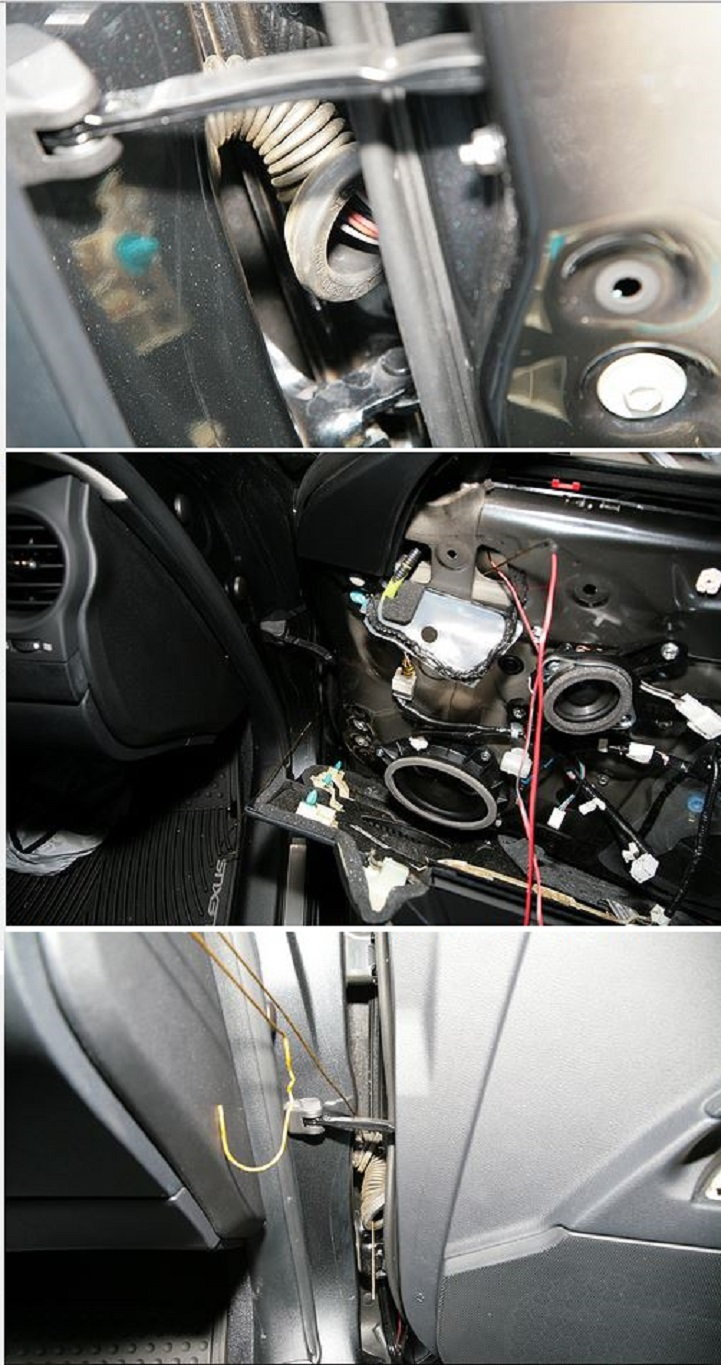
This is perhaps the most difficult part of this modification. The wires now need to be fed through the door frame and into the vehicle along the same path that all the existing wires take. The first part is to remove the rubber sleeve that protects those other wires that runs between the door and front fender. First, remove the tape and wire from the hanger first. Then, run the hanger up from the hole in the bottom fender through the hold in the front edge of the door and out the opening you created by removing the white piece of plastic. Now run the new wire along with the existing wires through the rubber hose. Poke the hanger through the rubber hose from the left side, tape the wire to the hanger, and pull it all the way through. Remove the tape and leave the wires hanging here.
Step 13 - Pull wires into the car
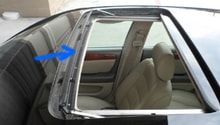
This is another tricky part of this mod. You'll first have to pop the plastic cover from underneath the glove box. There are four plastic clips holding it in place and they are not easy to pop. Again, be careful not to break these plastic clips. Once the panel is removed, reach in and find a hole in the fender well which should be just under the carpet line. Poke the hanger through that hole back to where you left the wires hanging in the last step. Tape the wire to the hanger and pull it all the way through the fender and to the inside. Replace the rubber hosing, wrapping it around all the wires.

Step 14 - Pull wires behind stereo
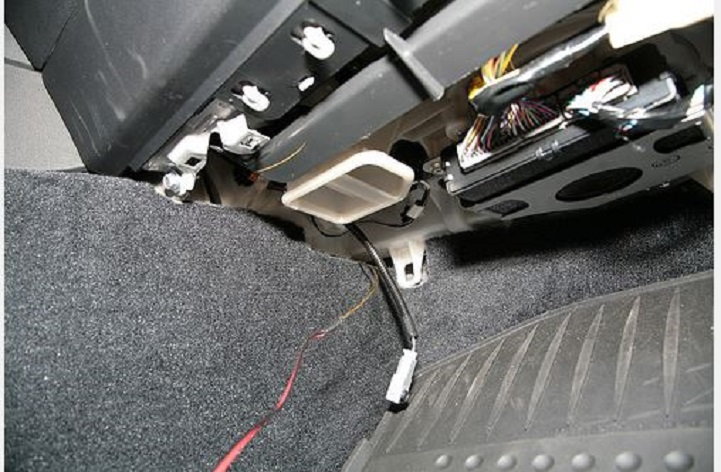
From the other side (assuming you started with the passenger side), find the hole in the front of the driver's side foot-well that is near the gas pedal. Feed the hanger through this hole and snake it to the passenger side to the hole where you left the wire hanging. Tape the wire back to the hanger and pull it through to the other side. Tuck the wire under the carpeting.
Step 15 - Repeat steps for other side and complete wiring
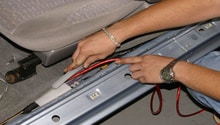
Repeat steps 1-14 for the other side door panel and mirror wiring so that both side mirror wires have ended up in the same place behind the gas pedal. You need to take the black wires from both the driver's and passenger side mirrors and ground them to anywhere on the metal where you can find and secure them. The driver's door sill needs to be popped open by pulling up on it. Inside, you'll find a medium-sized light green and a medium-sized red wire. The green is for the driver's side turn signal and the red is for the passenger side. For the driver's side mirror cover wiring, the non-ground wire will need to be spliced into the green; do the same for the passenger side mirror. Test the turn signals to make sure your wires aren't crossed. If the mirror covers are blinking correctly, bundle all the wires up, tape them, and re-connect the driver's sill plate. Put everything back together and you are done. Enjoy your sweet new mirror covers with LED lighting!

Featured Video: How to Install LED Turn Signal Mirrors in Lexus
Related Discussion
- DIY JDM LED Side Signal Mirror Covers - ClubLexus.com