Lexus ES RX: How to Replace Ignition Coils
Is your ES or RX running rough or has it lost its giddy-up-n-go? Does it have a lot of miles on it? Your coil modules may have gone to pasture, in which case it's time to replace them.
This article applies to the Lexus ES, RX (2006-2013).
Every Lexus needs three things to run: air, fuel, and spark. Each cylinder has a coil module that fits over each spark plug; there are six total. If one goes bad, the engine will run rough and throw codes. It's recommended to be proactive and replace them all if they start failing. If they've never been replaced, change out all of the spark plugs and the ignition coils for better mileage and performance. Be advised: half of them are a pain to access and work on.

Materials Needed
- 3/8" drive ratchet wrench and metric sockets
- 10mm wrench
- Decoder
- Small flat-bladed screwdriver
- Spark plug socket, socket wrench and extension bar (optional)
Replacing coils includes many of the same steps needed to change spark plugs. Consider this job an opportunity for a tune-up and to get better mileage and performance. If you're not comfortable removing parts from the engine to get access to the rear coils/plugs, take it to your trusted mechanic.
Step 1 - Hook up decoder and pull codes
Locate the port for the decoder under the steering wheel. Plug it in, start the vehicle, and let the decoder do its thing. Write down the code(s), then do an ODB search or contact someone who can tell you what they mean.

Pro Tip
If you don't have access to a decoder, visit your local auto parts store to find out if they can plug one in and read the codes for you.
Step 2 - Remove engine covers
Remove push pins holding plastic covers in place by prying them up between the pin and cover with a small flat-blade screwdriver. Then remove hex-head screws located around the perimeter of the engine cover with a wrench. Have a small dish nearby to put screws in. Grab sides and pull up and off.

Figure 2. Push pins are the little round "pimples" sticking up. All of them have to come off to gain access to the engine. 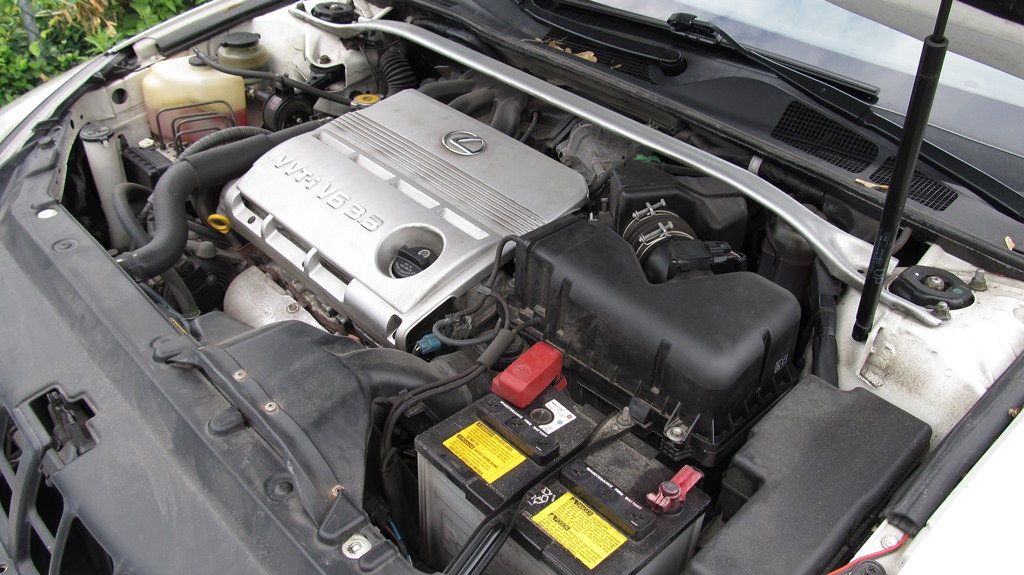
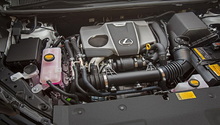
Figure 3. The RX is mounted sideways, with one cylinder bank buried under the cowl plenum.
Pro Tip
Clean dirty panels with soap and water. Wipe them down with a good vinyl/plastic protectant before re-installing.
Step 3 - Determine which coil needs to be replaced
The decoder may have identified which coil was bad. If not, remove wiring connectors from one coil at a time; pinch/push down on clip and pull out. If the engine changes speed or runs rougher, re-install the connector and go to next coil, continuing until you pull the plug and nothing changes.
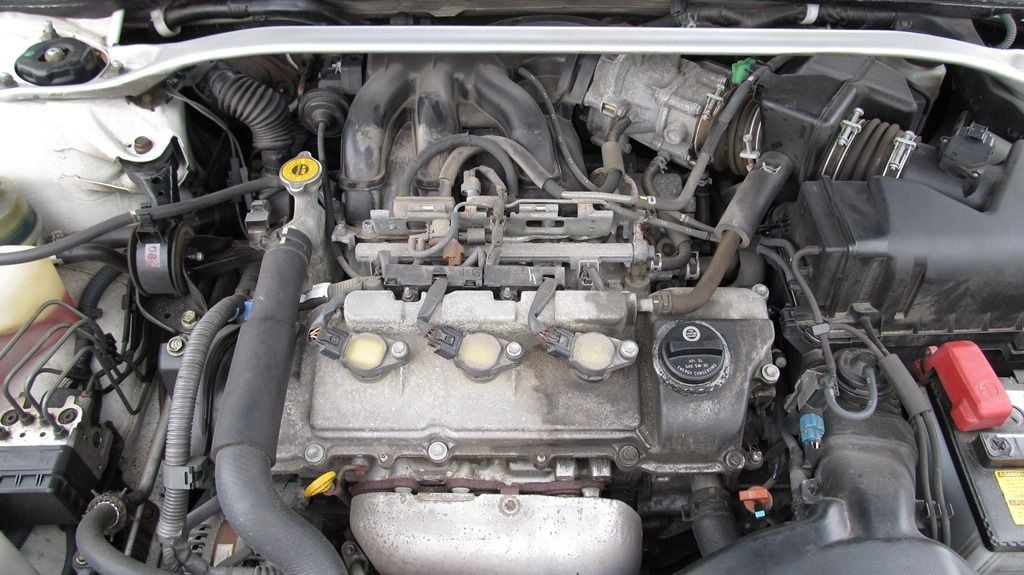
Figure 4. Lexus RX Engine bay. The front coils are easily accessible. 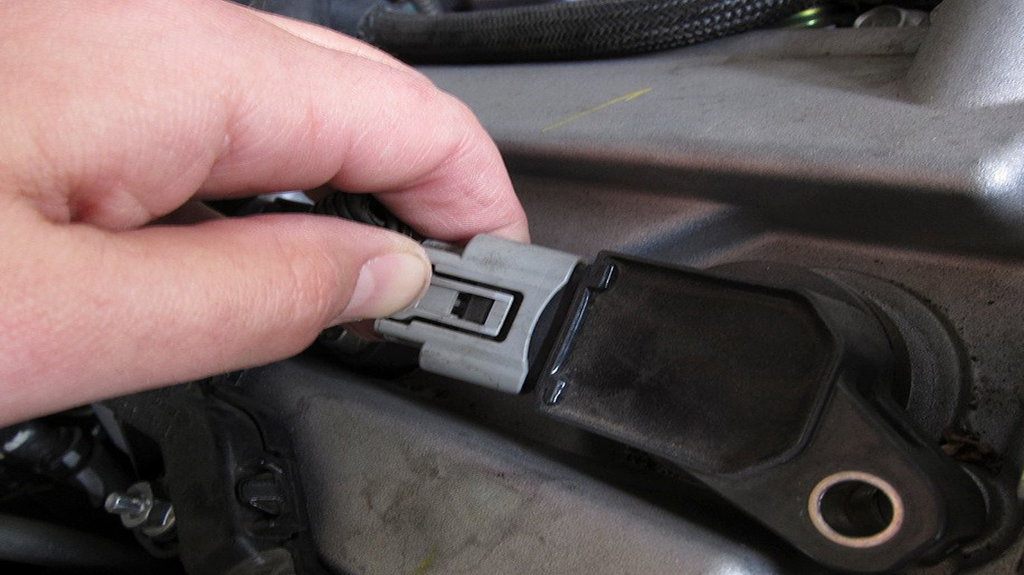
Figure 5. Pull wiring connector off of coil while engine is running; if nothing happens, the coil is bad.
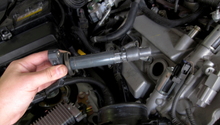
Step 4 - Remove front coils
If you have the replace one of the front coils, access should be easy. Rear coils may require removing manifolds and shielding. Unplug connector. Remove retaining bolt with 10mm wrench. Grab coil body and twist/pull up.

Figure 6. Remove 10mm nuts holding wiring harness in place. 
Figure 7. Remove 10mm screw holding coil in place. 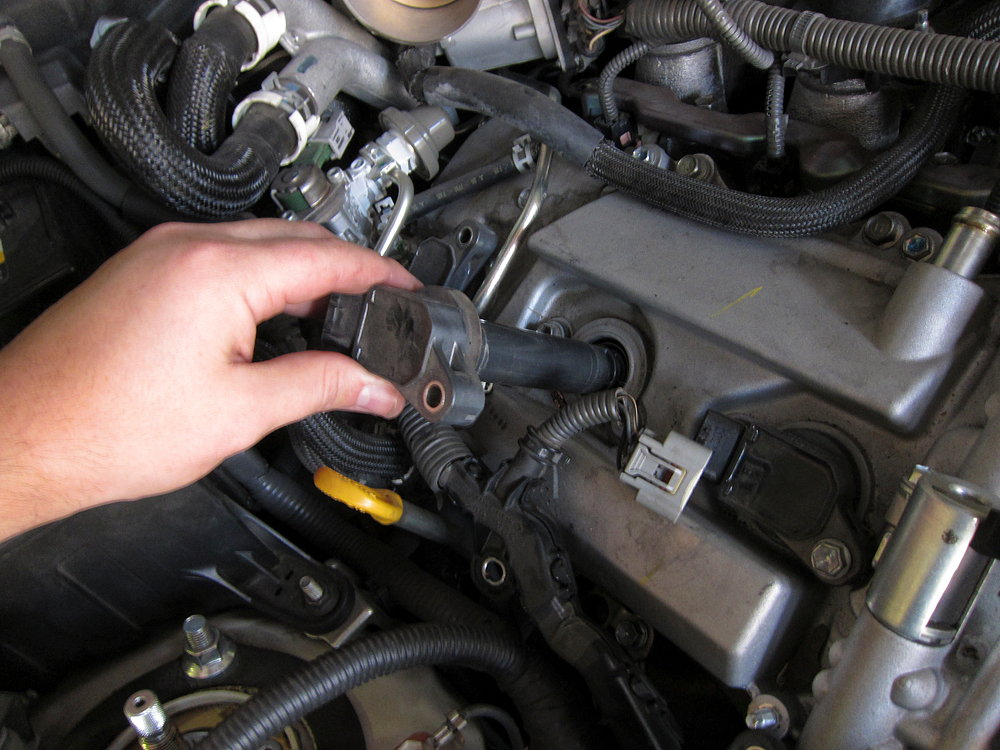
Figure 8. Grab coil, pull up and out.
Pro Tip
Take pictures before and during disassembly at each step so you can see how it all went together. If you're not comfortable getting to the rear coils under the manifold, spend the money and have a mechanic do it.
Step 5 - Remove miscellaneous hoses
Removing the rear coils is more of a process. They're buried beneath a tangle of hoses and connectors. Begin by disconnecting the lines and clips highlighted in Figure 9 below. It's recommended to remove the top of the air intake, too.
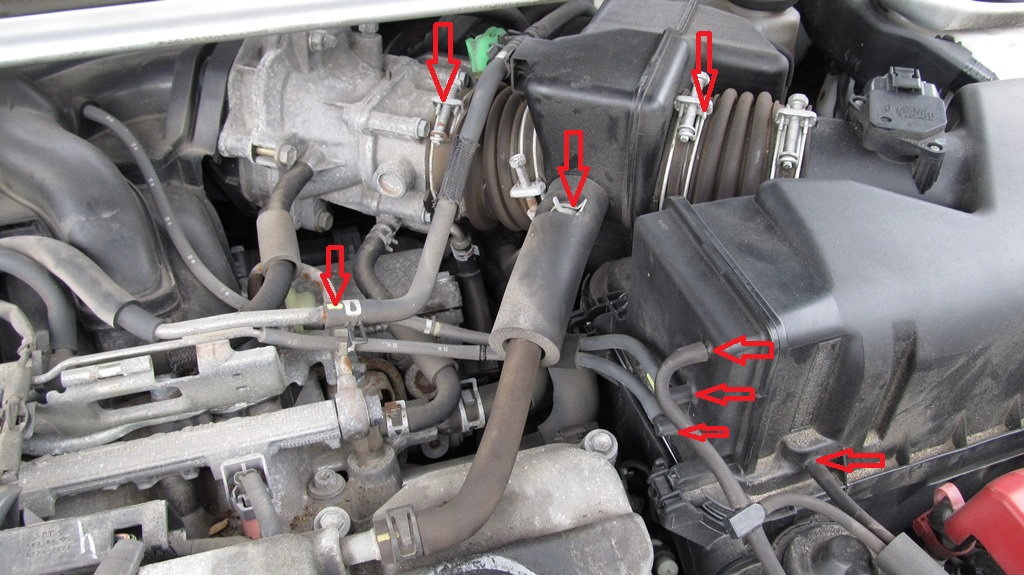
Figure 9. Disconnect these hoses and connectors. 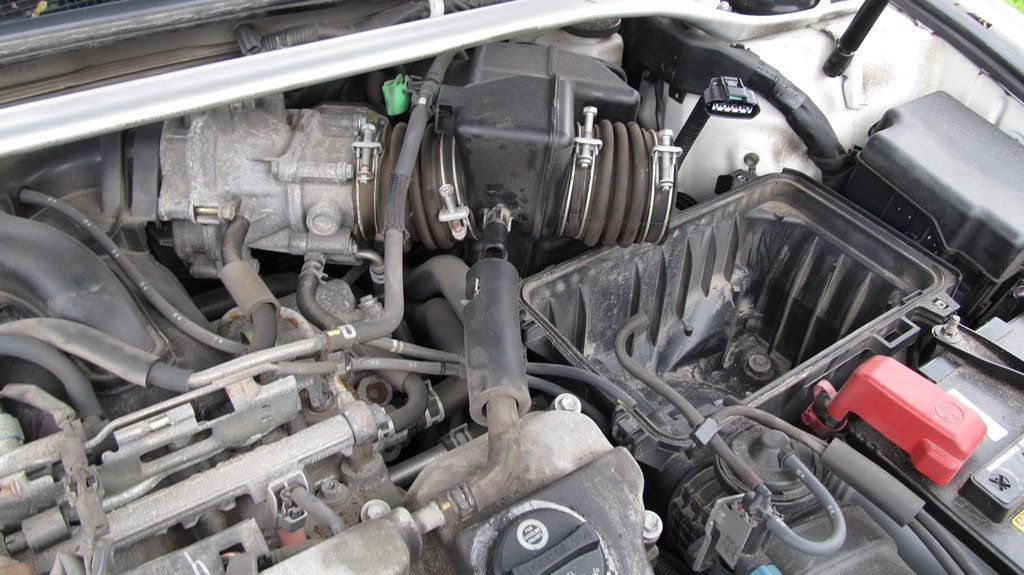
Figure 10. Hoses disconnected with filter removed.
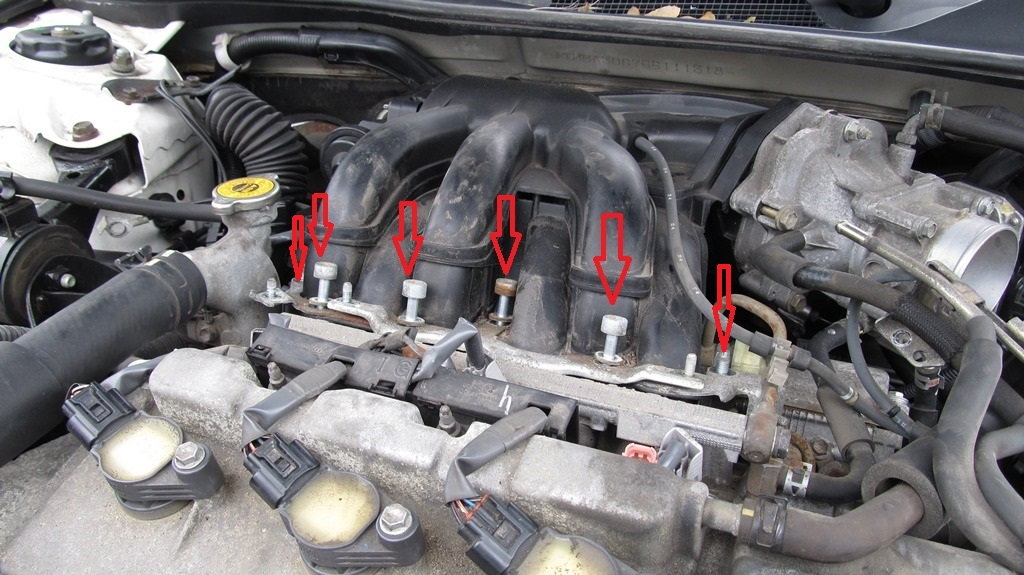
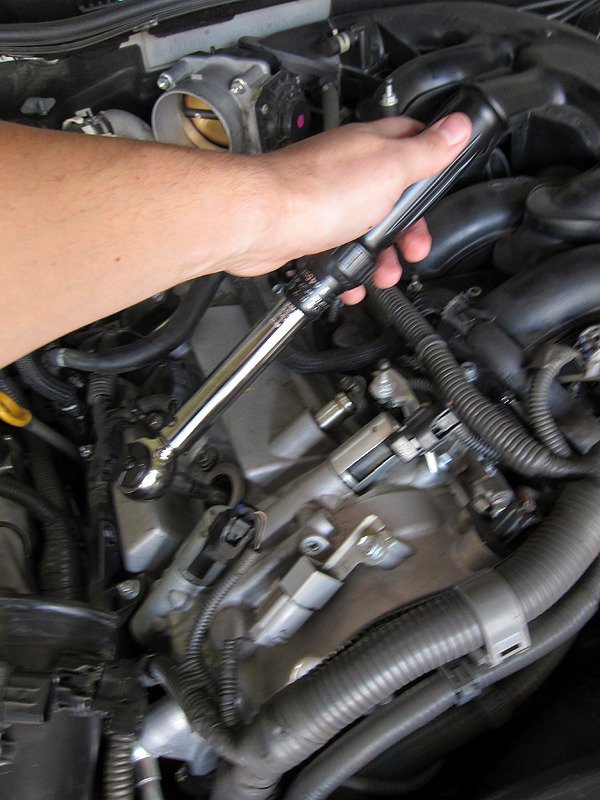
Step 6 - Disconnect intake plenum
First, remove the electrical connectors from the rear fuel rail. Then remove the bolts securing the intake plenum to the motor. There should be two 14mm nuts and four 8mm hex bolts.
Three more bolts secure the intake plenum along the firewall. Getting to these bolts can be tricky because they're in a cramped location, but it's much easier with a flat flex head wrench. There's one 14mm bolt on the passenger side and another two 12mm bolts on the driver's side.

Figure 12. Remove this 14mm bolt on the passenger side. 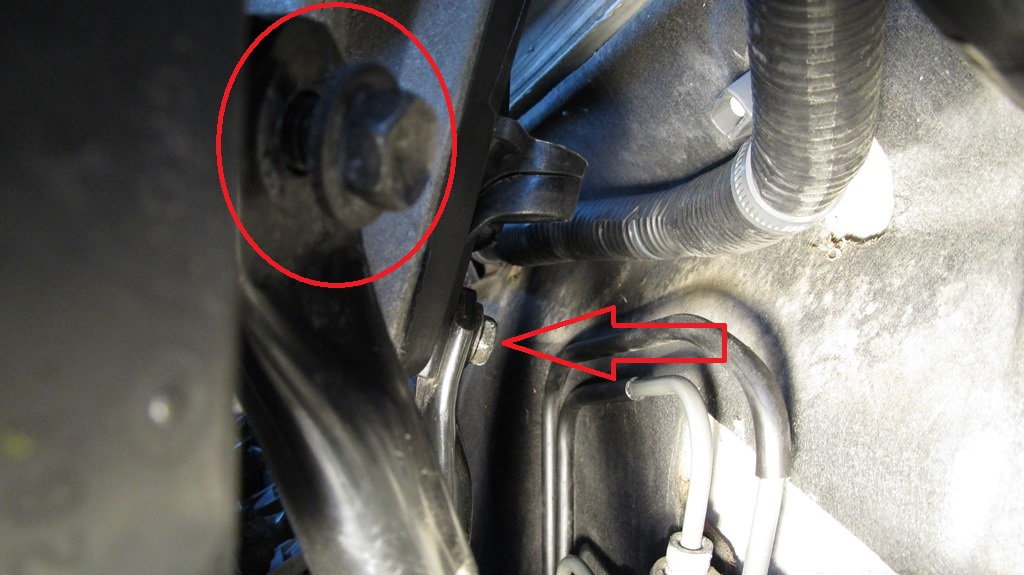
Figure 13. Remove these two 12mm bolts.
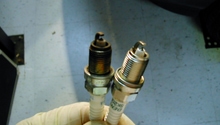
Step 7 - Replace spark plugs (optional)
Assuming they've never been replaced, use a deep-well spark plug socket, extension, and socket wrench in this step. To remove them, you'll need a 5/8" spark plug socket, a 6" extension, and a 3/8" drive ratchet.

Figure 14. Removal of coil. 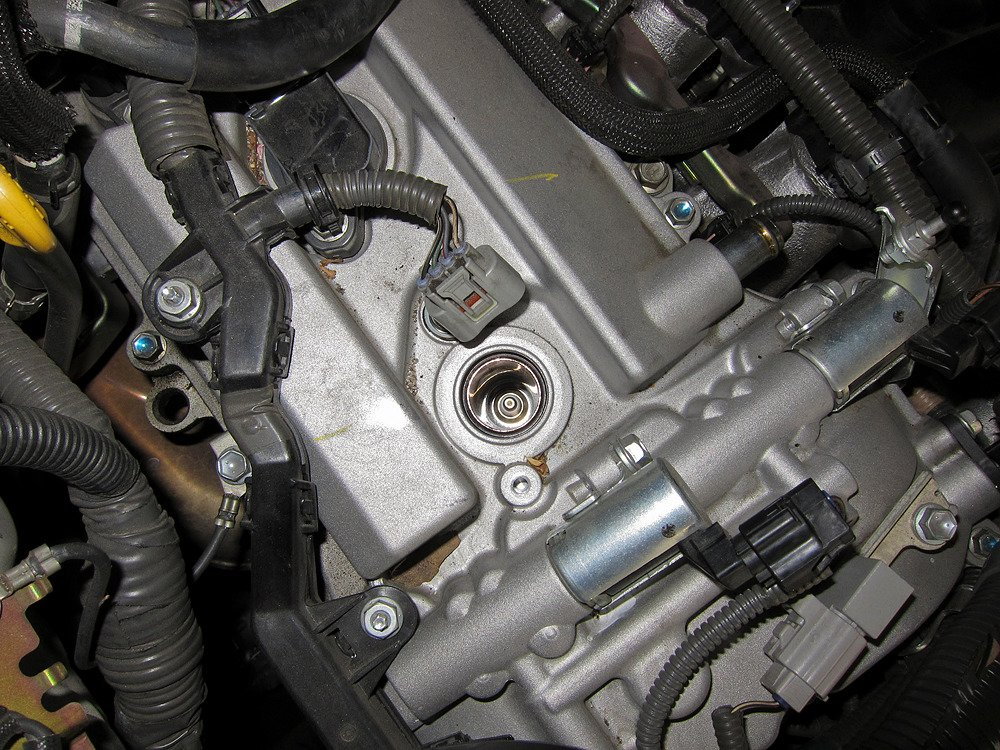
Figure 15. With coil removed, spark plug is now accessible.
Gap the new plug to specs, place in socket, and screw it into the engine, torquing down to 25 N*m (254 kgf*cm or 18 ft*lbf).
Pro Tip
Place a little bit of motor oil on the plug threads before installing. If you use anti-seize compound on the threads, apply it sparingly and keep away from the plug's electrode and lower threads. If it gets on the electrode, it will shorten the life of the plug considerably.
Step 8 - Install new coil
Push new coil over top of spark plug to seat it. Then re-install the 10mm retaining bolt and wiring plug.
Pro Tip
If one coil has gone bad, the rest are probably not too far behind. Replace all coils at the same time for peace of mind and as preventative maintenance practice. A small dab of dielectric grease on top of the plug and on electrical connections will help keep corrosion to a minimum.
Step 9 - Reassemble engine components
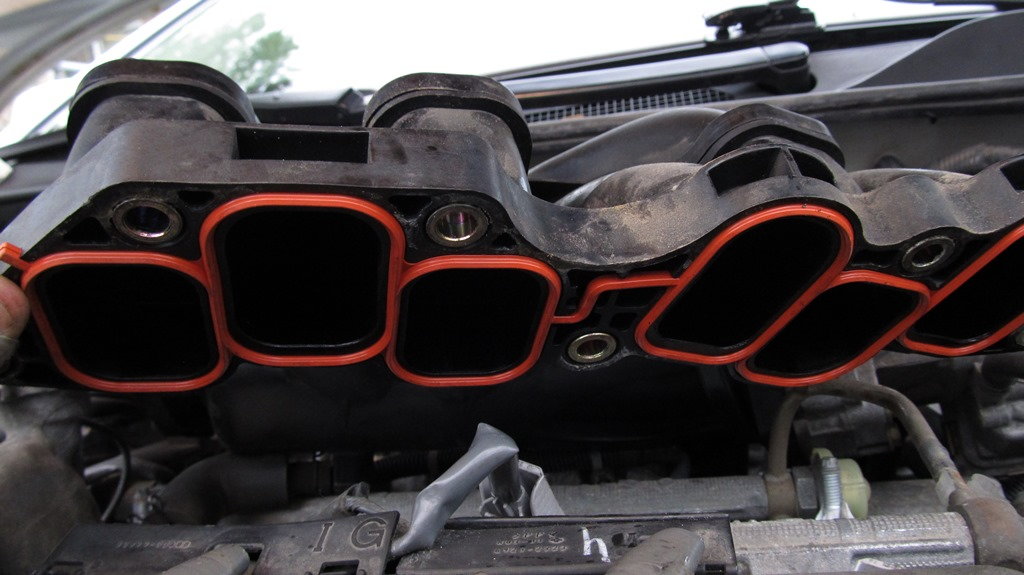
Reverse your steps to re-install harnesses and shields. Be sure to replace the intake plenum gasket with a new one. If you had to remove shields and other parts on the rear bank of cylinders, re-install them before starting the engine.
Step 10 - Test drive and re-install engine covers
Start the engine, let it run for a minute or more and look to see if the Check Engine Light (CEL) on the dash lights up. If it runs better than before you started, take it for a short drive to test it under load (acceleration, sustained speed, etc.). If it all works fine, go back home, put the engine covers back on, and call it a day.
Related Discussions
- ES/RX Spark Plug Install - ClubLexus.com
- Common Ignition Coil Malfunction/Misfire Symptoms - - ClubLexus.com
- Other Ignition Coil Failure Symptoms - ClubLexus.com
- Common DTCs for Ignition Coil Faiure are P0351-6 - ClubLexus.com
- DIY: IS350 Spark Plug Service - ClubLexus.com