


D.I.Y. clearing out '92 Tail lights


Thread Starter
Lead Lap
Joined: May 2001
Posts: 404
Likes: 3
From: Hawaii
 D.I.Y. clearing out '92 Tail lights
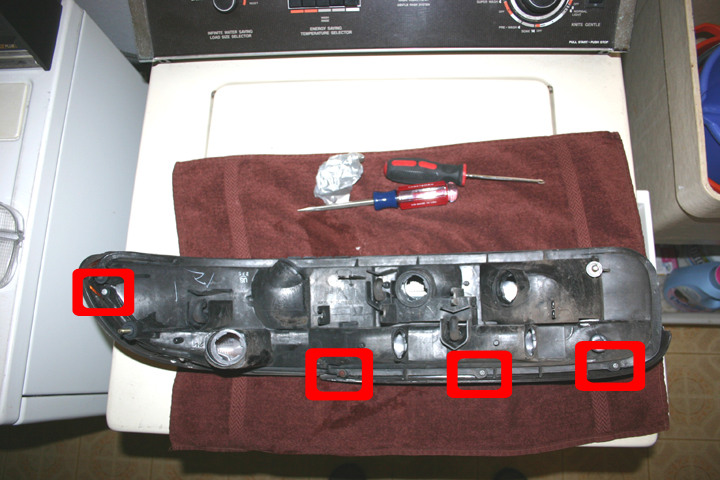
Step 1.
Remove wire harness and (4) screws in the back (red squares)
Step 2.
Remove foam pad
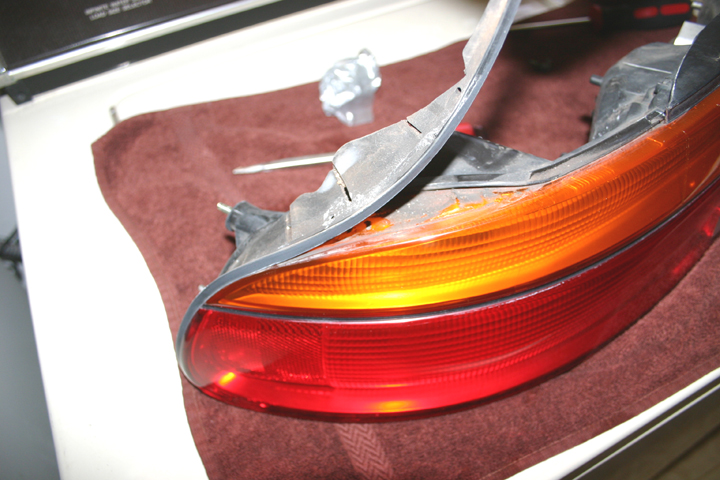

Step 3.
Place taillights in oven for 5-6 minutes at 300 degrees (place newspaper under taillight… the rack gets very hot and it’ll melt anything it touches)
Separate the Taillights very carefully, I used a screwdriver to pry it.

Step 4.
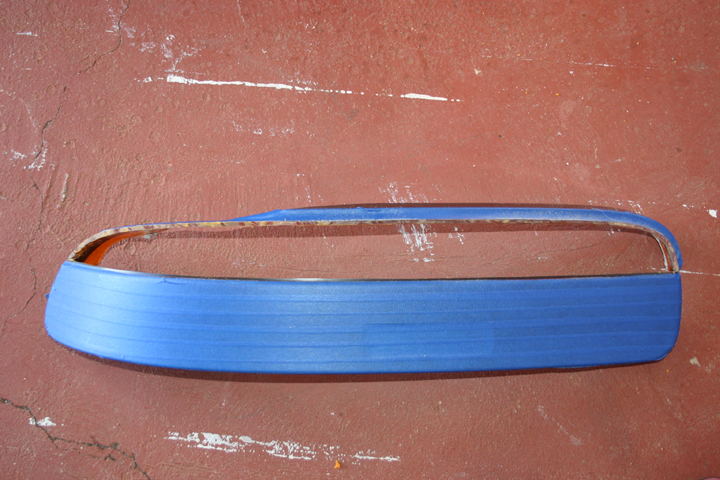
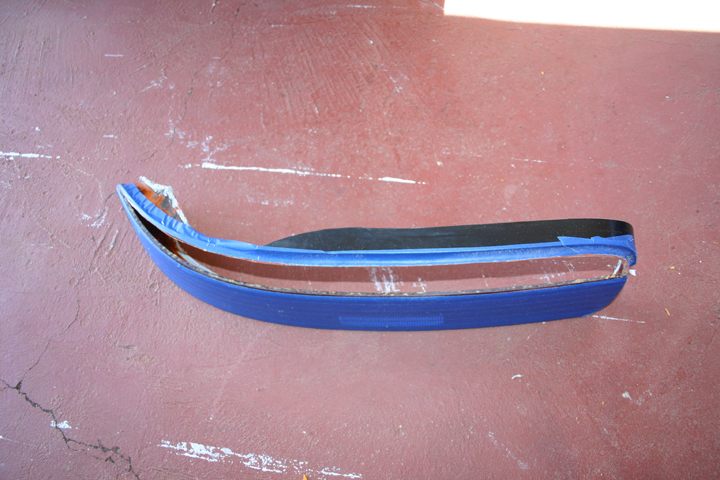
We’ll be working on the outer lens (orange and red) Mask the sections with painters tape which you don’t want to remove.
Dremel out the orange section. Cut out only where it bends (look at the photo)
Sand edges with 80 grit sand paper
Step 5.
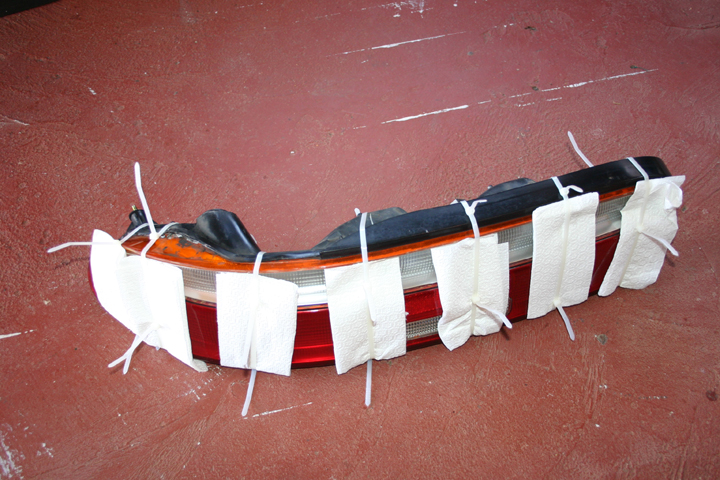
Reassemble the whole taillight and place it in the oven for 5-6 mins at 300 degrees, when glue is heated, ziptie the whole taillight together.
Let taillight set for 24 hours. Then remove zipties.
Step 6.
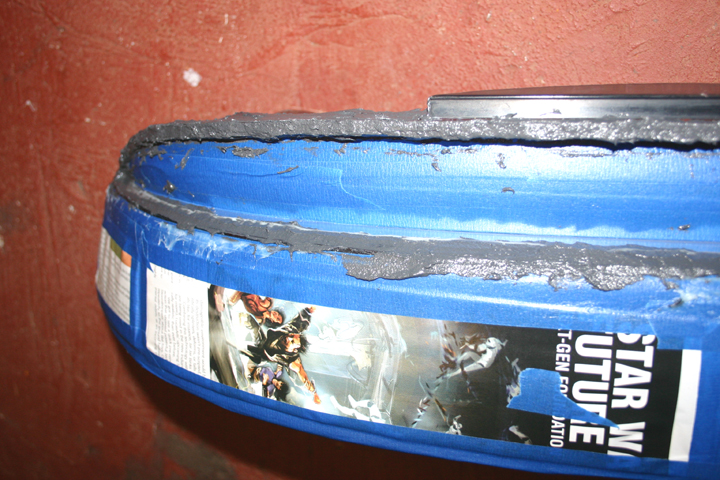
Mask area with painters tape to protect the area of the lens that you don’t want to cover with the epoxy.
I used (3) types of sealants
(1) Devcon Plastic Welder
(2) PC-7 Epoxy
(3) Bondo Filler
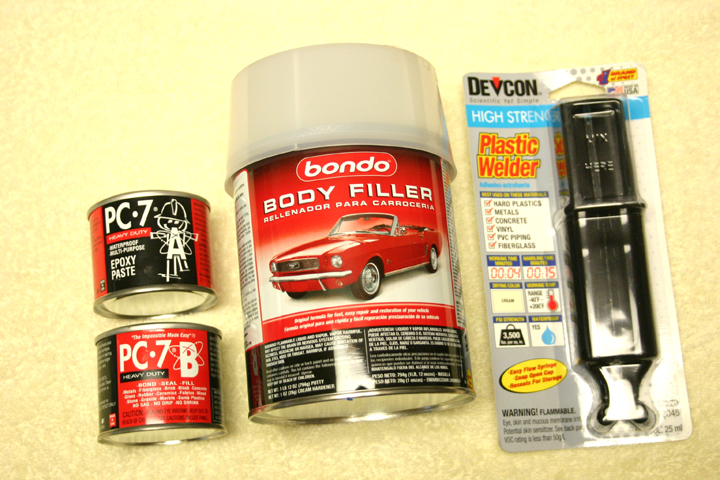
(1) Mix Devcon Plastic Welder and spread as needed (working time is only 4 min)
(2) Mix PC-7 and spread as needed (I use this to cover the most) don’t be afraid to use a lot because we’ll be sanding it down in the next step.
Let Plastic Weld and PC-7 Set for 24 hours.

Remove wire harness and (4) screws in the back (red squares)
Step 2.
Remove foam pad
Step 3.
Place taillights in oven for 5-6 minutes at 300 degrees (place newspaper under taillight… the rack gets very hot and it’ll melt anything it touches)
Separate the Taillights very carefully, I used a screwdriver to pry it.
Step 4.
We’ll be working on the outer lens (orange and red) Mask the sections with painters tape which you don’t want to remove.
Dremel out the orange section. Cut out only where it bends (look at the photo)
Sand edges with 80 grit sand paper
Step 5.
Reassemble the whole taillight and place it in the oven for 5-6 mins at 300 degrees, when glue is heated, ziptie the whole taillight together.
Let taillight set for 24 hours. Then remove zipties.
Step 6.
Mask area with painters tape to protect the area of the lens that you don’t want to cover with the epoxy.
I used (3) types of sealants
(1) Devcon Plastic Welder
(2) PC-7 Epoxy
(3) Bondo Filler
(1) Mix Devcon Plastic Welder and spread as needed (working time is only 4 min)
(2) Mix PC-7 and spread as needed (I use this to cover the most) don’t be afraid to use a lot because we’ll be sanding it down in the next step.
Let Plastic Weld and PC-7 Set for 24 hours.
Thread Starter
Lead Lap
Joined: May 2001
Posts: 404
Likes: 3
From: Hawaii
Step 7.
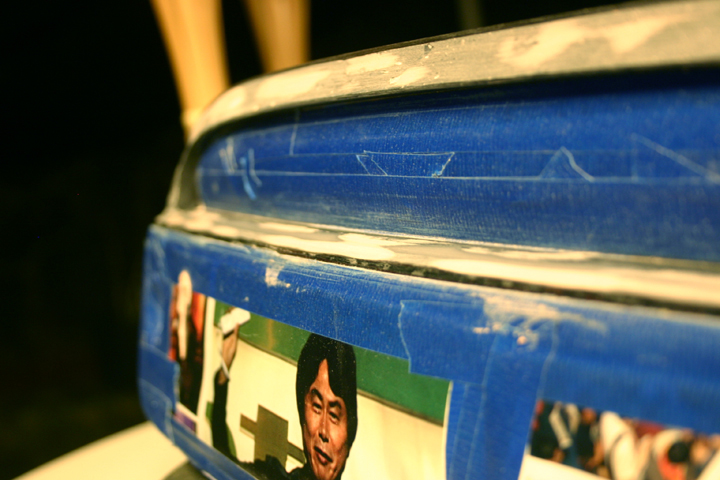
Sand and shape with 80 grit paper, I used a palm sander, dremel (for corners and details), then hand sand with 200 grit paper.
Mix Bondo Filler and spread to fill in cracks (working time is only 3 mins)
Sand with 200 grit until smooth.
Step 8.
Clean lens of all dust.
Paint sanded areas black. I used Krylon Plastic Paint
Let paint dry for 24 hours.
Remove upper masked area (painters tape)
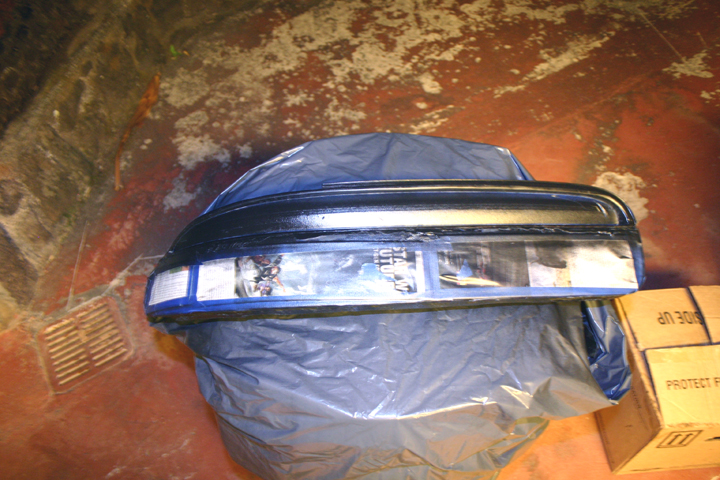
Step 9.
Place the plexiglass over the taillight and heat the plexiglass with a heating gun to mold it into the shape.
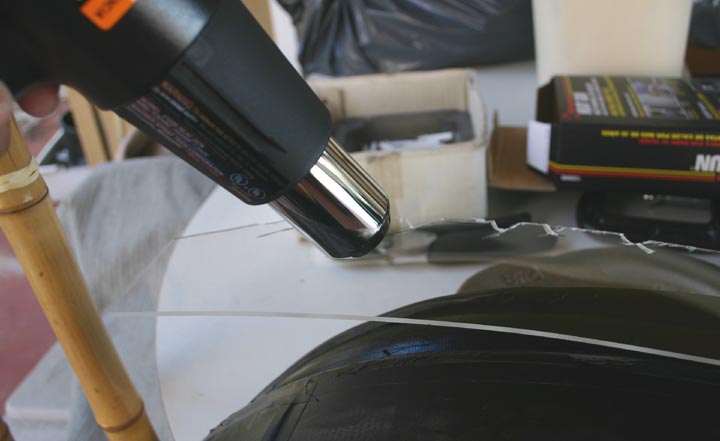
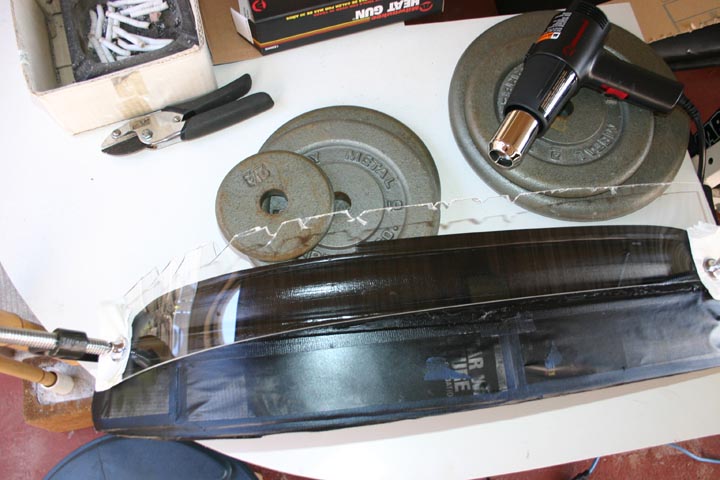
Step 10.
Place the plexiglass over taillight, Mask the plexiglass and use a dremel to cut out the shape that is needed.
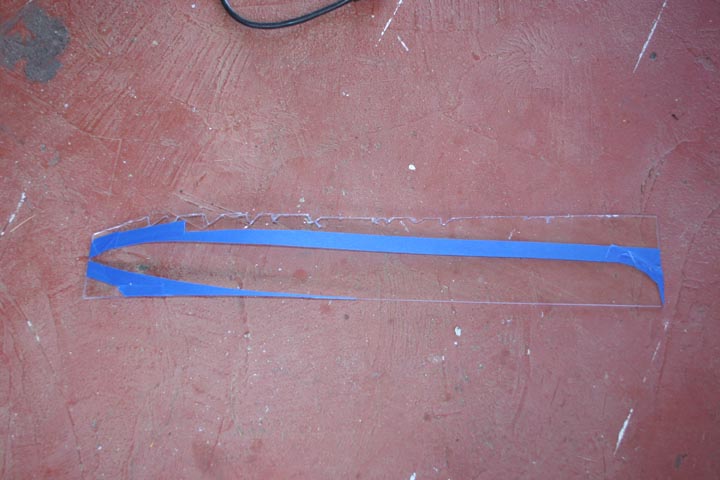
Step 11.
Mask area with painters tape to protect the area of the lens that you don’t want to epoxy.
Mix Devcon Plastic Welder and spread as needed (working time is only 4 min)
Mix PC-7 and spread as needed (I use this to cover the most) don’t be afraid to use a lot because we’ll be sanding it down in the next step.
(Let Plastic Weld and PC-7 Set for 24 hours.)
Step 12.
Sand and shape with 80 grit paper, I used a palm sander, dremel (for corners and details), then hand sand with 200 grit paper.
Step 13.
Mix Bondo Filler and spread to fill in cracks (working time is only 3 mins)
Sand with 200 grit until smooth.
Step 14.
Clean lens of all dust.
Paint sanded areas black. I used Krylon Plastic Paint
Sand and shape with 80 grit paper, I used a palm sander, dremel (for corners and details), then hand sand with 200 grit paper.
Mix Bondo Filler and spread to fill in cracks (working time is only 3 mins)
Sand with 200 grit until smooth.
Step 8.
Clean lens of all dust.
Paint sanded areas black. I used Krylon Plastic Paint
Let paint dry for 24 hours.
Remove upper masked area (painters tape)
Step 9.
Place the plexiglass over the taillight and heat the plexiglass with a heating gun to mold it into the shape.
Step 10.
Place the plexiglass over taillight, Mask the plexiglass and use a dremel to cut out the shape that is needed.
Step 11.
Mask area with painters tape to protect the area of the lens that you don’t want to epoxy.
Mix Devcon Plastic Welder and spread as needed (working time is only 4 min)
Mix PC-7 and spread as needed (I use this to cover the most) don’t be afraid to use a lot because we’ll be sanding it down in the next step.
(Let Plastic Weld and PC-7 Set for 24 hours.)
Step 12.
Sand and shape with 80 grit paper, I used a palm sander, dremel (for corners and details), then hand sand with 200 grit paper.
Step 13.
Mix Bondo Filler and spread to fill in cracks (working time is only 3 mins)
Sand with 200 grit until smooth.
Step 14.
Clean lens of all dust.
Paint sanded areas black. I used Krylon Plastic Paint
Thread Starter
Lead Lap
Joined: May 2001
Posts: 404
Likes: 3
From: Hawaii
FINISHED RESULTS.
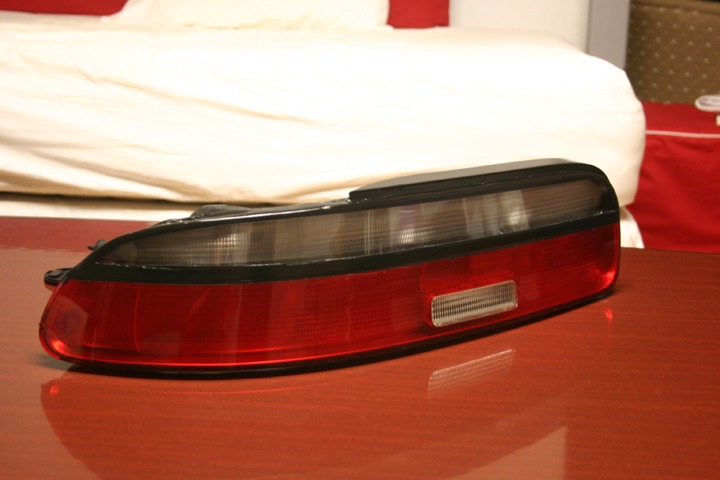
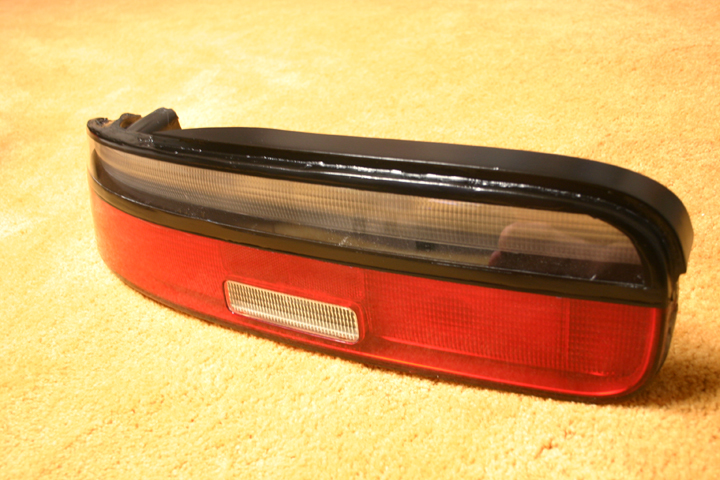


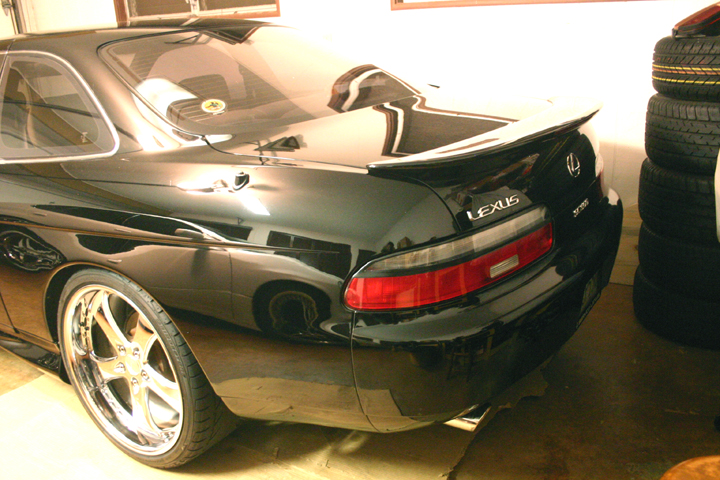
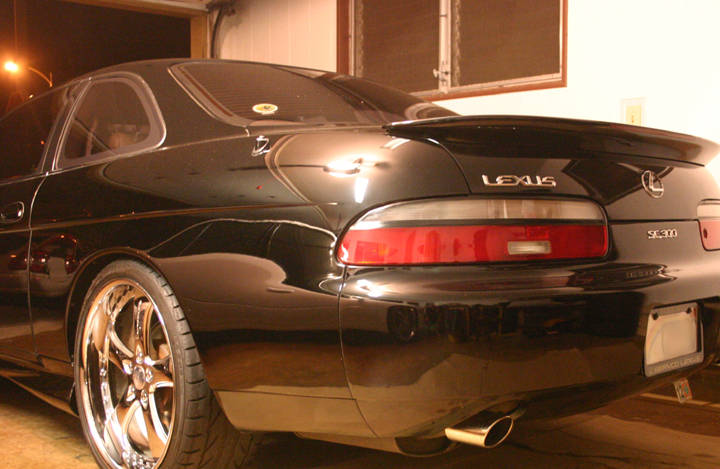
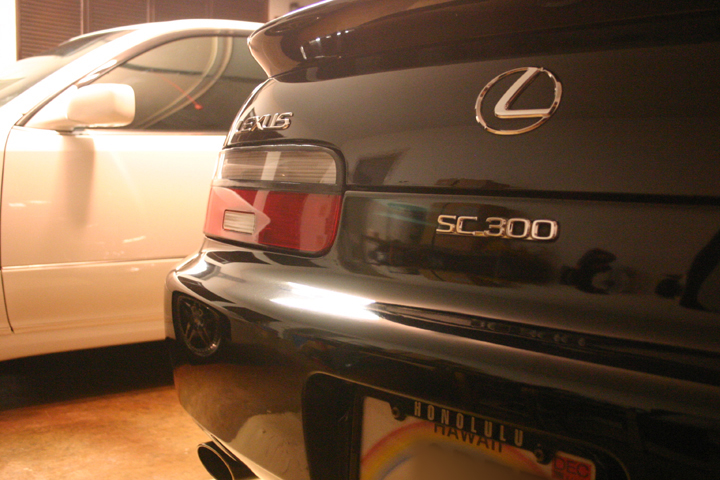
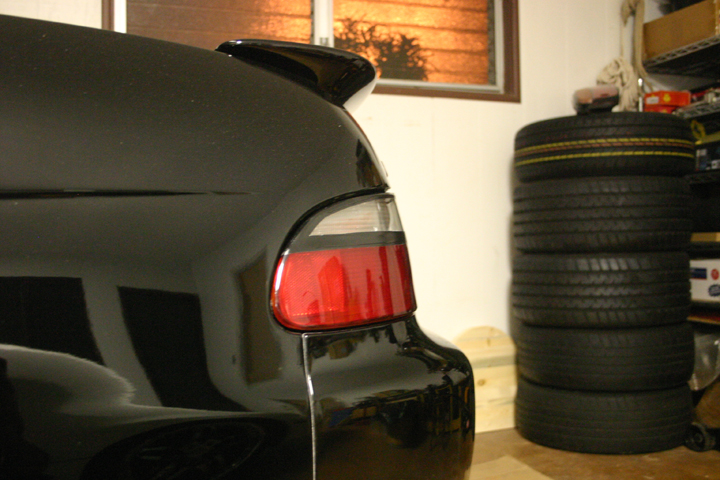
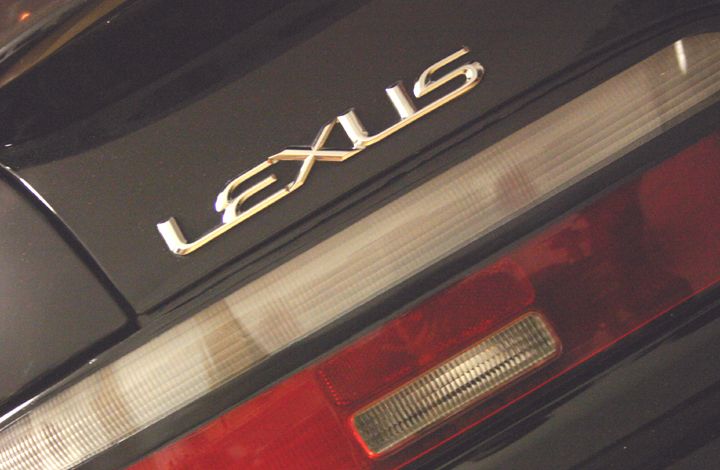
This was my first shot at it, so I’ll be cleaning it up alittle, still not where I want it but you get the idea. I think that the black border around the clear is to thick and it needs to be smoothed out more.
Good Luck and I’m glad I can contribute to Club Lexus , after it’s done for me, it’s the least I could do!
Thanks,
tann
This was my first shot at it, so I’ll be cleaning it up alittle, still not where I want it but you get the idea. I think that the black border around the clear is to thick and it needs to be smoothed out more.
Good Luck and I’m glad I can contribute to Club Lexus , after it’s done for me, it’s the least I could do!
Thanks,
tann
Last edited by Sc400on20s; Jul 25, 2006 at 03:55 PM.


Trending Topics


Lexus Champion
Joined: Aug 2003
Posts: 3,255
Likes: 2
From: Maryland
OH MY GOD!!! 


 that is amazing. some here will nitpick at the minor details, but i think you did an amazing job. deffinatley the best DIY write up on CL. i would never have thought of this. i think i may snag a spare set of 93 tails if i cant find my stock ones and see what i can do. i love me red/clear 95s, but the lenses are cracked, so this may be a fun little project. thanks for the in depth write up.
that is amazing. some here will nitpick at the minor details, but i think you did an amazing job. deffinatley the best DIY write up on CL. i would never have thought of this. i think i may snag a spare set of 93 tails if i cant find my stock ones and see what i can do. i love me red/clear 95s, but the lenses are cracked, so this may be a fun little project. thanks for the in depth write up.



Great job dude. I did this last year, but I did not like the fact it still ended up looking like a DIY job so I never posted pics. I think you did it cleaner than I did though because after I figured it would never look factory I gave up and got sloppy. LOL. 
I'd definitely make the black lines as small as possible. Also, use the plastic weld to try and mold around the bottom of the plexi to smooth it into the case better. I think the black lines are the only thing messing up the look right now.
KILLER job, and great effort. Looks excellent.
I'd definitely make the black lines as small as possible. Also, use the plastic weld to try and mold around the bottom of the plexi to smooth it into the case better. I think the black lines are the only thing messing up the look right now.
KILLER job, and great effort.
Looks excellent.


Lexus Champion
Joined: Jan 2004
Posts: 2,068
Likes: 1
From: California
Nice job, man.
It's very hard to do something on this forum that hasn't been done before and you've definitely
done a great write up for the rest of us who might want to try it.
Looks like a mountain of work and time. GALLL DARN! You've taken custom tail lights to another
level. Overall, the tail lights look great. I would agree with OLT that the black line between the
clear and red would look better if it were narrower.
Excellent work.
It's very hard to do something on this forum that hasn't been done before and you've definitely
done a great write up for the rest of us who might want to try it.
Looks like a mountain of work and time. GALLL DARN! You've taken custom tail lights to another
level. Overall, the tail lights look great. I would agree with OLT that the black line between the
clear and red would look better if it were narrower.
Excellent work.


