
CAD File Sharing

The STEP file is a more generic 3D output file that can be opened by lots of different viewers. It's the format that lots of shops will accept for CNC'ing.
The SLDPRT is the SolidWorks Part file. It's the actual part / model that was created in SolidWorks.
About the best analogy I can think of is it's like creating a document in MS Word (.doc). That's the actual file you created, 100% editable (so think of that as the .SLDPRT). But you might send it somewhere to folks that haven't paid for, or don't have, MS Word. So you save it as a PDF because everyone can view a PDF ((think of that as the .STEP). You may not be able to (or minnimally) edit a PDF, but it's a more generic format that anyone can see with free viewing software.


I haven't used any CAD software since learning on the early days of AutoCAD. Man that was a bear of a program to get the hang of. It didn't help that the engineering lab was riddled with viruses and saved files kept reverting to random versions.
Here are some alternatives to SolidWorks that may be worth trying:
http://opensourceecology.org/wiki/List_of_CAD_Programs
Edit: FreeCAD looked worth a shot, for features and active development. I tried it out on the gauge panel and it handles the SolidWorks file just fine, although I haven't toyed with editing mode yet.
Last edited by t2d2; Jan 31, 2017 at 08:45 AM.

Rookie

Joined: Nov 2013
Posts: 63
Likes: 5
From: Alabama
I haven't used any CAD software since learning on the early days of AutoCAD. Man that was a bear of a program to get the hang of. It didn't help that the engineering lab was riddled with viruses and saved files kept reverting to random versions.
Here are some alternatives to SolidWorks that may be worth trying:
http://opensourceecology.org/wiki/List_of_CAD_Programs
Edit: FreeCAD looked worth a shot, for features and active development. I tried it out on the gauge panel and it handles the SolidWorks file just fine, although I haven't toyed with editing mode yet.
Here are some alternatives to SolidWorks that may be worth trying:
http://opensourceecology.org/wiki/List_of_CAD_Programs
Edit: FreeCAD looked worth a shot, for features and active development. I tried it out on the gauge panel and it handles the SolidWorks file just fine, although I haven't toyed with editing mode yet.


Thank you for clearing up the basics of these files, Halon and MLeopard!
This is exciting stuff still in the early stages for most hobbyists.
I came across this article the other day which I feel is a good indication of where things in this area are going for us. Maybe not quite as elaborate as the most expensive process described but certainly this is a spectrum of technologies and expertise we're getting involved with:
http://www.popularmechanics.com/cars...-car-15566080/
The mounting lugs in my original model were really larger than necessary so I've cut them down in the reworked models. Also, some may want to note that the factory mounting screws are M5s.
Part appearances are rarely something I deal with so it could very well be originating with me.
Y'all have me working now haha. I messed around with my models some more this morning. So now there's a 2 guage version, 3 guage version (VDO Vision guages), blank panel version and a cubby version. Note that the cubby version is two pieces, frame and the cubby. I have all the files here: https://drive.google.com/open?id=0B1...EpYUXNYUmRCTVk
If you open the main SC_gauge_panel.SLDPRT I have the various versions as different configurations of the part.
I have to take some final measurements, but I think I'm going to be having this made. I'll have to remove/sell my double din stereo now haha, but it's all good. I'll go single din stereo. And then this will be a perfect clean way to mount my single AEM CanBus gauge, and my two AEM 12pos switches for boost & traction control. Thanks again man!!
Last edited by Halon; Feb 3, 2017 at 08:07 AM.


Rookie
Joined: Nov 2013
Posts: 63
Likes: 5
From: Alabama
This should be the correct link. https://drive.google.com/drive/folde...UNwdkdCUVJ5azg
I'll go back and fix the other link too.
I have to take some final measurements, but I think I'm going to be having this made. I'll have to remove/sell my double din stereo now haha, but it's all good. I'll go single din stereo. And then this will be a perfect clean way to mount my single AEM CanBus gauge, and my two AEM 12pos switches for boost & traction control. Thanks again man!!
Rookie
Joined: Nov 2013
Posts: 63
Likes: 5
From: Alabama
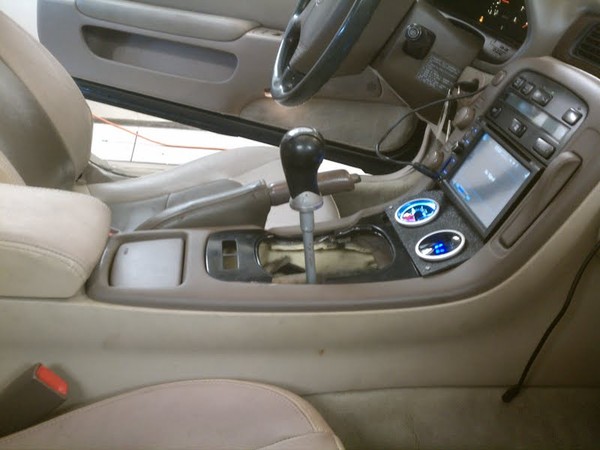
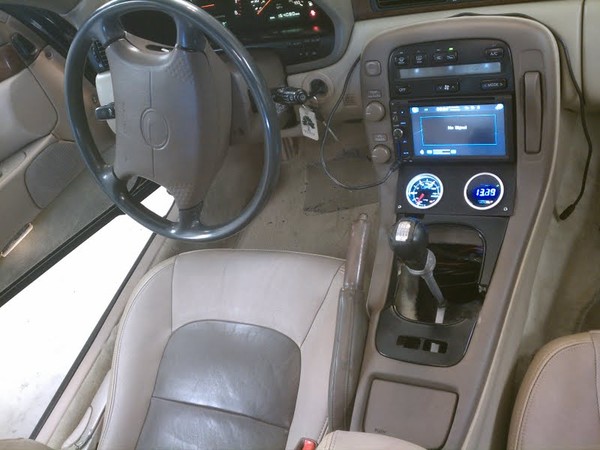
Ali, took your advice on putting the gauge in the middle. Here is my 'final' design as of right now (still need to double check a couple measurements on my BTI can-gauge). Gauge in the middle, and my 2 AEM switches on either side. I sent the file off to my buddy who has a 3D printer. Will see if he can do it, and if so I'm totally having him make one. Now I need to go shop for a new single din head unit, lol.
2JZGE (SC300) DISTRIBUTOR COVER
**UPDATED TO REVISION C**
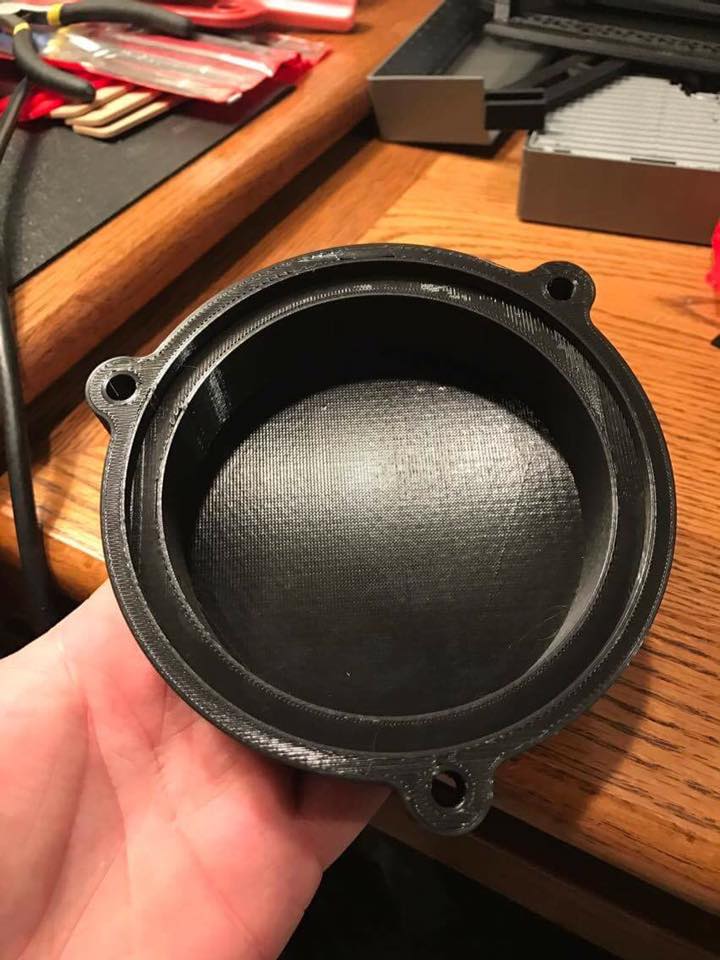
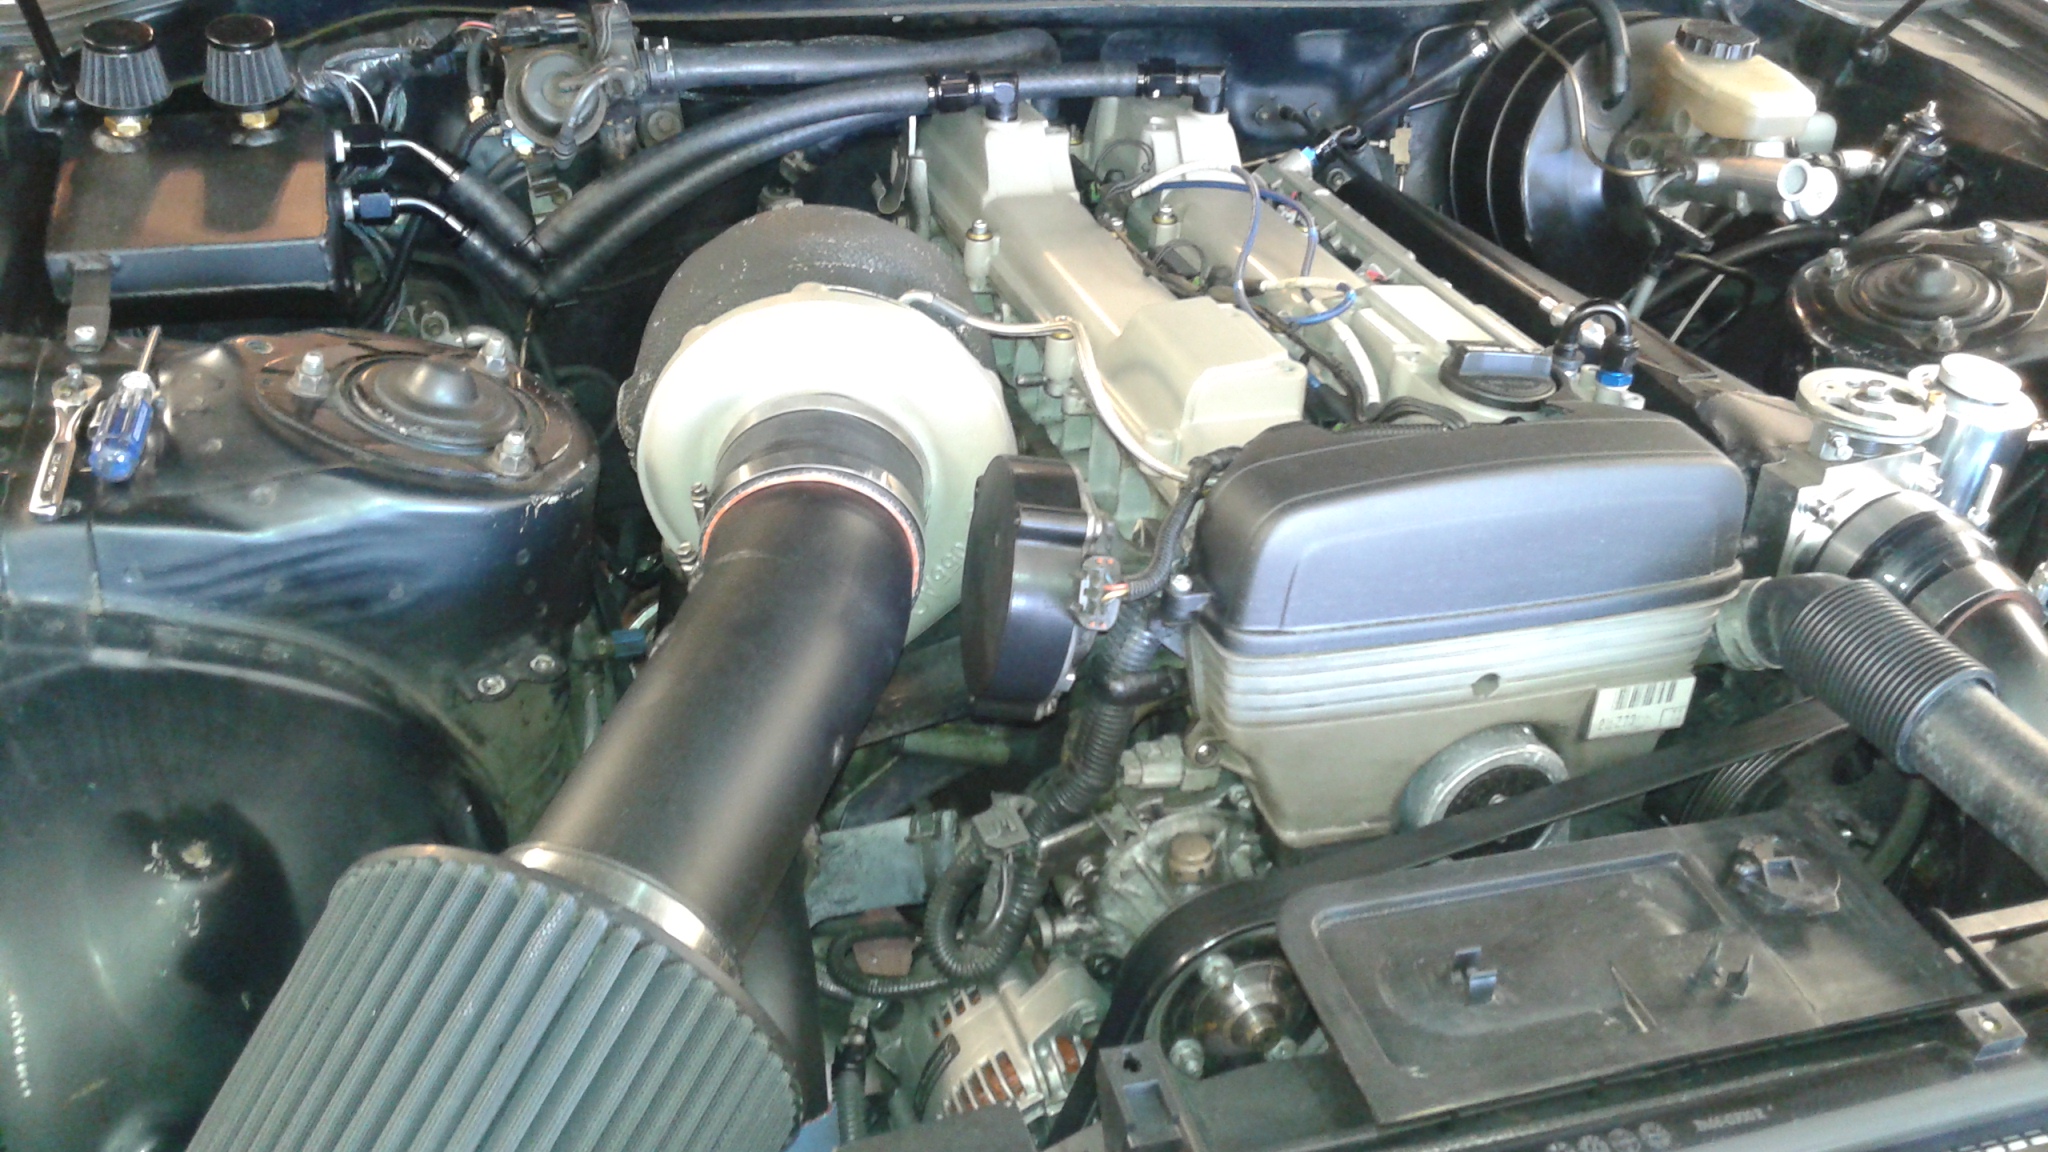
Next file I have is for a basic 2JZGE (SC300) Non-VVTI distributor cover. For anyone going COP but is retaining the stock cam/crank sensors, this is a great way to somewhat cleanly cover up the sensors/toothed wheel. Since the size of this is so small, it should be as simple as getting one 3D printed and your ready to rock. However you could also get one CNC'd out of aluminum or whatever. I made it as simple as possible without any real fancy design features or logos on the front, that way anyone can add their own if they want, but this at least gets you the base part.
File Naming:
SC3_DC_RevC: This is the file for the 2JZGE (SC300) Distributor Cover.
As always, I've included both the Solidworks 3D model as well as a STEP 3D file that should work with any number of free viewers. Anyone with SW 2017 can open the 3D model and make any sort of edits they want (add a logo, etc). The STEP file is the file you should be able to give anyone with a 3D printer or CNC machine to just load onto their machine.
Take Note!!!: I have not actually 3D printed one of these yet. So use this file at your own risk. It should work, but if anyone actually gets one made, please post it up! If something doesn't fit right, we can edit it. I'll try and get one 3D printed in the next month or so, but until then fitment of this file hasn't been 100% verified, so I want to make sure that is clear and understood. I'm 99% sure this will fit, but please whomever uses it, please post up your real world results!
Photos:


**UPDATED TO REVISION C**
Next file I have is for a basic 2JZGE (SC300) Non-VVTI distributor cover. For anyone going COP but is retaining the stock cam/crank sensors, this is a great way to somewhat cleanly cover up the sensors/toothed wheel. Since the size of this is so small, it should be as simple as getting one 3D printed and your ready to rock. However you could also get one CNC'd out of aluminum or whatever. I made it as simple as possible without any real fancy design features or logos on the front, that way anyone can add their own if they want, but this at least gets you the base part.
File Naming:
SC3_DC_RevC: This is the file for the 2JZGE (SC300) Distributor Cover.
As always, I've included both the Solidworks 3D model as well as a STEP 3D file that should work with any number of free viewers. Anyone with SW 2017 can open the 3D model and make any sort of edits they want (add a logo, etc). The STEP file is the file you should be able to give anyone with a 3D printer or CNC machine to just load onto their machine.
Take Note!!!: I have not actually 3D printed one of these yet. So use this file at your own risk. It should work, but if anyone actually gets one made, please post it up! If something doesn't fit right, we can edit it. I'll try and get one 3D printed in the next month or so, but until then fitment of this file hasn't been 100% verified, so I want to make sure that is clear and understood. I'm 99% sure this will fit, but please whomever uses it, please post up your real world results!
Photos:
Last edited by Halon; Apr 11, 2017 at 06:42 AM. Reason: Updated to Rev C
Nice work Halon, I think that cover is one of the most useful pieces that can be 3d printed for na-t. Should help out tons of people.
I would have printed one out myself for sure if this was available before.
Only other SC part I can think of being super useful is a replacement center vent. That would be sweet if you could just print one off when it cracks.. lol.
I was also thinking, instead of putting the gauges where the stereo was maybe its possible to replace the ashtray portion with a gauge mount somehow.
I remember holding up the gauge to it and it seemed like the area was a hair too small for a regular size gauge but maybe there is a way to make some more place for it.
It would sit a little low though compared to the stereo so it might not be worth the effort, I do like the one you made above.
This thread makes me want to get a good 3d printer and try some stuff out, if you guys have any recommendations please pm me thanks.
Lol, I was shopping 3D printers today on Amazon haha!
Regarding putting the gauges where the ash tray is. That's actually how I had mine before. I just used a flat piece of ABS. It worked fine, but there's a lot of times I wished I had that lighter port to charge my phone. So I'll be glad to have that back here soon!
Regarding putting the gauges where the ash tray is. That's actually how I had mine before. I just used a flat piece of ABS. It worked fine, but there's a lot of times I wished I had that lighter port to charge my phone. So I'll be glad to have that back here soon!
I was also thinking, instead of putting the gauges where the stereo was maybe its possible to replace the ashtray portion with a gauge mount somehow.
I remember holding up the gauge to it and it seemed like the area was a hair too small for a regular size gauge but maybe there is a way to make some more place for it.
I remember holding up the gauge to it and it seemed like the area was a hair too small for a regular size gauge but maybe there is a way to make some more place for it.
This thread makes me want to get a good 3d printer and try some stuff out
https://www.clublexus.com/forums/bui...ork-truck.html
I think you could do that in between two round gauges.
Just a heads up, I re-uploaded the files for the distributor cover. I tweaked the design a hair, made it what I think is overall a simpler overall design and cleaner/simpler look than my original. So it's named RevB at this point.
I have a guy lined up to 3D print one for me in the next couple weeks in his spare time. So I'll see how it fits. If I need to tweak anything I will at that time.
I have a guy lined up to 3D print one for me in the next couple weeks in his spare time. So I'll see how it fits. If I need to tweak anything I will at that time.
Last edited by Halon; Feb 15, 2017 at 06:55 AM.