When you click on links to various merchants on this site and make a purchase, this can result in this site earning a commission. Affiliate programs and affiliations include, but are not limited to, the eBay Partner Network.
2015 RX350 front passenger broken window glass replacement.
2015 RX350 front passenger broken window glass replacement.
I initially called my Lexus dealer to obtain the correct part number based on the vehicle VIN number. My dealer charged list price, $428.54, not including tax or labor. I received a discounted price, $334.92, from an online dealer.
The last time my window broke, I paid just over a $1000 for parts and service. This time I only paid for the price of the OEM window ($334.92) and shipping ($50). Your can also buy an aftermarket nonOEM window for an even lower price. I used a genuine Lexus part.
Be sure to take pictures of the project with your cell phone to remember the correct assembly of parts.
Consider laying screws on white sheet paper that you personally label to ensure you use the correct screws in the reassembly process.
Tools:
Phillips #2 screwdriver
Plastic trim removal tools bought at Autozone
Socket wrench, short adapter, 10 mm socket
Small hemostats
Parts:
2015 RX350 Front Passenger Window Glass
68101-0e051
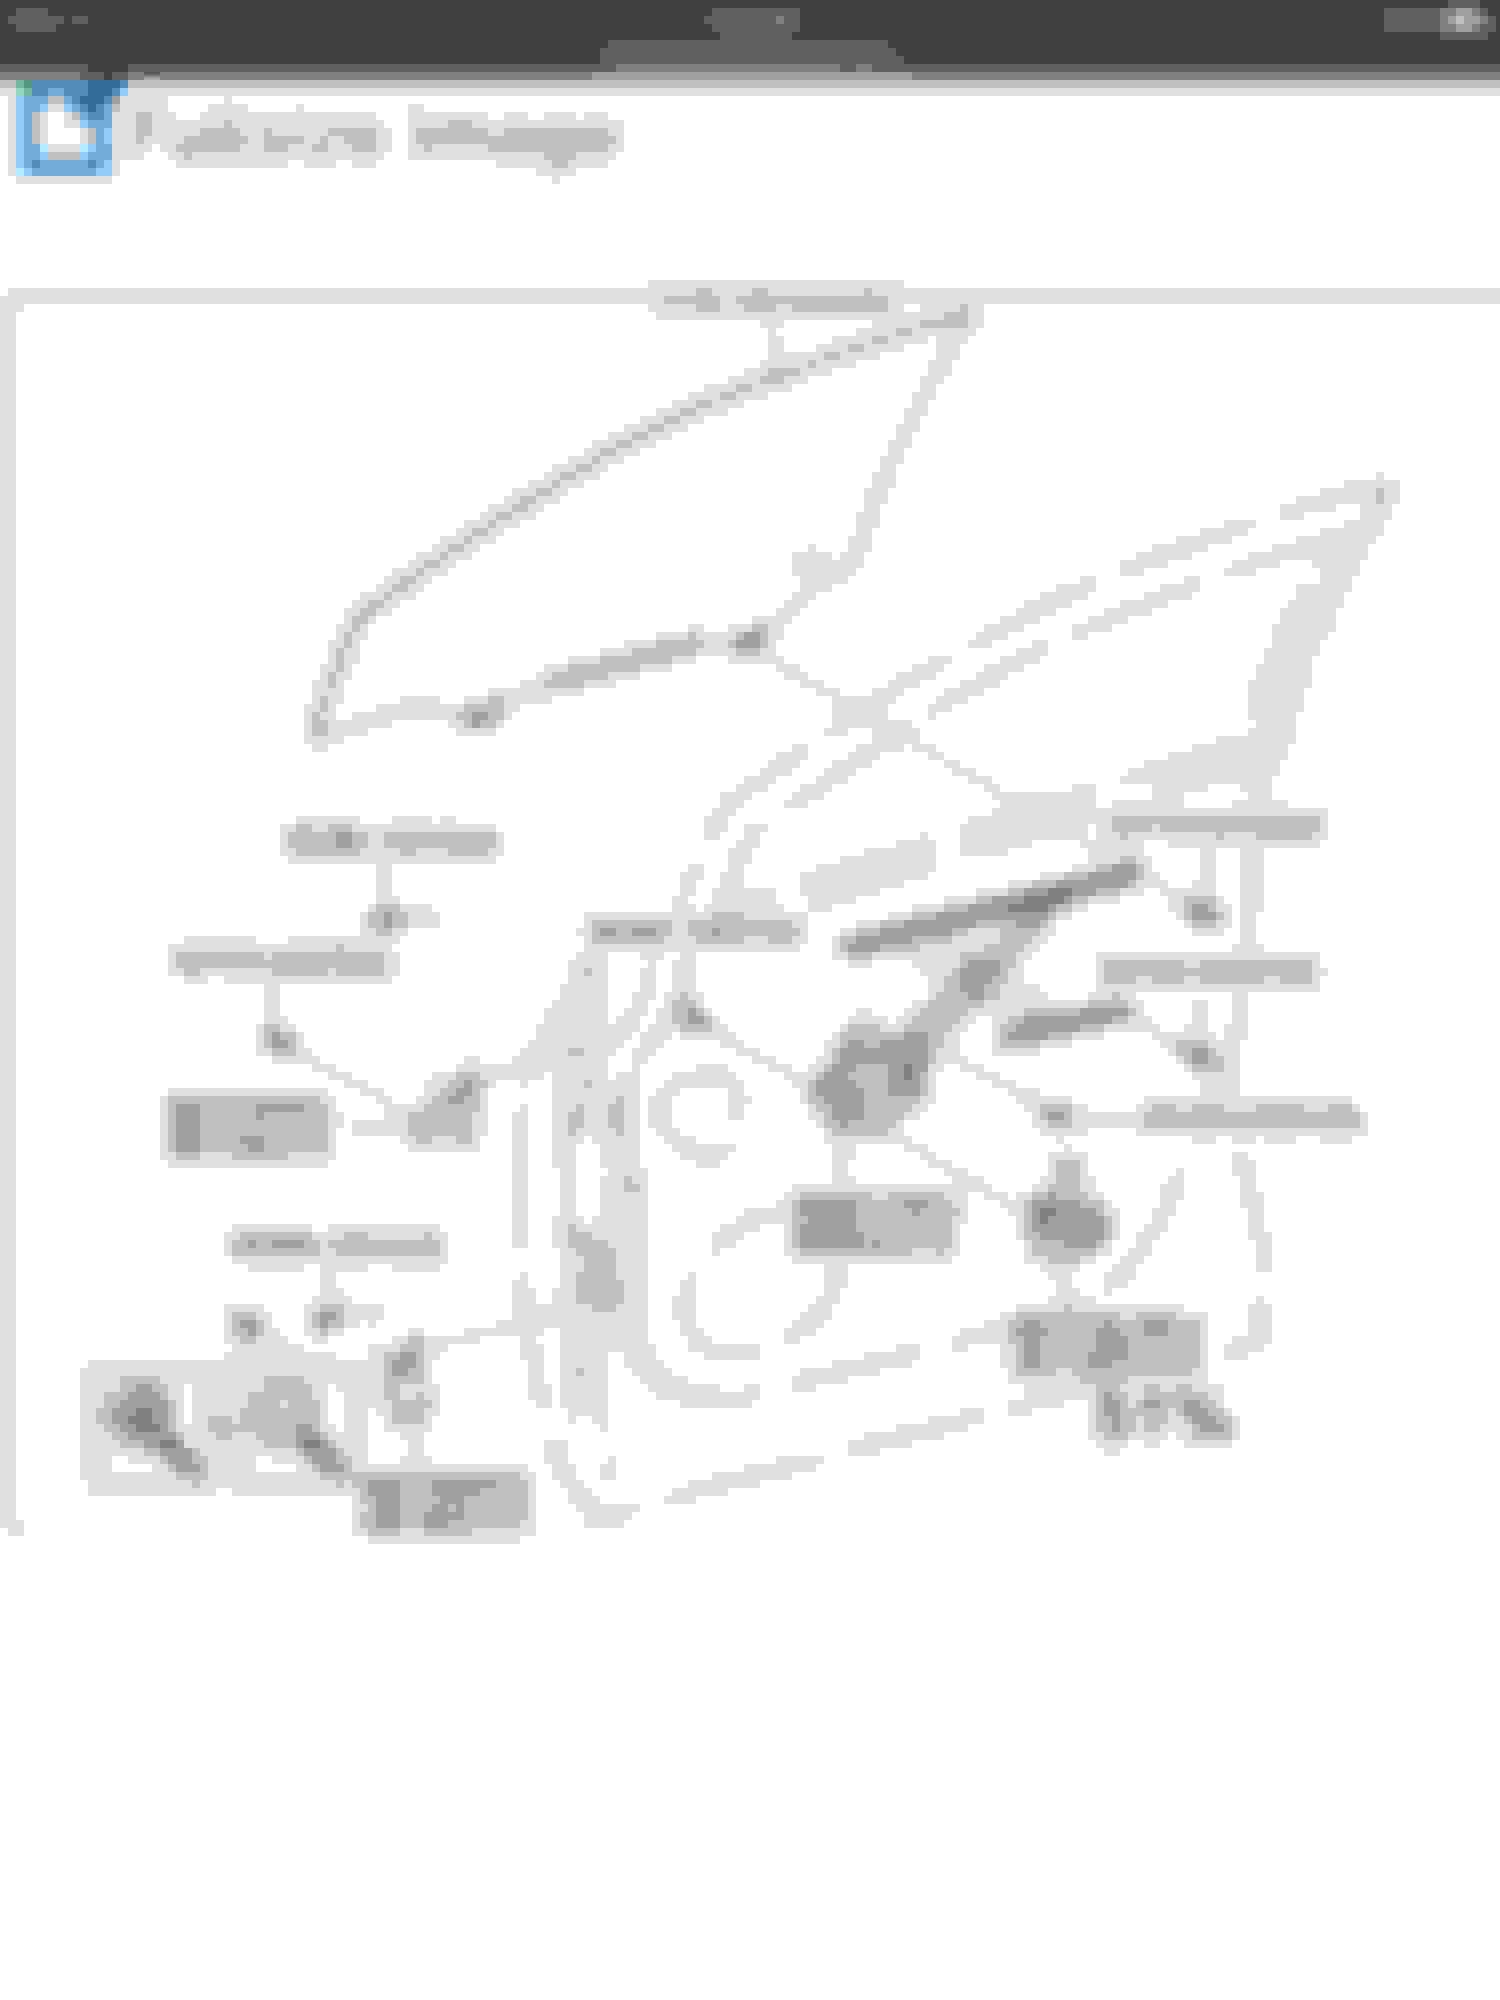
Similar door frame layout, front driver's door.
Review the following videos and forum posts prior to attempting the project.
If the window is broken, consider "stabilizing" the broken glass by applying a single layer of wide clear packing tape over the cracks. Be careful. Don't injure yourself. Consider using gloves when removing the broken window.
Window Glass Replacement
1. Remove felt pad in door pocket with clip or hemostats. Remove screw.
2. Unlock inside door lock. Remove plastic piece in door handle pocket with hemostats. Remove screw.
3. Remove screw with rubber grommet along back of the door.
4. Remove door arm rest panel trim piece held in place by clips. Remove screw. Be careful not the chip corner of panel. Only apply force away from edge of panel with lever like action. This part costs about $300! You might consider protecting this arm rest trim panel edge with duck tape or some plastic/rubber material between the plastic panel and plastic trim removal tool. Take your time during this step. Use your fingers to help pry off the plastic panel.
5. Remove door panel with plastic trim tool starting at the bottom and work your way up. Clips may fall out and can be reinserted once door panel is removed. Once the clips are disengaged, carefully lift the top of door panel upward out of the top of the door frame.
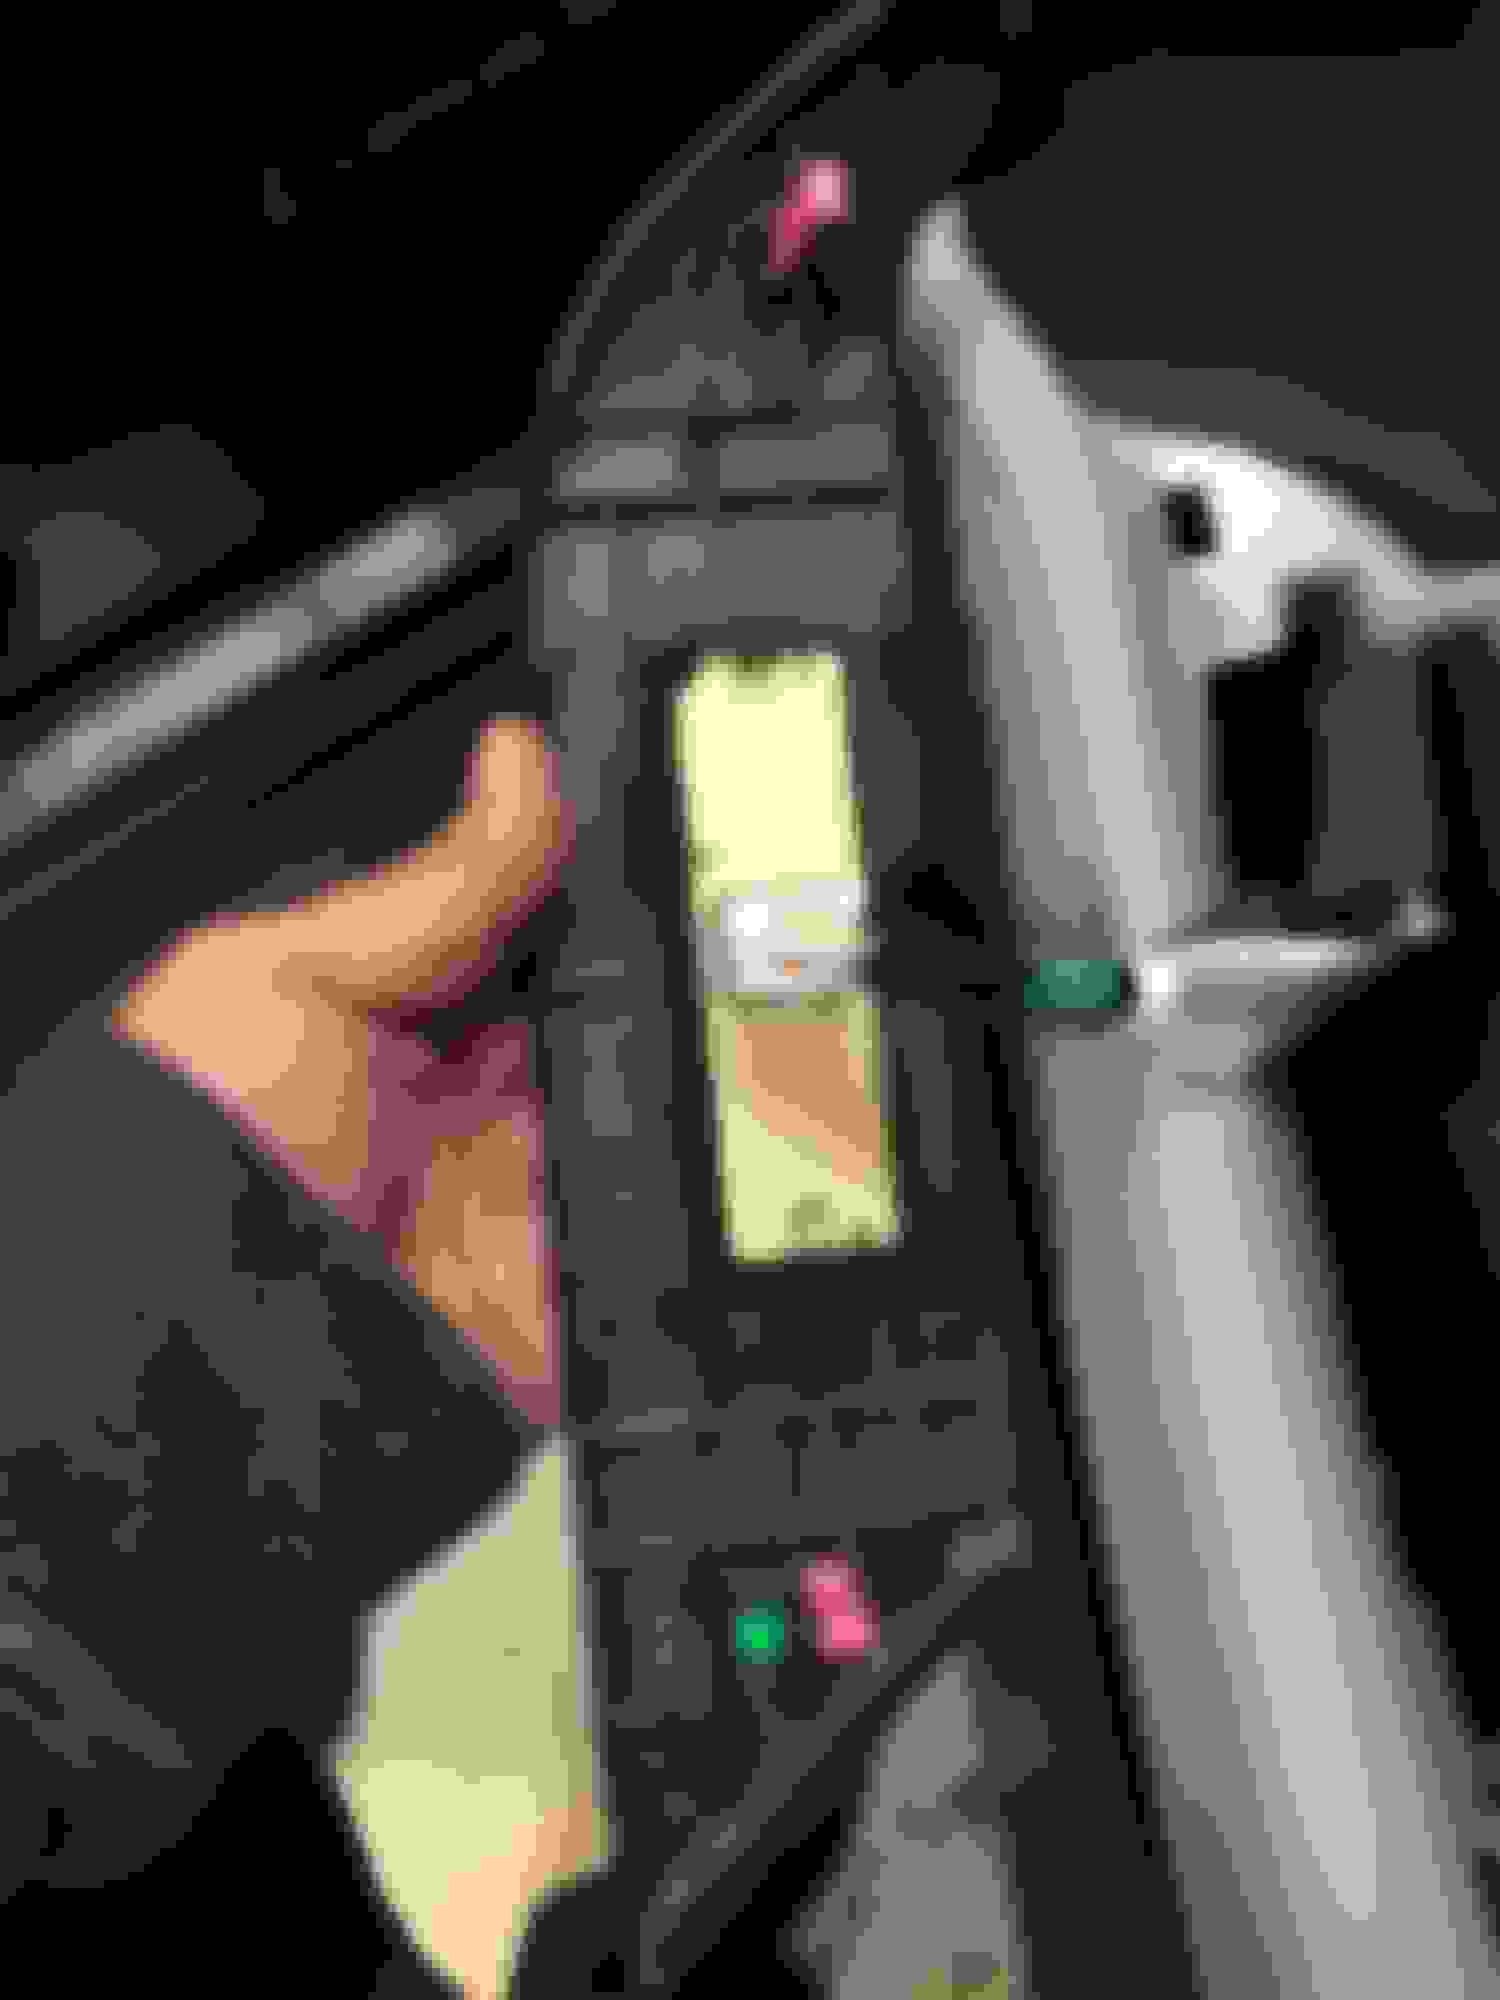
6. Disconnect door handle cables, similar to removing bike brake cables. The green cable is on the bottom, white cable on top. I left the remaining electrical cables connected and allowed the door panel to gently dangle from these cables. I did this to save time and potentially avoid damaging the electrical connectors. Be sure not to damage the speakers. I also left the window switch cable connected to adjust the window height.
7. Remove bottom half of door weather plastic sheet from the back bottom half extending anterior to the top of the speaker to access the window 10mm bolts.
8. Lower window so that about 3/4 down, leaving 1/4 of the window glass up above the bottom of the window sill. More exact positioning is needed to access the (2) 10 mm bolts securing the bottom of the glass window to the widow regulator rail.
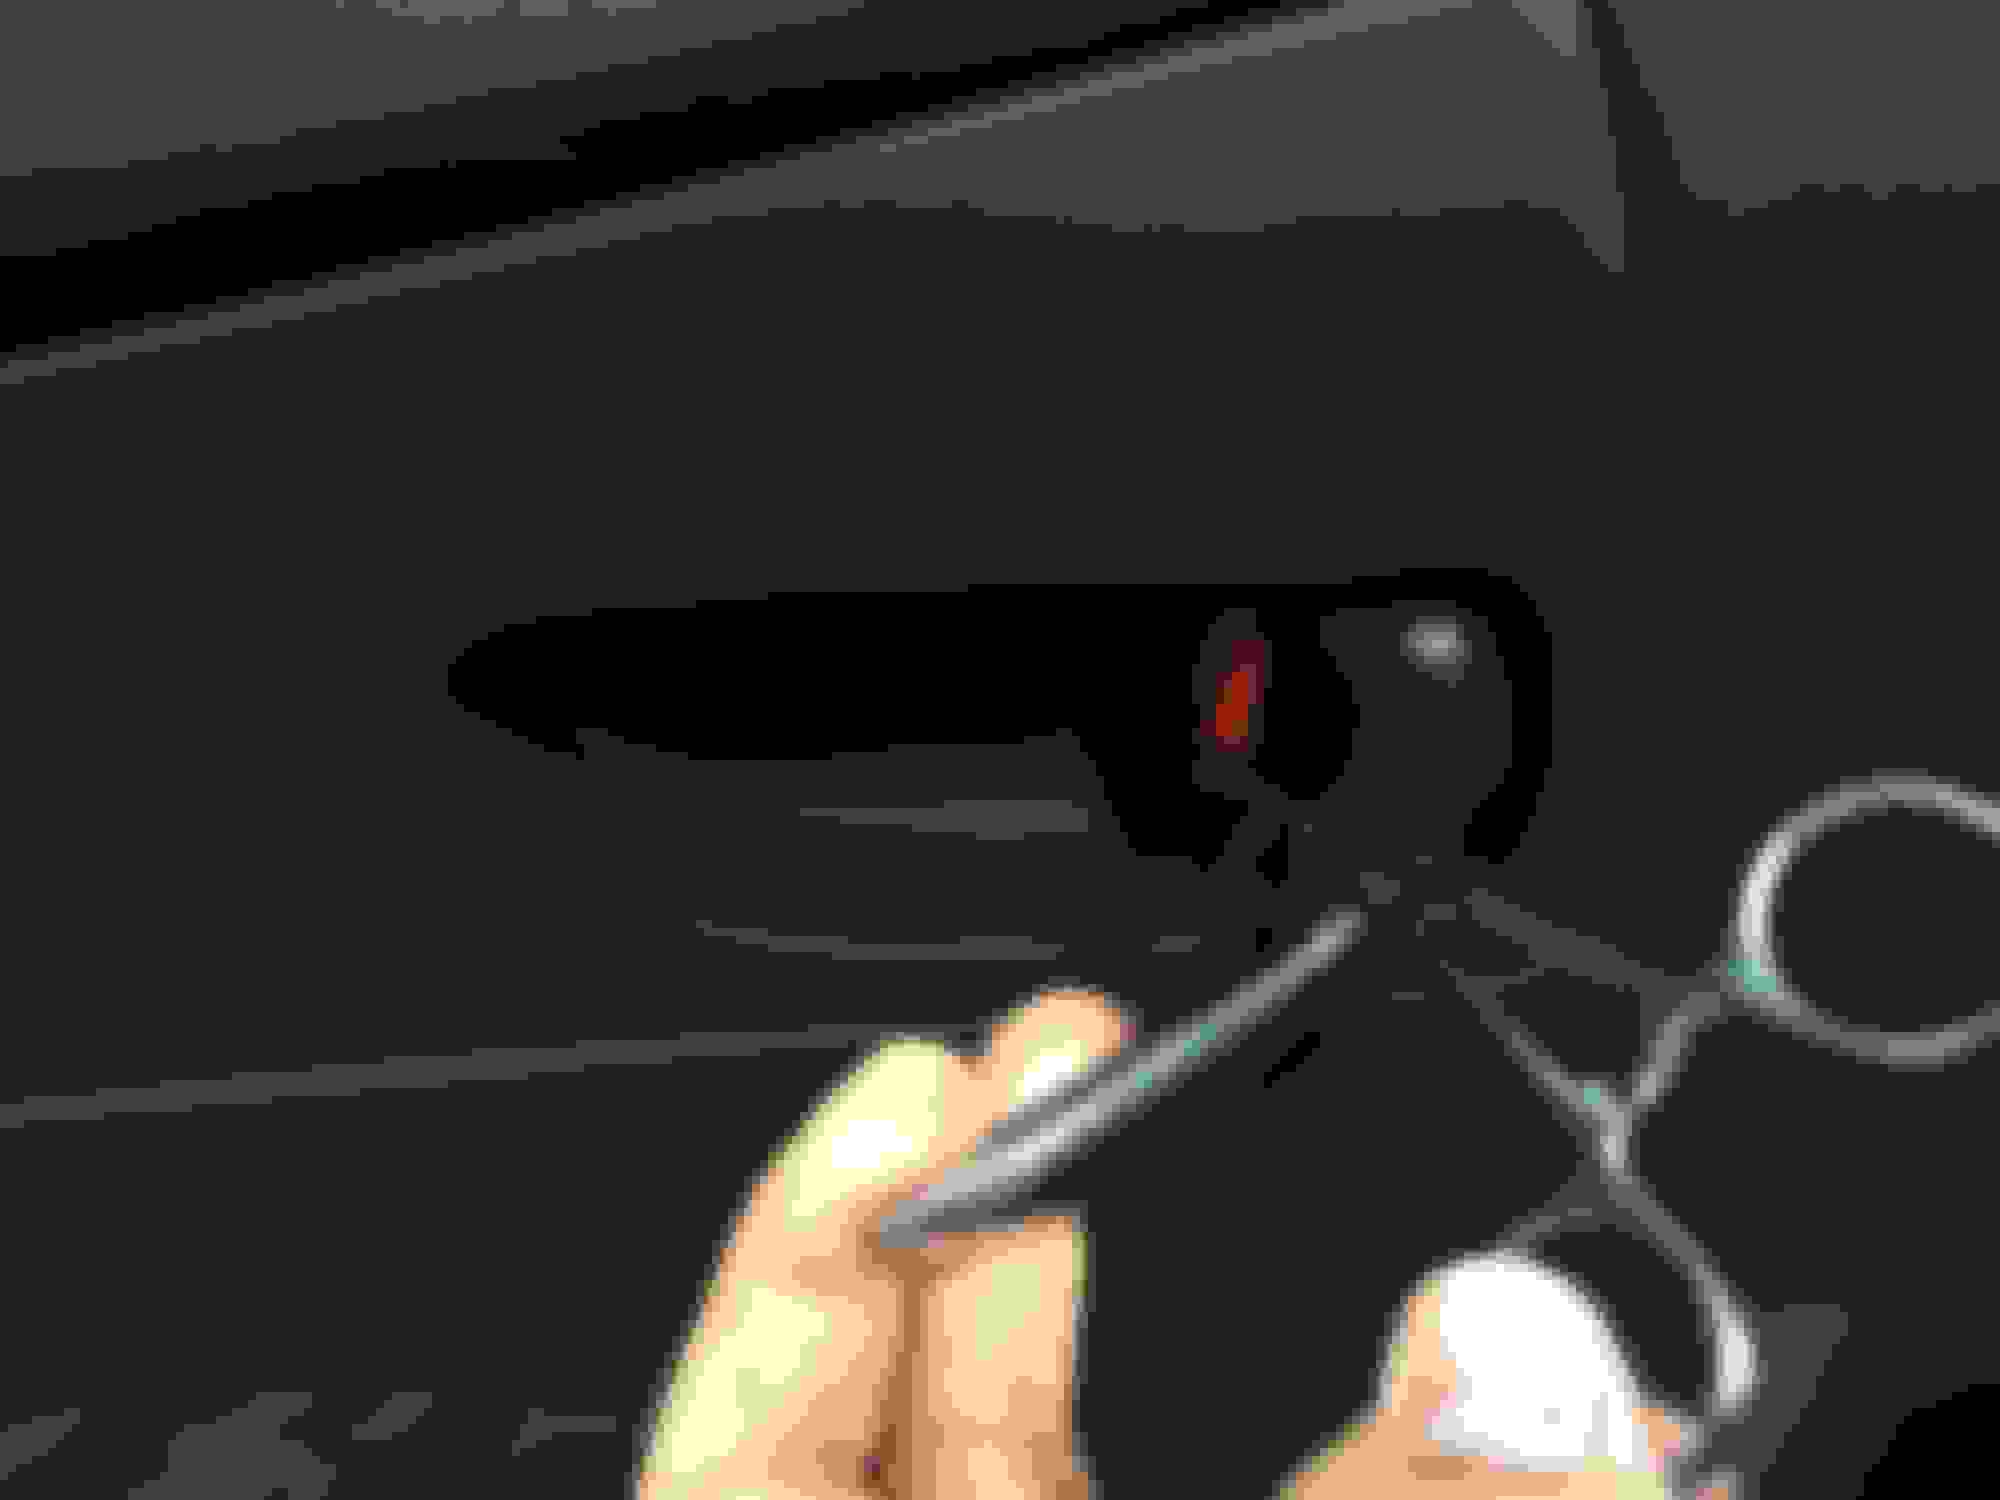
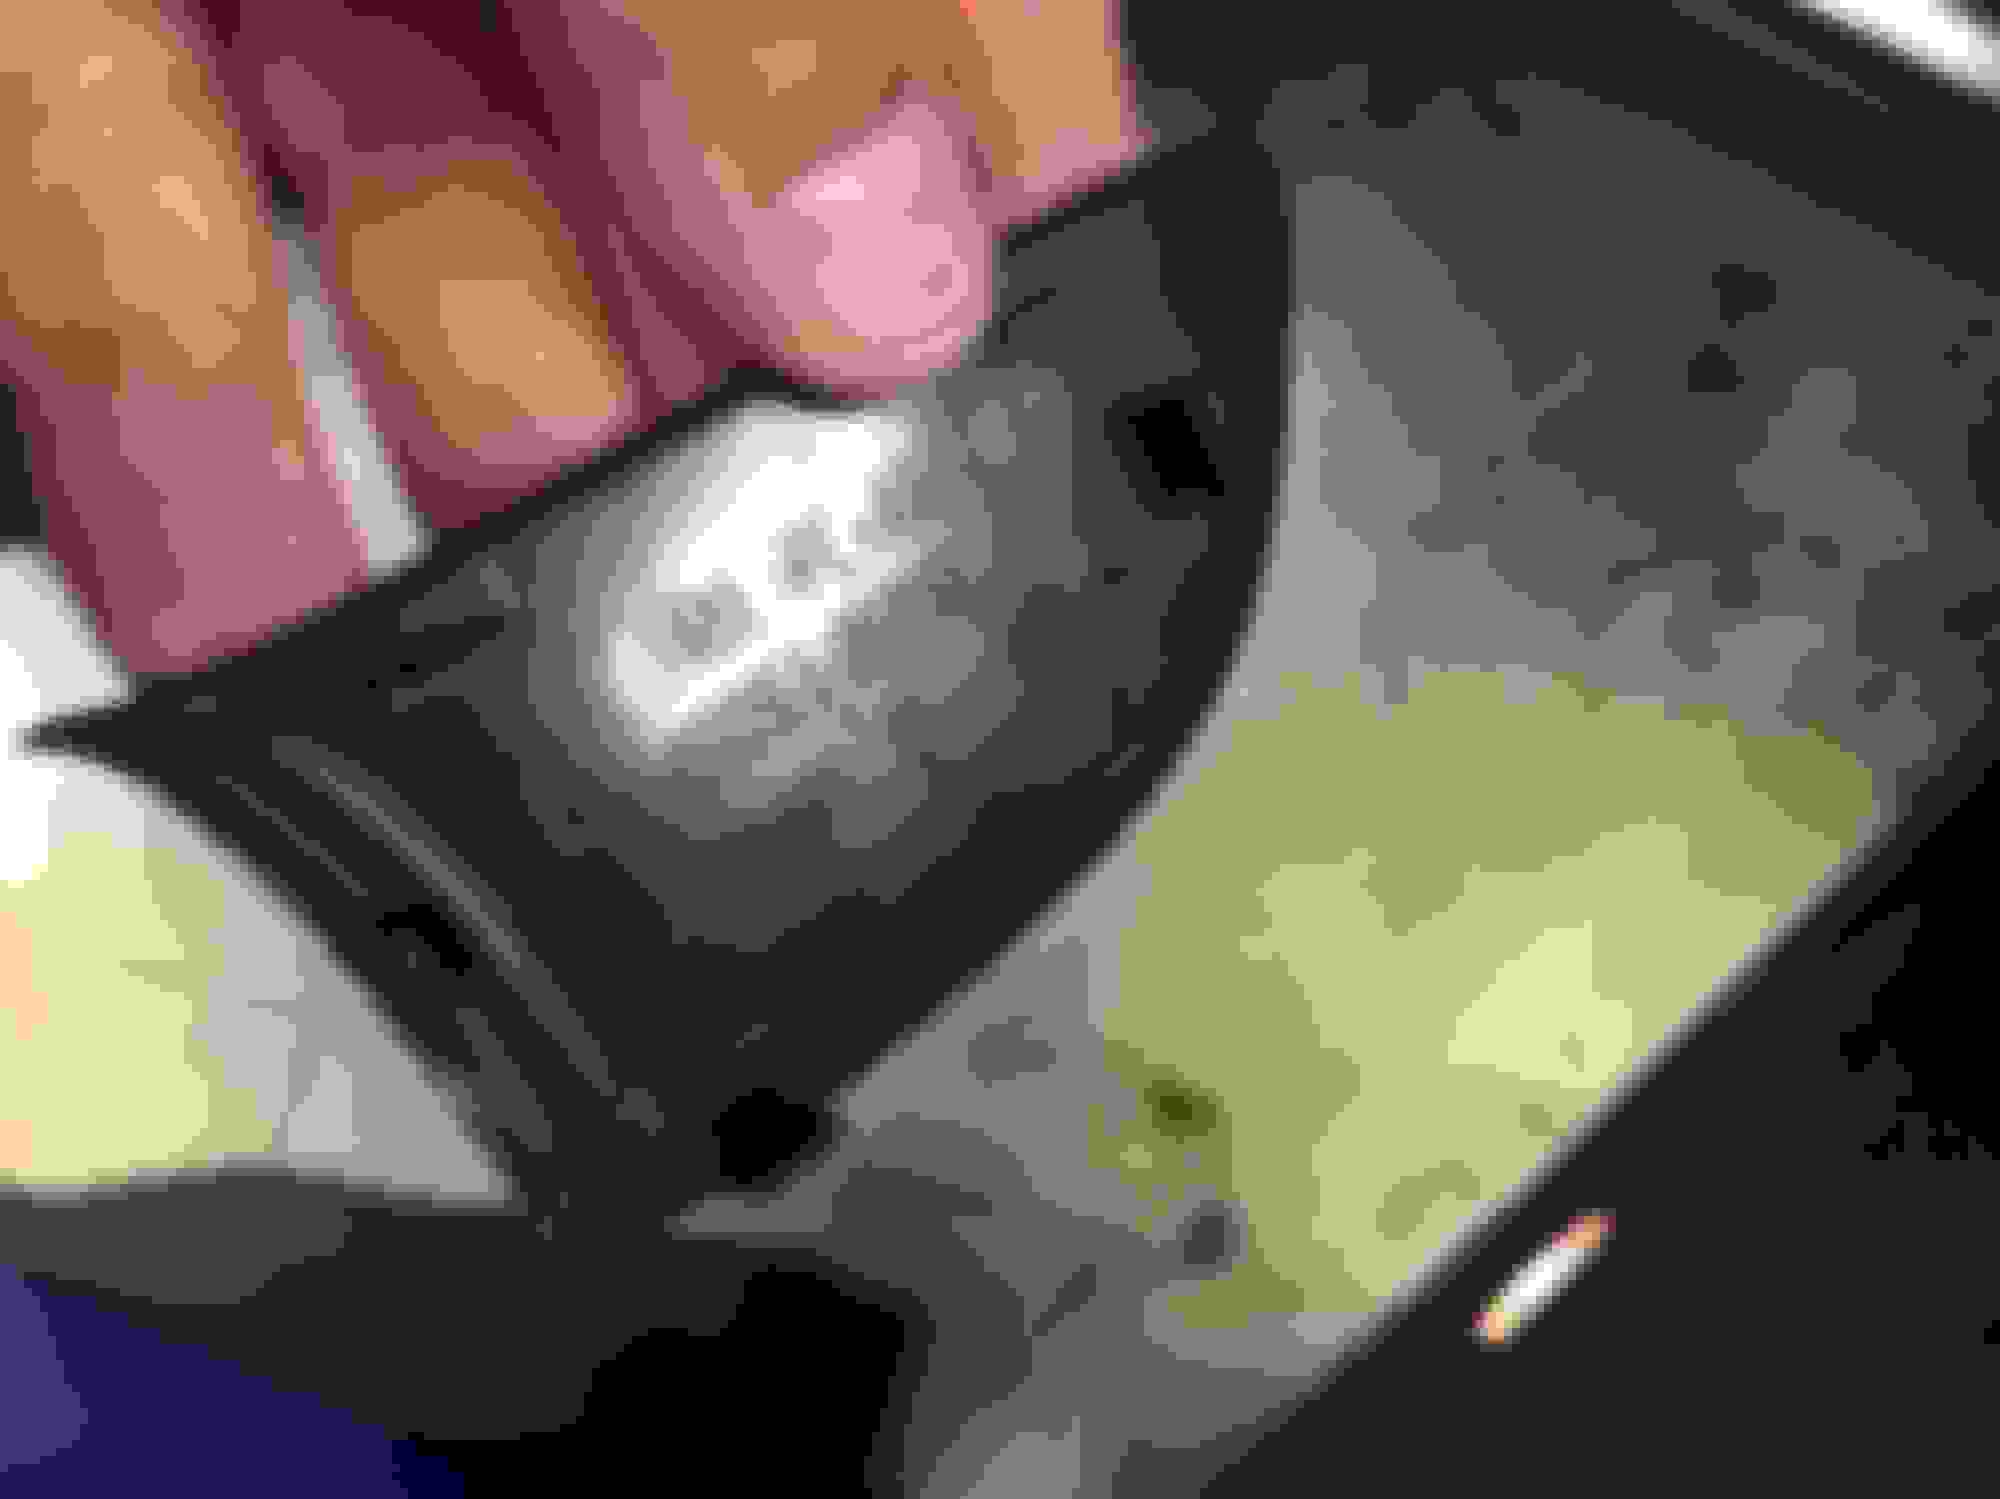
9. Position window so that both 10mm bolts can be accessed through metal openings as seen in the pictures. The rearmost screw is accessed via the large triangular shaped opening along the lower back part of the door frame. The anterior most screw is accessed via the small oval shaped opening just above the back of the speaker. You will need to adjust the window glass height to allow access to the anterior screw.
10. Remove the (2) 10mm bolts holding the window glass in place using a ratchet wrench with small extension and 10 mm socket. You can reach from behind in the larger opening with your right hand to help guide your left hand holding the ratchet wrench and socket in the smaller oval opening.
11. Carefully remove the window glass by lifting and slightly rotating the window glass out of the rubber tracks and toward the outside of the window frame.
12. Carefully place the new window from the outside, slightly rotating the window glass into rubber tracks of the window frame.
13. Lower glass window into door frame until the bottom of the window glass engages the track of the window regulator. The bottom of the window glass has metal "clips" which rest on the regulator rail.
14. Secure the window glass with the (2) 10mm bolts. You may have to slightly pull up window glass to properly seat the bolt. Tighten first by hand using only the socket and adapter to avoid stripping bolts. Tighten with wrench. Test fit the window by opening and closing window glass several times.
15. Reapply door weather plastic sheet using existing black adhesive. You will likely not need anymore sealant.
16. Use window control to completely lower window glass in the door frame. This will give you a little extra room to reseat the door panel into the top of the door frame. Inspect the door panel to ensure all the clips are properly seated in the door panel prior to reassembly.
17. The door panel fits tight into the top of the door frame. Take your time reseating the top of the door panel into the top of the door frame. You may need a thin film of dishwater soap to lube the top of the door panel.
18. Once reseated, the top of the door panel will be flush with the bottom edge of the window sill. Use your other door for comparison purposes.
19. Now reengage the clips along the front, bottom, and back of the door panel by pushing the panel back onto the door frame. Be sure the bottom light electrical cable doesn't protrude out of the door panel. This will prevent the door panel from completely seating onto the door frame.
20. Reinsert and secure screw below door rest arm panel. Reinsert door rest panel.
21. Reinsert and secure screw within door pocket. Reapply felt covering.
22. Reinsert and secure screw within inner door lock handle. Reapply plastic trim.
23. Reinsert and secure screw and rubber grommet securing the back of the door panel.
24. Do a final inspection to confirm proper fit and operation of lights and window and door lock controls.