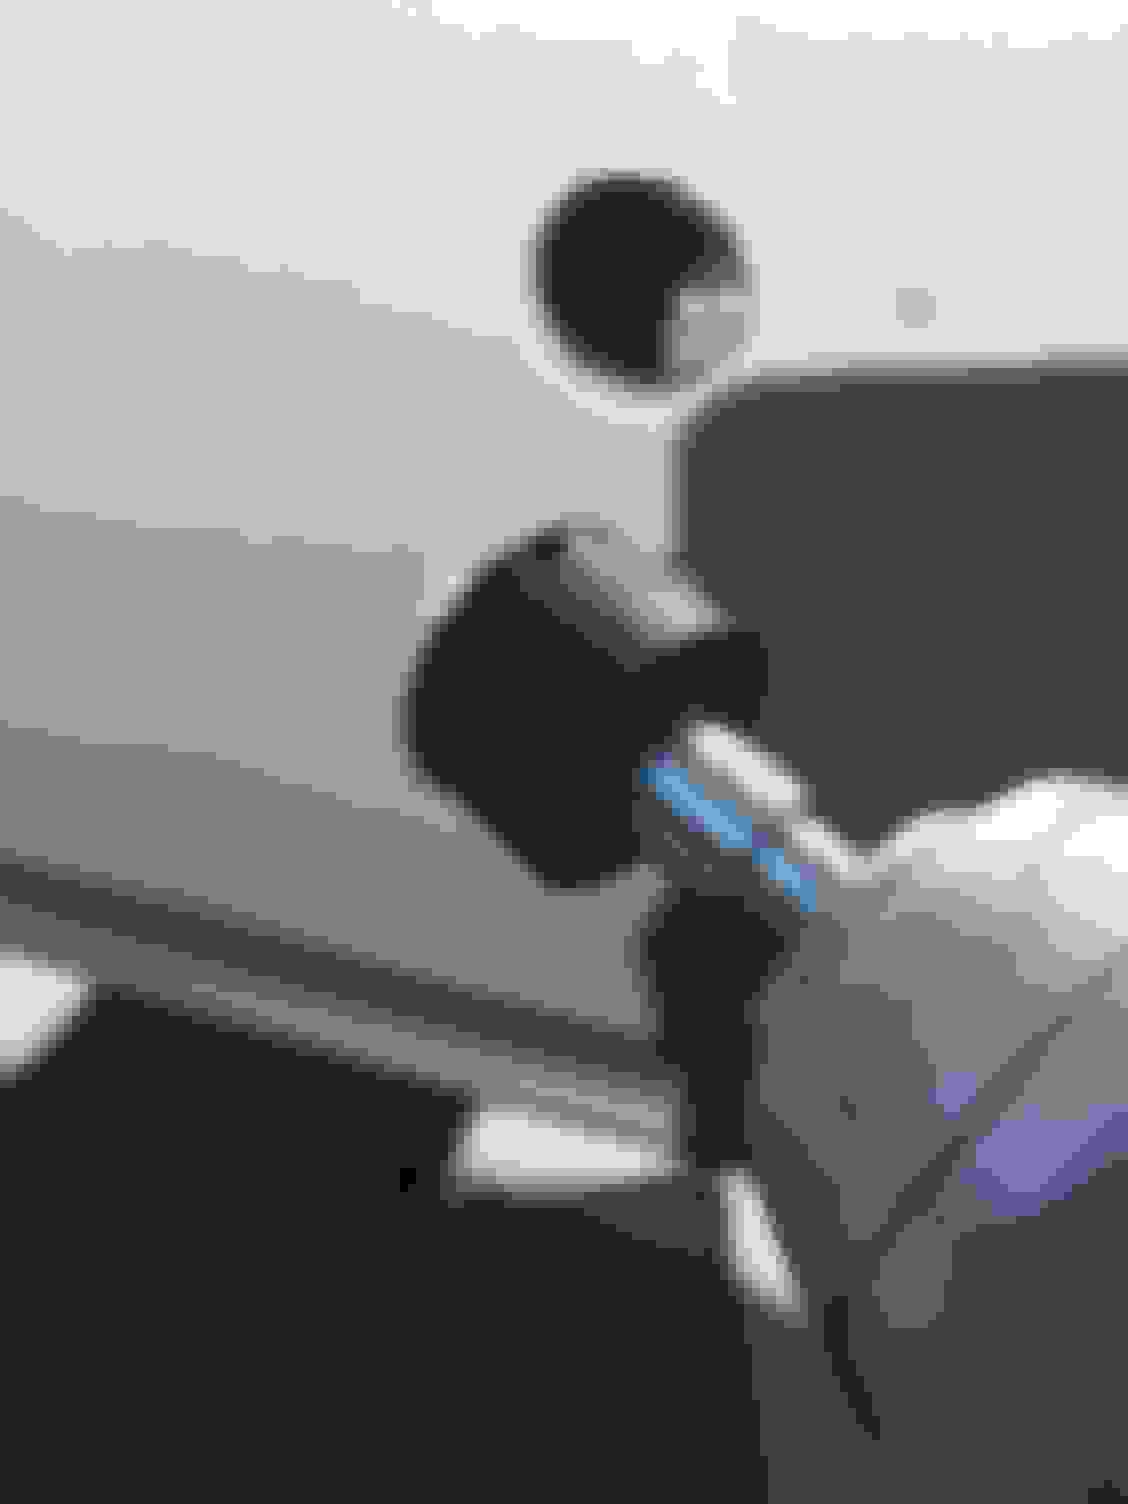
Sorry, this is the most clear photo I can get. Hopefully it's good enough. That part number refers to that outer ring you see on the outside of the sensor. It's part 6 on the photo I pulled from eBay. Looks like it might slide into hole from outside and clip itself to part 5 with the sensor held in place in between the two and that might be how it is fixed to the bumper?
Sorry, this is the most clear photo I can get. Hopefully it's good enough. That part number refers to that outer ring you see on the outside of the sensor. It's part 6 on the photo I pulled from eBay. Looks like it might slide into hole from outside and clip itself to part 5 with the sensor held in place in between the two and that might be how it is fixed to the bumper?
Sorry, yes, the ring clips (part 6) definitely needed. It's this part (#5) that doesn't seem to provide any benefit:
89348-33090
Part 6 snaps FIRMLY into the hole and clips tightly onto two sides of the sensor and holds it snugly. Part 5 adds no additional support at all
No pics yet (been focusing on the work) but a few additional notes:
Neither front nor rear bumper covers HAVE to be removed to to this job. Admittedly removing the covers would make it easier, but certainly doable with the covers intact. I've not removed either cover, just the cosmetic plastic engine cover panels to reach down and get enough room for the fronts, and the black undertray/side underpanels for the rears. For the rears, you'll need to use a boxcutter or similar sharp blade tool to cut away some (not much) of the supporting black foam that resides on the backside of the rear bumper cover so that you can install the two centermost sensors for the rear. To mark my positions for the rear sensors, I took photos of a RX350 on the lot that had the sensors installed, and used those as my reference points along with careful measuring to make sure horizontal and vertical distances were as close to stock positions as possible. After cutting the holes make sure you carefully trim away all excess plastic flashing around the hole so that the retainers can fit SNUGLY and clip TIGHTLY into the holes. You should hear an audible click if they are inserted properly. And they'll be so tight, they wont even be able to rotate once inside the holes. Drilled all of my holes from the outside of the bumper covers
Another tip. The rear sensors must be positioned so that the two outside sensors have their connectors pointed horizontally towards the center of the vehicle. The center sensor that's on the drivers side needs its connector aimed horizontally towards the drivers side of the vehicle. The center sensor that's on the passenger side seems to be fine aimed either direction. The wiring harness is built to a fairly precise length so having the connectors aimed the wrong way means the harness connectors won't reach the sensor connectors.
Sorry, yes, the ring clips (part 6) definitely needed. It's this part (#5) that doesn't seem to provide any benefit:
89348-33090
Part 6 snaps FIRMLY into the hole and clips tightly onto two sides of the sensor and holds it snugly. Part 5 adds no additional support at all
Maybe part 5 is for support for the models that do not have the ring clips like some other models. Looks so much cleaner with the sensors flush to the bumper.
So I'm pretty well set to start the tough work (I have the module added and the car knows the sensors aren't "Working") but I'm more nervous on sensor placement.
So I'm pretty well set to start the tough work (I have the module added and the car knows the sensors aren't "Working") but I'm more nervous on sensor placement.
It has a template for the sensors - Id love to find something like this for my 2011 .....
Not aware of a template for the RX350's. Best suggestion is to find a RX350 with the sensors, on a local lot..take pics, and a few measurements. And use that as your guidelines for the rear. For the two front sensors the backside of the bumper cover had markings for both sensors. I didnt see any such markings for the rear cover, because the foam support behind the cover is there. If anyone decides to actually remove the rear cover, it's quite possible they may find markings there for the sensors.
So, I'm use to this type of luck .... not sure how many others have tried this yet, but my module works fine, plugged in - recognized by the car, and all 5 sensor icons show as "Check Sensors".
I received two of the same sensors you used about 10 mins ago and ran outside to plug them in - and...... nothing, the front two, connected, still say "check sensors". Turned car off / etc. a few times and the same thing .... Guess I'll need to check the front cables to see if they attach somewhere, maybe they aren't connected to some other harness
you will get the "check sensors" warning until you connect all 6 sensors. However, if you just connect the front two, you should no longer have the circle with a red line through it error for the two front sensors. See post #48 for what Im referring to.
I didnt have to do this, but you may want to disconnect/reconnect your car battery after adding the sensors/parking ECU. Sometimes electronics are like that..need a fresh start, of sorts.
I did have both connected and the picture still had the red x on them ... Good idea on the battery, Ive seen that on other electronics as well - I'll do that one after my meeting....
I did have both connected and the picture still had the red x on them ... Good idea on the battery, Ive seen that on other electronics as well - I'll do that one after my meeting....
Also make absolutely certain the sensors firmly "clicked" into the connectors.
All 6 of my sensors worked 100% fine as soon as I connected them all, btw. Being from China and at that low pricepoint had me nervous, but even after painting them with the bare minimum amount of touch up paint to cover the black? They are working well.
Also, breaking news: Mail man just delivered the buzzer. Will try to install that tonight