


Mudflap/splashguards
Pole Position
Joined: Mar 2007
Posts: 2,730
Likes: 26
From: Sakon Nakhon
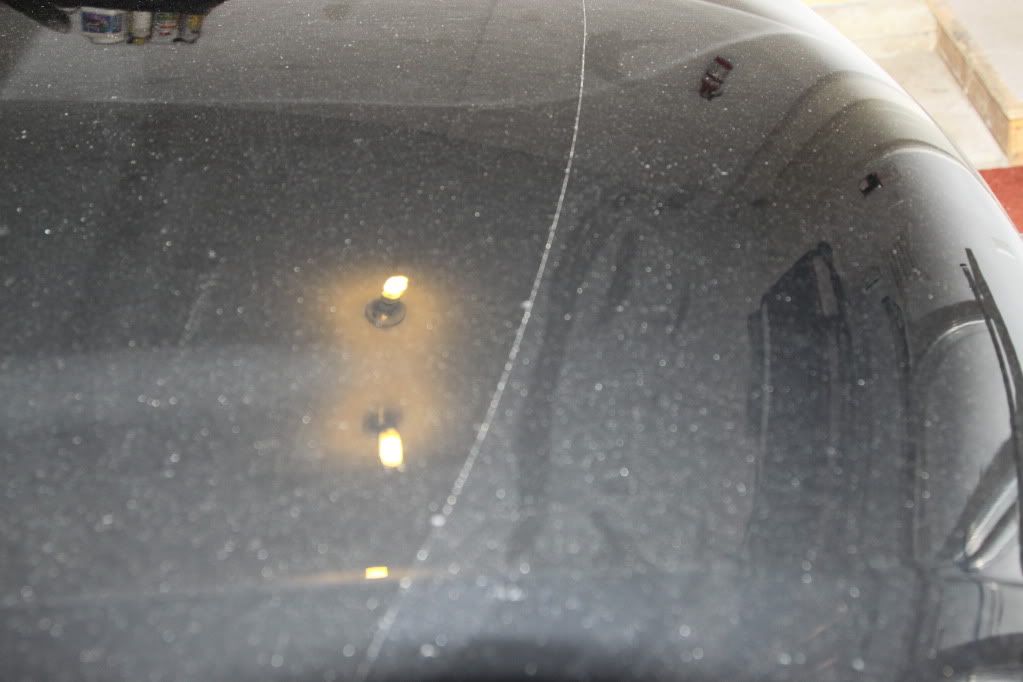
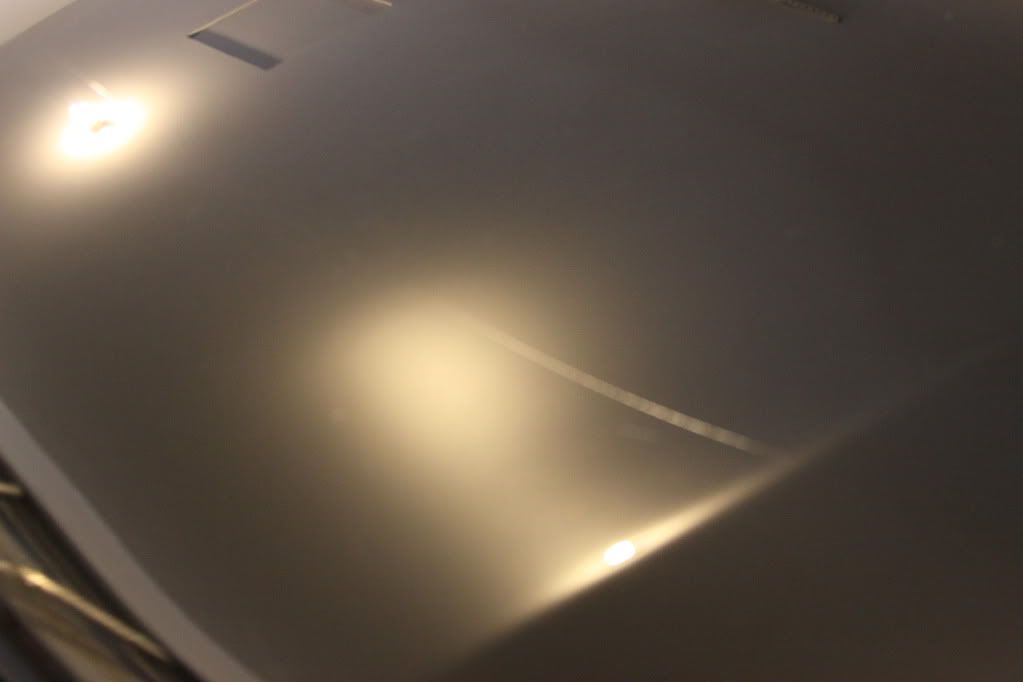
Overall, one needs to follow the instructions to the letter, be patient, work with a very clean surface, having clean and wet hands at all time. If you follow these simple steps, any DIY individual can pull it off, but there's only one crack at it, so confidence is imperative. The pics I have show the hood using the flash on one shot which reveals a very dusty surface today, while the other is shaky (handheld) and uses ambient light - therefore the dust is not apparent; I could pull out the tripod, but you get the idea.
Pole Position


Joined: Jun 2007
Posts: 283
Likes: 0
From: Sunny Prestwick in Avon, IN
I installed the frontal hood (abt. 18") and down both sides so far. I tried to install the film on the headlight lens, but surprisingly, I just could not form it as the area is too small to stretch the film properly; it needs a thinner film, imho. On a large area this is not a problem as you anchor one side with the alcohol/water mix and squeegee, and work the film across in stages. It looks very good so far with only one pinhead-sized bubble which I will roll out next time. I've yet to tackle the bumper. It is more complex in shape and compound curves. I'll need to heat up the garage or do it on a warm day to help the film's stretchability.
Overall, one needs to follow the instructions to the letter, be patient, work with a very clean surface, having clean and wet hands at all time. If you follow these simple steps, any DIY individual can pull it off, but there's only one crack at it, so confidence is imperative. The pics I have show the hood using the flash on one shot which reveals a very dusty surface today, while the other is shaky (handheld) and uses ambient light - therefore the dust is not apparent; I could pull out the tripod, but you get the idea.
Overall, one needs to follow the instructions to the letter, be patient, work with a very clean surface, having clean and wet hands at all time. If you follow these simple steps, any DIY individual can pull it off, but there's only one crack at it, so confidence is imperative. The pics I have show the hood using the flash on one shot which reveals a very dusty surface today, while the other is shaky (handheld) and uses ambient light - therefore the dust is not apparent; I could pull out the tripod, but you get the idea.
Thanks for the info and pictures,
lar
Pole Position
Joined: Mar 2007
Posts: 2,730
Likes: 26
From: Sakon Nakhon
The hood and two side fender pieces took just over an hour - would have gone faster but there was some trepidation going in. I expect the bumper to take about a half hour, and the mirrors about 10 minutes each. It goes faster as you become more familiar. The biggest impediment is uncertainty... 
Get them from Lexus at Richmond Hill in Toronto.
I like and buy from Sewell but the mudguards are $202+ shipping with the club discount.
I paid $125 shipped.
Like asked earlier,why the cost difference for the same Lexus part?
I like and buy from Sewell but the mudguards are $202+ shipping with the club discount.
I paid $125 shipped.
Like asked earlier,why the cost difference for the same Lexus part?
ClubLexus Stories
Celebrating Lexus & Toyota from Around the Globe

8 Tips for Improving Your Hybrid or Plug-in Hybrid's Efficiency!
Michael S. Palmer
10 Best Lexus Models No One Remembers
Joe Kucinski
TRD Off-Road Premium: Best 2026 4Runner, Except This One Thing
Michael S. Palmer
Top 10 Lexus & Toyotas to Drive Before You Die!
Joe Kucinski
Top 10 Lexus/Toyotas With The LEAST 5-Year Depreciation
Joe Kucinski
Lexus LC500 Convertible Auction: A Preview of Rising Values?
Brett Foote
GX 550 vs TX 550: Best 3-Row Luxury Lexus Family Hauler
Michael S. Palmer
9 Best Lexus Models You Can Buy for Half Price (And 1 You Shouldn't!)
Joe Kucinski
2026 Lexus NX Buyer's Guide: Models, Features, Prices & More!
Brett Foote
Thread
Thread Starter
Forum
Replies
Last Post
grabber2
RX350 / 330/ 300 / 400H / 450H Classifieds
2
Mar 14, 2013 03:03 PM