
LED DRL DIY with pics

Thread Starter
Lexus Fanatic
Joined: Jan 2014
Posts: 5,371
Likes: 526
From: BC Canada
With all the good advice, tips and info from members like cjitty and tee, I went ahead and tackled the Audi style LED lights in the lower valance.
I went with these:
http://www.ebay.ca/itm/2x-9-LED-Audi...34bd19&vxp=mtr
There are countless sellers with this item and they are all the same except for the price. They sell as low as 9 dollars and as high as 50+. But they all come from the same Chinese supplier.
As for how I wired mine, I went with the "always on when ignition on". I did not want to go with relays and switches. The next time I go to a dealer, I'll have them disable my factory DRL's as these will now replace their function. For power, I wired into the passenger side under-hood fuse panel for a switched power source. Mounting the lights was facilitated with outdoor 3M Mounting tape as seen in pics.
NOTE: the supplied wire connections that came with the lamps ARE NOT long enough between the two lights, nor are they long enough to reach a power source. It's about 3 inches too short between the lamps. My pics will show how I easily tackled the minor glitch. All connections and splices are soldered and sealed with heat shrink tubing.
Here's the gear: I used 18 ga wire, but to be honest even THAT is awfully thick. To do it again, I would go with no larger than 22 ga. The wire that came with the bulbs is maybe a 24 ga or less.
[IMG]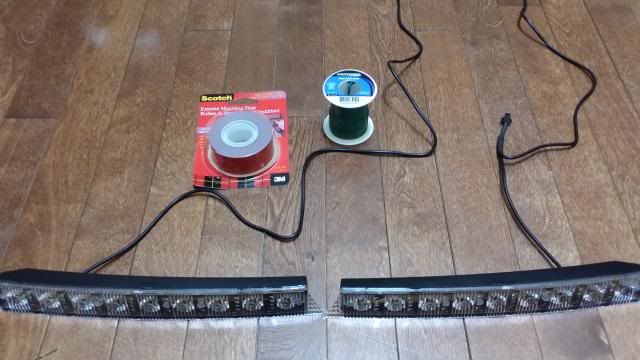 [/IMG]
I used a fish tape to run the wire between the lamps behind the valance. It was at this point that I realized the wires were too short, so it was back to the drawing board:
[IMG]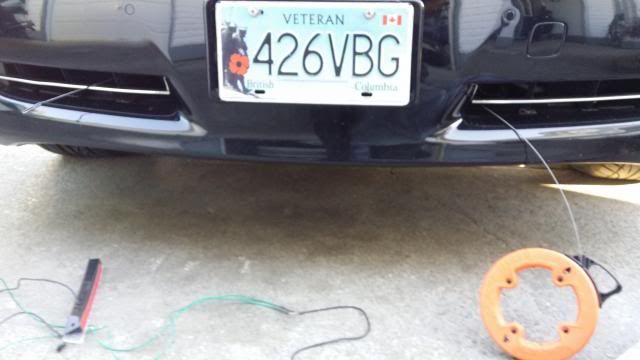 [/IMG]
This is where I cut the wire connection of one side of the lamps so as to splice in a 12" length of 24ga wire
[IMG]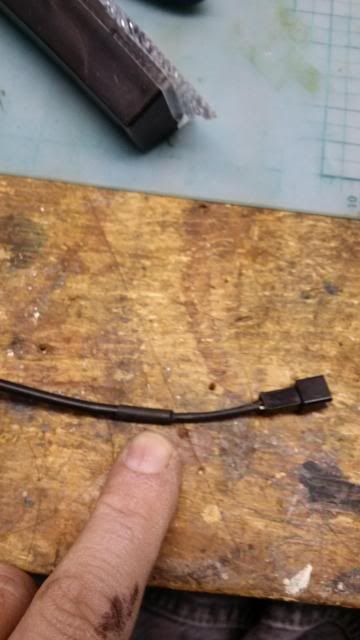 [/IMG]
[IMG]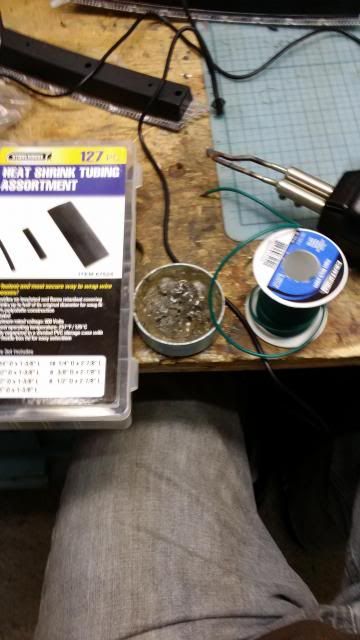 [/IMG]
[IMG] [/IMG]
[IMG]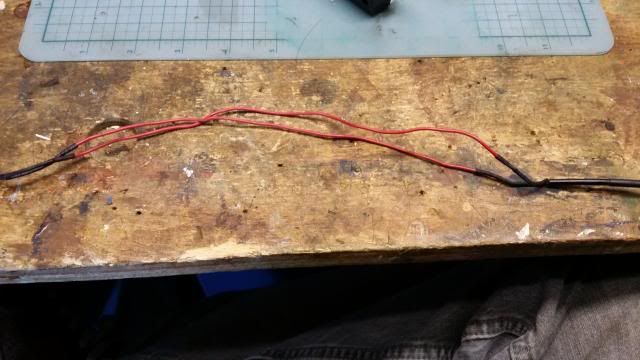 [/IMG]
Added the mounting tape to the lamp assemblies next. This stuff is quality as expected of 3m. Once mounted, they aren't going anywhere:
[IMG]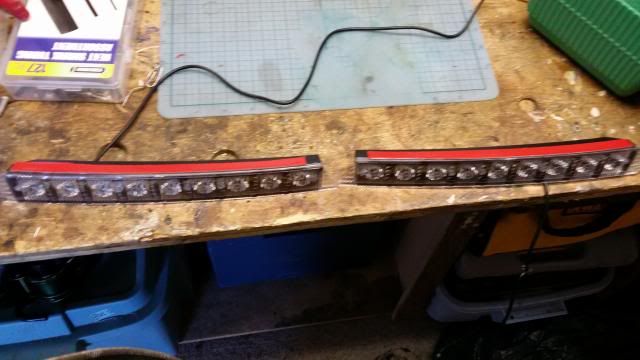 [/IMG]
[IMG]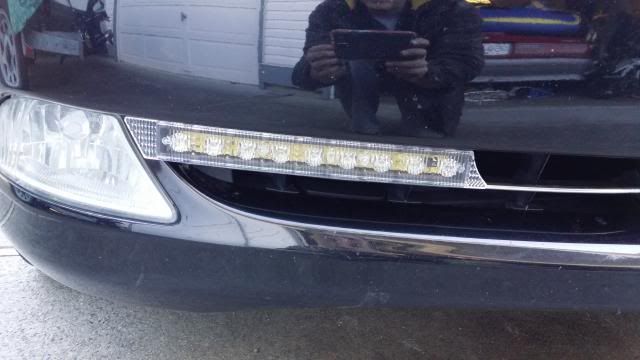 [/IMG]
As you can see from the pic above, it's amazing how closely the lights follow the angles of the valance and factory fog light, as though made for our cars. I considered removing the angled tab seen on the left side of the light, but I feared breaking a waterproof seal, so I left it alone.
Here is where the fuse panel is located. As mentioned earlier, it's on the passenger side if the engine compartment. I tapped into the wiper fuse, as it was the first power source I found that was a switched source. Many of the others were hot at all times. When looking at the fuse panel, it is the second one down from the top on the far right side row of fuses. For ground, I used an existing lug that secured the fuse panel to the fender well.
[IMG]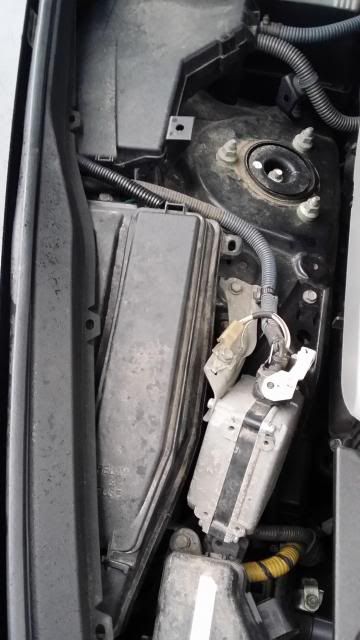 [/IMG]
Here's the outcome:
[IMG]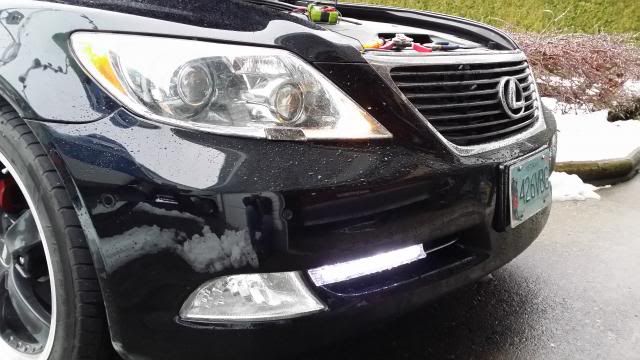 [/IMG]
[IMG]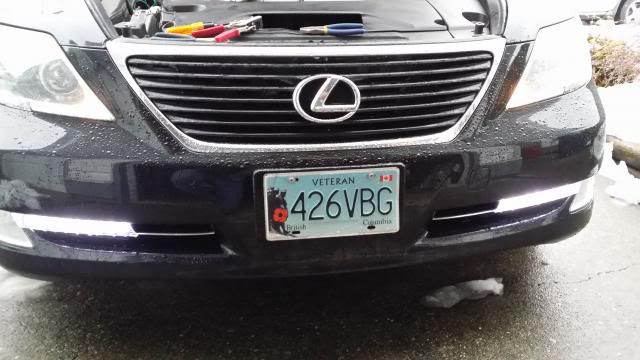 [/IMG]
It really looks factory. It's uncanny how the lines of the lights align perfectly with the lines of the valance. All angles are exactly matched as you can see from the pics. It's as thought they were made for our cars.
As always, if you have any questions with my DIY, fire away.
I went with these:
http://www.ebay.ca/itm/2x-9-LED-Audi...34bd19&vxp=mtr
There are countless sellers with this item and they are all the same except for the price. They sell as low as 9 dollars and as high as 50+. But they all come from the same Chinese supplier.
As for how I wired mine, I went with the "always on when ignition on". I did not want to go with relays and switches. The next time I go to a dealer, I'll have them disable my factory DRL's as these will now replace their function. For power, I wired into the passenger side under-hood fuse panel for a switched power source. Mounting the lights was facilitated with outdoor 3M Mounting tape as seen in pics.
NOTE: the supplied wire connections that came with the lamps ARE NOT long enough between the two lights, nor are they long enough to reach a power source. It's about 3 inches too short between the lamps. My pics will show how I easily tackled the minor glitch. All connections and splices are soldered and sealed with heat shrink tubing.
Here's the gear: I used 18 ga wire, but to be honest even THAT is awfully thick. To do it again, I would go with no larger than 22 ga. The wire that came with the bulbs is maybe a 24 ga or less.
[IMG]
 [/IMG]
 I used a fish tape to run the wire between the lamps behind the valance. It was at this point that I realized the wires were too short, so it was back to the drawing board:
[IMG]
 [/IMG]
This is where I cut the wire connection of one side of the lamps so as to splice in a 12" length of 24ga wire
[IMG]
 [/IMG]
[IMG]
 [/IMG]
[IMG]
 [/IMG]
[IMG]
 [/IMG]
Added the mounting tape to the lamp assemblies next. This stuff is quality as expected of 3m. Once mounted, they aren't going anywhere:
[IMG]
 [/IMG]
[IMG]
 [/IMG]
As you can see from the pic above, it's amazing how closely the lights follow the angles of the valance and factory fog light, as though made for our cars. I considered removing the angled tab seen on the left side of the light, but I feared breaking a waterproof seal, so I left it alone.
Here is where the fuse panel is located. As mentioned earlier, it's on the passenger side if the engine compartment. I tapped into the wiper fuse, as it was the first power source I found that was a switched source. Many of the others were hot at all times. When looking at the fuse panel, it is the second one down from the top on the far right side row of fuses. For ground, I used an existing lug that secured the fuse panel to the fender well.
[IMG]
 [/IMG]
Here's the outcome:
[IMG]
 [/IMG]
[IMG]
 [/IMG]
It really looks factory. It's uncanny how the lines of the lights align perfectly with the lines of the valance. All angles are exactly matched as you can see from the pics. It's as thought they were made for our cars.
As always, if you have any questions with my DIY, fire away.
Last edited by roadfrog; Mar 6, 2014 at 03:59 PM.


Trending Topics
Lead Lap


Joined: Jul 2010
Posts: 4,785
Likes: 154
From: The South
Good job. I never installed them on my 600 after I sold my 460. I use my fogs independently with 4300k hids only during the day time. Best of all I use the factory switch and they work only when car is on. With the flick of a hidden switch, I can go back into oem mode so the fogs work just like oem. My hids are actually much brighter than these LEDs but your look great on the car. That's exactly why Tee and I got these because of how they match the lines. One member on here installed them upside down and it doesn't look right, but you did it right!
Thread Starter
Lexus Fanatic
Joined: Jan 2014
Posts: 5,371
Likes: 526
From: BC Canada
")
Lead Lap
Joined: Jul 2010
Posts: 4,785
Likes: 154
From: The South
I believe so. I know amazon and ebay have the dimensions. But the ends of the led bars have unique characteristics and you can't butt this particular style together with another bar flush without modding it and potentially introducing leaks. I personally think it wouldn't look right. You should look into the Phillips 8 DRL system..way way brighter but not quite as thin as these.

