Hello everyone. I finished my stereo install for now and wanted to post pics of what I did in case anyone else wants to do this also.
2003 LS430 non Nav non ML
Pioneer CD Player (old one I already had)
Factory amp bypass and removal
Pioneer TS-M650 PRO speakers 4ohm
Q Power Tweeters 4 ohm (old ones I already had)
Rockford Fosgate 15" P1 4 ohm (old ones I already had)
Autotek 1500 watt max amp wired at 4 ohm mono (old one I already had)
I'll break them down in different posts to make them easier to read.
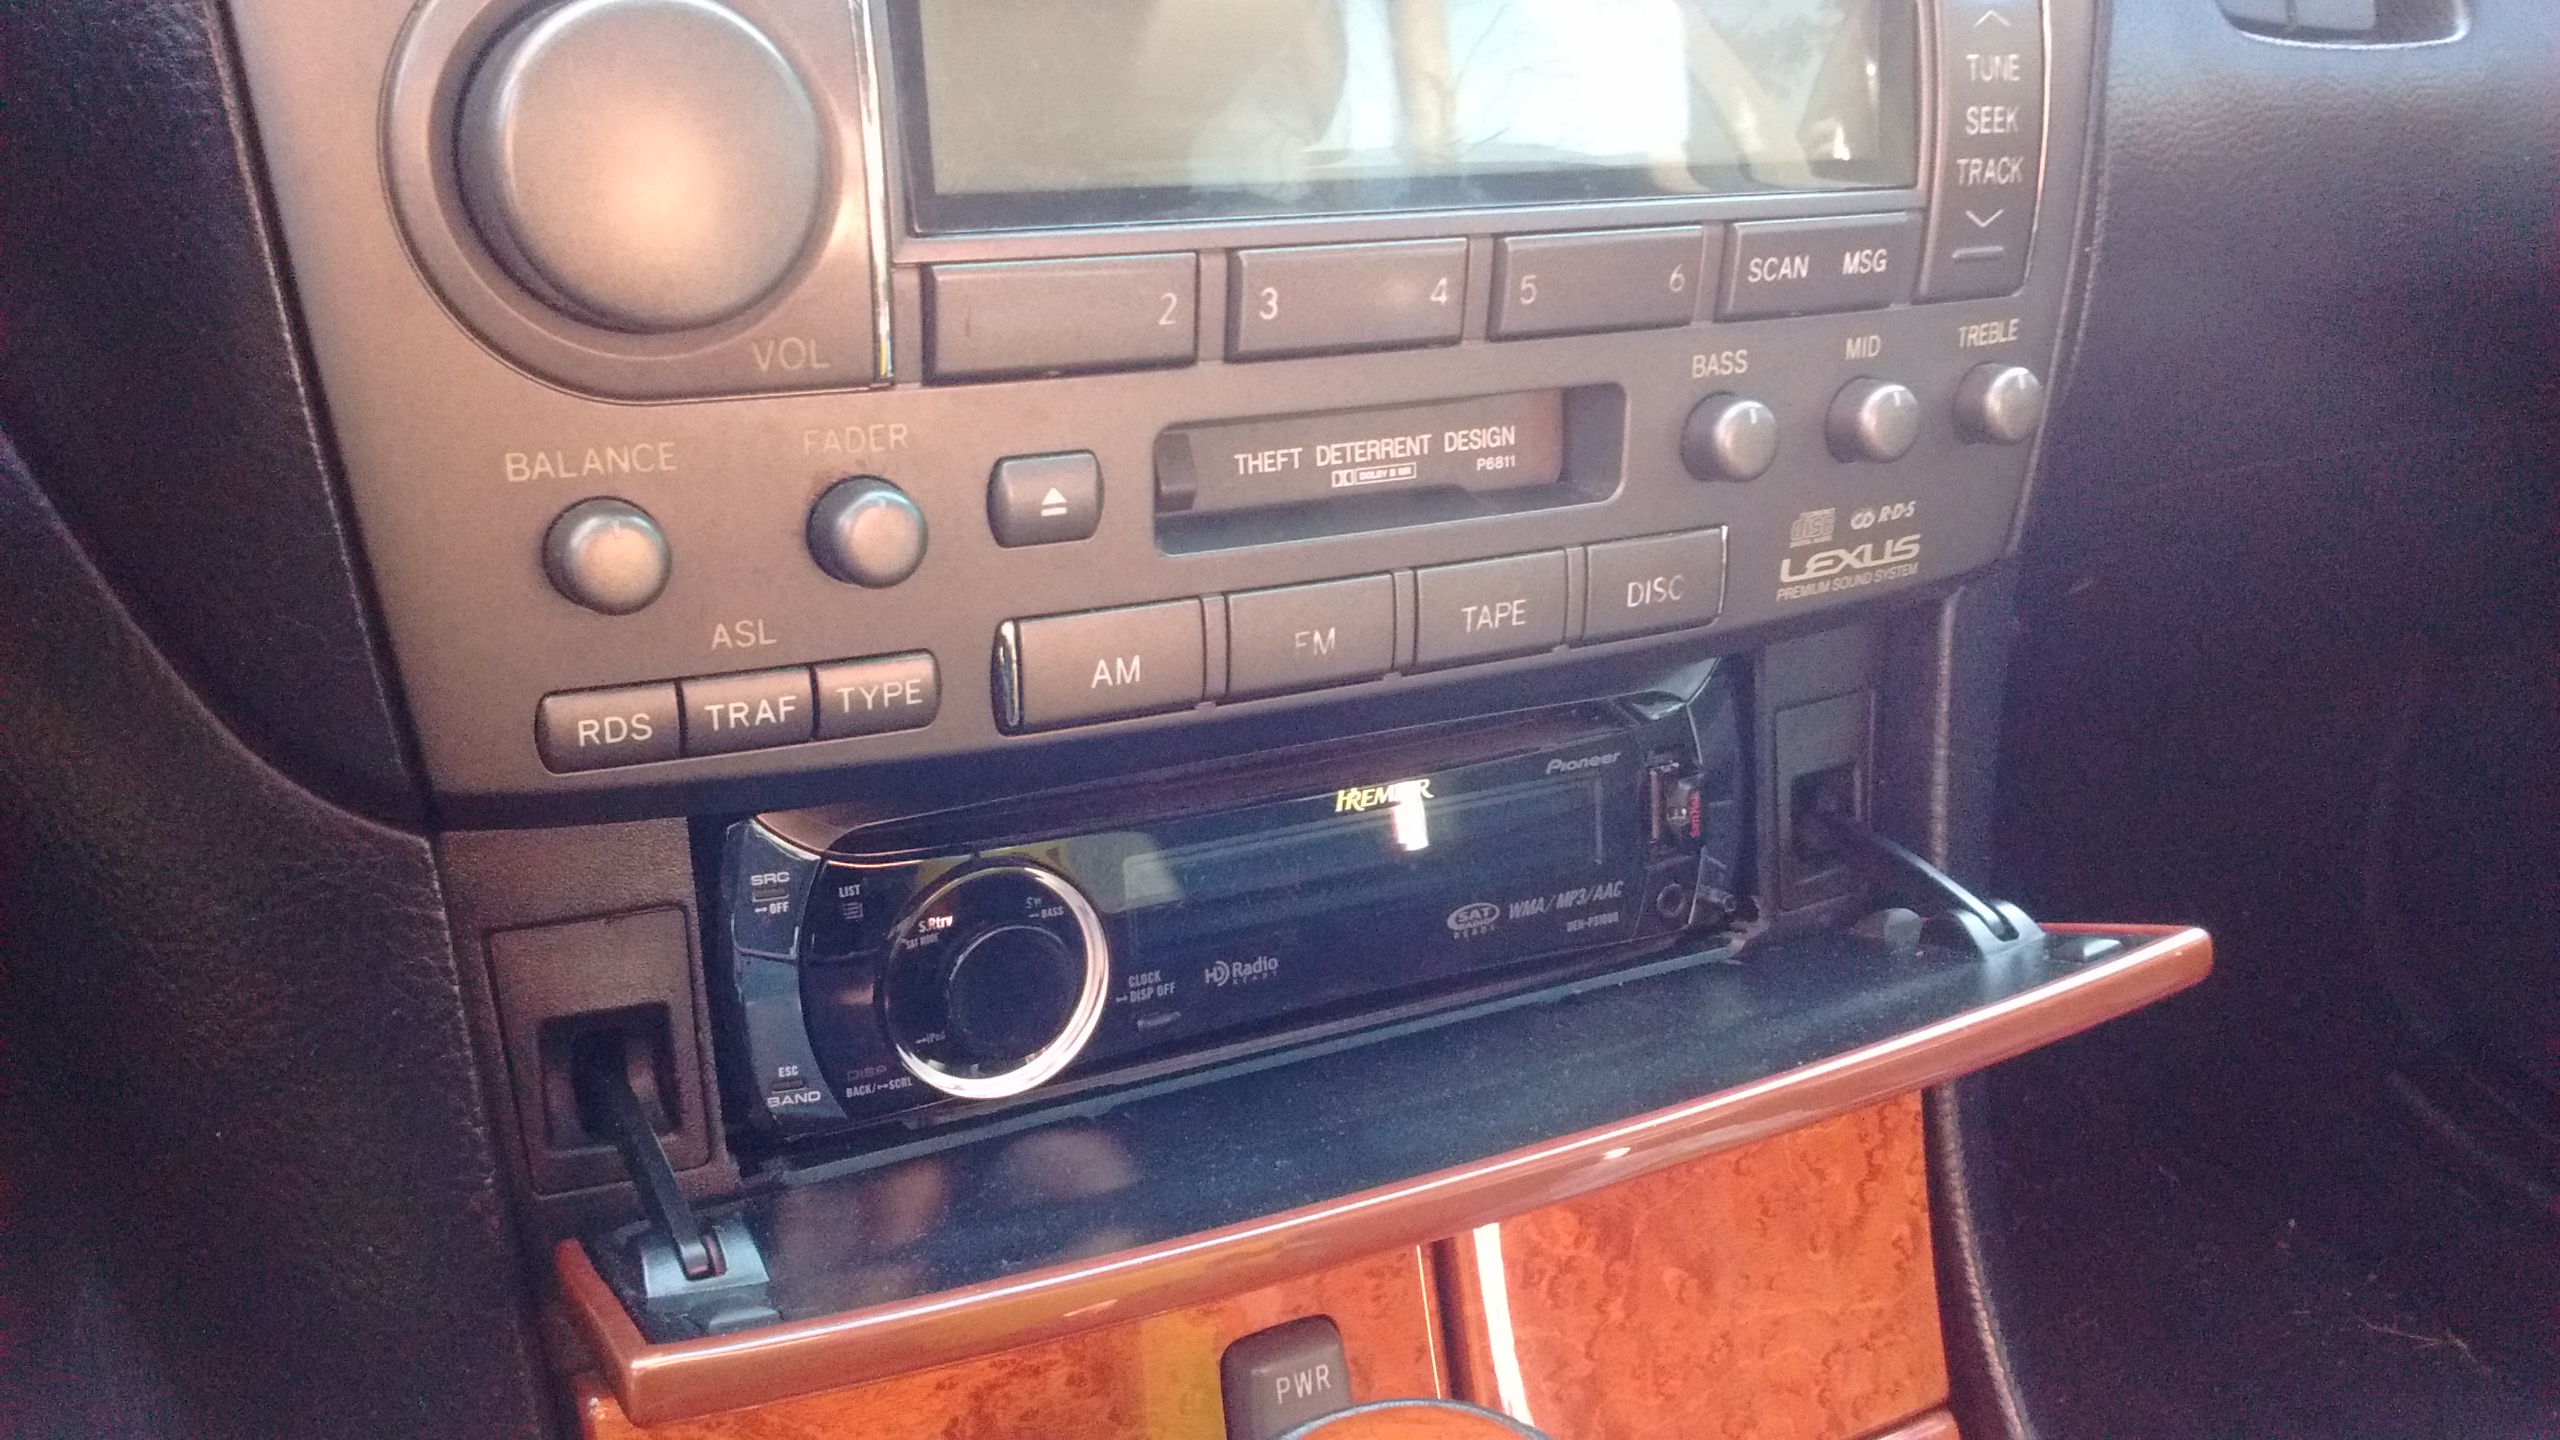
Stereo is a Pioneer CD Player 22w x4 RMS 50w x4 Max.
I had it wired up to interface with the factory amp using a TYTO-01 adapter. Since I am bypassing the factory amp I modified the TYTO-01 adapter to only use the Battery +, Constant +, and Ground to power the aftermarket CD Player.
I also separated the factory CD changer from the factory head unit and put the Pioneer CD player in that location.
I want to thank rkw77080 for providing the wiring diagram for the factory amp.
The Pioneer CD player will be powering all 4 door speakers and two tweeters in the front that I installed. The factory dash tweeters are no longer being used.
I ran all the speaker output wires from the Pioneer CD player to the trunk and tapped them into the speaker output wires from the factory amp.
I removed the factory amp because its no longer needed.
I used electrical tape to cover the factory amp harness plugs to protect from electrical shorts and dust.
The Autotek amp wires are also ran too.
For the door speakers I bought 4 Pioneer 6.5" TS-M650 PRO speakers. I only ended up using two for the front doors because they sound more than good enough and are already super load and put the factory Lexus Audio to shame.
The factory speakers have the following impedence:
Front doors 2 ohm
Rear door 4 ohm
Dash tweeters 6 ohm
Rear Sub 2 ohm
I removed the rear sub since I will no longer need it since I put 2 15"s
So now all doors speakers are 4 ohm. Subs are wired at 4 ohm mono. If the Autotek amp could handle a 1 ohm mono load I would wire them up at 1 ohm mono.
I built custom speaker pods out of 1/2" MDF for the front door speakers. The speaker magnets are so big the window would hit the magnet while being rolled down if I used the factory plastic adapters.
The factory speakers for my car are one piece. I cut one out to try and fit the Pioneer 6.5 speakers but making them myself worked out better for me.
Used Q Power tweeters for the front doors....$10 tweeters but they sound really good. Ebay has them.
Subs are two Rockford Fosgate 15's. Autotek amp amp. Also pic of door with tweeter is posted here and the Pioneer 6.5 installed also. I didn't want to drill any holes in the factory doors so that's why you can see the tweeter wire. It doesn't bother me so I don't care if it shows.
The only splicing of factory wiring I did was at the factory amp output wires and front door speakers. Only hole I drilled was in the firewall to run the 4 guage power wire. A lot of people like to run the amp power wire through the factory grommet behind the battery which is fine but if I don't have to mess with factory wiring or grommets I prefer not to.
Future plans:
Since the subs take up almost all my trunk space. I will be replacing them with one 10" Sundown Audio X-10 and a 1300watt RMS amp capable of a 1 ohm mono load. No time frame yet on this but I'll keep everyone posted.
You said that you ran new speaker output wires from the Pioneer CD player to the back of the trunk. What route did you take to get them from the console to the trunk? I would like to run an antenna cable from the trunk to the front console for my new head unit installation so I am looking for the best route to run the cable.
You said that you ran new speaker output wires from the Pioneer CD player to the back of the trunk. What route did you take to get them from the console to the trunk? I would like to run an antenna cable from the trunk to the front console for my new head unit installation so I am looking for the best route to run the cable.
Thanks!
I ran the antenna cable down the passenger side of the vehicle.
At the dashboard what I did is use a metal coat hanger and straighten it out. Also wrap the straightened coat hanger with electrical tape in case it makes any contact with exposed cables as to not short anything out.
Tie the antenna cable to the coat hanger and run it through the dash to the passenger side panel under the glove box...(remove this panel). Remove the door sills...(I think that's what they are called) and remove rear seat.
Run antenna cable down the passenger side.
At that point you should be able to find an opening to run the antenna cable to the trunk.
Radio tuner box will be on the passenger side trunk area.
I'm sure you can probably do the same and run it down the drivers side but I don't know of what obstacles might come up since I ran all my wiring down the passenger side.
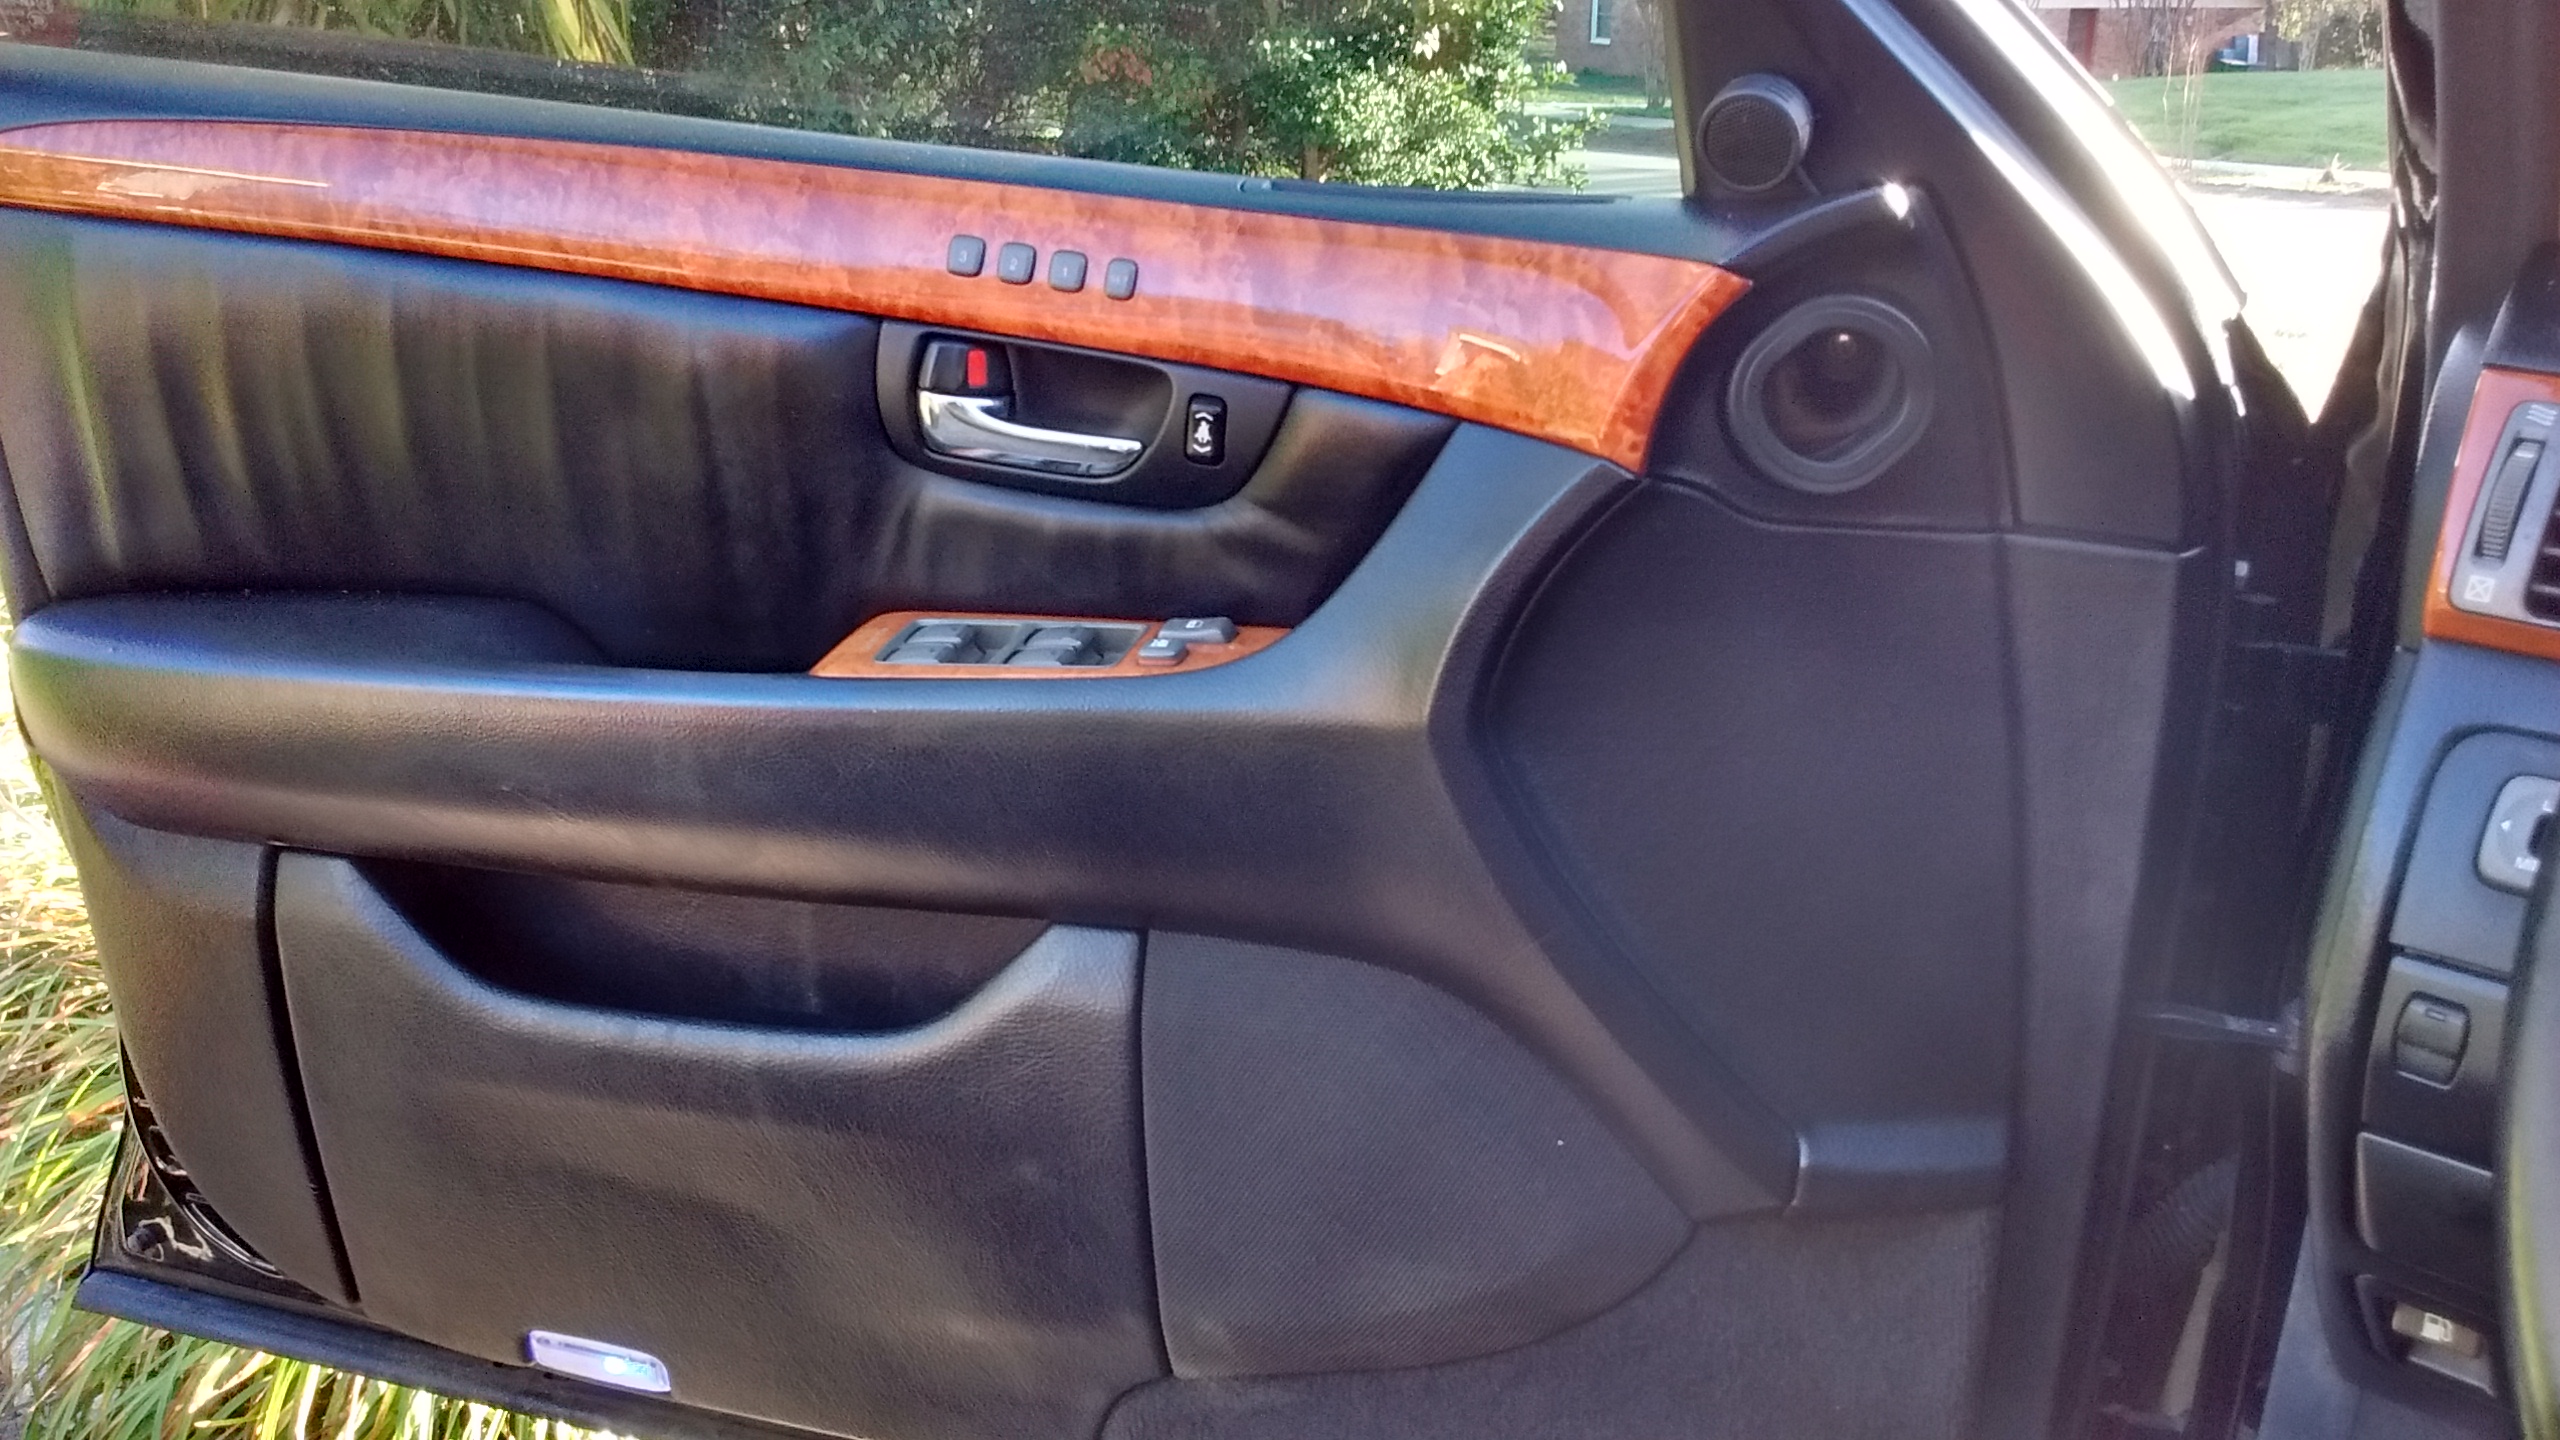
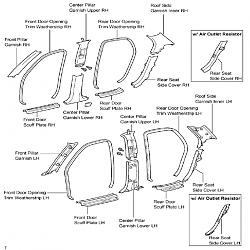
Running the antenna down the passenger side makes sense since the tuner is on that side - that is where I need to tap into the rear window antenna. Are the door "sills" the same thing as the "scuff plates and pillar garnish"? See the attached drawing of the door trim:
Also, after you went behind the glove box, where did the antenna come out? Did it come out under the carpet? On top of the carpet?
Thanks!
According to your diagram you need to remove the front and rear door scuff plates...(pull up and they pop out).
The center pillar garnish can be removed or just popped out towards the bottom. I didn't completely remove the center pillar garnish, just popped it out towards the bottom. Either way will work.
When you have your stereo removed look at the dashboard behind it towards the right and you will see a small opening through to the carpet...you might need a flashlight if your in a low light situation.
The reason I used a coat hanger and taped the wires to it is that Lexus tolerances are so tight due to the fact that is a high quality auto, its hard to stick your hand anywhere to run wires. You can use the coat hanger to fish the wire through. Wrap the coat hanger with electrical tape in case it makes contact with any connectors so it wont short anything.
The antenna wire will come out on top of the carpet. There is a panel under the glove box that will need to be removed, it pops out also.
I attached a pic that you can look. I was going to post it with the other pics but ran out of space.
The pic shows the Pioneer head unit. You can see the wires behind it. If you look to your right you will see wires hanging under the glove box....that's where your antenna cable needs to come out.
Thanks for the great information! I probably should have asked this before, but I assume that a 17-foot antenna extension cable should be enough to cover the route from the tuner to the back of the console. I have already purchased the extension cable but I can take it back and exchange it if I need it to be longer.
Thanks for the great information! I probably should have asked this before, but I assume that a 17-foot antenna extension cable should be enough to cover the route from the tuner to the back of the console. I have already purchased the extension cable but I can take it back and exchange it if I need it to be longer.
Your welcome! I honestly don't know if 17 foot is long enough. I already had the antenna extension cable from another car I previously owned that was longer than the LS430 so I knew it would work but I didn't measure it. I know 20 feet would for sure be long enough.
If you don't want to get a 20 foot extension ask a local car audio shop and see what they say.
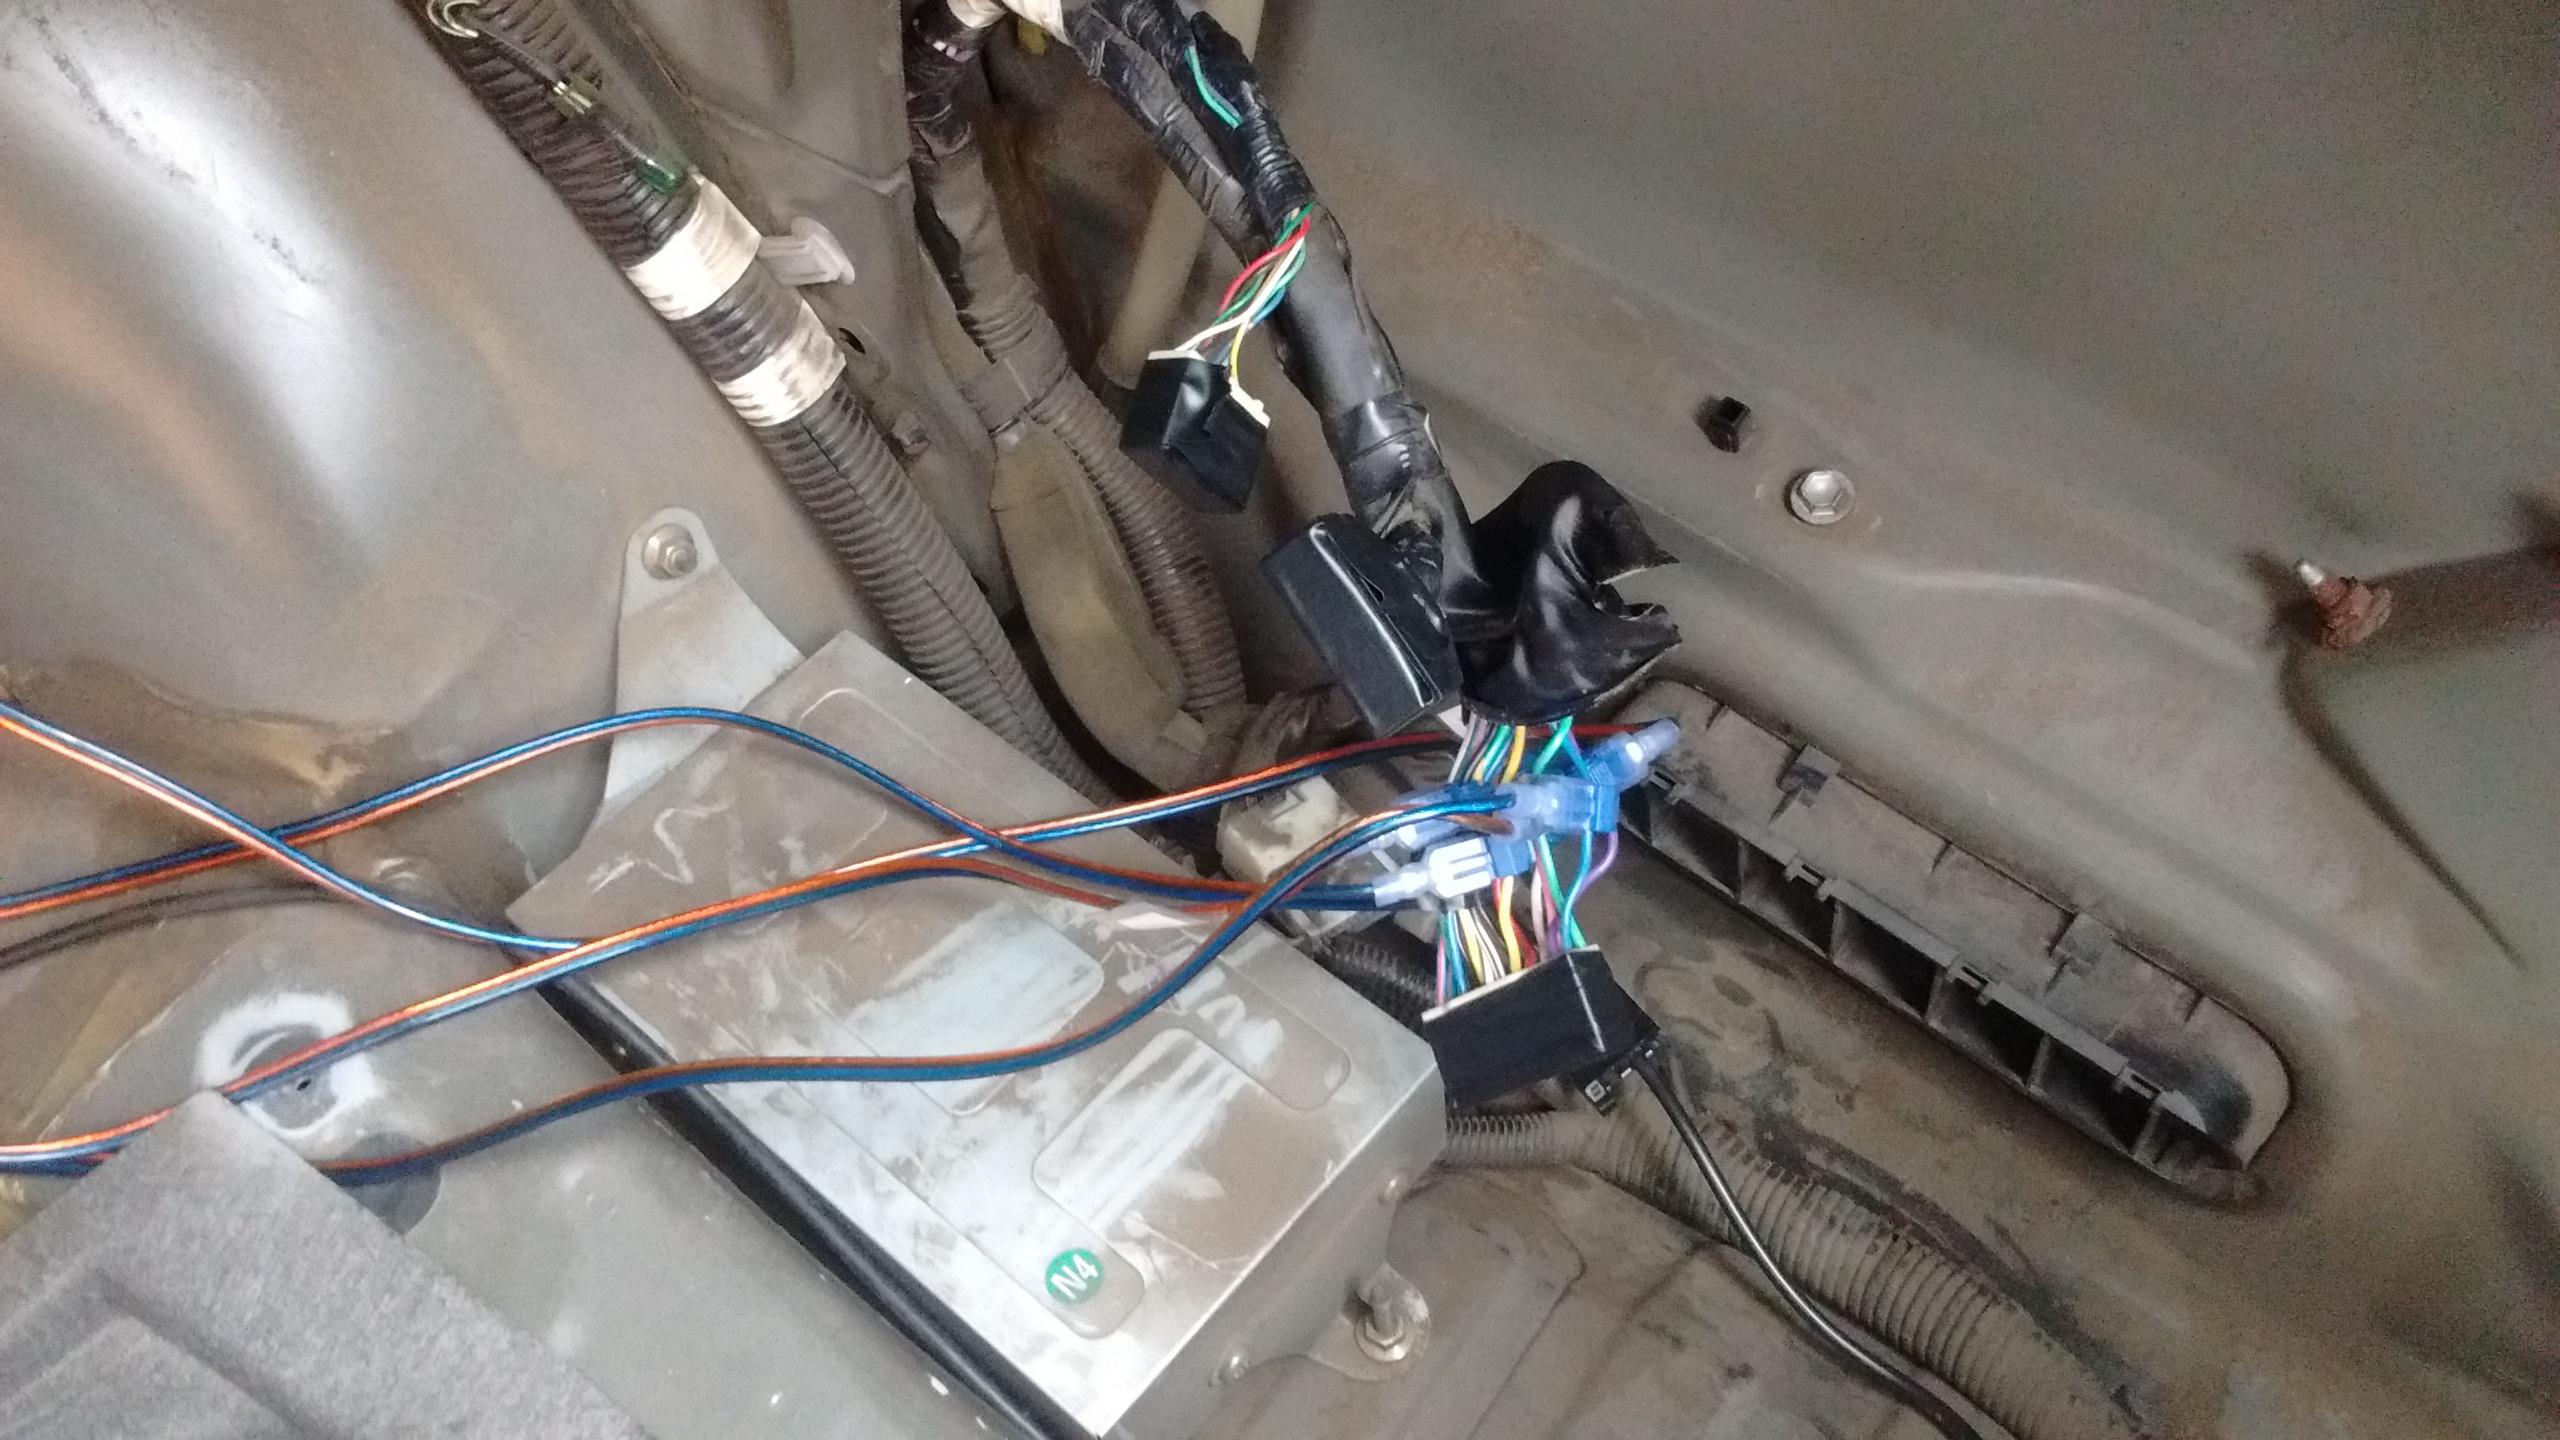
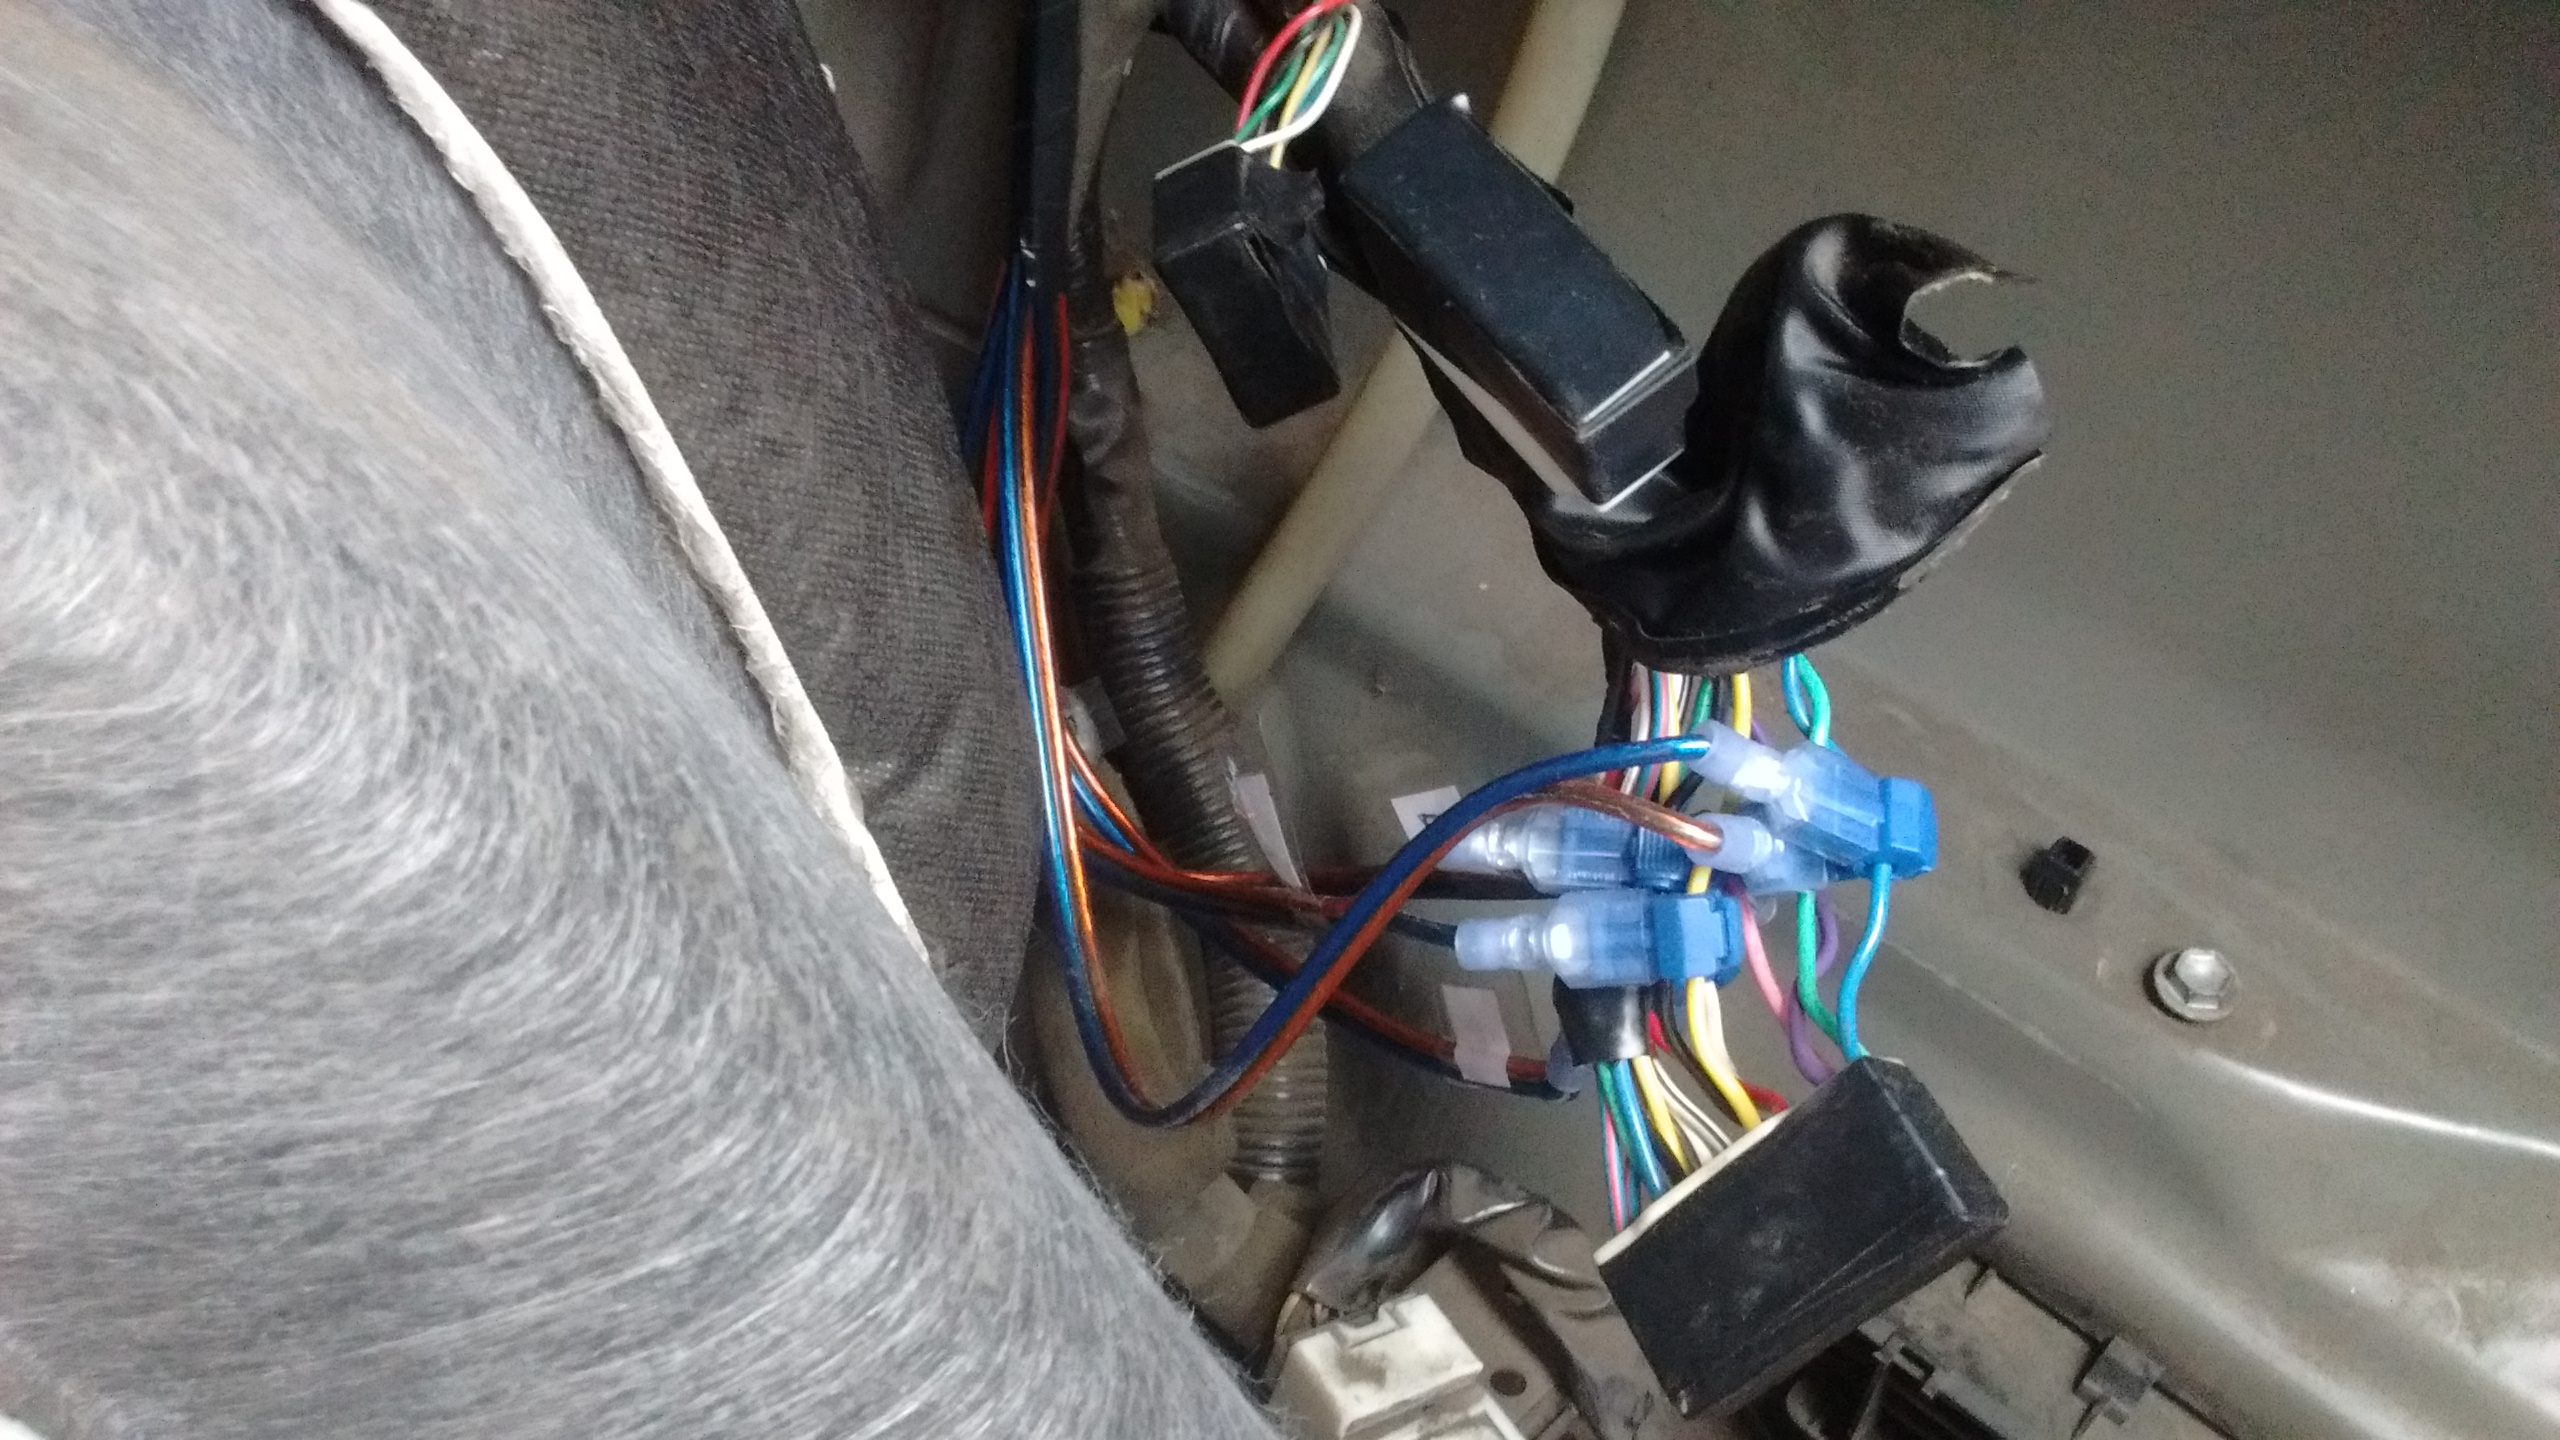
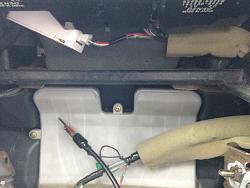
Oldsports- from an old post you were asking me how to fish the wires through. I explained that I had to run the wires up through the rear deck lid like Indulgent did (I attached picture for the example). I had to do the same thing that Indulgent when running new wires from the speakers to the aftermarket amp in the truck but I didn't tap into the oem wires. I give extensive kudos to Indulgent for this write up!!!!!! When I was doing my ML rip-out I was going to do a step by step but once your in the project, you forget because I wanted to be done within the two day weekend window.
Again GREAT WRITE-UP INDULGENT!!!!
I ran my power wires & speaker wires through the rear deck lid like this but in different locations (to the left side of the truck- my aftermarket amp is right behind the inserted black toolkit hidden from being seen).
Thanks so much for your help! I was able to run the antenna exactly like you said. Using a straightened coat hanger (covered with electrical tape), I fished the antenna starting at the console opening, around the glove box, through the channel covered by the door scuff plates and behind the pillar cover next to the back seat. I removed the back seat and loosened the rear deck just enough to fish the antenna through one of the openings near the subwoofer and down into the trunk. I loosened the trunk insulation just enough to fish the antenna behind it and over to the tuner where the antenna connection is.
A 17-foot antenna cable was not enough to make the trip; 20 feet is about right. I purchased another short antenna extension and added it to the 17-foot cable (connected the ends and wrapped them with electrical tape). I hope that does not adversely affect my reception. I will check this out when I finish installing the new head unit.
The reason I have not yet installed my new head unit is that I ran into an unexpected obstacle. When I removed the OEM unit, I found two things behind it - the magnetic field sensor (small white box) and a plastic brace that runs across the top of the console opening (black bar).
The magnetic field sensor was mounted to the top of the opening; I was able to detach it and I plan to hide it out of the way so it does not interfere with the new head unit. However, the brace is a different story. It is a part of the molding and it blocks my head unit from being inserted in the opening. The OEM unit does not extend very far at the top so the brace is not a problem for it. The only way I see to get it out of the way is to cut it. Did either of you encounter this issue with your installs? If so, how did you handle it?
Thanks!
Glad you got your antenna wire ran!
I didn't have any issues with the brace or magnetic sensor since I mounted my head unit where the 6 disc CD changer once was which is way below it.
Is you system a non Nav non ML? Did you use a mounting kit or are you making your own mount?
If you have a Nav and ML system I don't know too much about those. But even if you have Nav and ML if you purchased a car audio mounting kit for your vehicle you shouldn't have any clearance problems mounting your head unit.