When you click on links to various merchants on this site and make a purchase, this can result in this site earning a commission. Affiliate programs and affiliations include, but are not limited to, the eBay Partner Network.
Disclaimer: If YOU touch your car by following my "how to do" instructions and you break something, I assume no liability. With that said, let’s move on.
An extensive amount of work was put in to make this happen. Please appreciate it!
Thank you very much everyone in club Lexus and outside sources including many members you will see comments bellow and in other threads pertaining to this project. Extra huge thanks to Jeff Lange, specONE, Winstonchu, Mesh704, TinoPing, Sasnuke and all others that helped.
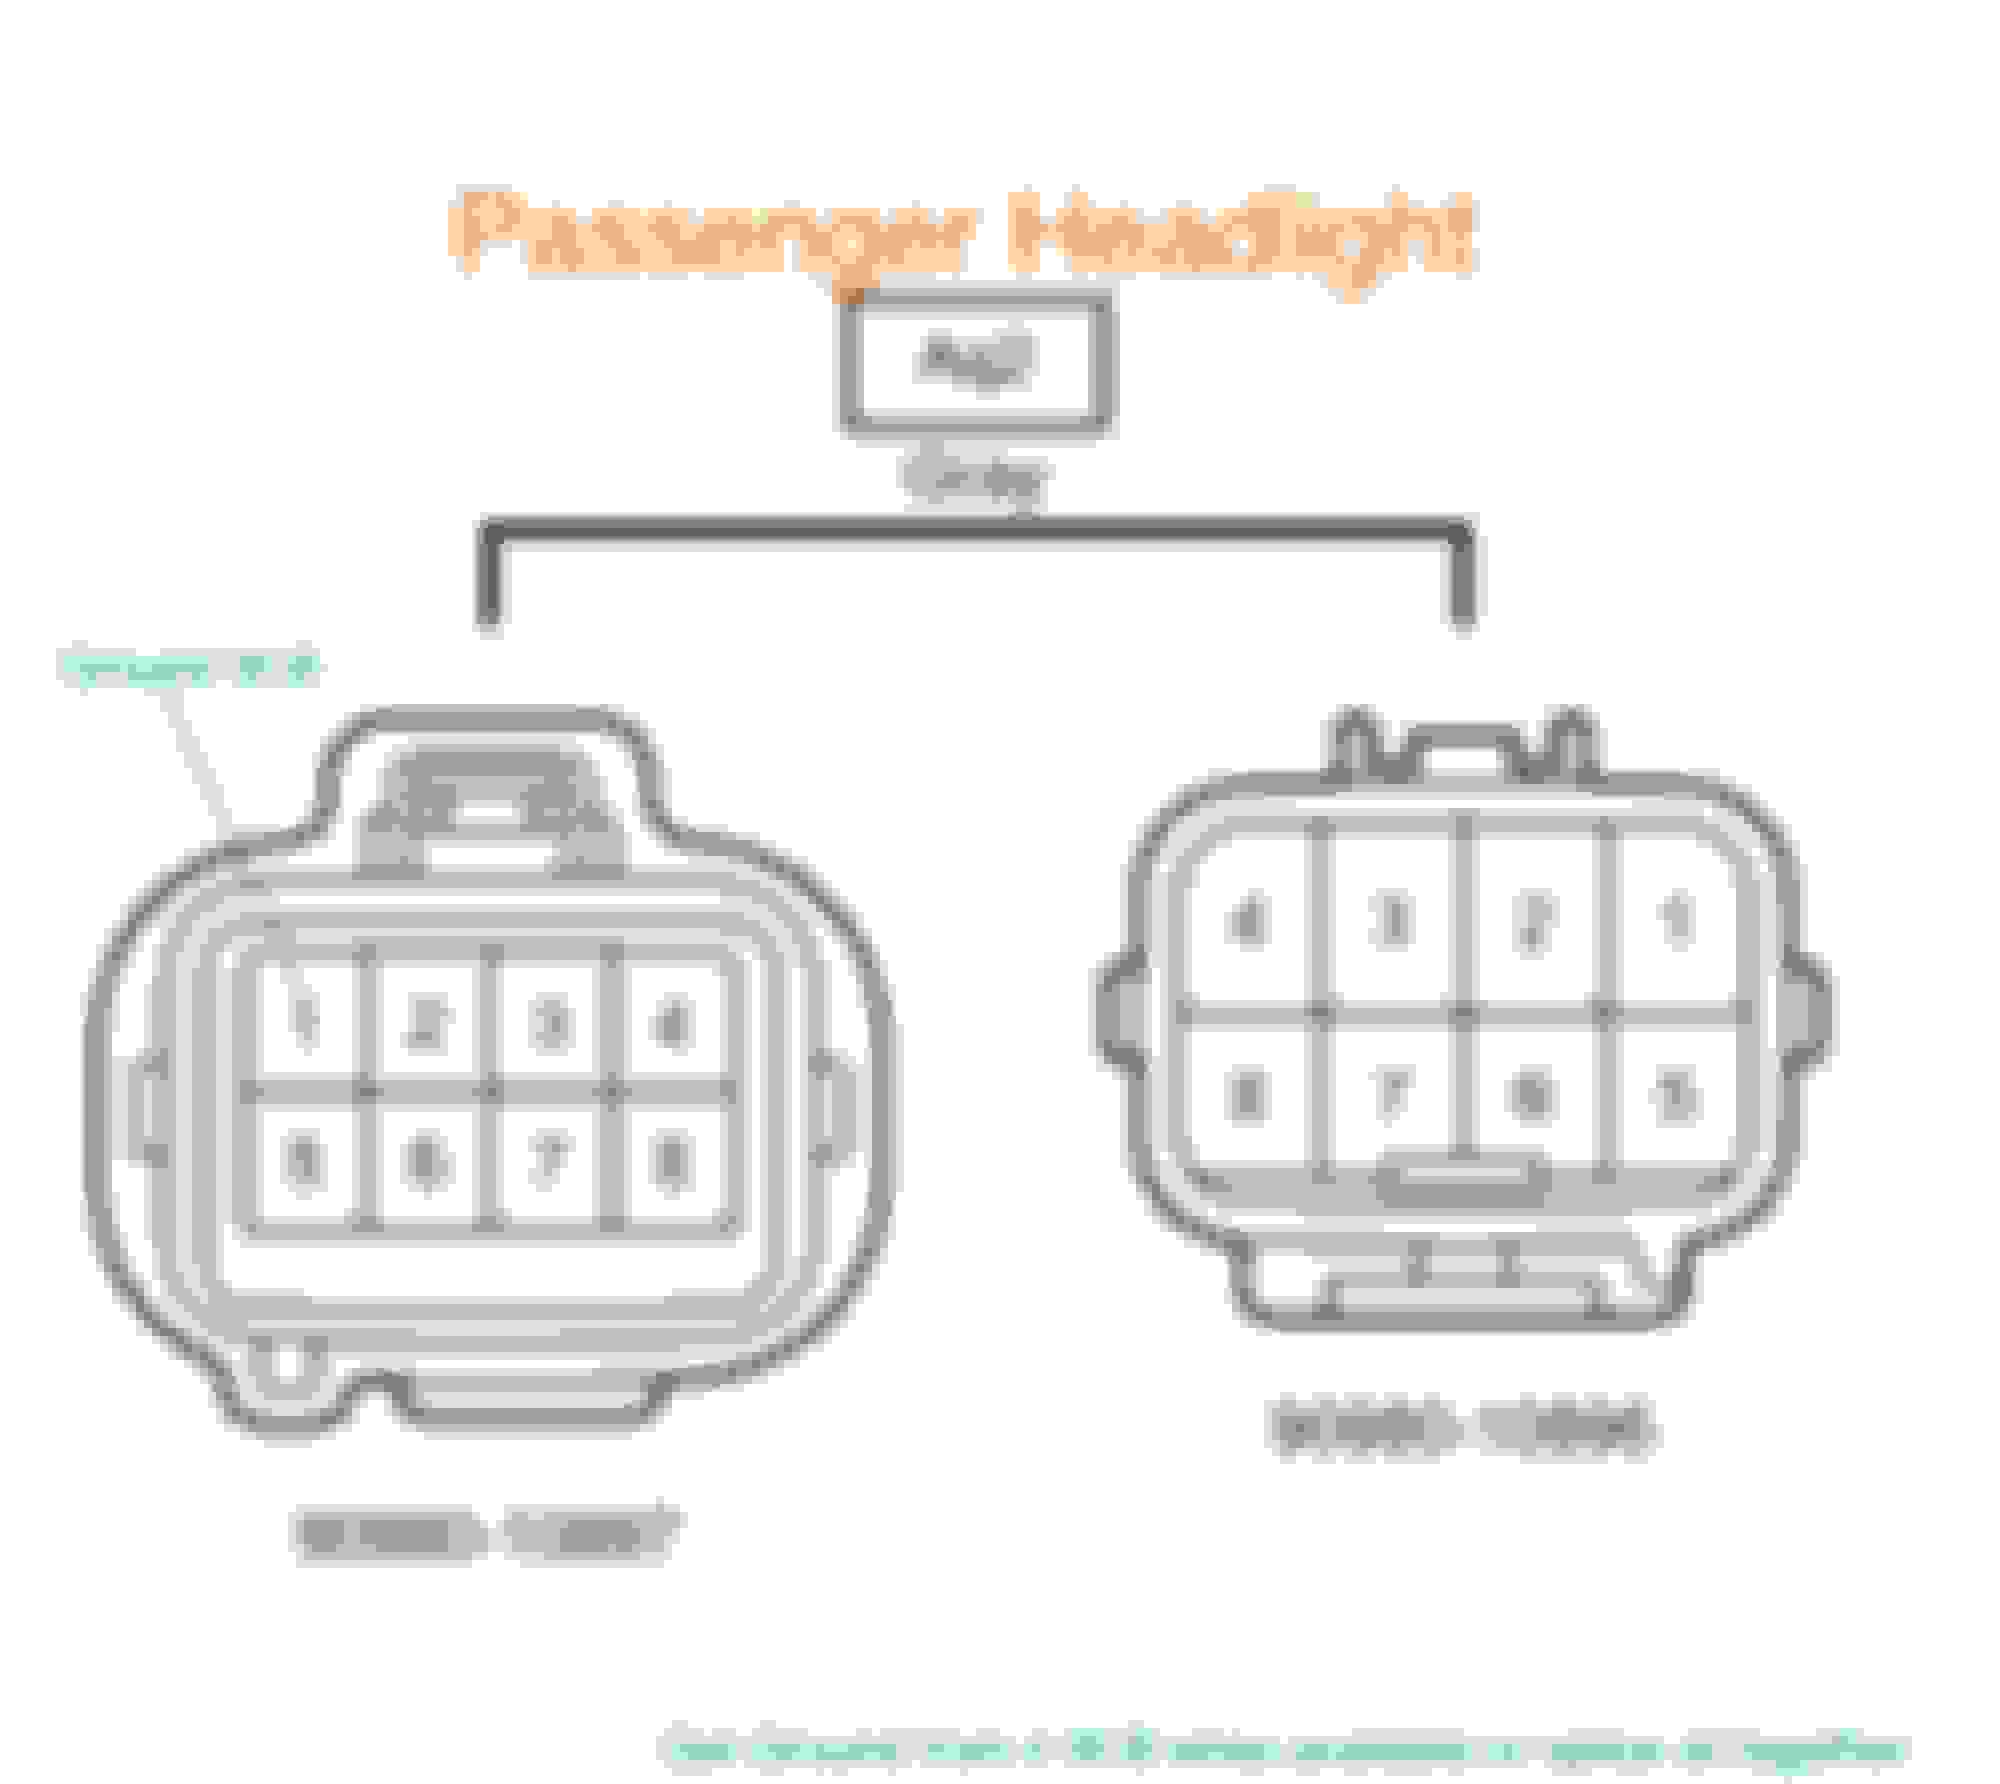
2014-2016 iS3XX
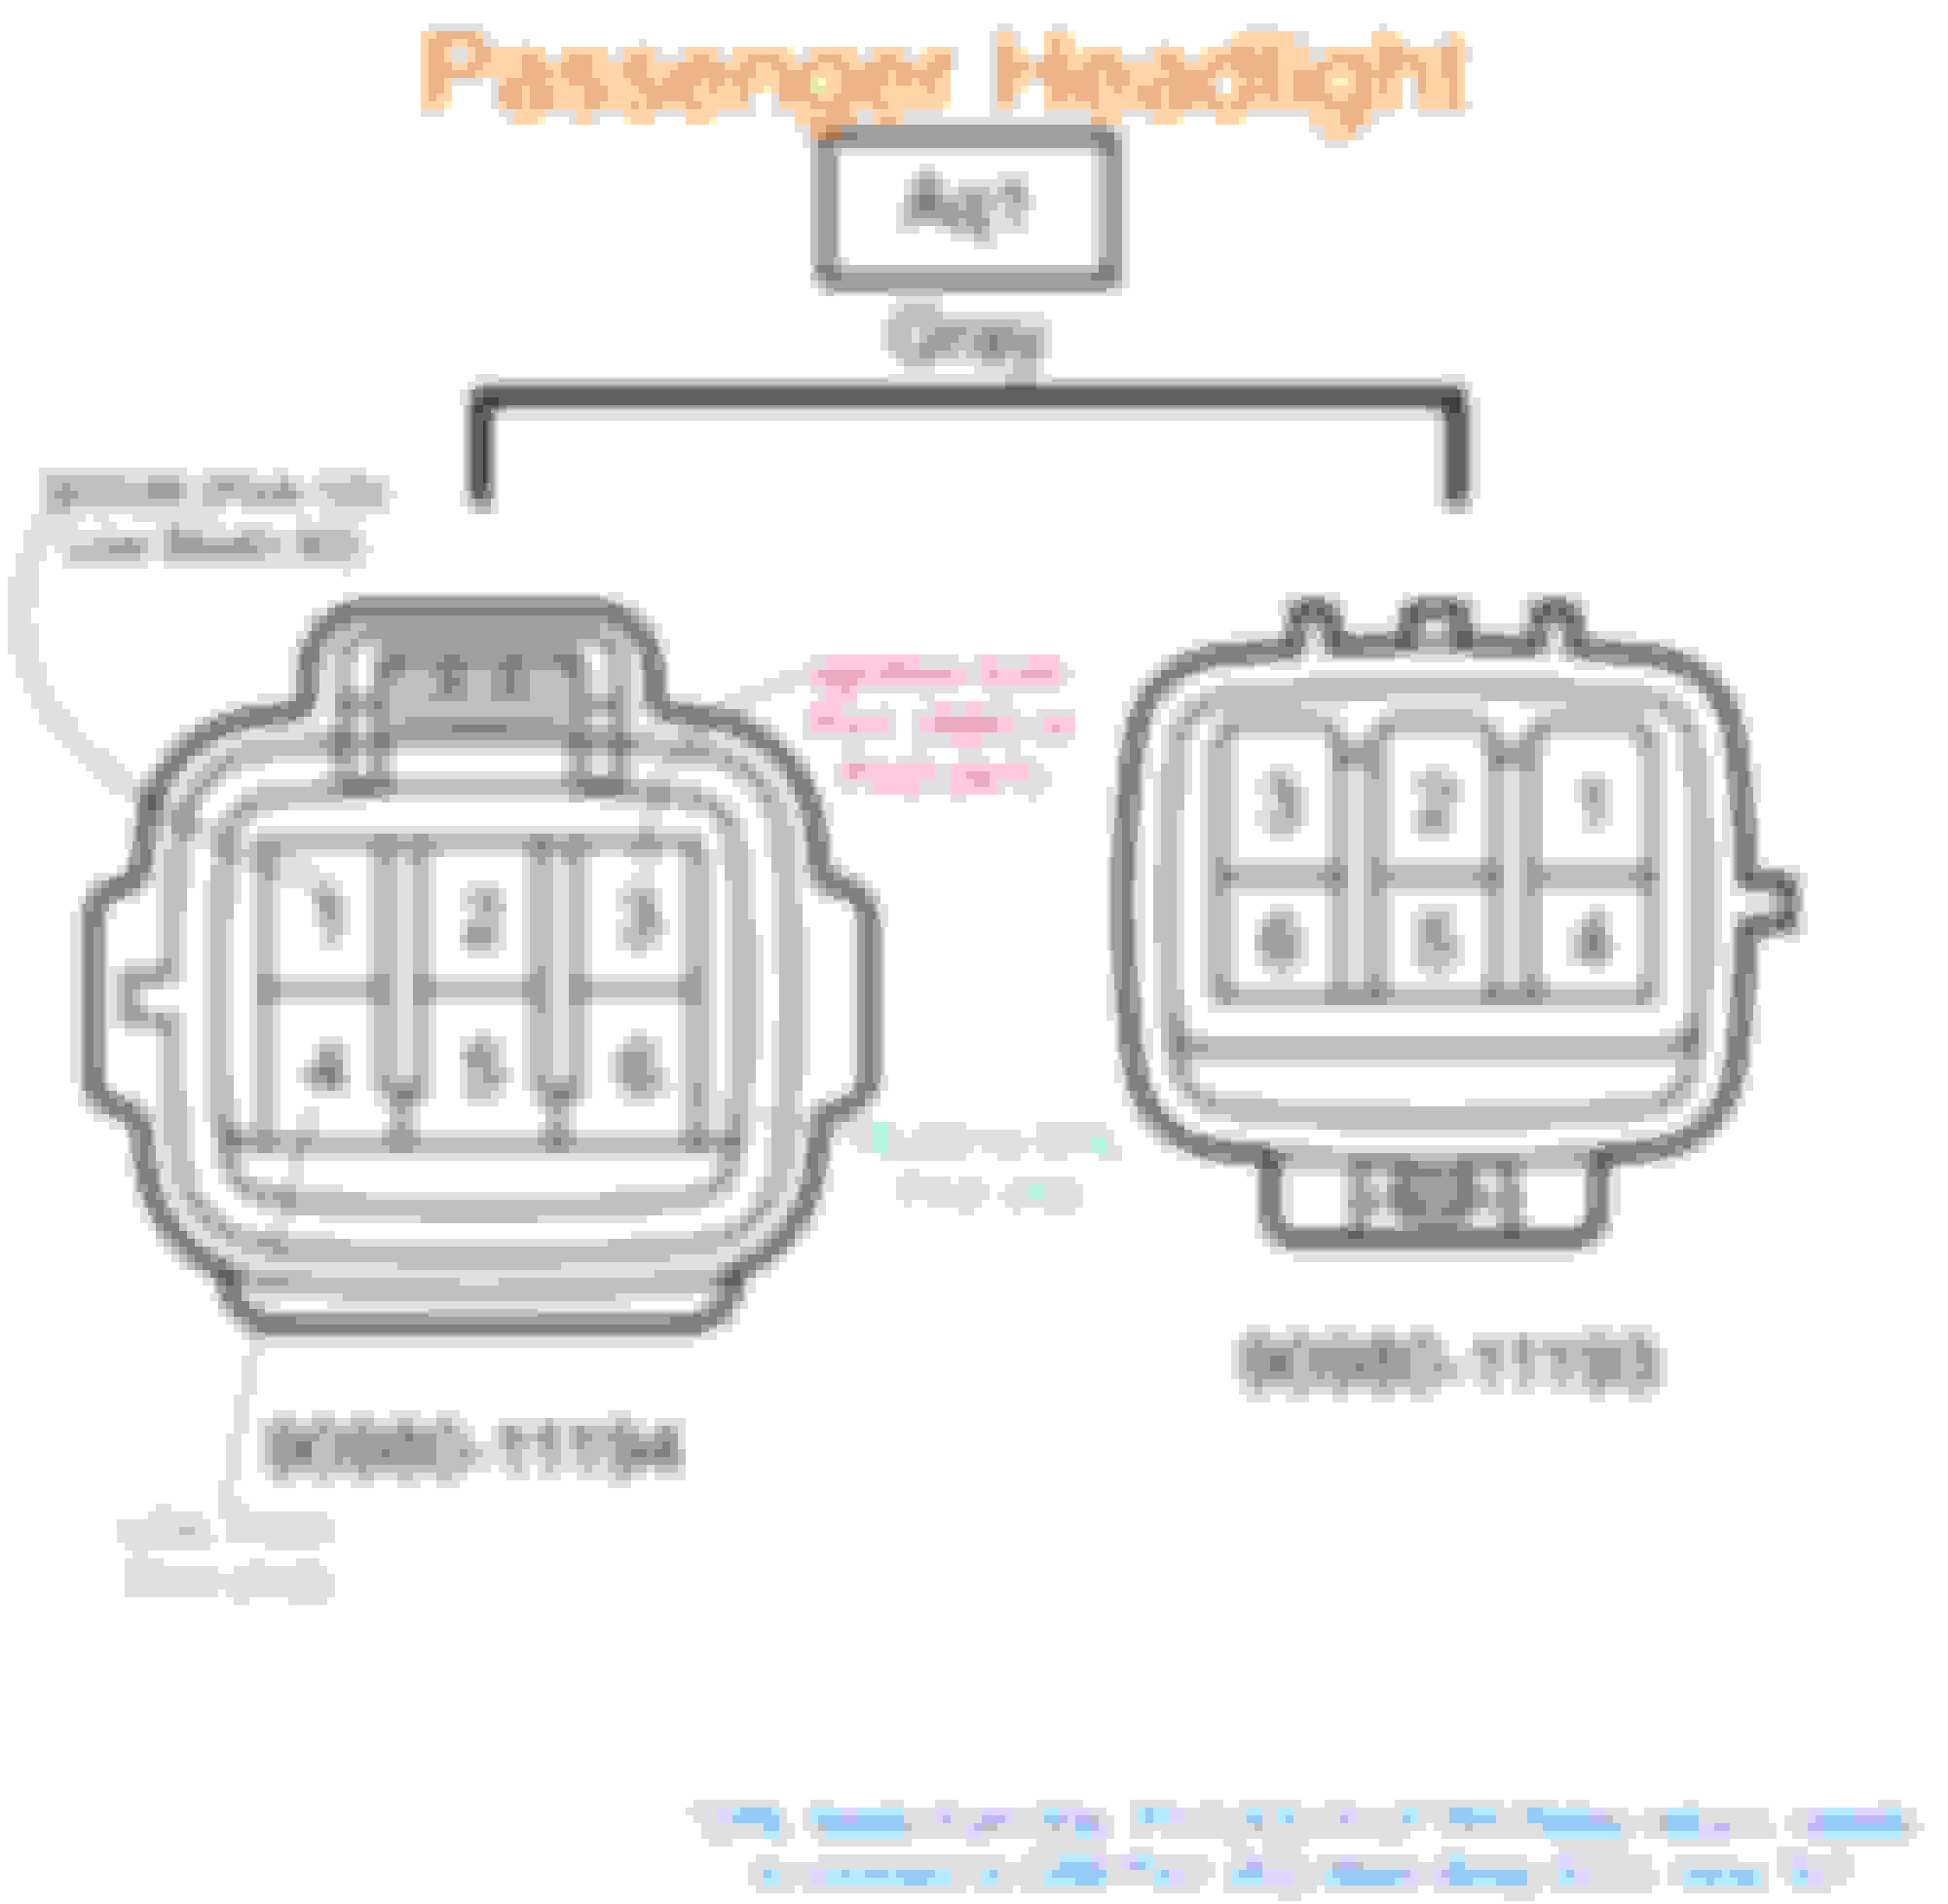
2017-Up iS3XX
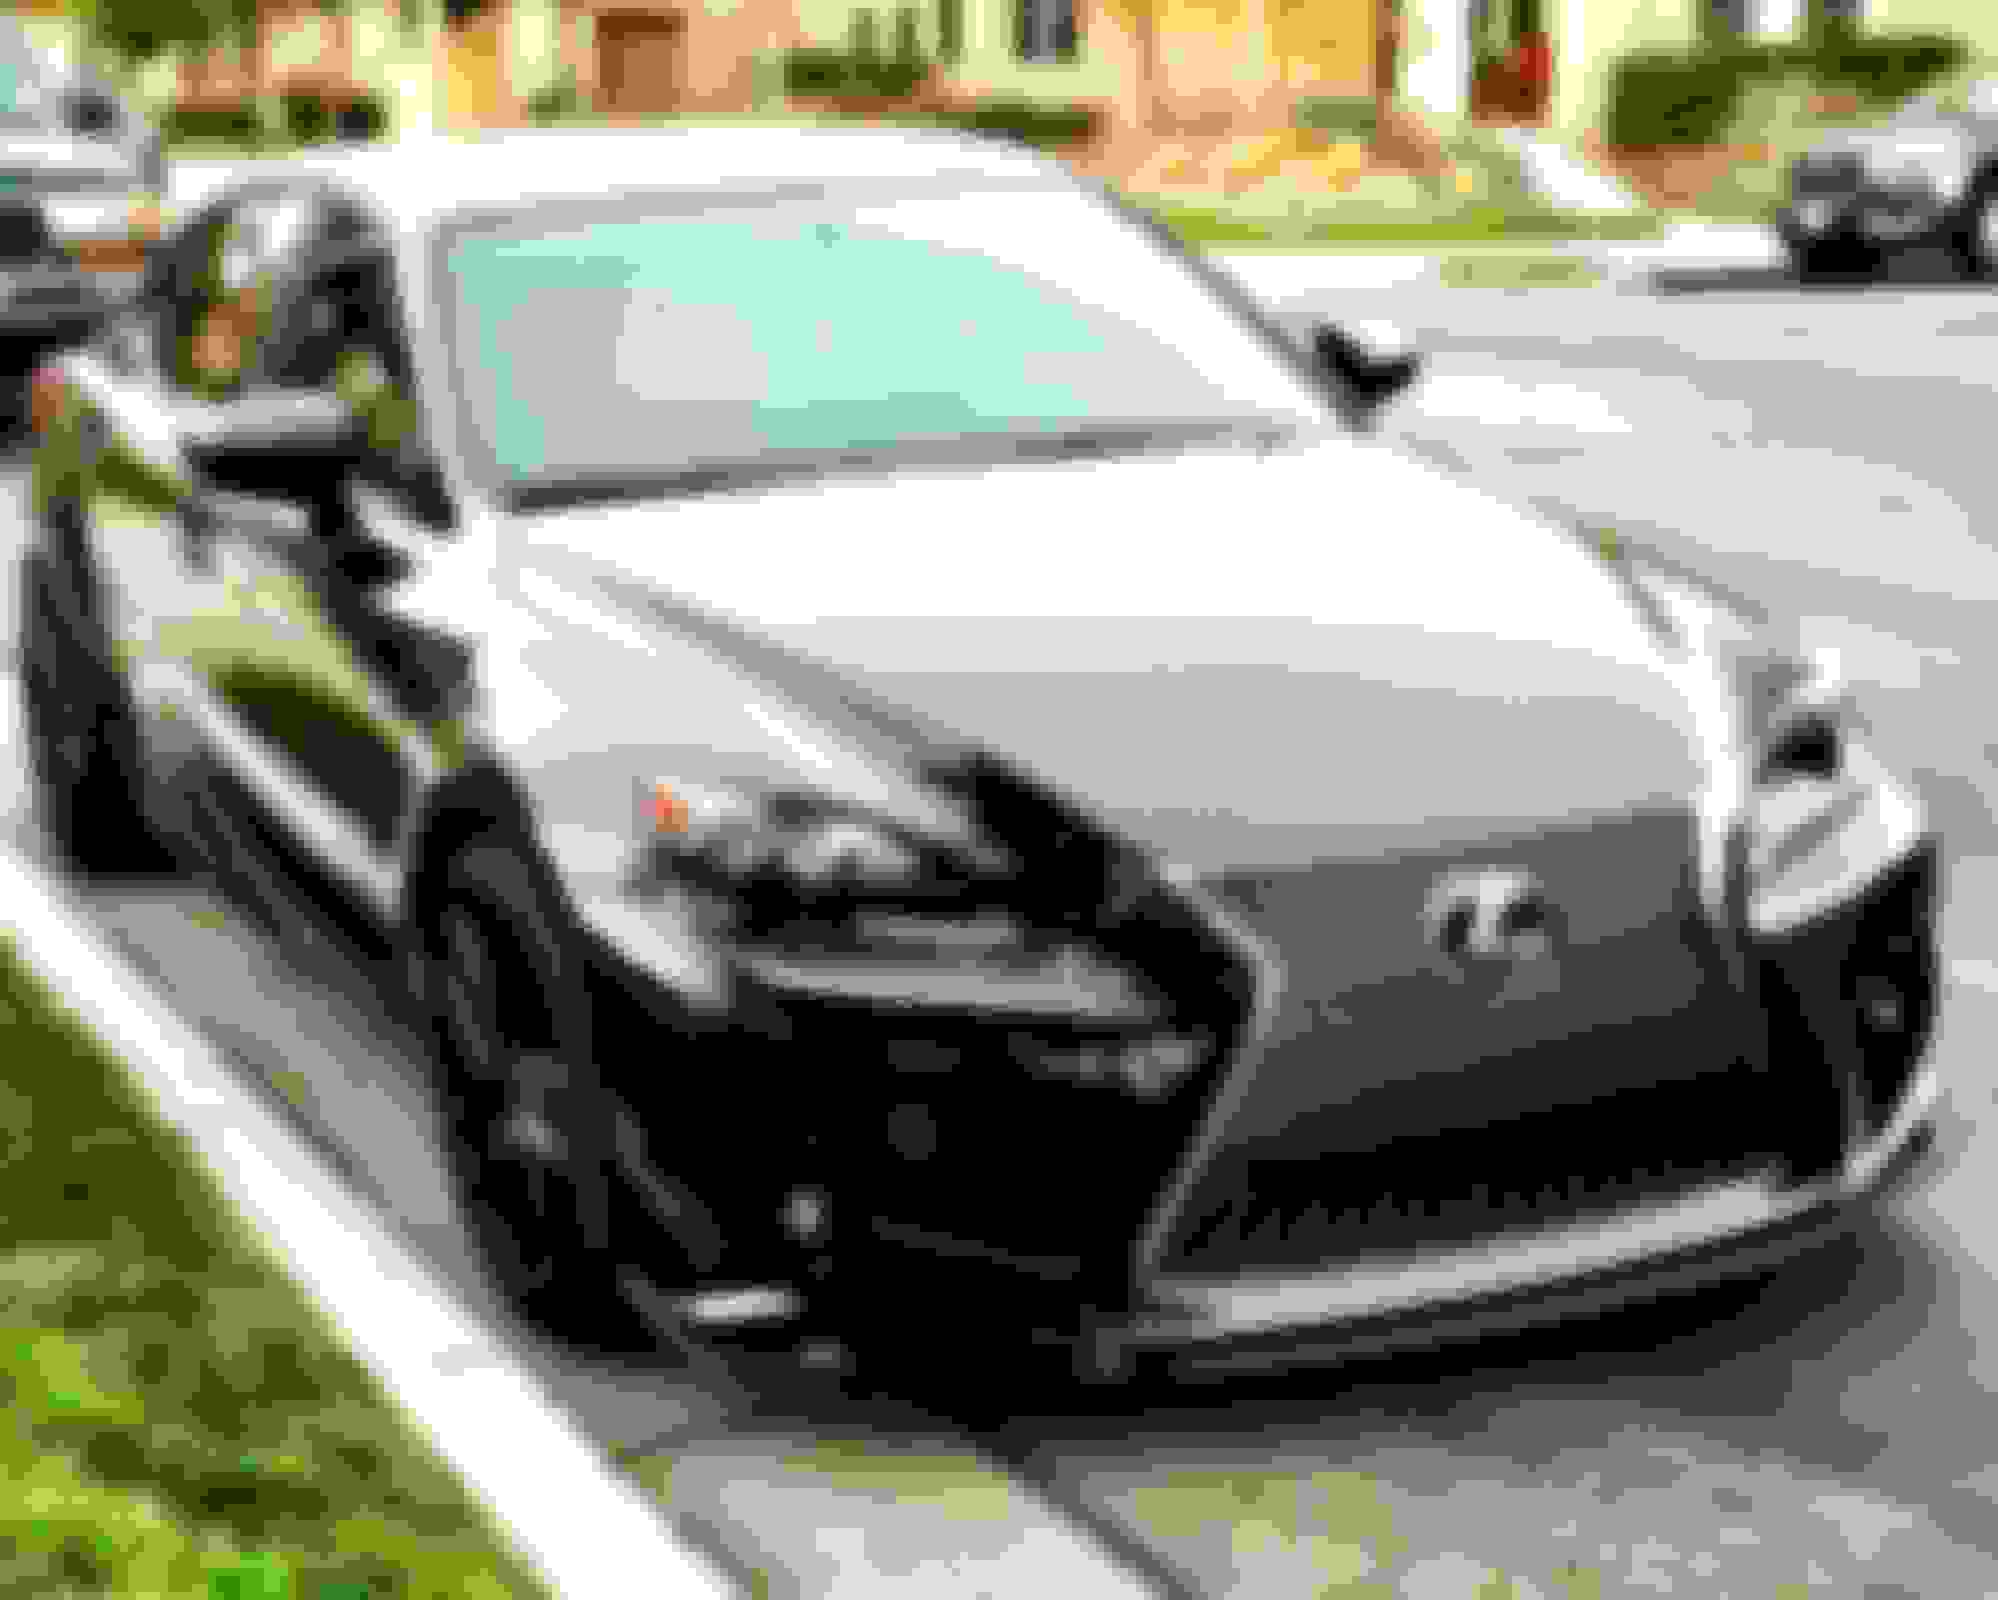
•The followings MUST!!!! be replaced with OEM 2017-2020 is3xx F-Sport parts.
Replace Front Bumper and all hardware mounts.
Replace Front Grille and all hardware mounts.
Replace Under Carriage and all hardware mounts.
Replace Radiator Cover Both upper and lower and all hardware mounts.
Replace wheel well covers.
Replace crash bar and foam isolation.
Replace Complete Headlight with ballast and wiring harness.
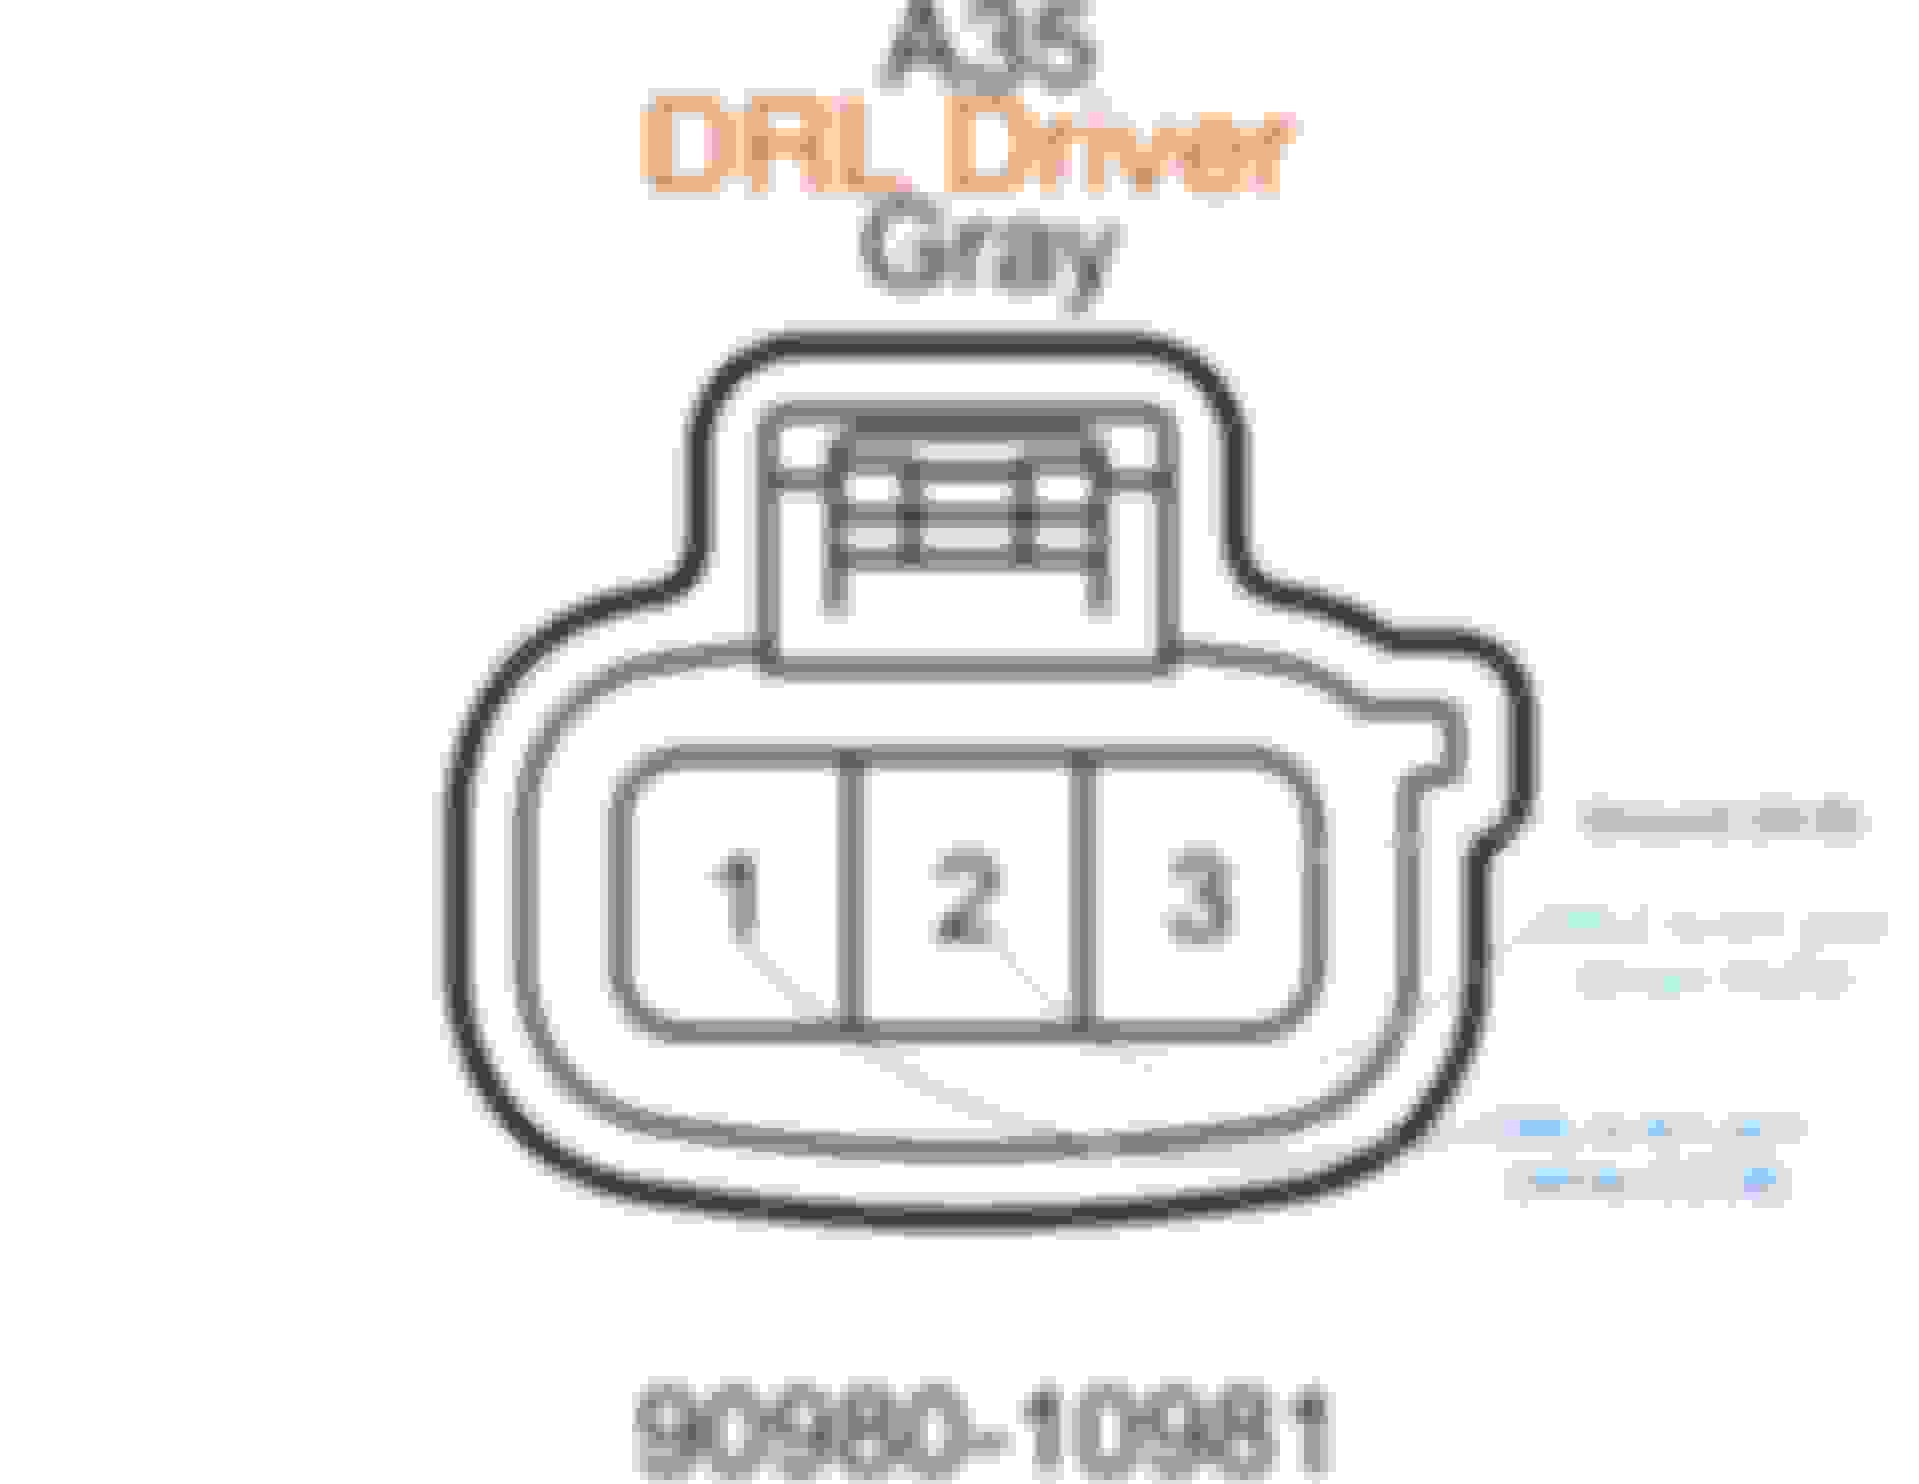
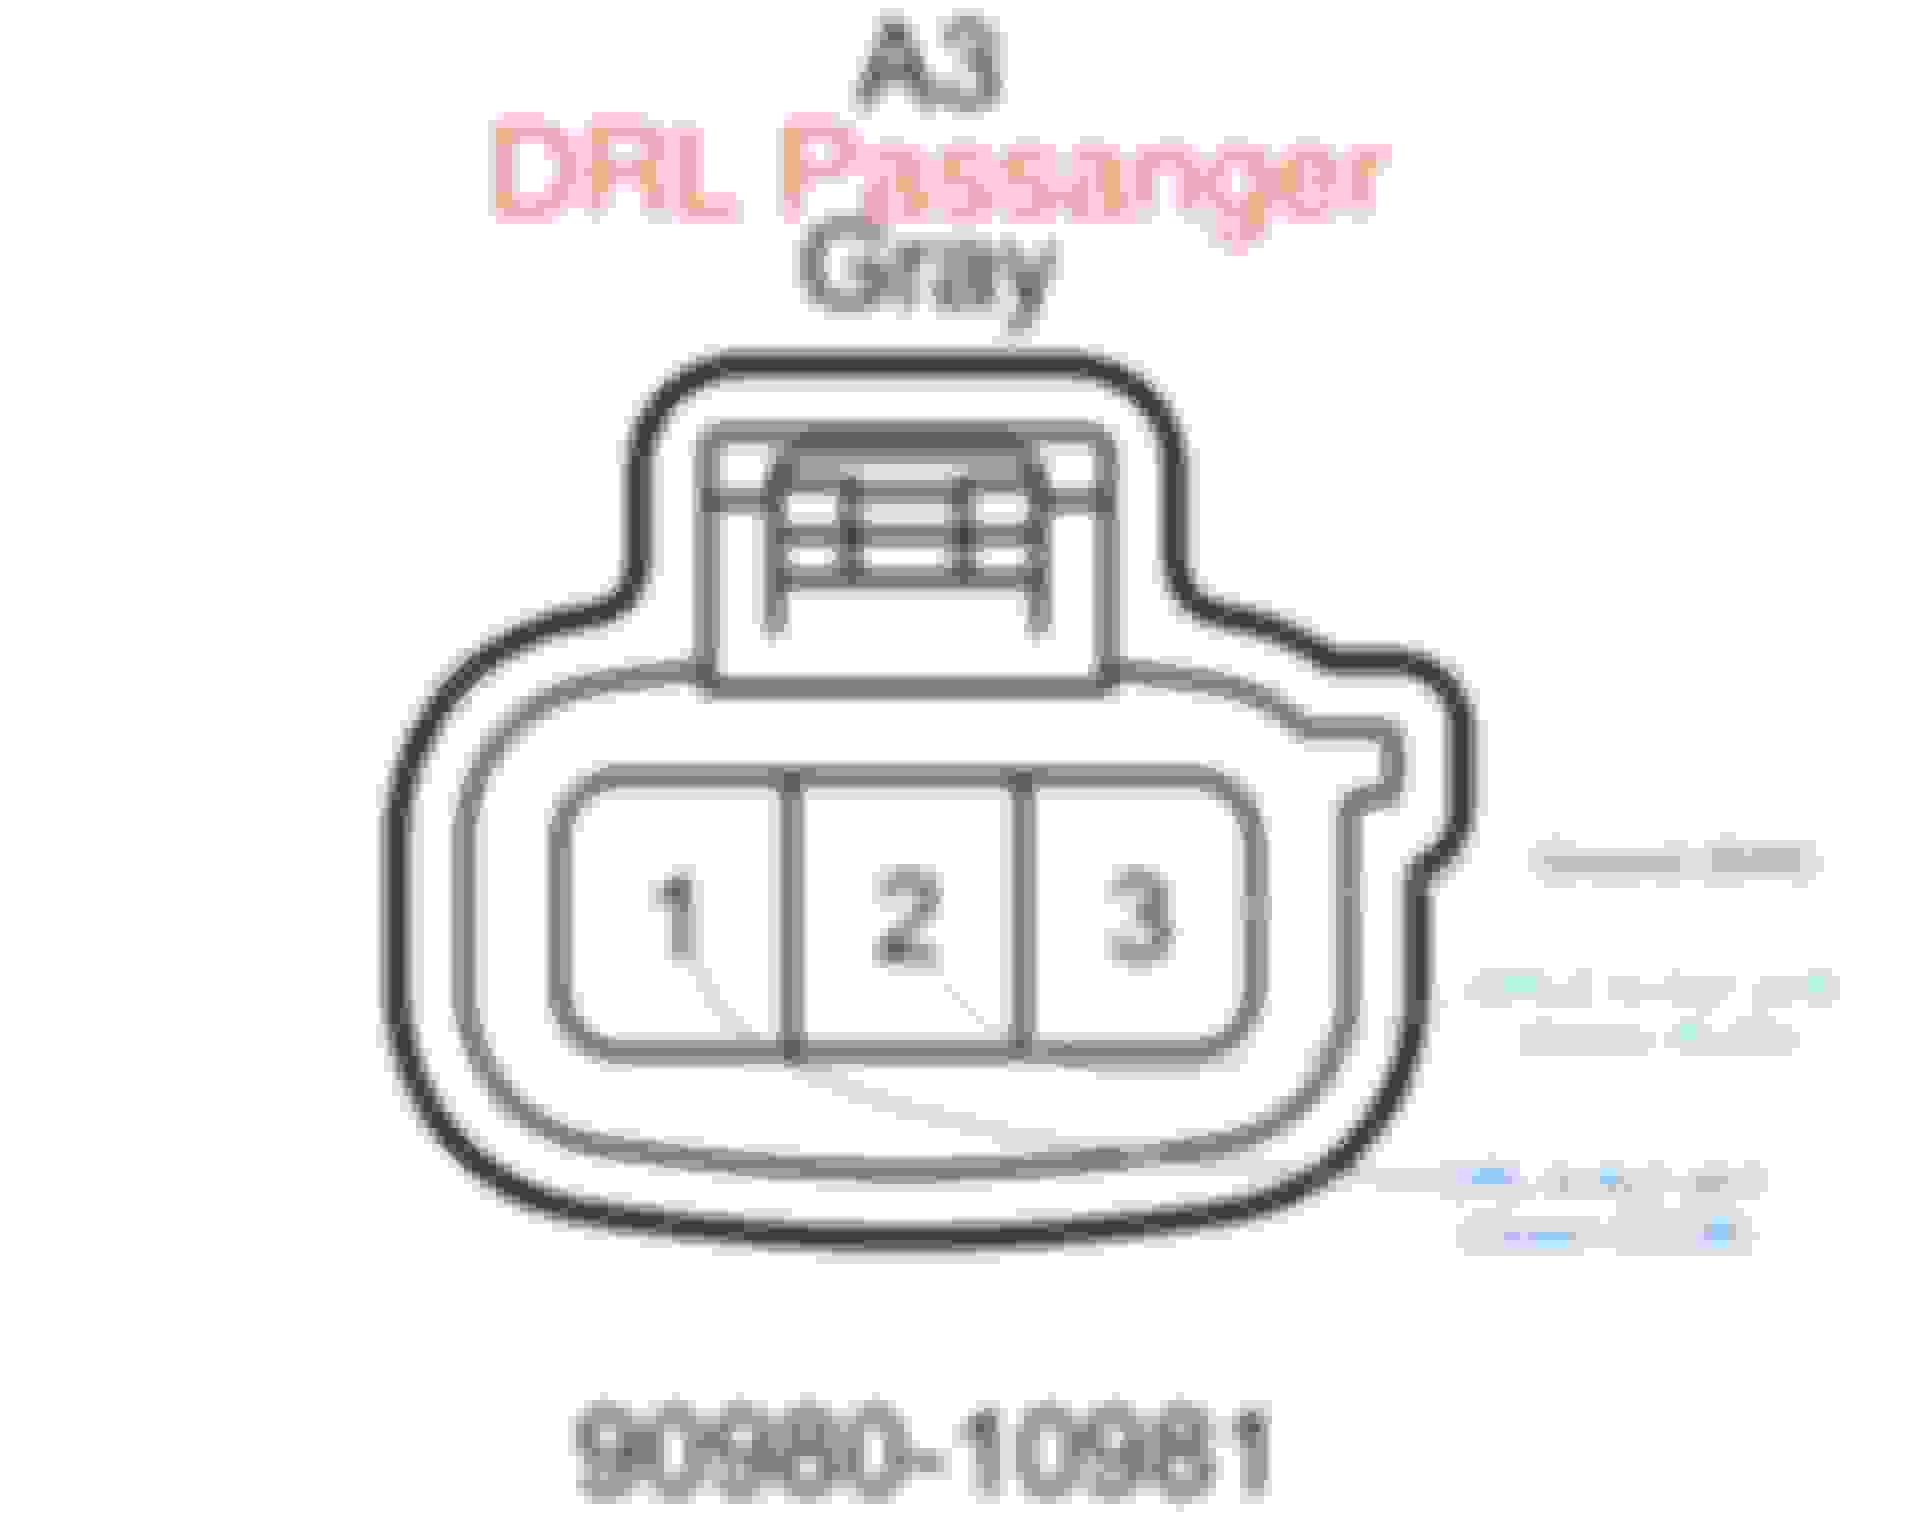
Replace DRLs with wiring and mounting harnesses.
Replace all vent components and all hardware mounts.
Replace all mounting tabs and screws.
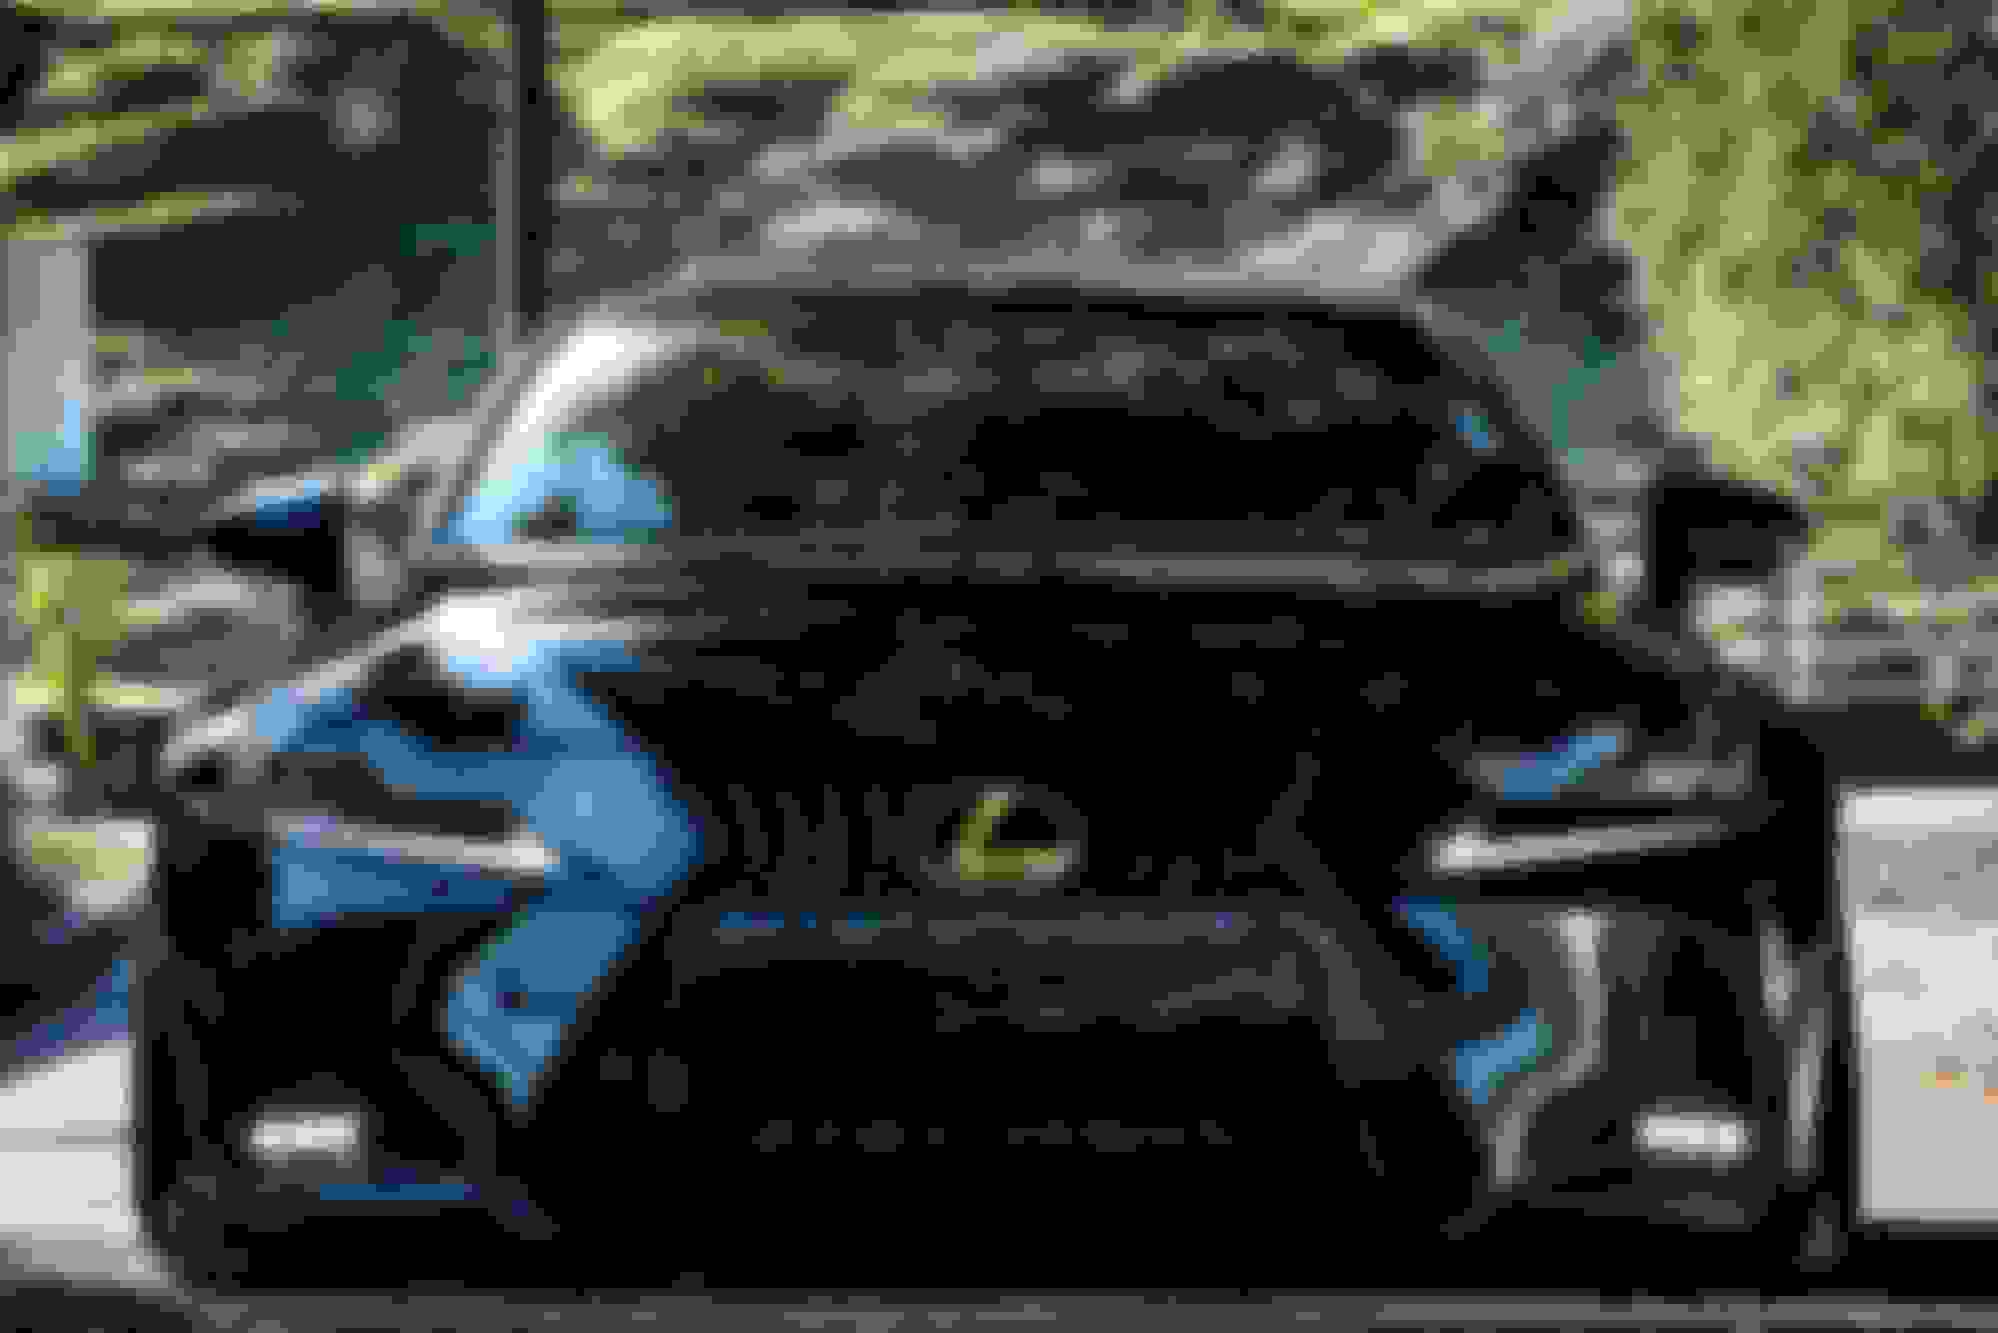
Rear valance and taillights can be replaced to 2017-2020
2017-2020 JDM Corner Taillights have LED turn signal.
You could order corner only from an outside source and order the rest of the Taillights in your country.
Part Number for outer left and right JDM / EDM Taillights with LED turn signal are; 81016-53010 and 81056-53010
-Refer to the list bellow to see which parts are needed.
Search for the parts bellow on the links provided bellow or through your local Lexus dealer or eBay to get the lowest prices.
*Some Items such as Clips and bolts would need to be order as multiple items.
-Use these links to help you get part number and price reference. I do not have much experience with the this dealer but they are a certified Lexus retailer of OEM parts. Check them out or order your parts through eBay or local Lexus dealer.
-The following images are the original setup images from the dealer for 2014-2016 Is3XX.
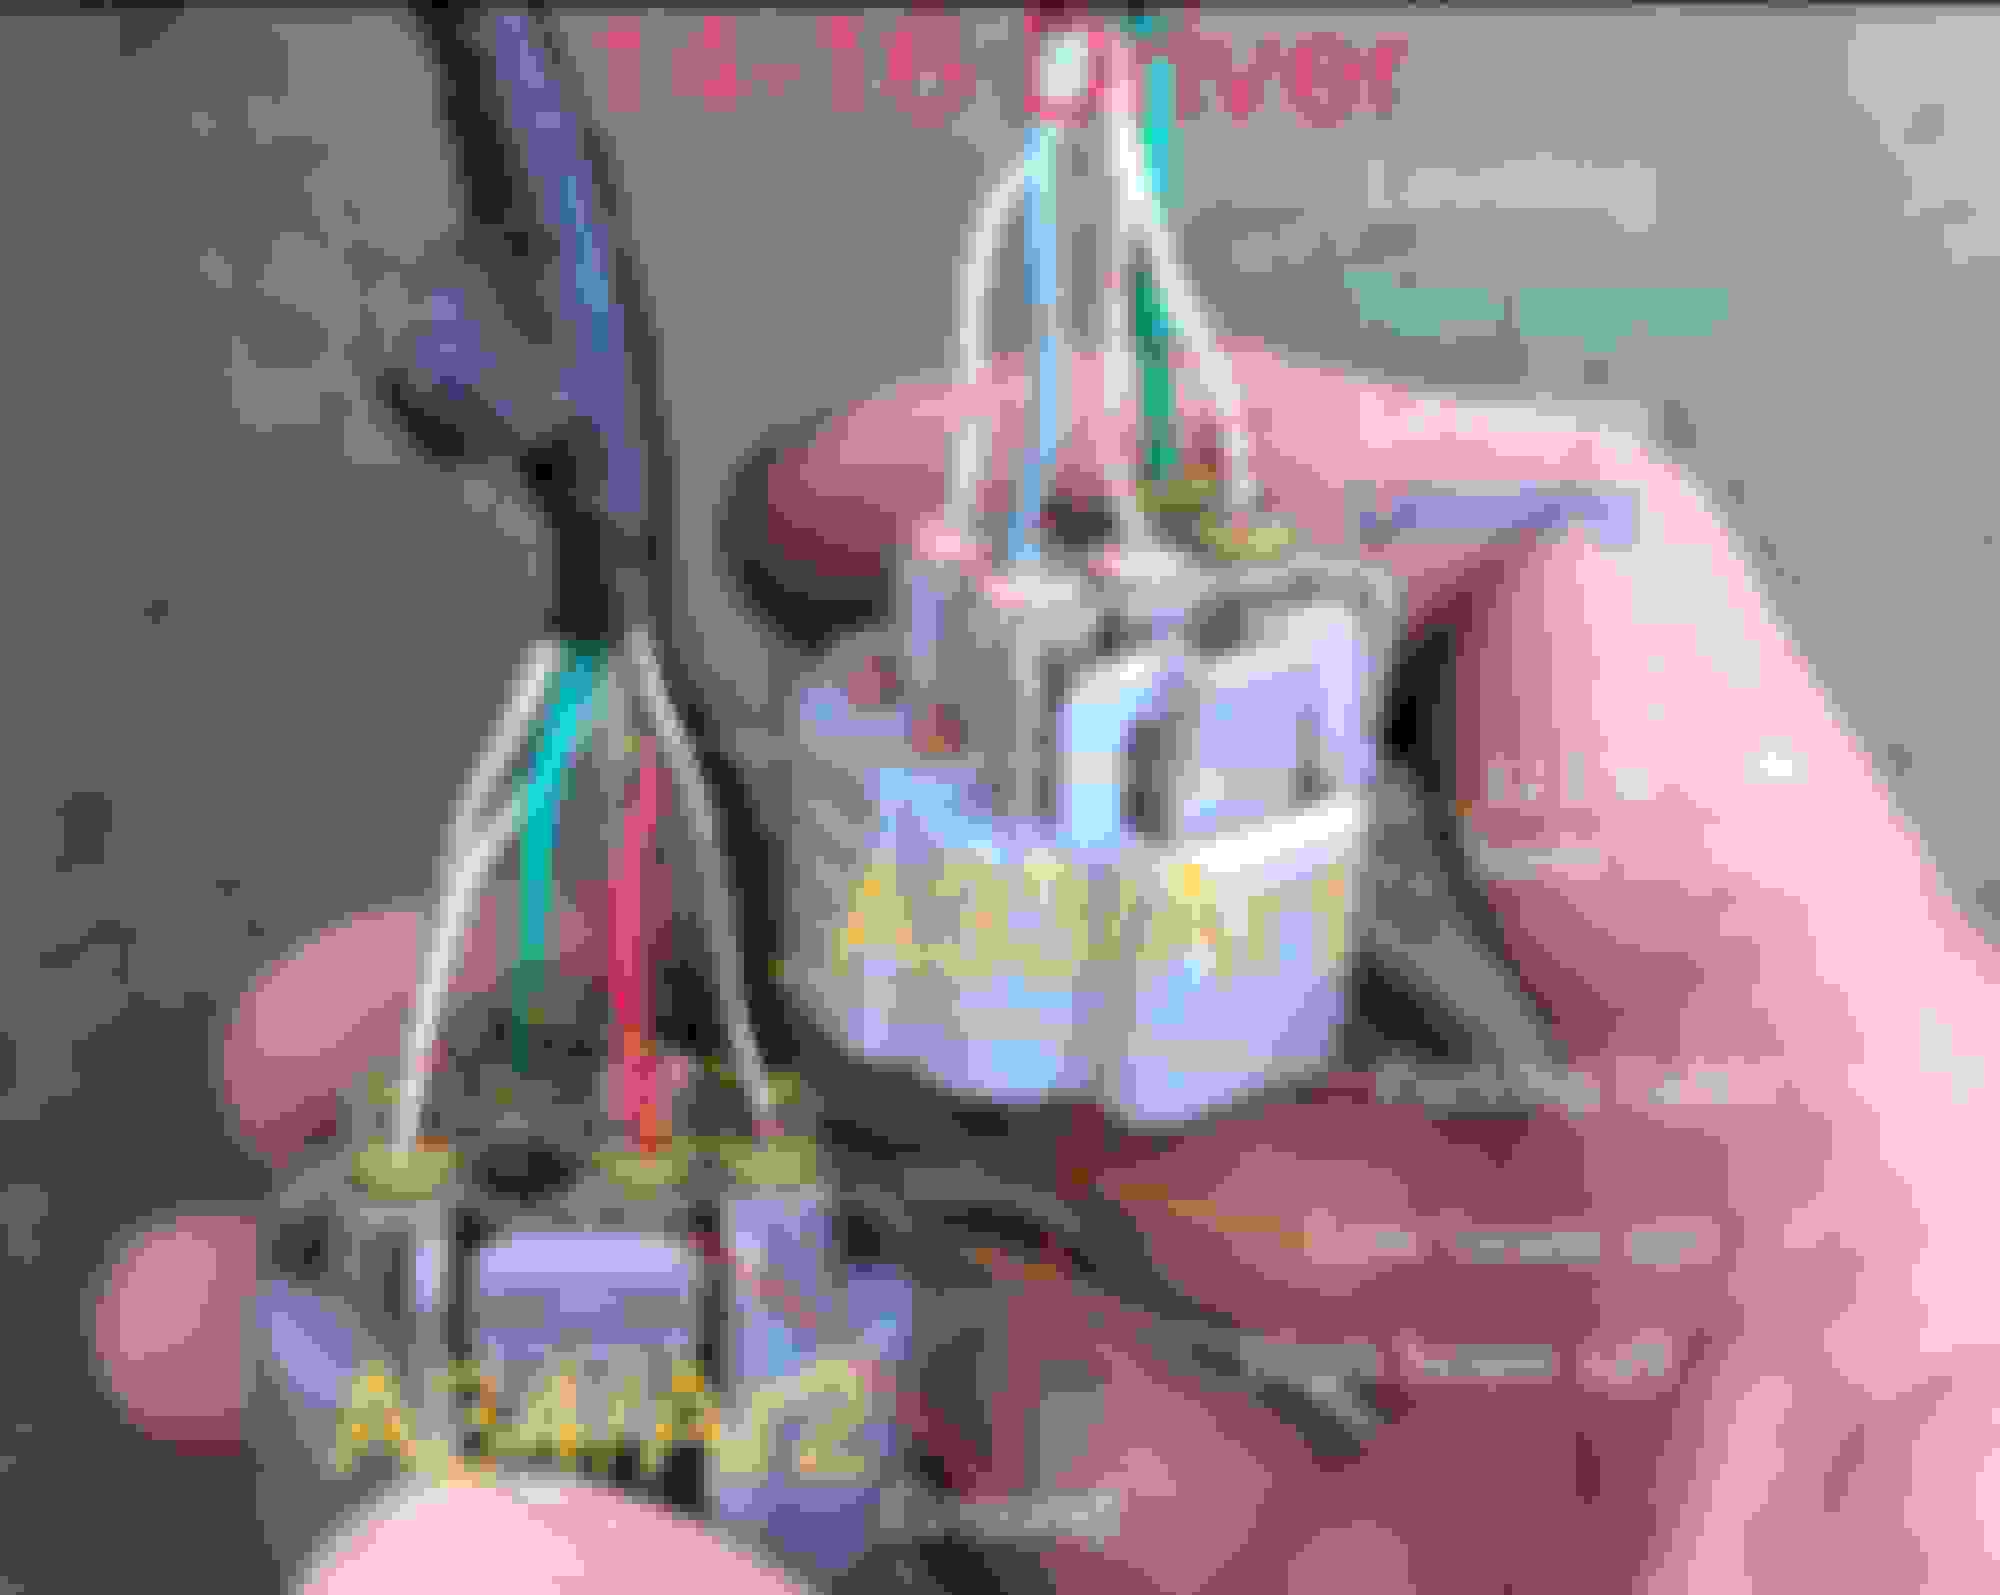
Note: You will need to take all the Pins out of the harnesses since you will be re-pinning most of them anyways. You will also CUT some of these in order to be able to use the Pins elsewhere.
Steps:
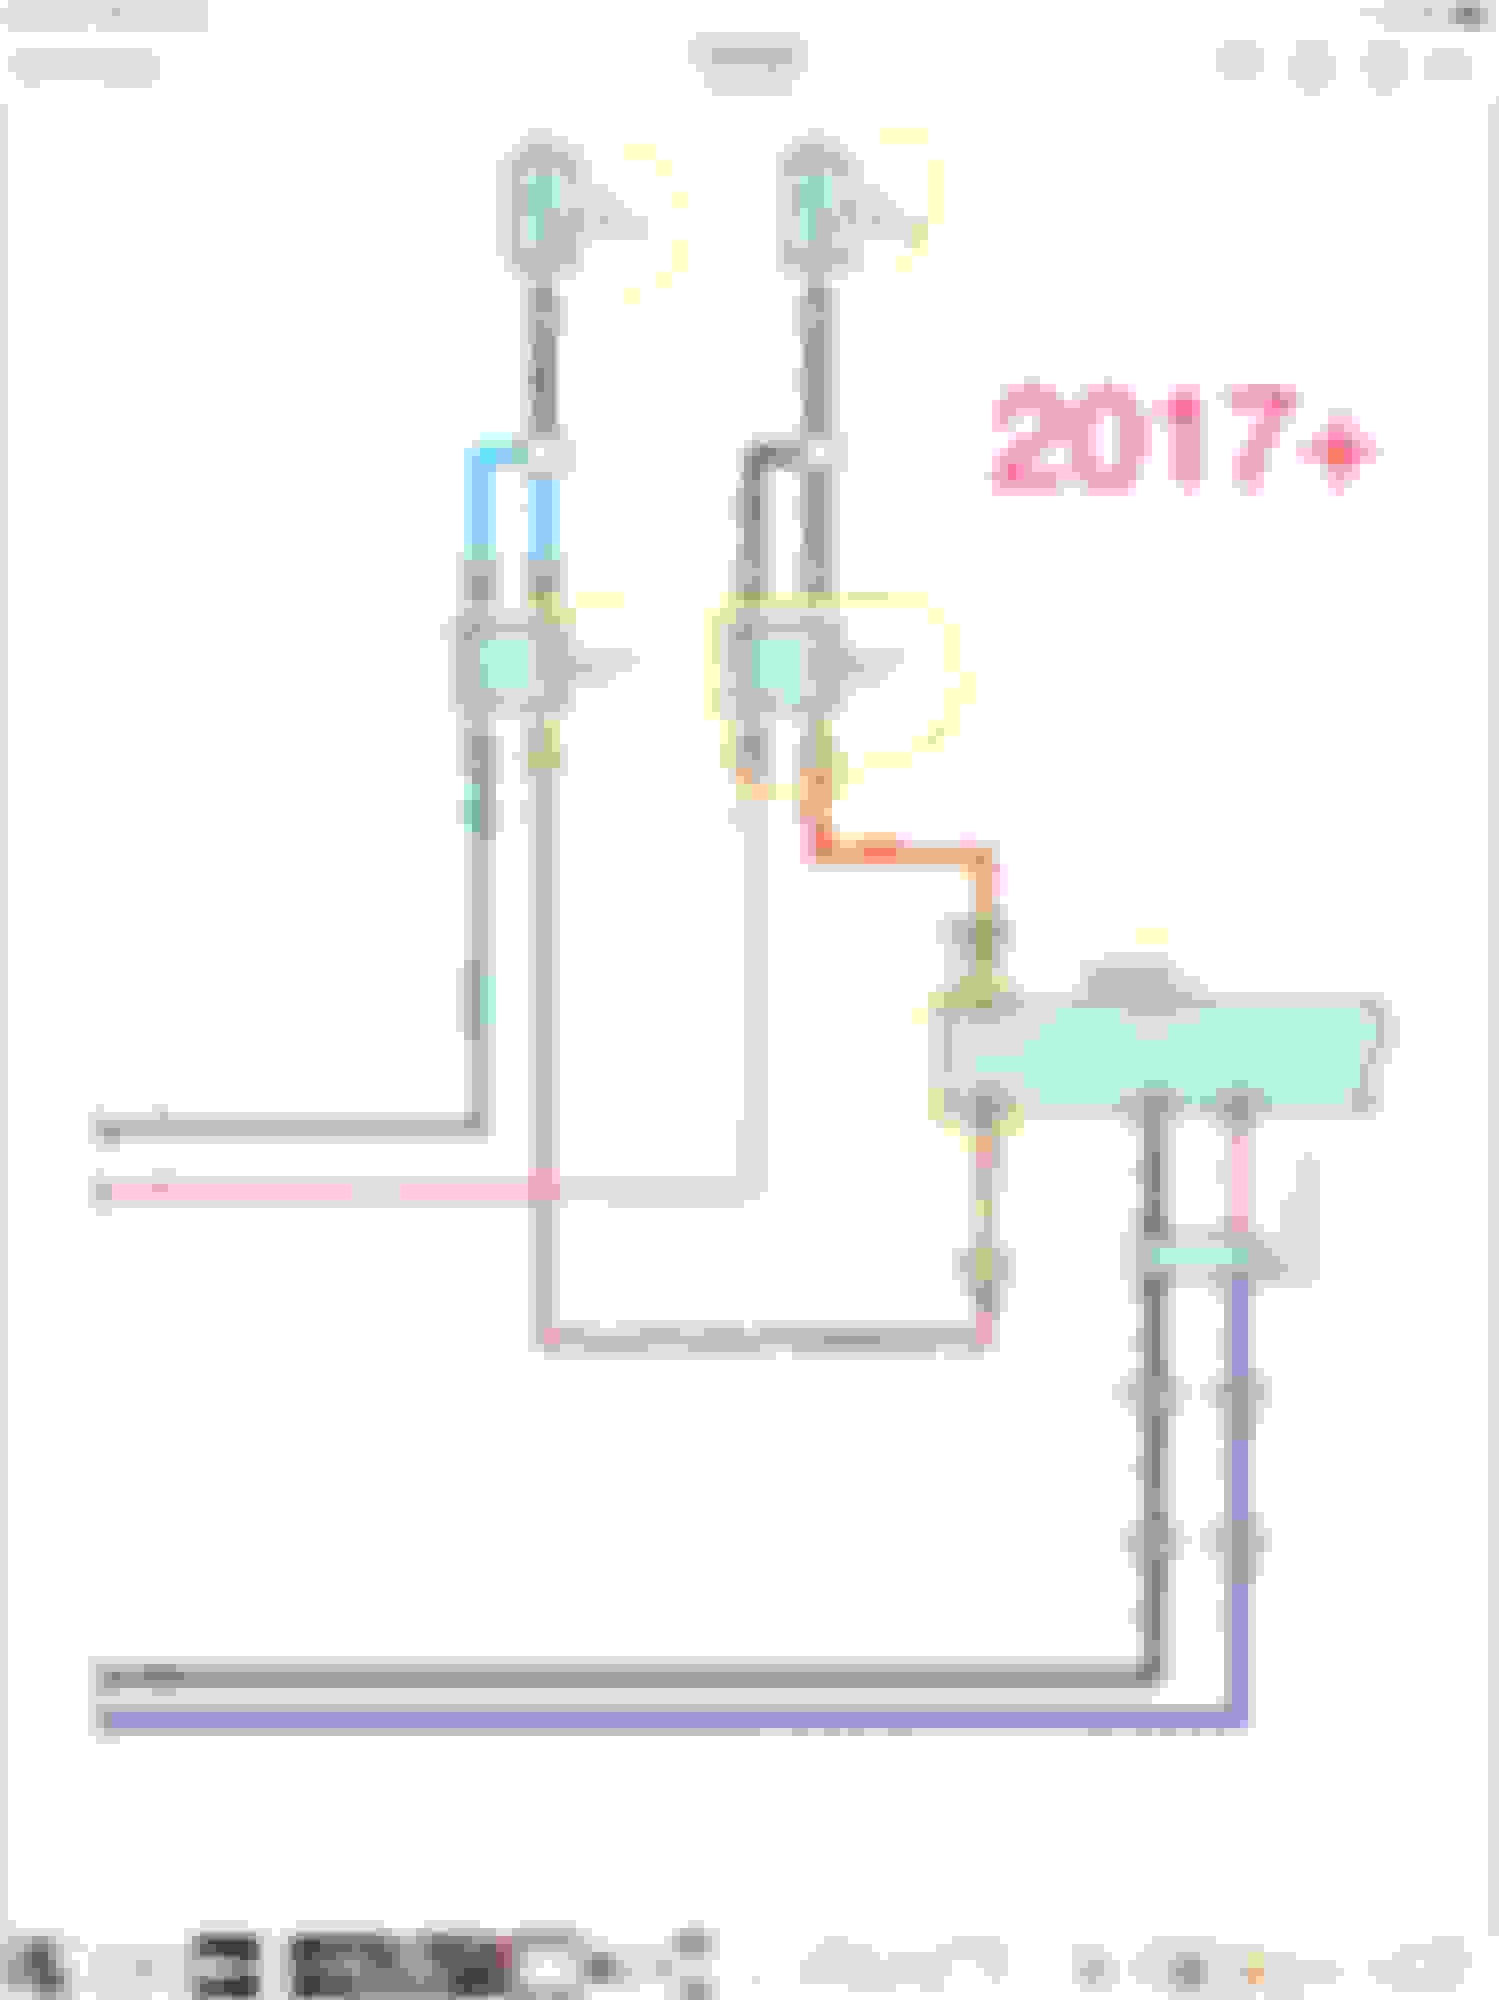
Route a total of 6-7 wires from inside the Cabin to the left (Driver)side headlight. Make sure you allow enough slack in both ends. I recommend using different color wires to be able to differentiate each. You can use from 16-20 gage wires.
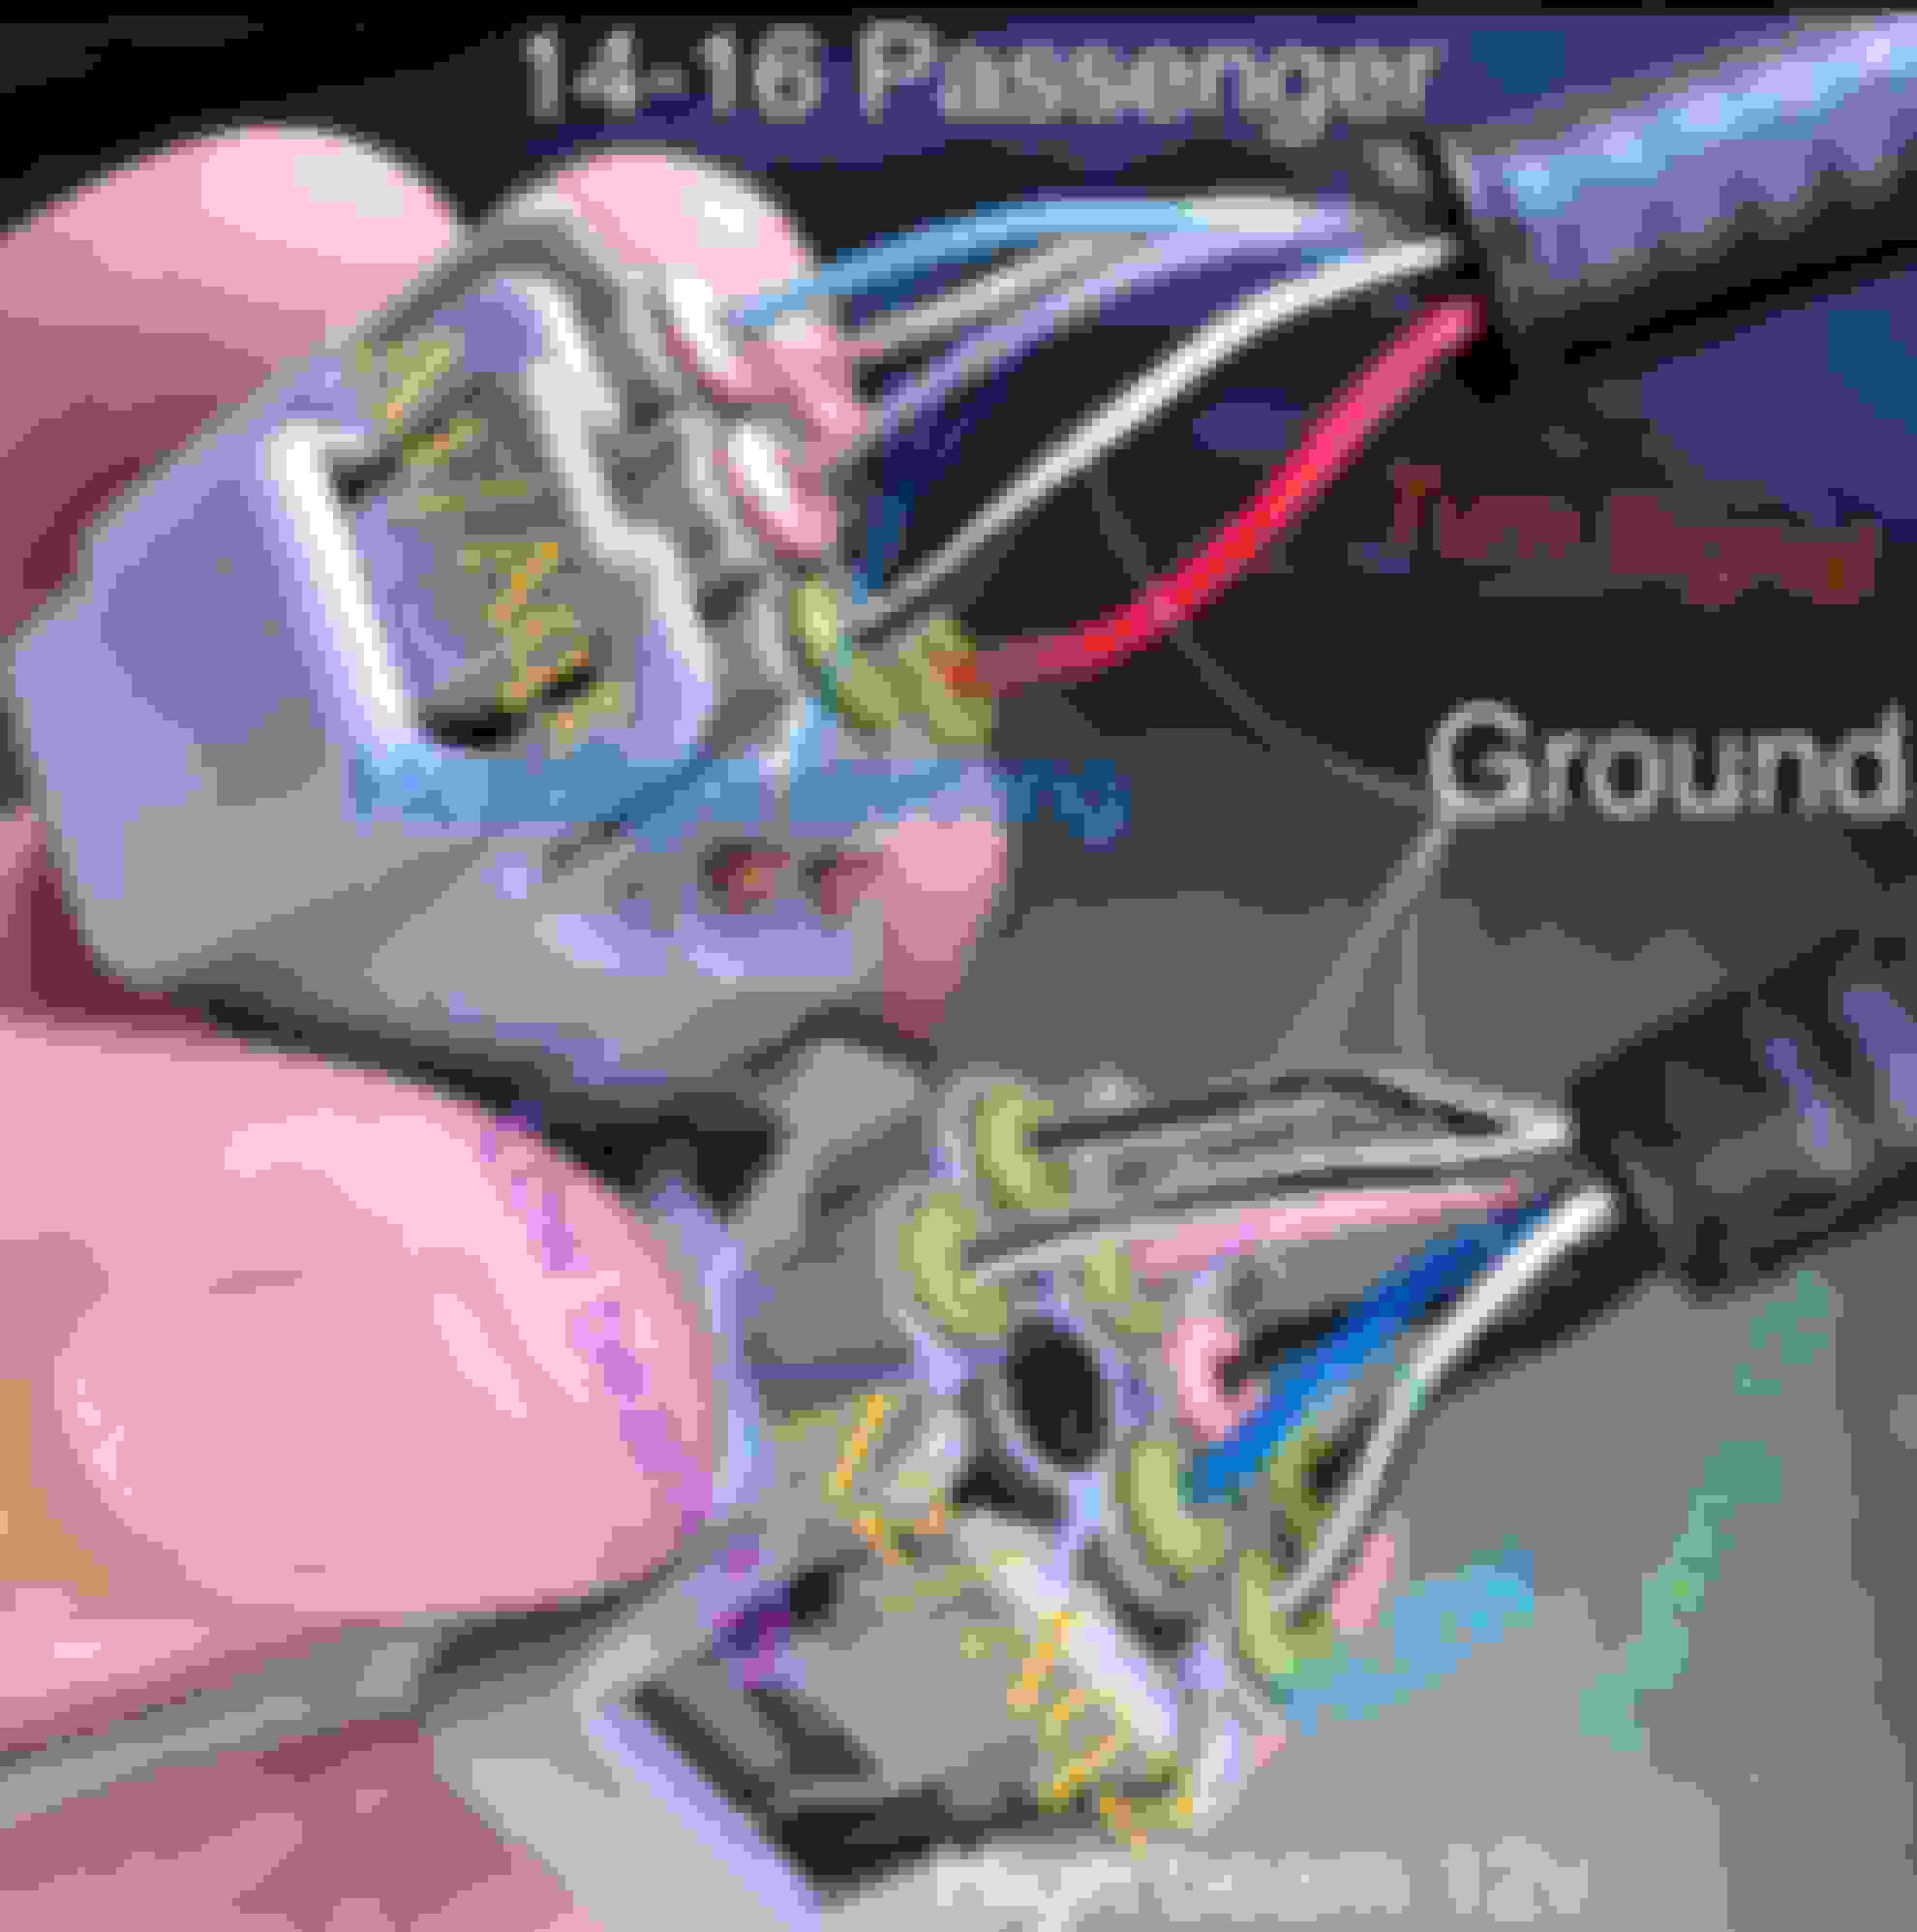
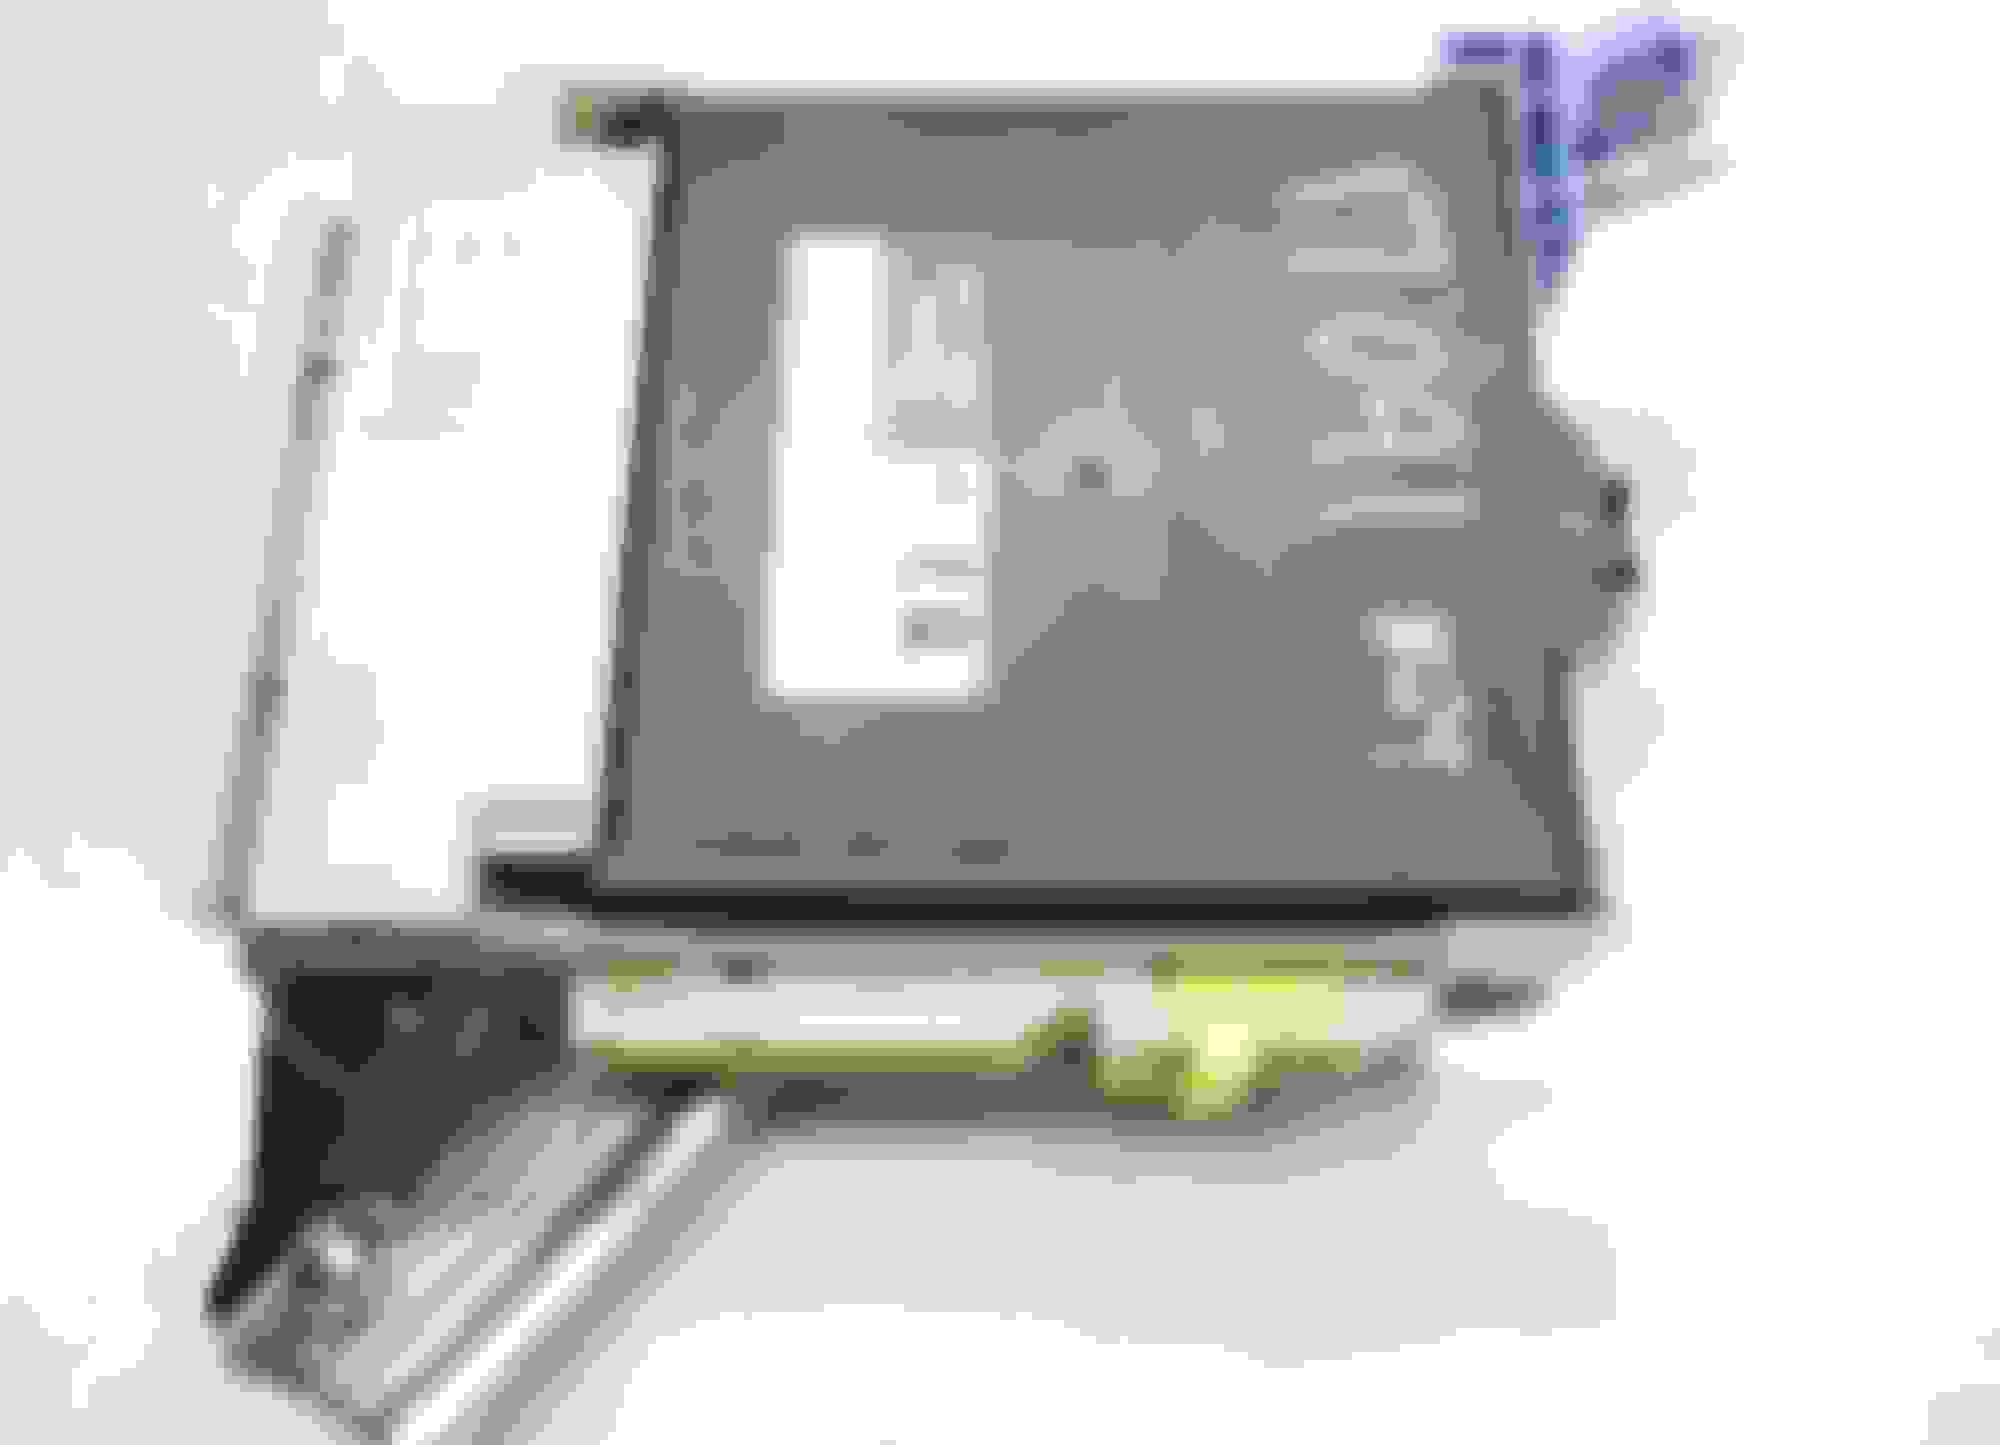
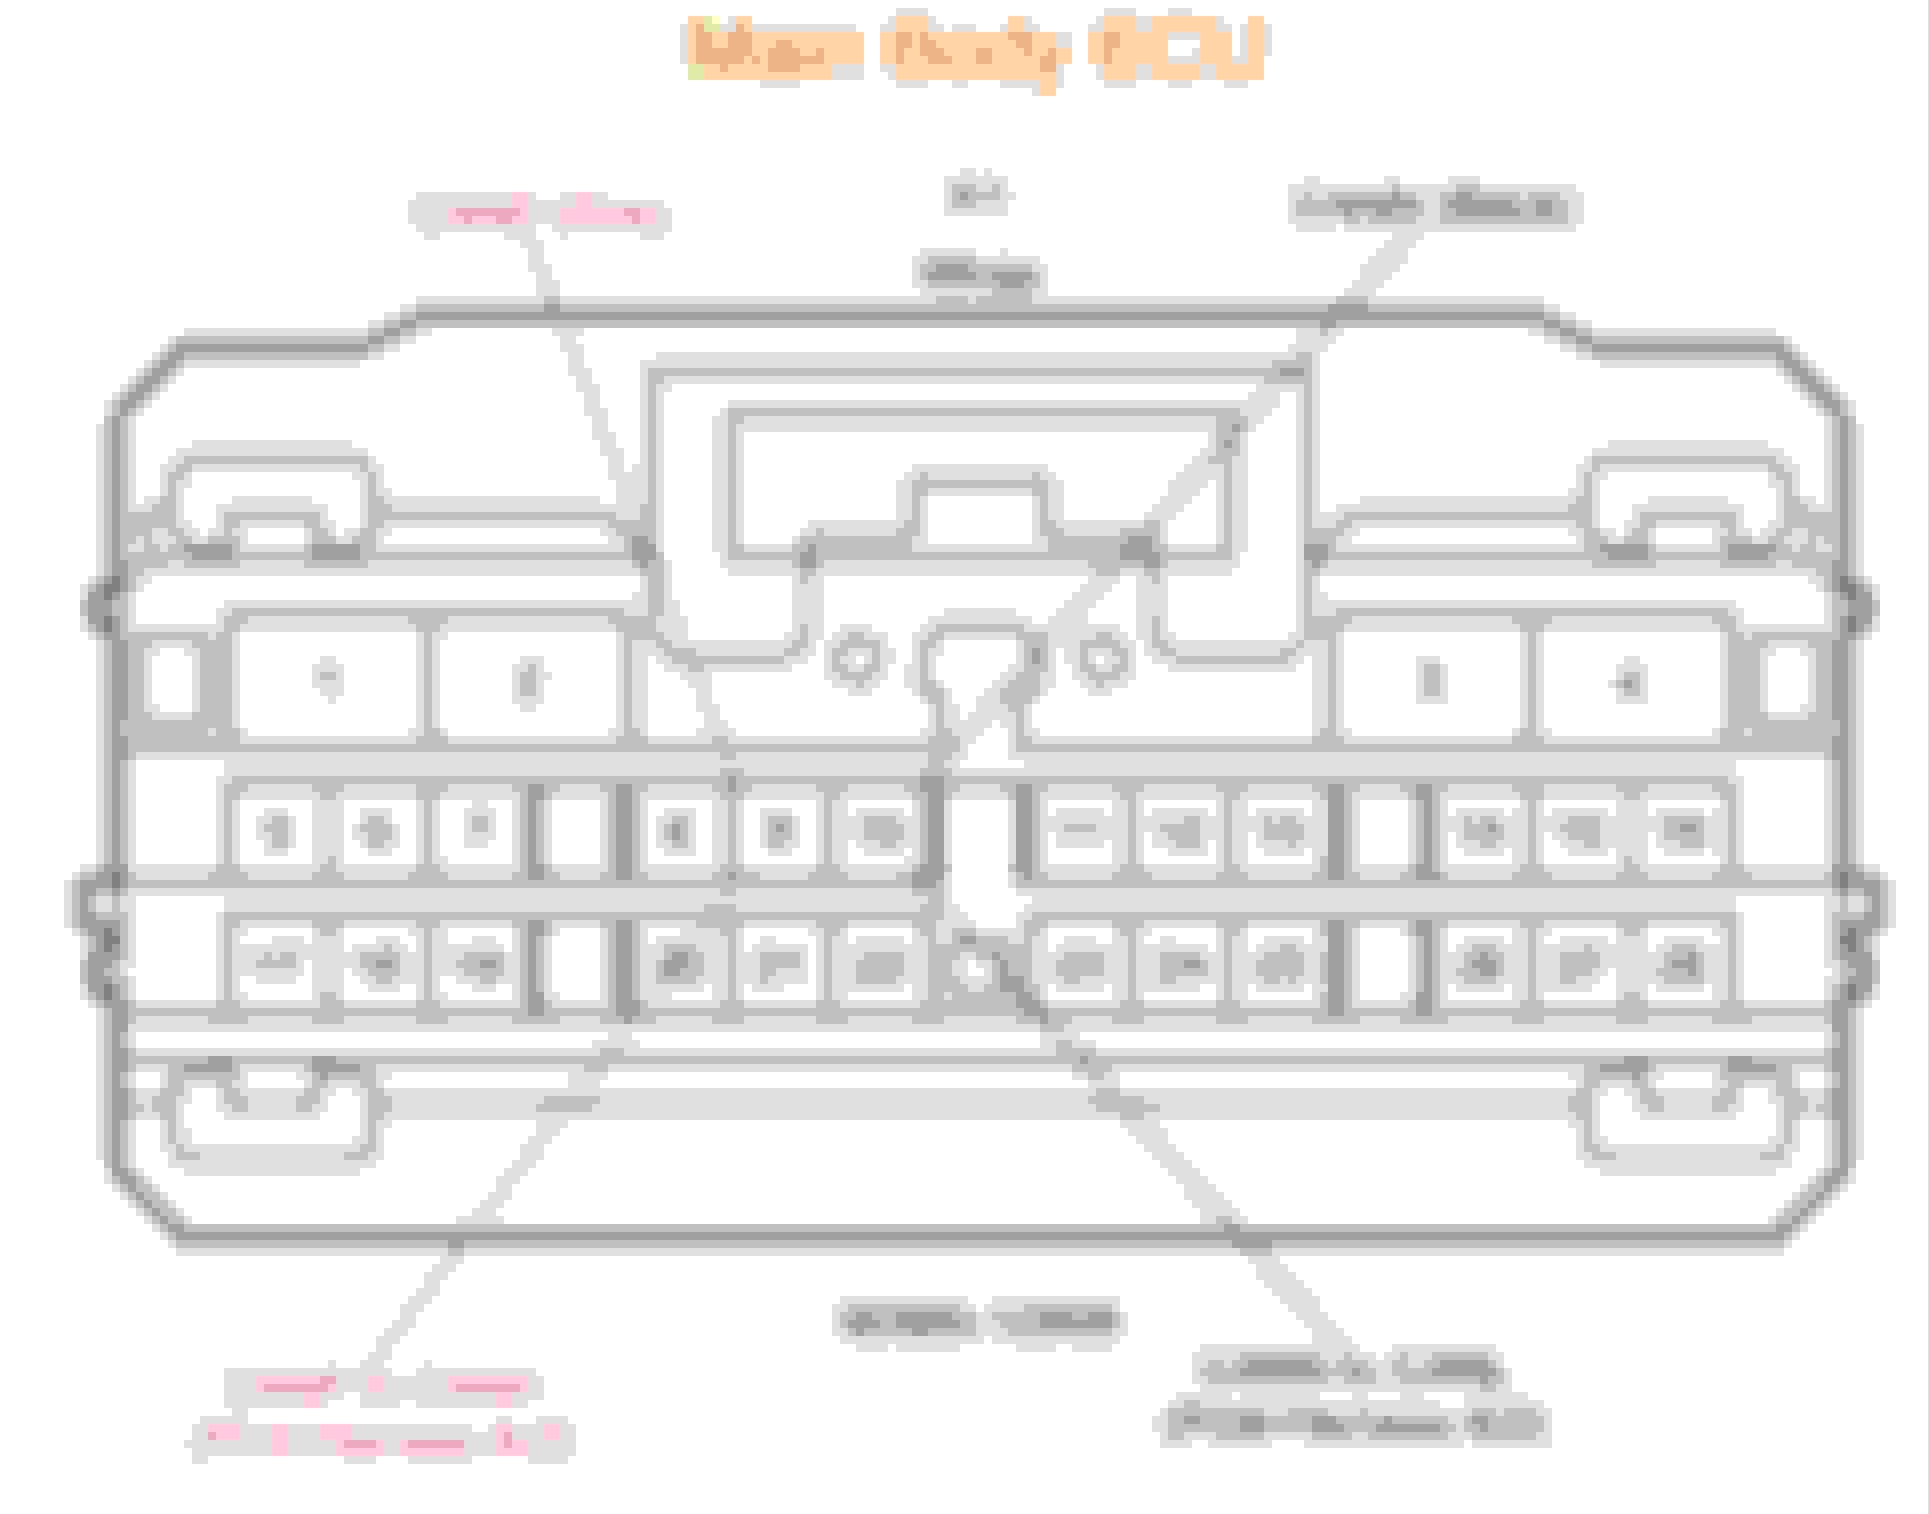
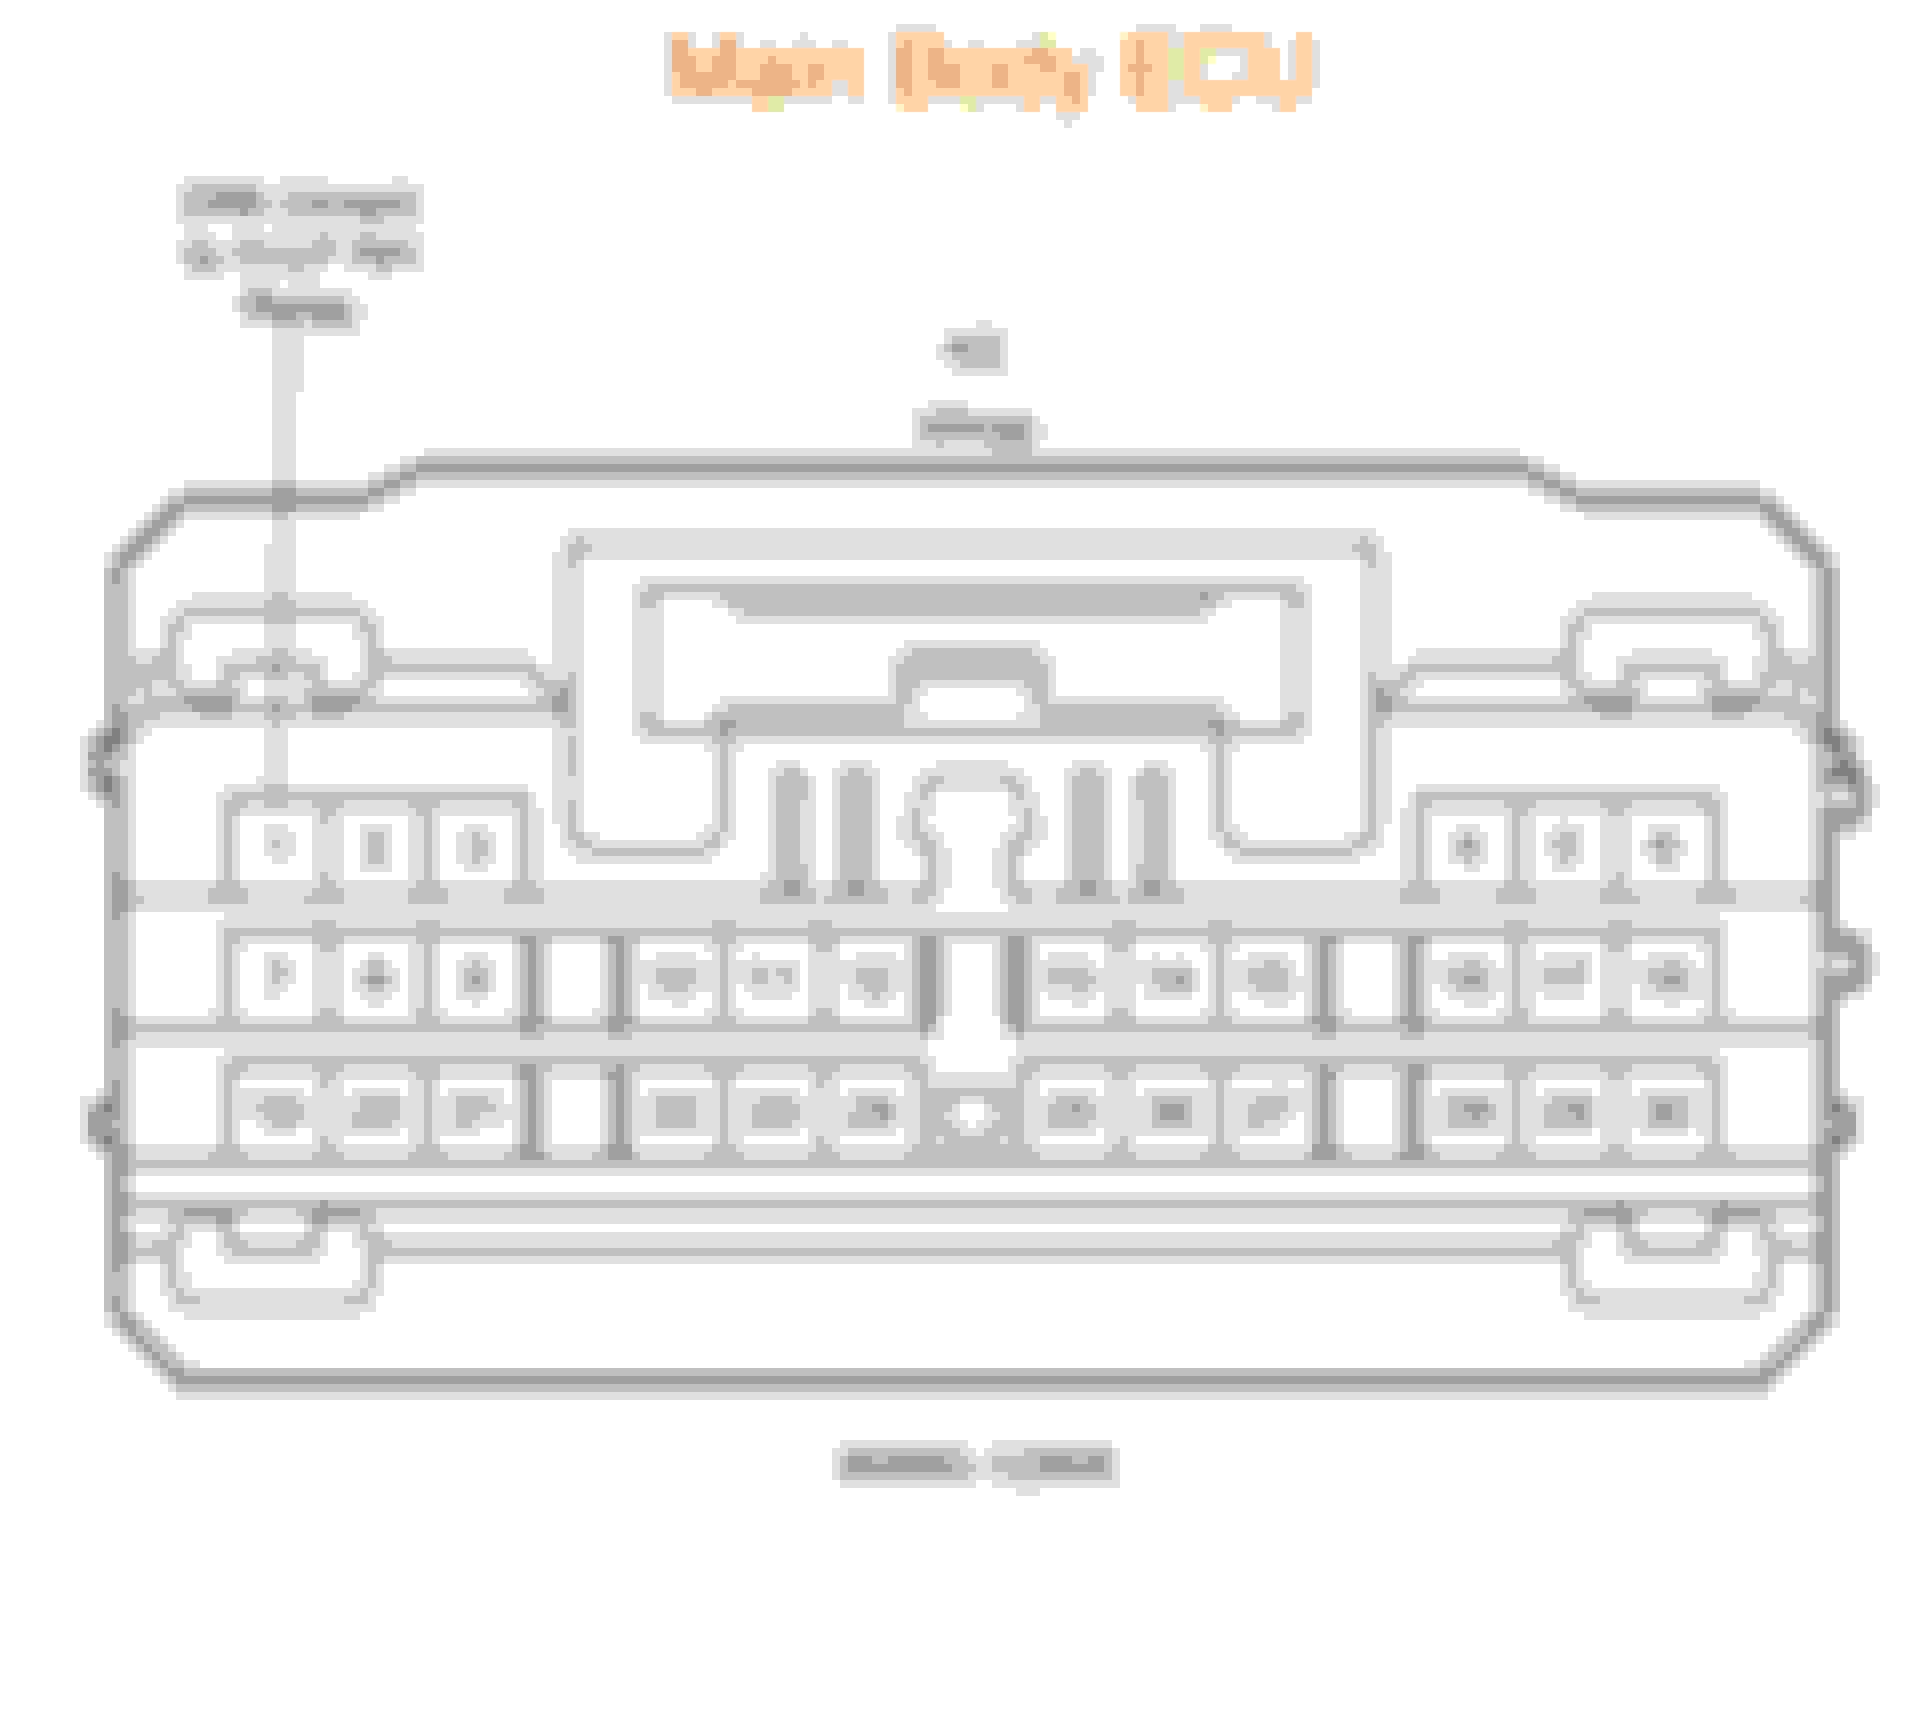
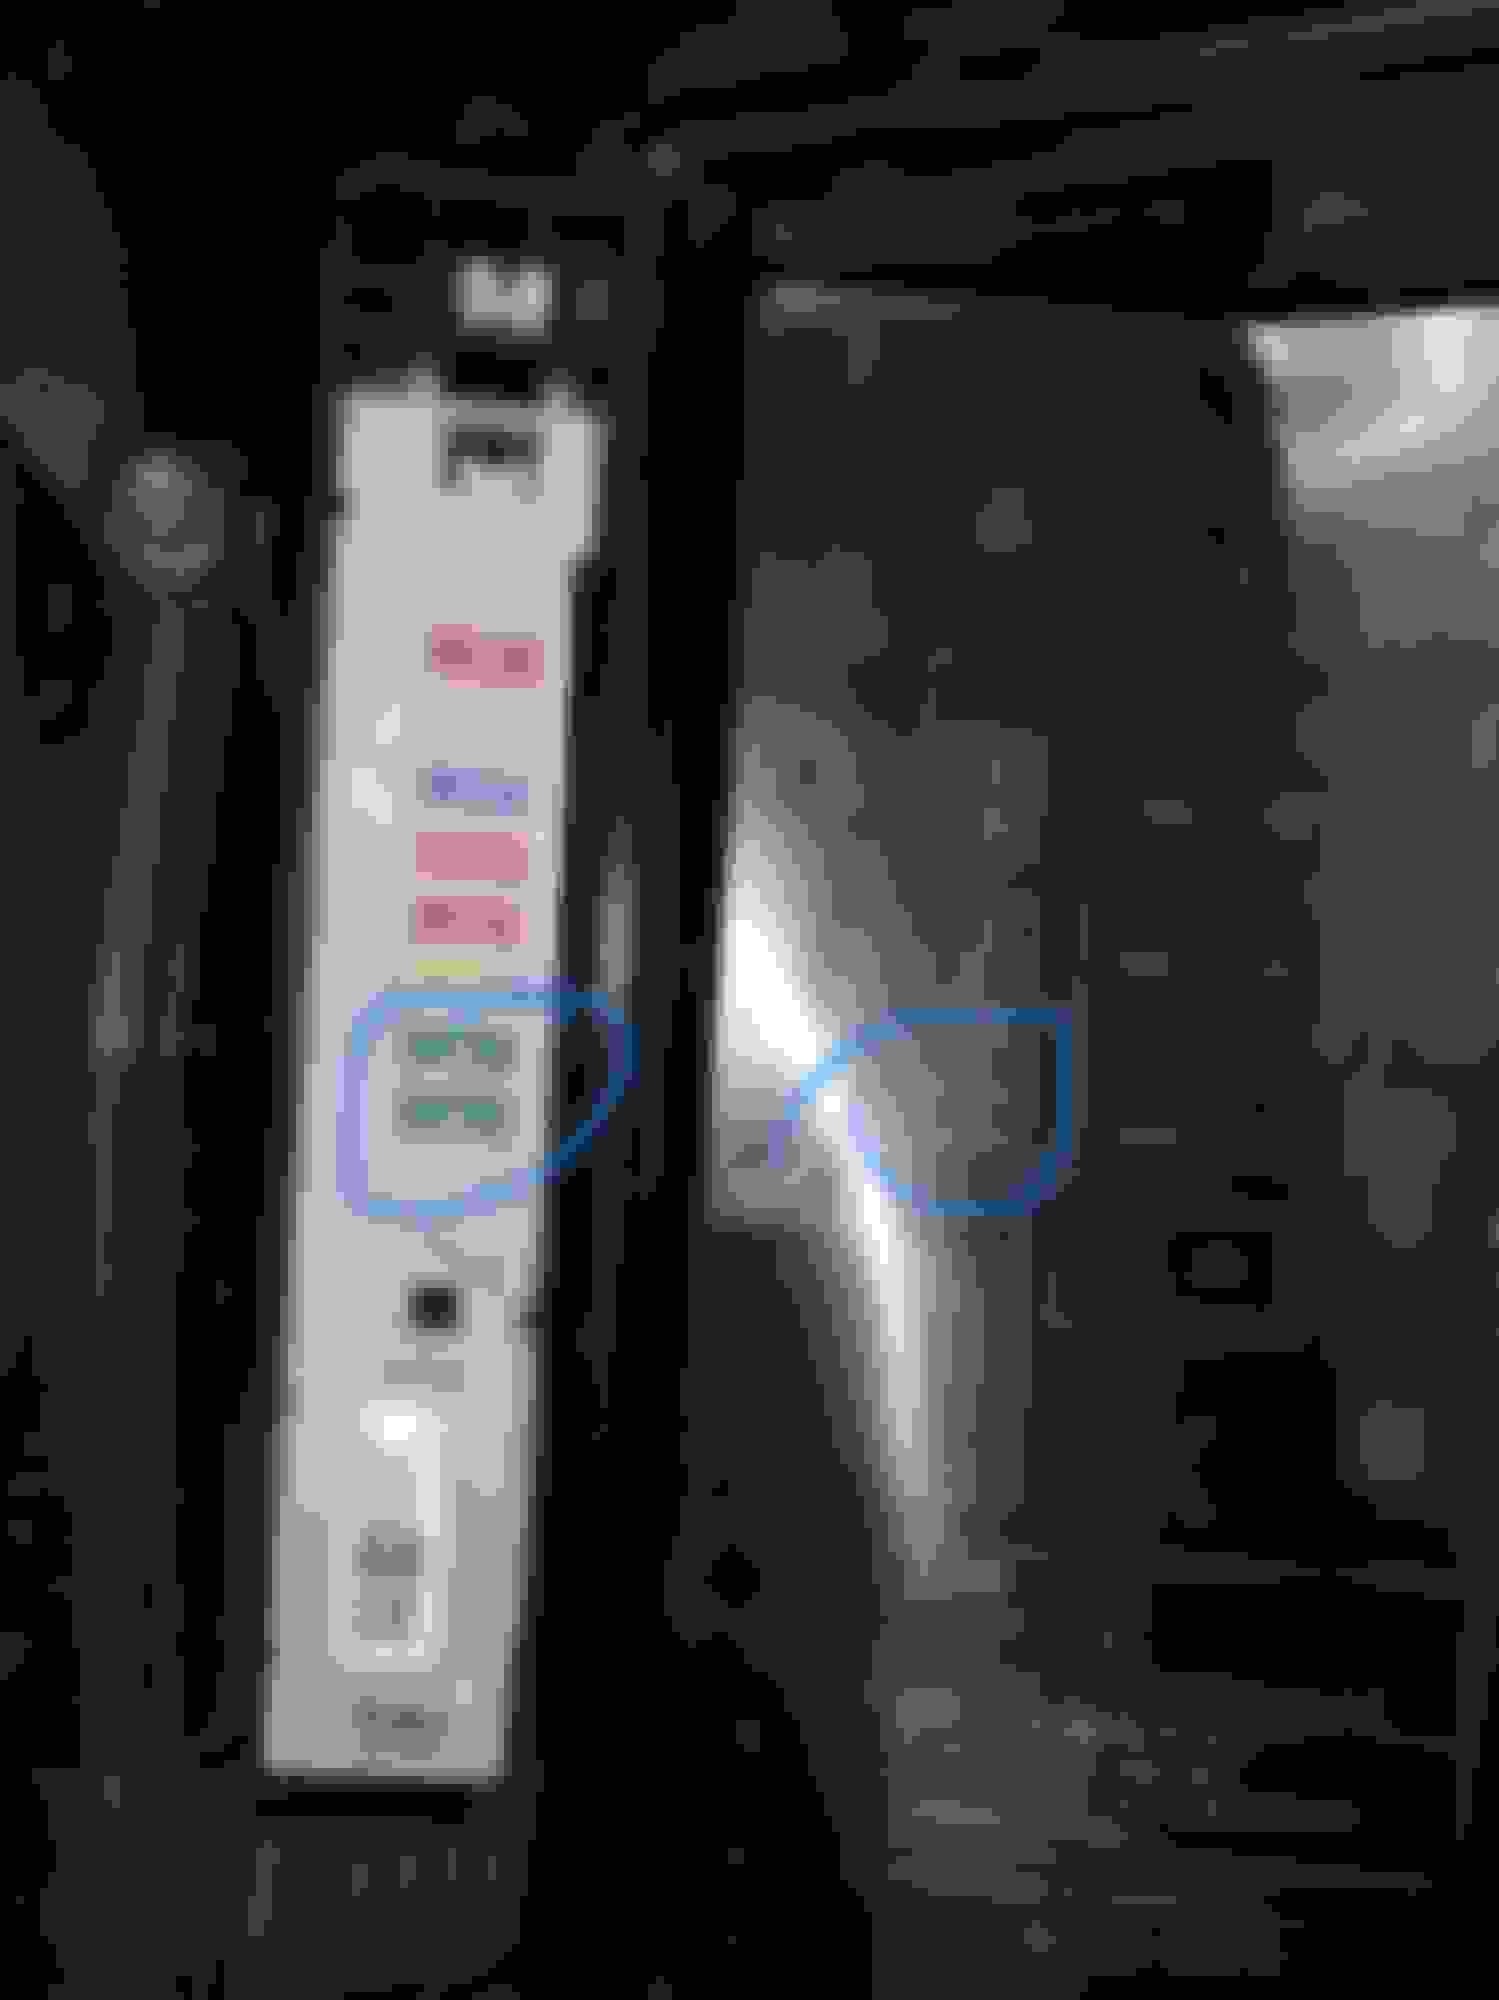
Four wires tap onto Four wires in the Headlamp Leveling Module, Harness A65. The module is located at the driver side kick panel, near the foot E-Brake. Follow images below to locate the module, harness, and wires.
3. Two wires tap onto two wires in the Main Body ECU, Harness K1. Main Body ECU is located at the driver kick panel. Refer to images to locate the unit, harness, and wires. Note: If you run the 7th wire. This might be used in the future to fix DRL issues. Wire to tap onto K2 Connector Pin1 (DIM)
Not Needed Yet. For Future Project. DRL Functionality.
4. Once all wires have been tapped in the cabin and routed outside to the driver headlight then its time to start splicing and pinning into the harnesses. Note: While splicing, some wires will need to be spliced with multiple wires. 2-3 of these spliced wires will need to be run to the passenger headlight.
5. In order to have enough pins to splice the wires that were run from inside the cabin, you will need to cut the wires from the existing harnesses. Some examples of wires to cut are the W-B) pins from 3 wires of the total 4 Grounds wires that exist. Make sure to cut them long, to assure that you have enough slack. You can also combine all 4 Ground wires into one solid ground wire. Since you will only be needing one.
6. Cut the wires from the existing harness for the headlamp leveling to use the pins to splice onto to the new wires routed from inside the cabin.
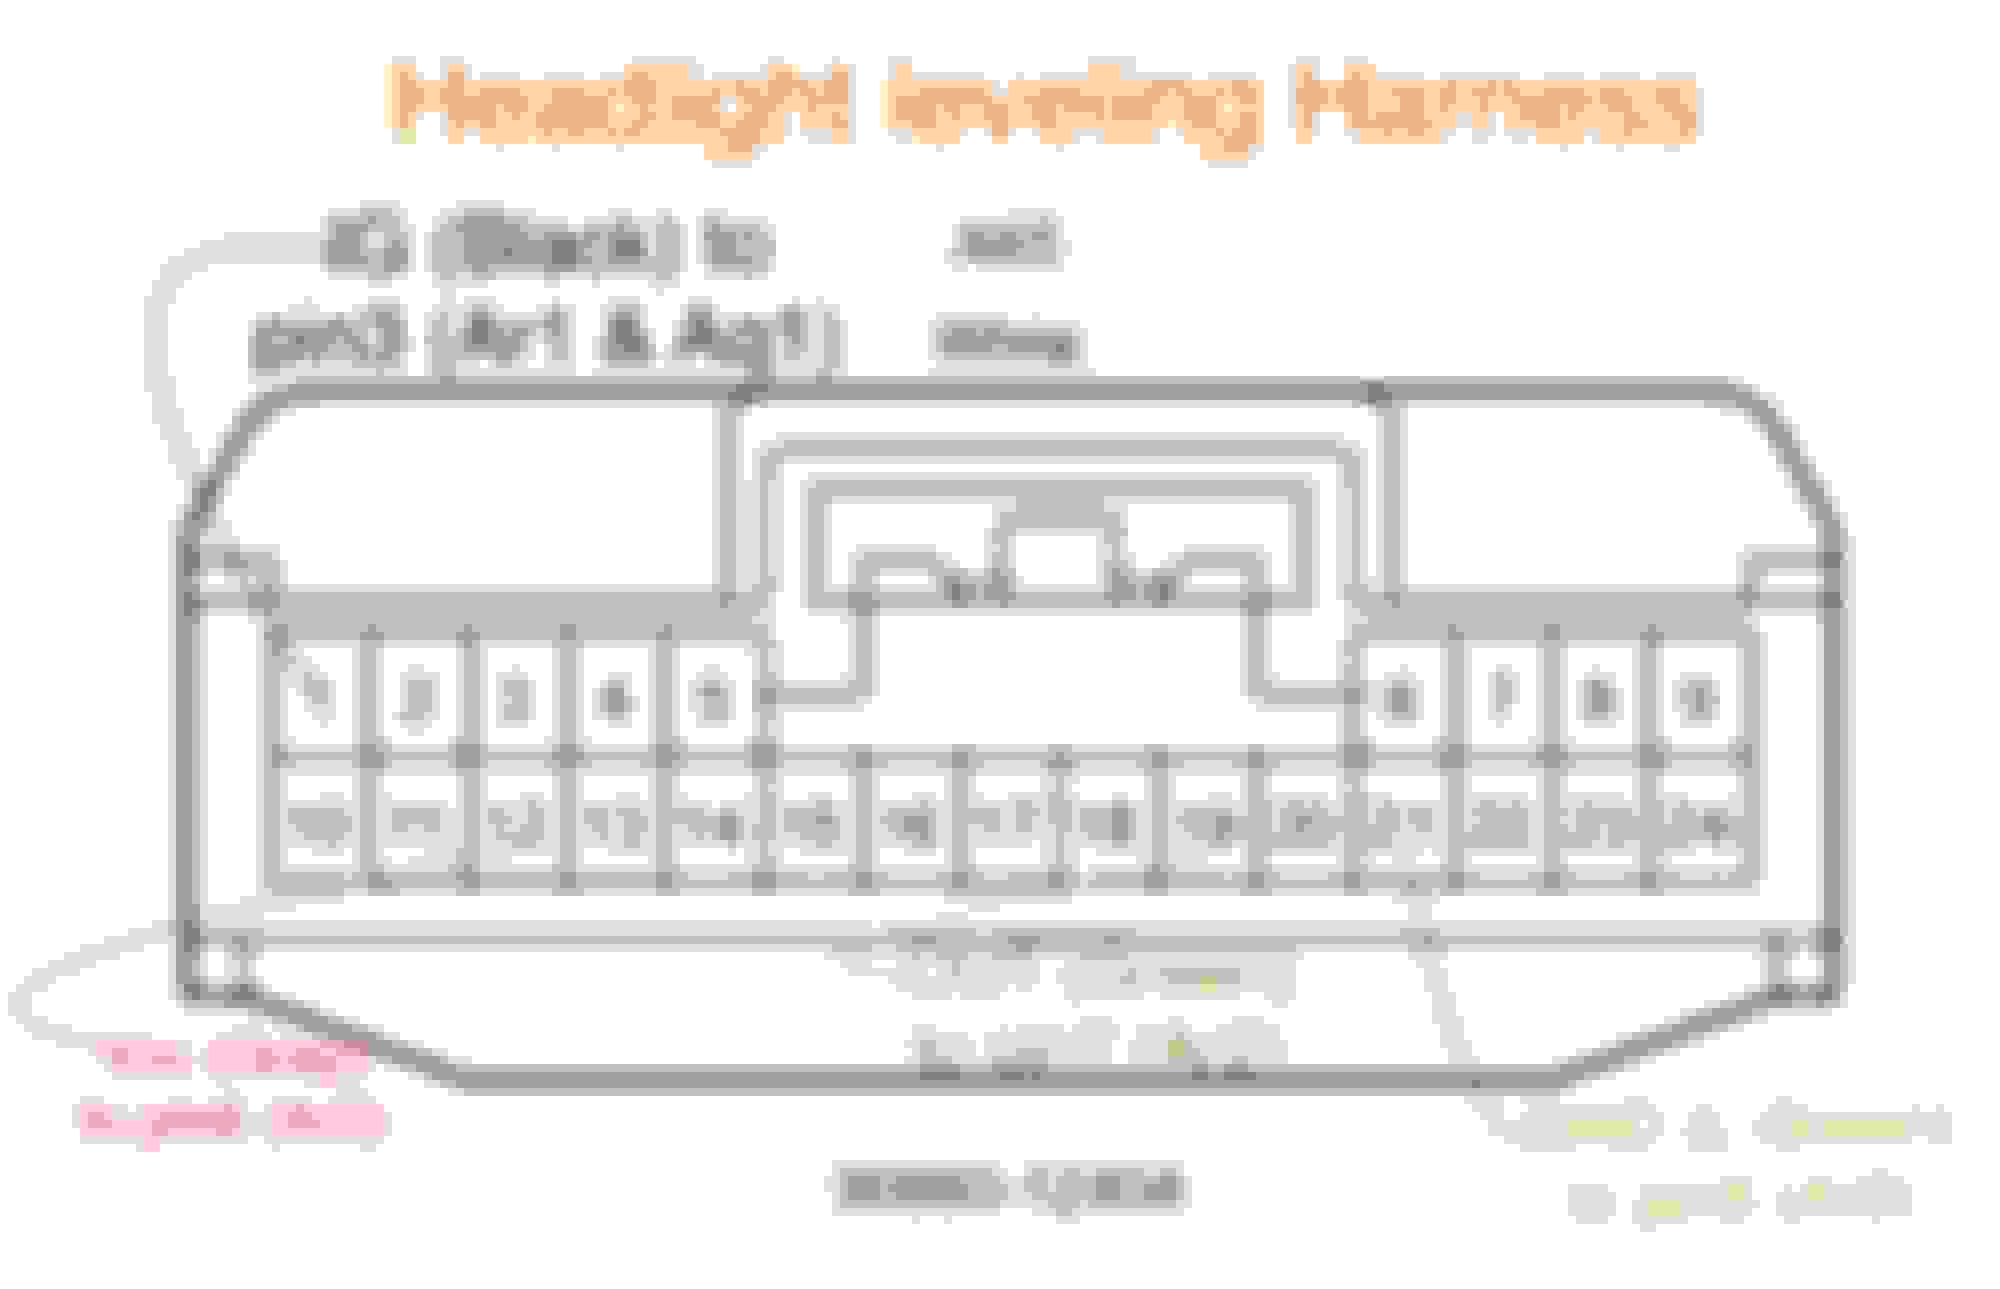
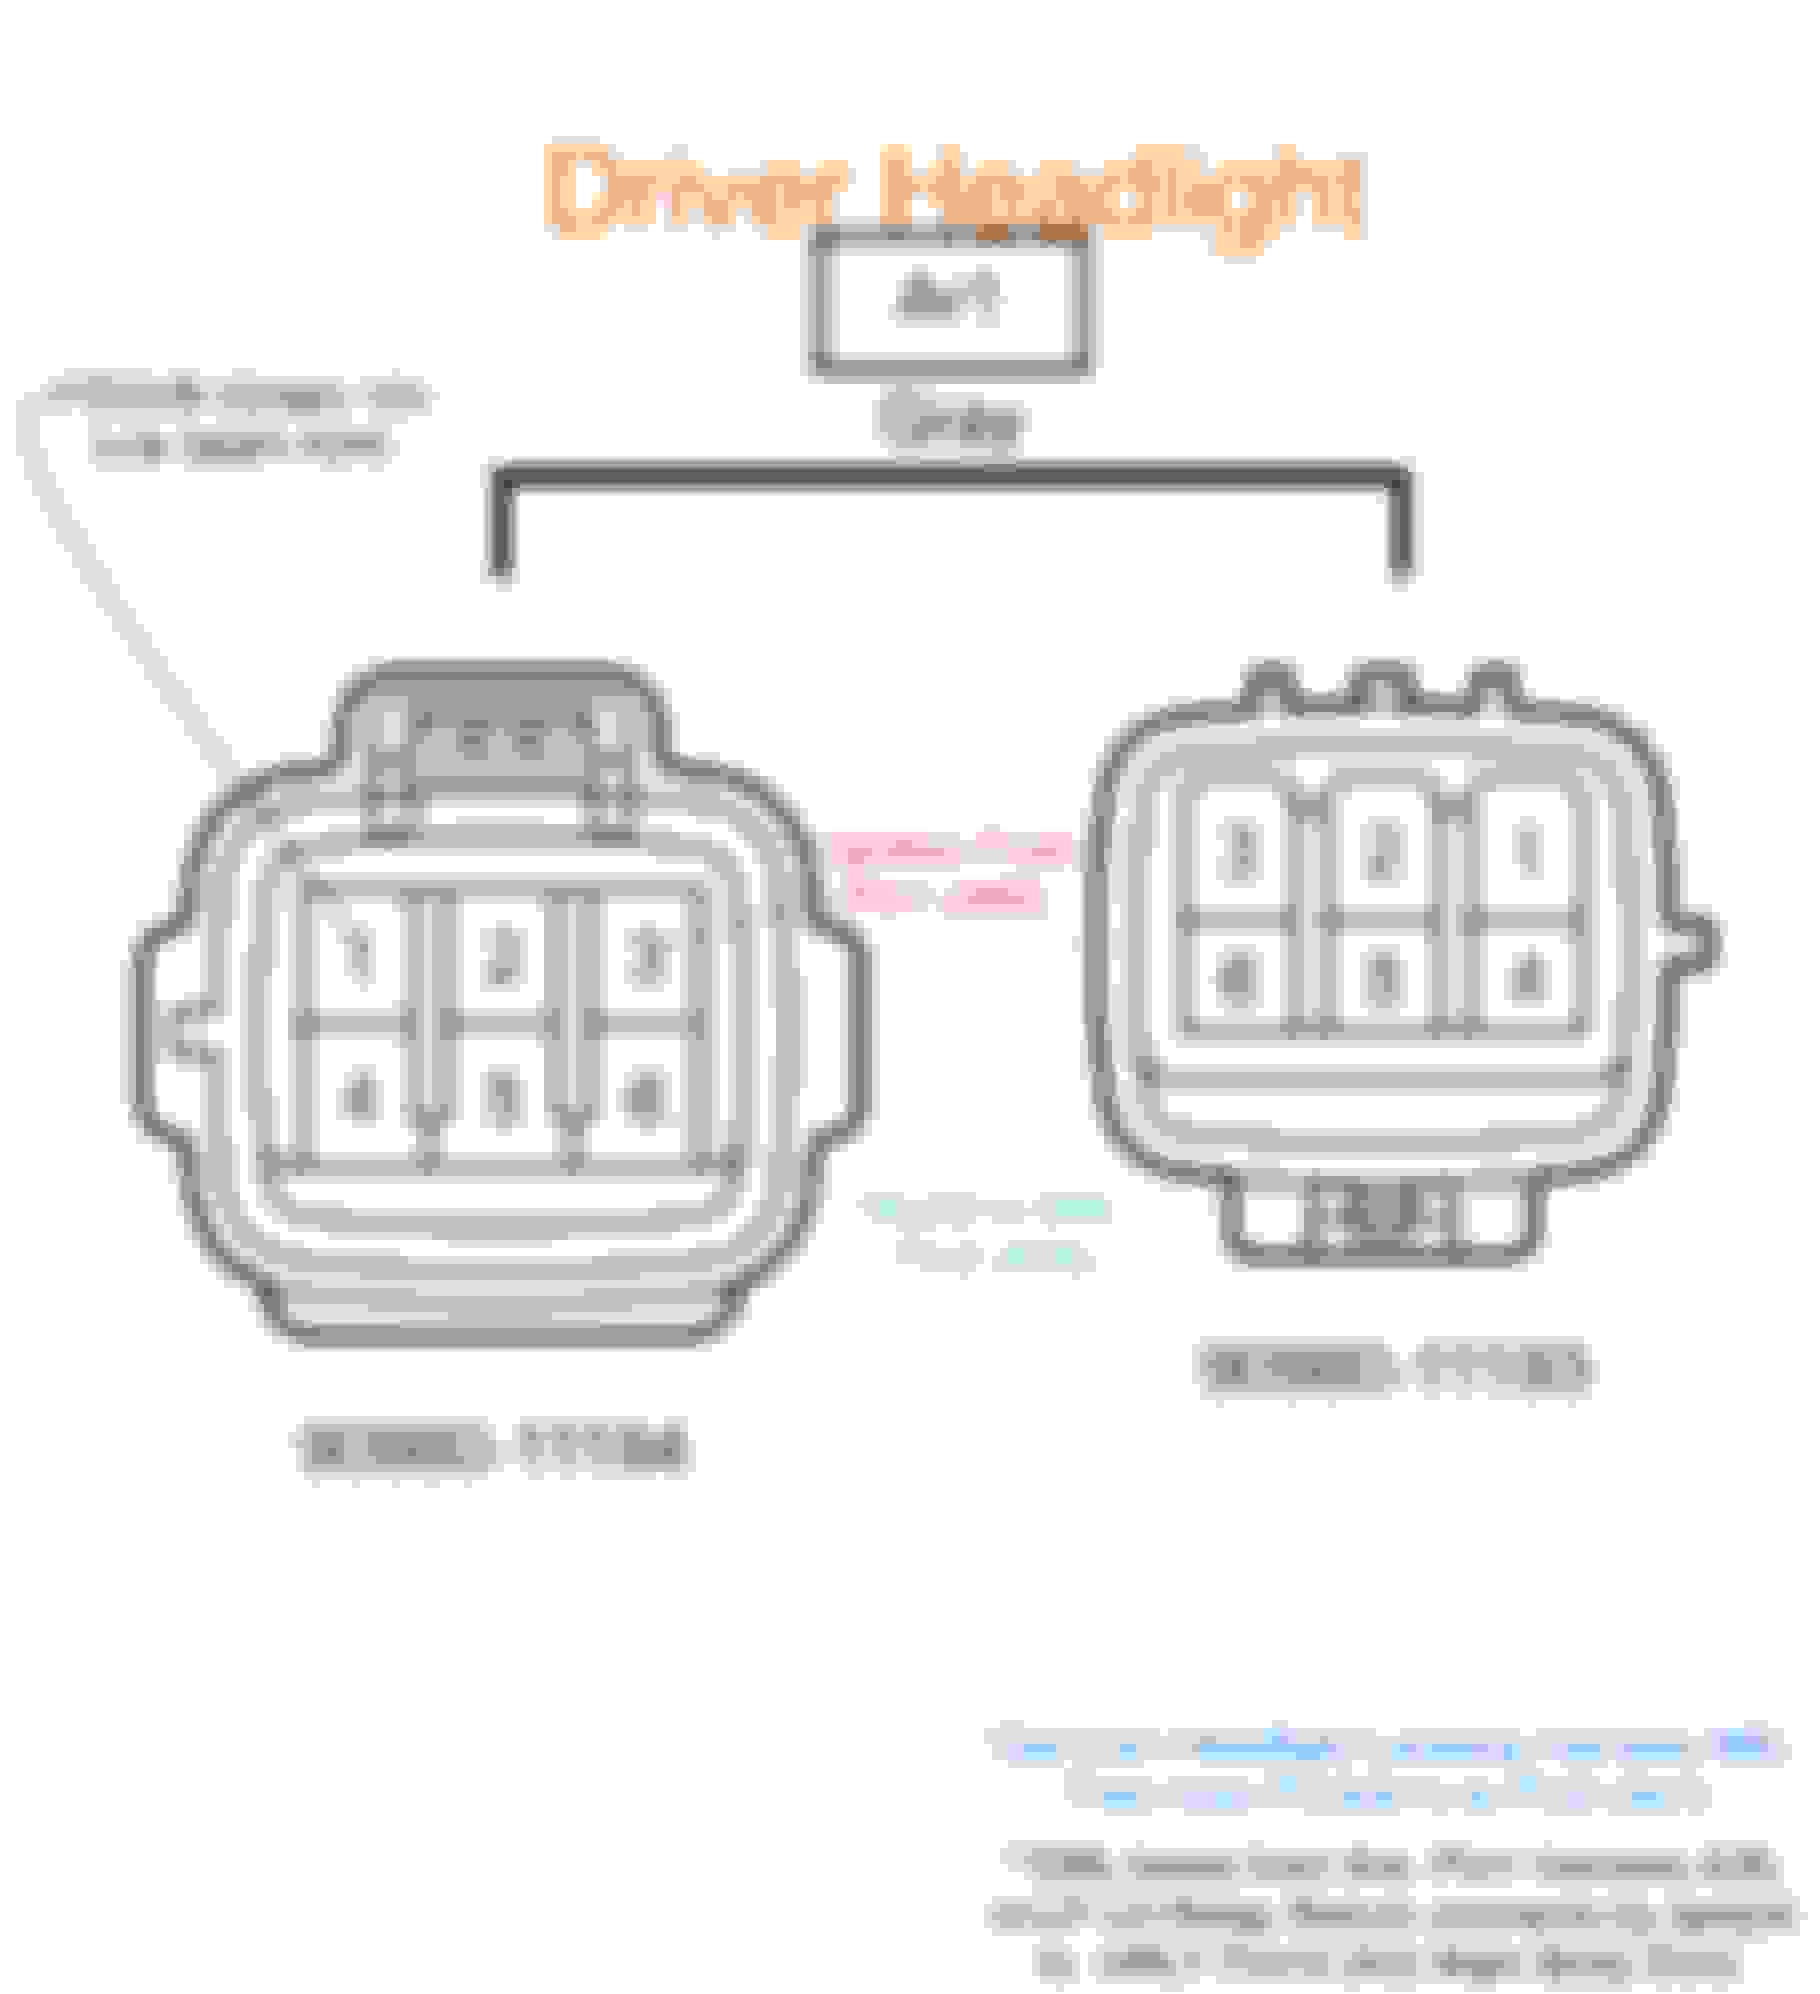
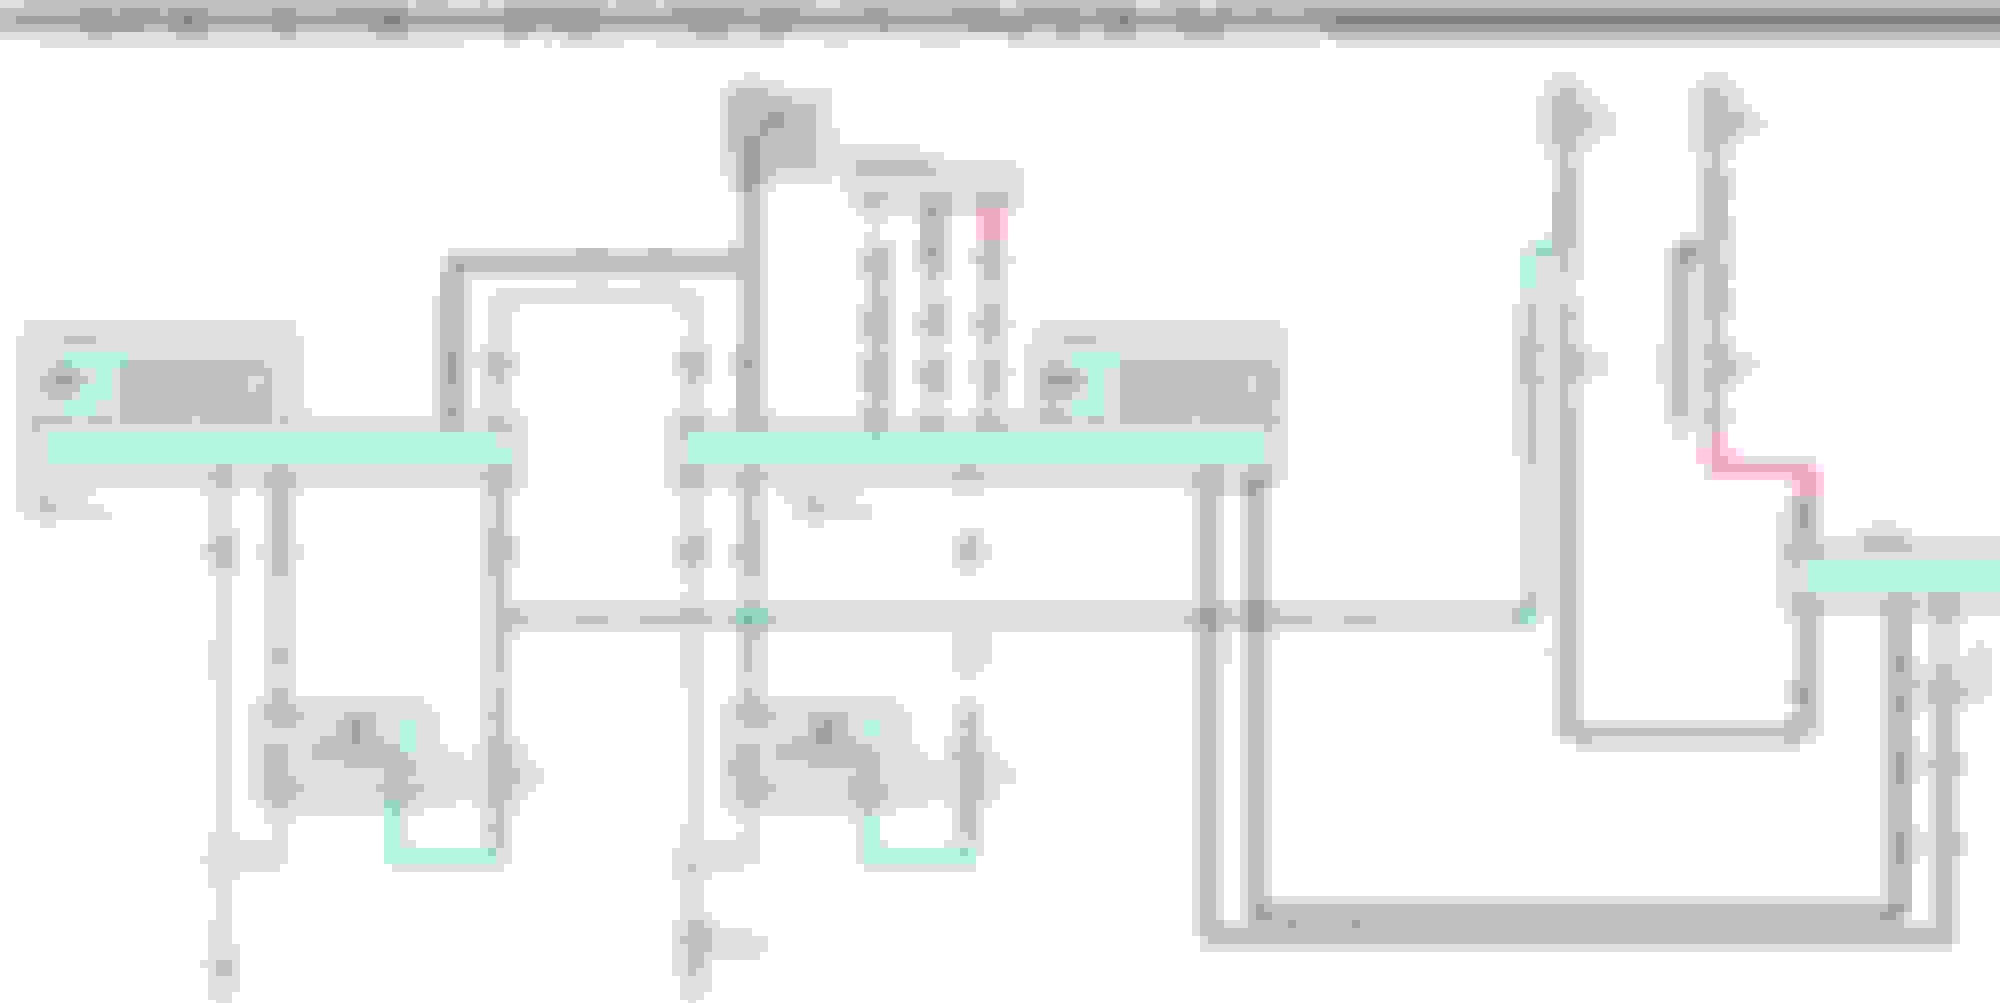
7. Splice and Re-pin wires as follow: Refer to images
Left (Driver) Side:
Right (Passenger) Side: All Other Pins Are Left Blanks.
8. Replace 15Amp Fuses with 30Amp Fuses from Driver side engine fuse box. Refer to Image.
*ERRORS;
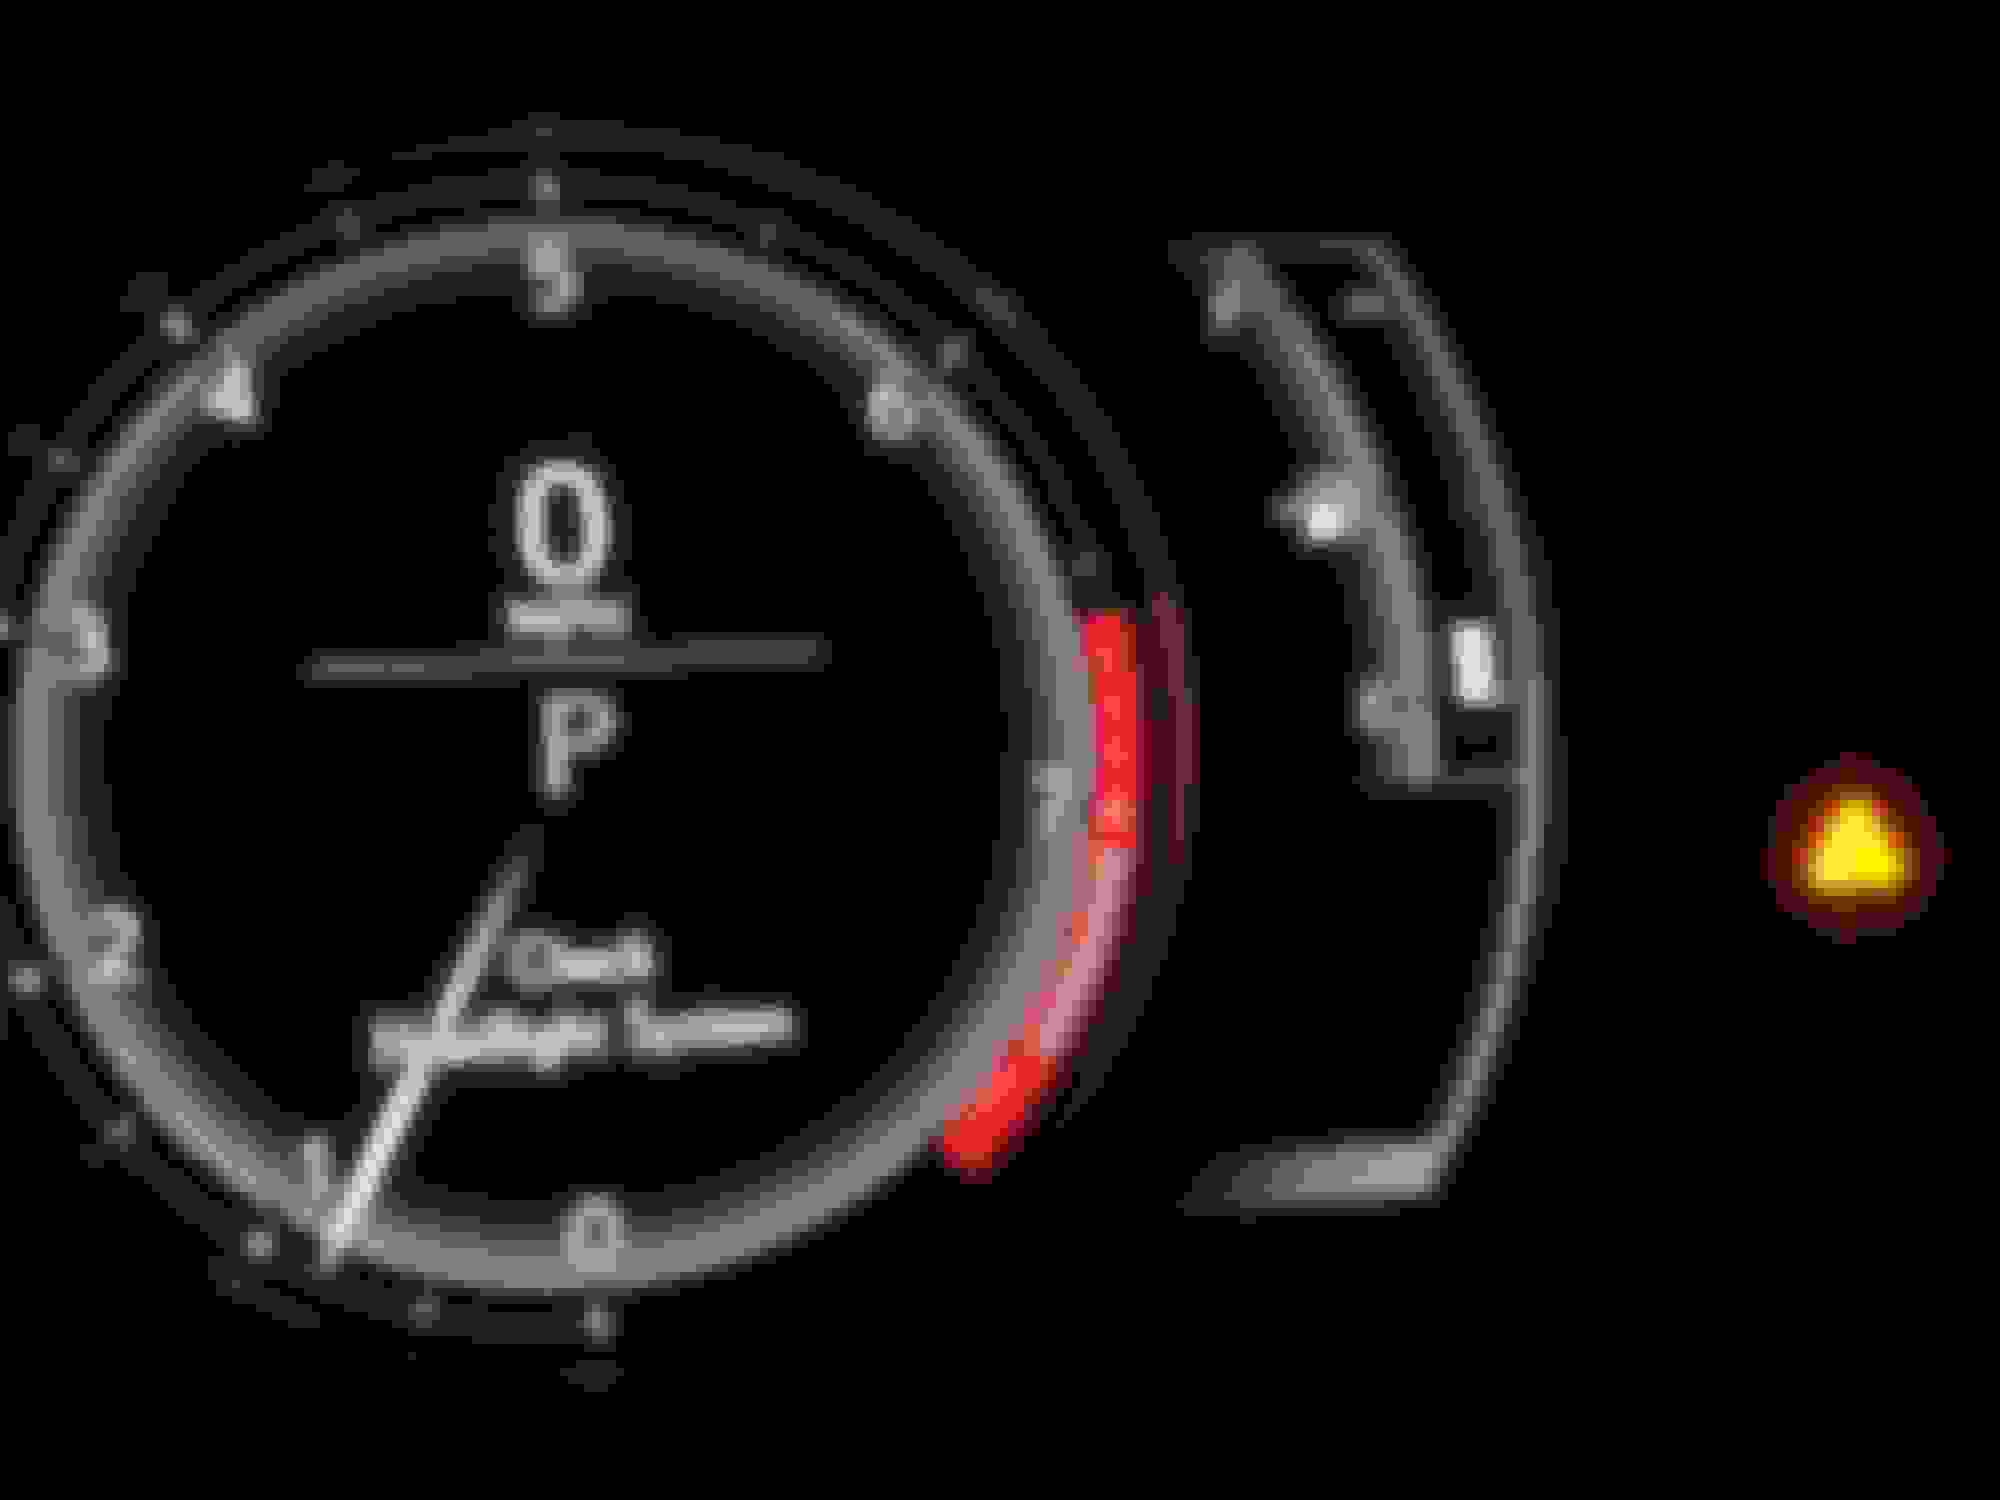
-My DRLs do not power on during the day. This only happens if the switch is in Auto. I believe this is due to the way The 30amp Relay powers the new headlights and DRLs vs how the old relay powered the old headlight. Refer to images below to see the difference. Apparently, The new way makes the passenger side relay communicate with the Main Body ECU through Pin 1 (DIM) Violet wire Harness K2. Unfortunately, I don’t know how to find this relay and wires to tap to.
- I get a “Check Headlight System” warning ⚠️. I am working on solving this. Refer to my diagram. I think it might be a miscommunication between the new headlight and the Main Body ECU. I think I might have pinned LINL on Pin 4 from both harnesses Ar2 and Aq1 in the wrong spot. I got confused because Pin4 on Ar2 harness is occupied by CANH (CANP from K1 Main Body ECU) When I get a chance, I will attempt to splice LINL and CANP on Pin4 harness Ar2 to harness Aq1.
8. Replace 15Amp Fuses with 30Amp Fuses from Driver side engine fuse box. Refer to Image.
- I get a “Check Headlight System” warning ⚠️. I am working on solving this. Refer to my diagram. I think it might be a miscommunication between the new headlight and the Main Body ECU. I think I might have pinned LINL on Pin 4 from both harnesses Ar2 and Aq1 in the wrong spot. I got confused because Pin4 on Ar2 harness is occupied by CANH (CANP from K1 Main Body ECU) When I get a chance, I will attempt to splice LINL and CANP on Pin4 harness Ar2 to harness Aq1.
Hows the output of the headlamps with the JDM LEDs? (i know this is probably answered, im lazy )
Im assuming this doesnt have AFS too?
No AFS but I believe some models do carry it. Check with the new 2019 IS. I believe the new headlights have it. Your car would have to come pre-wired to be compatible with AFS or else it would be very difficult to make it work.
Light output is way better than my old set up. I had to adjust the beams a bit higher and center.
Out of curiosity, what did you do with your old headlights? This is somewhat a good reference for me as I am trying source a JDM LED headlight, and currently looking for the best option to source bulbs and modules to 'upgrade' my single project Xenon headlights to the LED ones.
Last edited by Xenosis32; Nov 15, 2018 at 09:19 PM.
Out of curiosity, what did you do with your old headlights? This is somewhat a good reference for me as I am trying source a JDM LED headlight, and currently looking for the best option to source bulbs and modules to 'upgrade' my single project Xenon headlights to the LED ones.
Great work! Is the front bumper swap possible without the new headlights? I'm looking to simply swap out the 2014-2016 grille for the 2017+ grille, but it looks quite pricey if you factor in the lights and everything else.