
So heres what seperates the men from the Boys lol (sorry ladies)
-difficulty scale 2 out of 5
-nervous scale 4 out of 5
list of supplies
-oven
-butter knife (not your wifes fine china bad idea)
-800 grit sand paper
-phillips screw driver
-krylon fusion spray paint (semi-gloss)
heres a good place to start so you kinda get how it works
http://www.youtube.com/watch?v=ok1a9jyfRYw
how to remove your bumper
http://www.youtube.com/watch?v=ebp0Os7K1vM
how to remove your headlight
http://www.youtube.com/watch?v=tI_e8...eature=related
-so this is where you start out... in the begining lol
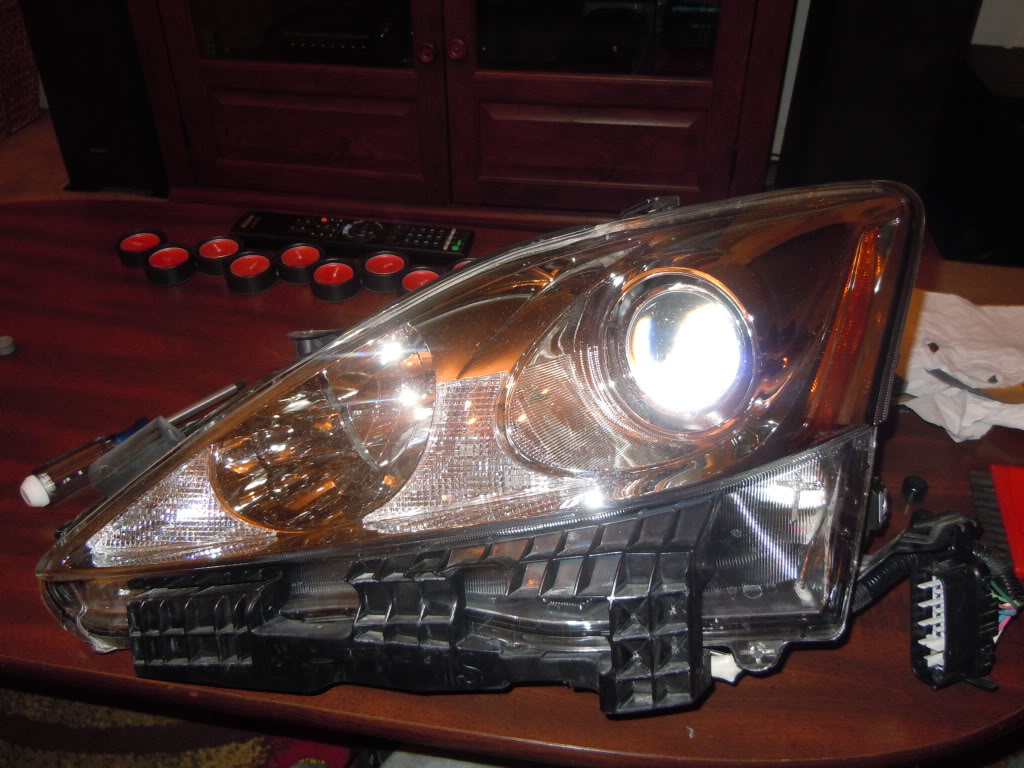
- clean the headlight the best you can before putting starting
-do a test run make sure it does fit in your oven
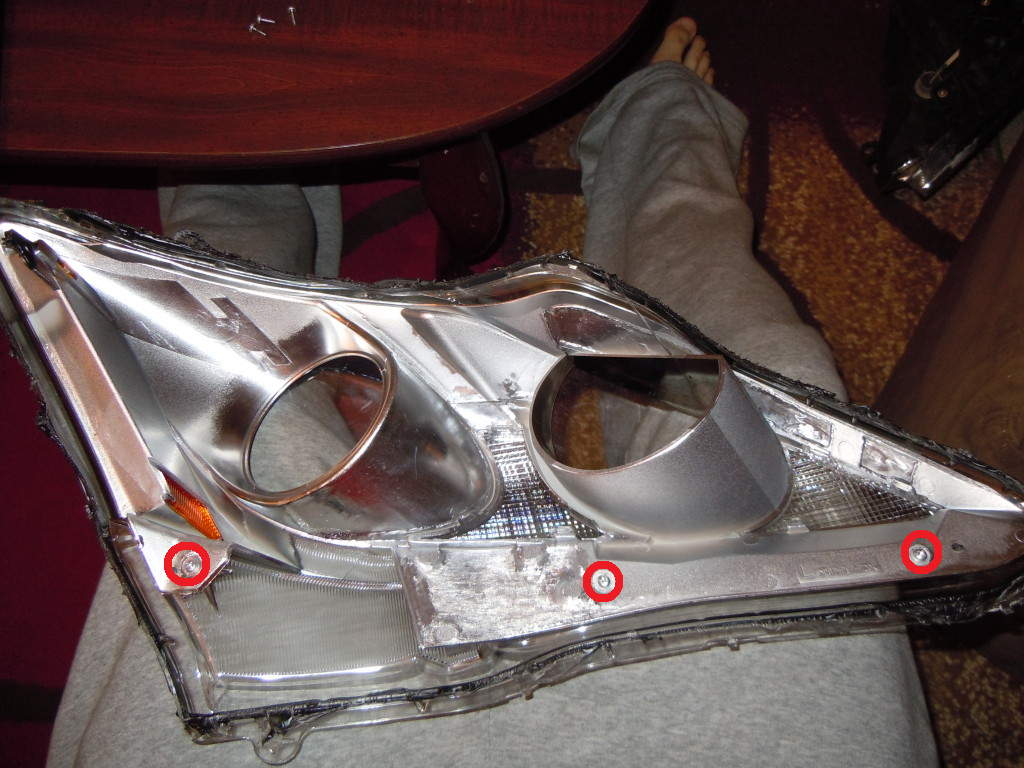
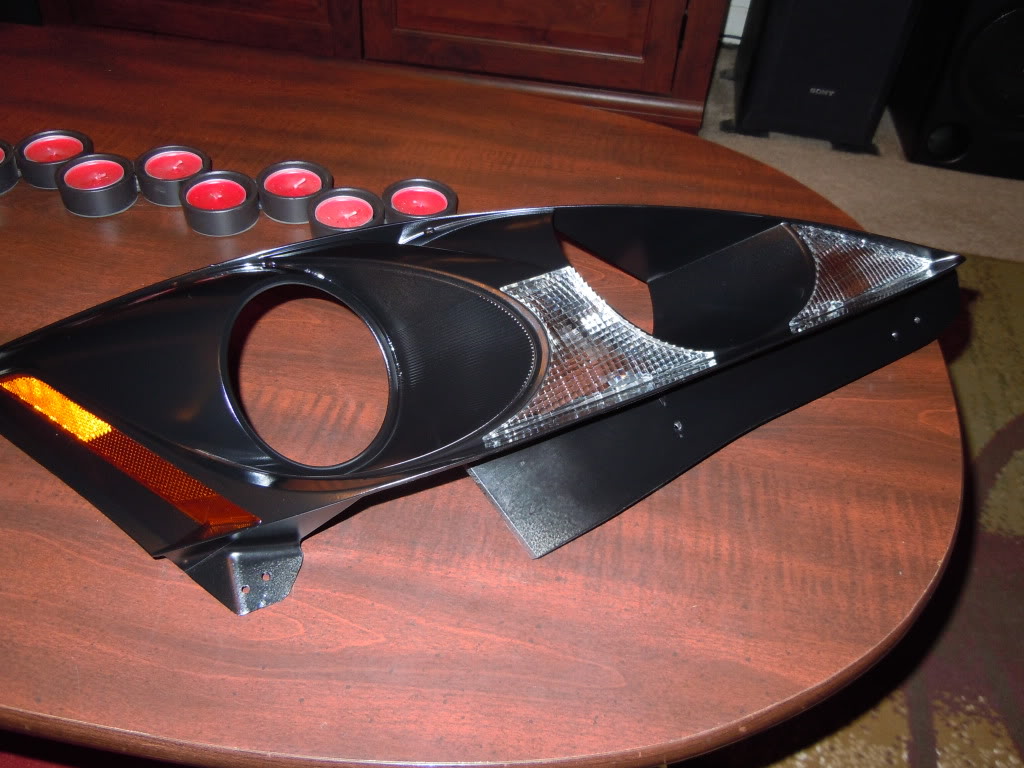
-remove the bottom plastic piece with 3 screws
*THATS IT!!* you cant remove the wires (trust me i tried) and i left the bulbs in there to prove the point 220 degrees doesnt do anything to this type of plastic or bulbs
-so heres the hard part is manning up to put a $500 piece of plastic into a oven lol seriously everyone seems really nervous about doing this (i was also) but the temp never really gets hot enough to melt anything except the glue... honestly you can almost bare-hand them right outta the oven except the metal (ouch) the reason i did the foglight first is to see if i was comfortable doing this. after the first one its a breeze
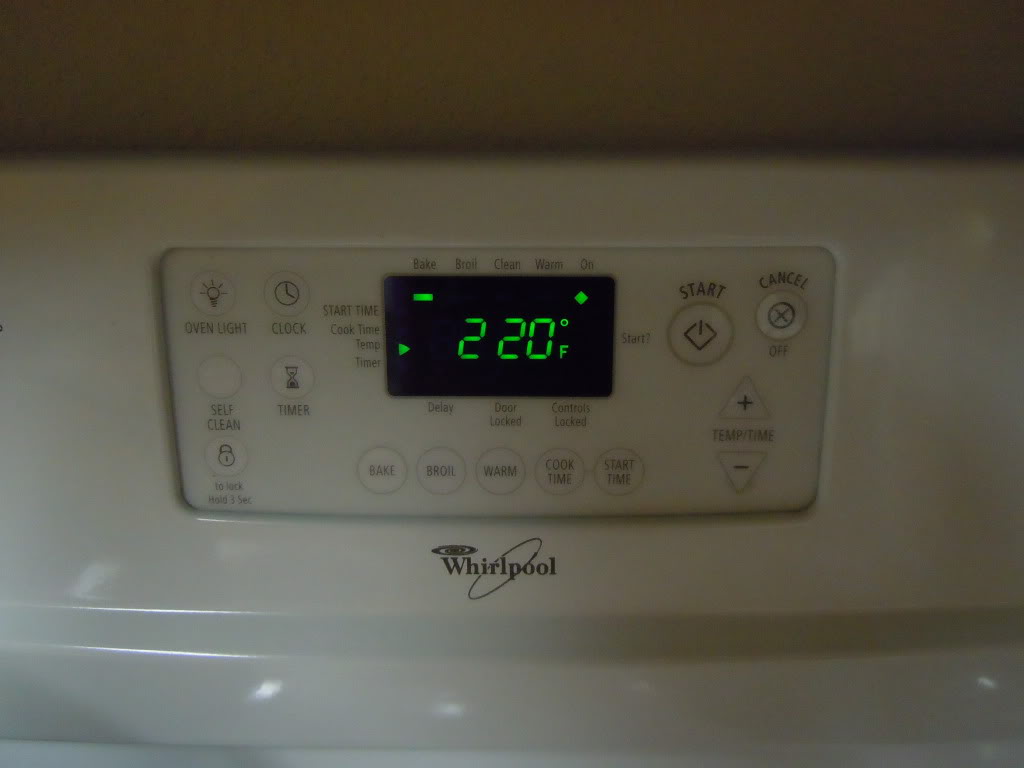
-preheat the oven to 220 degrees Fahrenheit (American) place in oven for 8 min.
-take out of oven with oven mitt and scrape around the plastic
repeat untill you can pull the plastic free from the casing
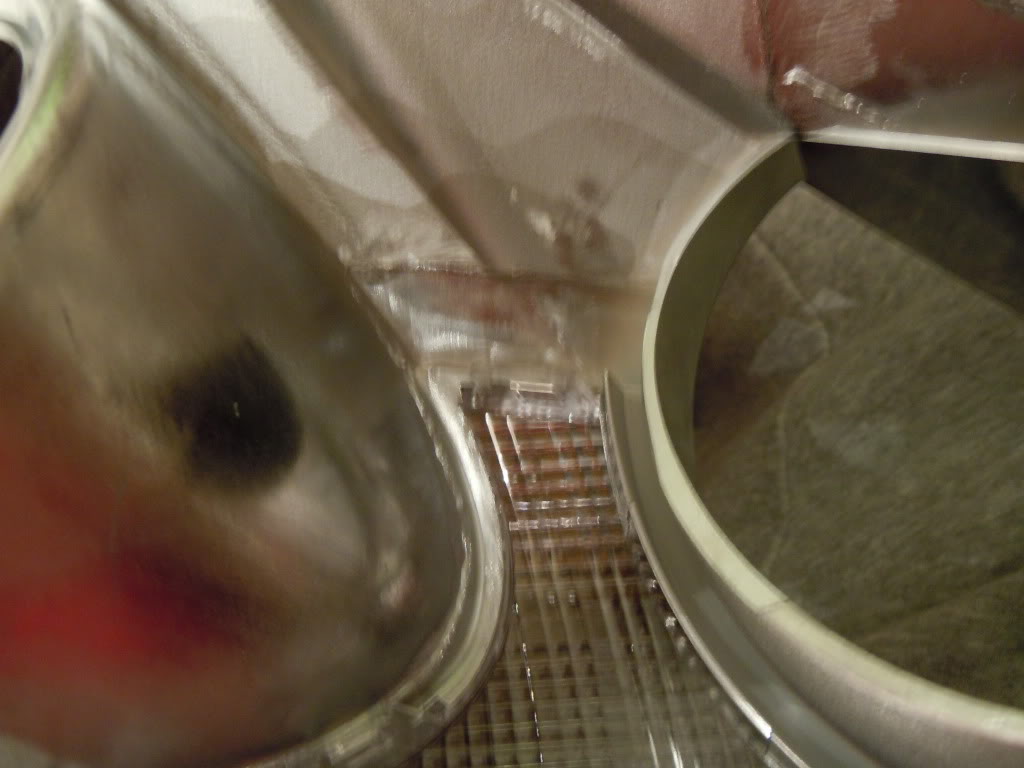
*quickly remove black glue if you get it on the exposed chrome casing*
if you do find some later goo gone works great on all of this
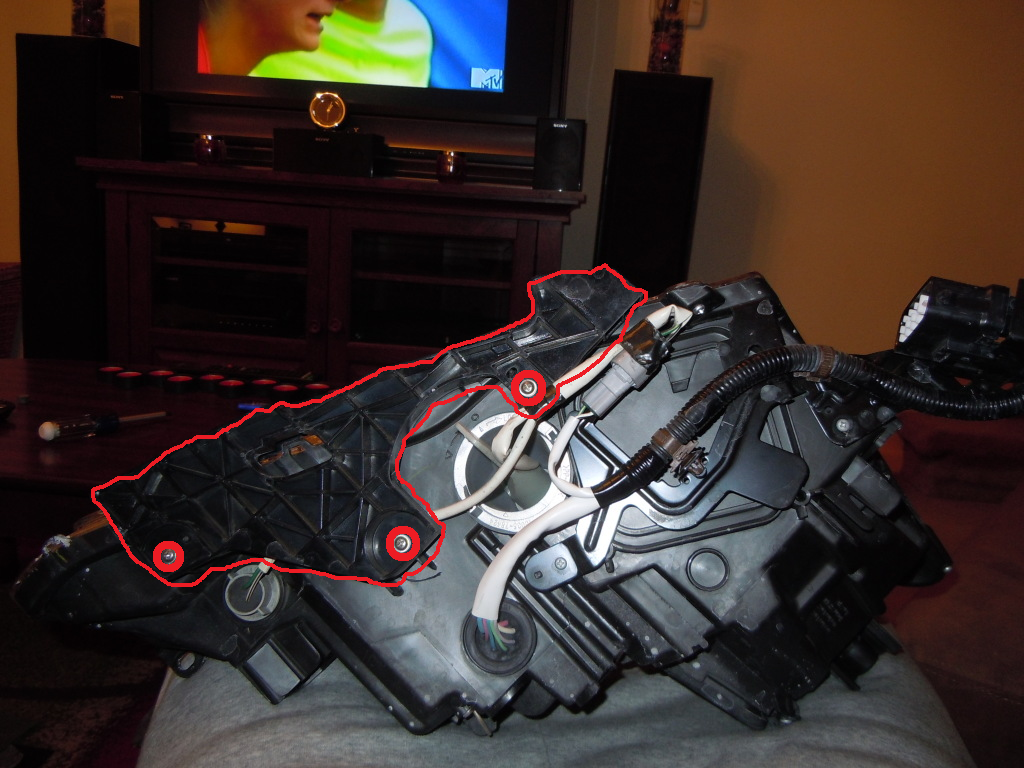
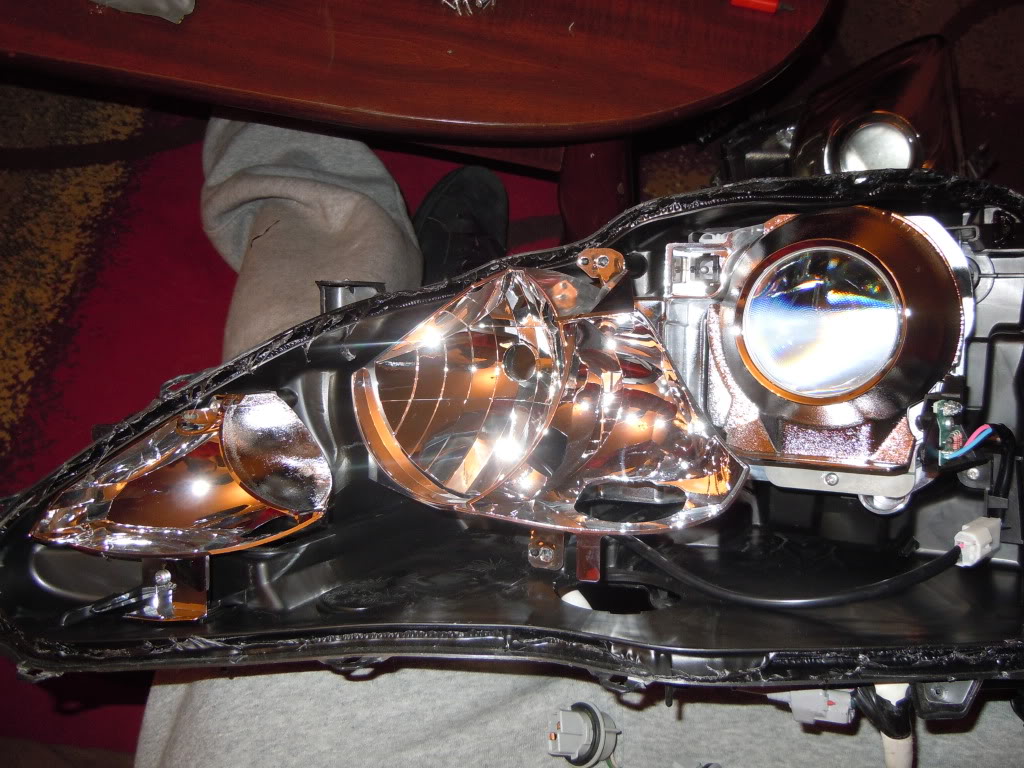
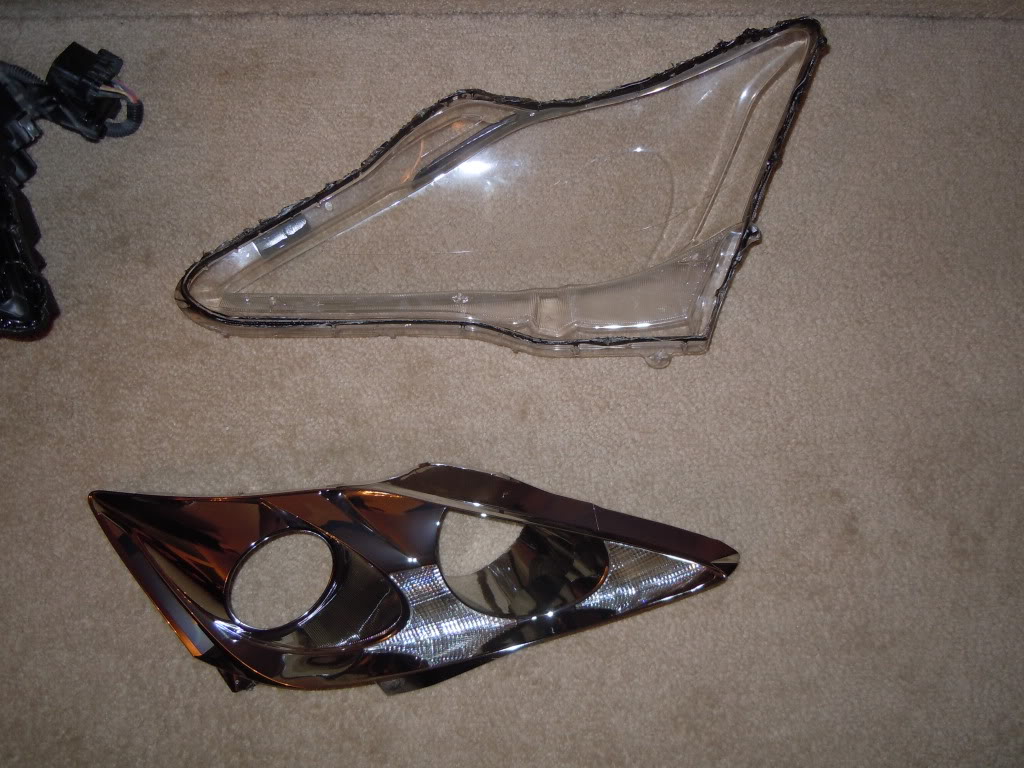
-then you will be left with 2 things
-the lense and chrome (back side)

-and housing and chrome
-to remove the chrome (lense) remove the 3 screws
-and you will be left with...
-wrap the lense in plastic wrap and put aside for you dont get dust or hair in it ( i have a husky so it was very nessary )
)
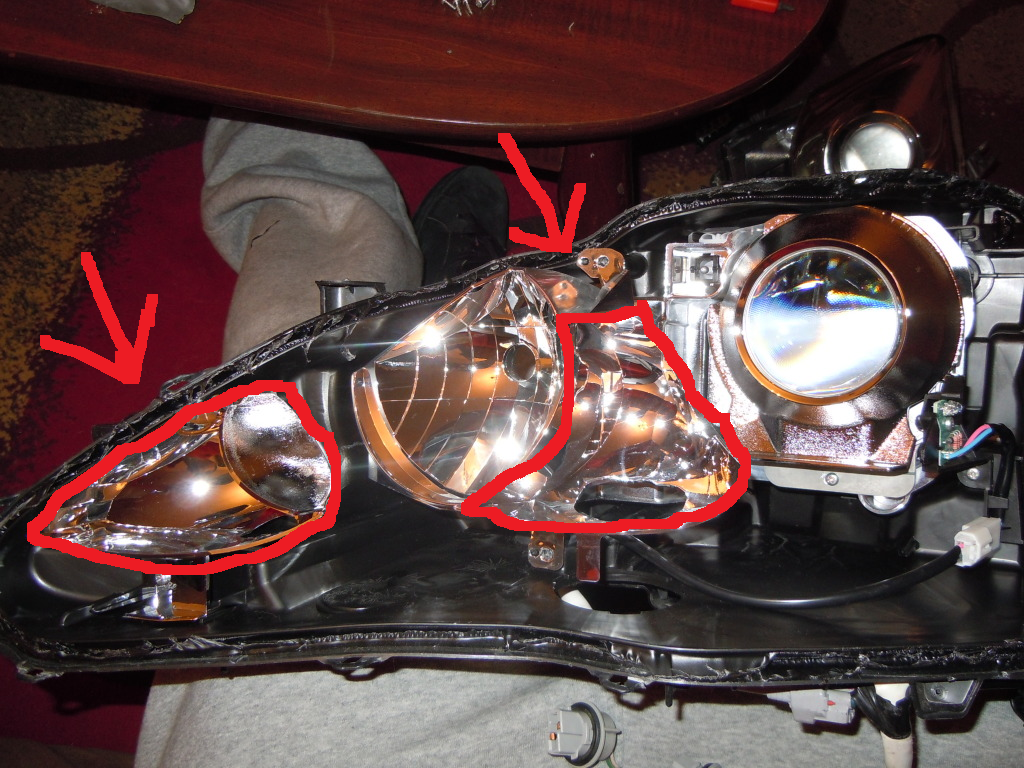
-take the chrome lense and pop out all the turn signals and relectors (3 total)
-I skuffed up the chrome lense so the paint would bond better...james bond lol
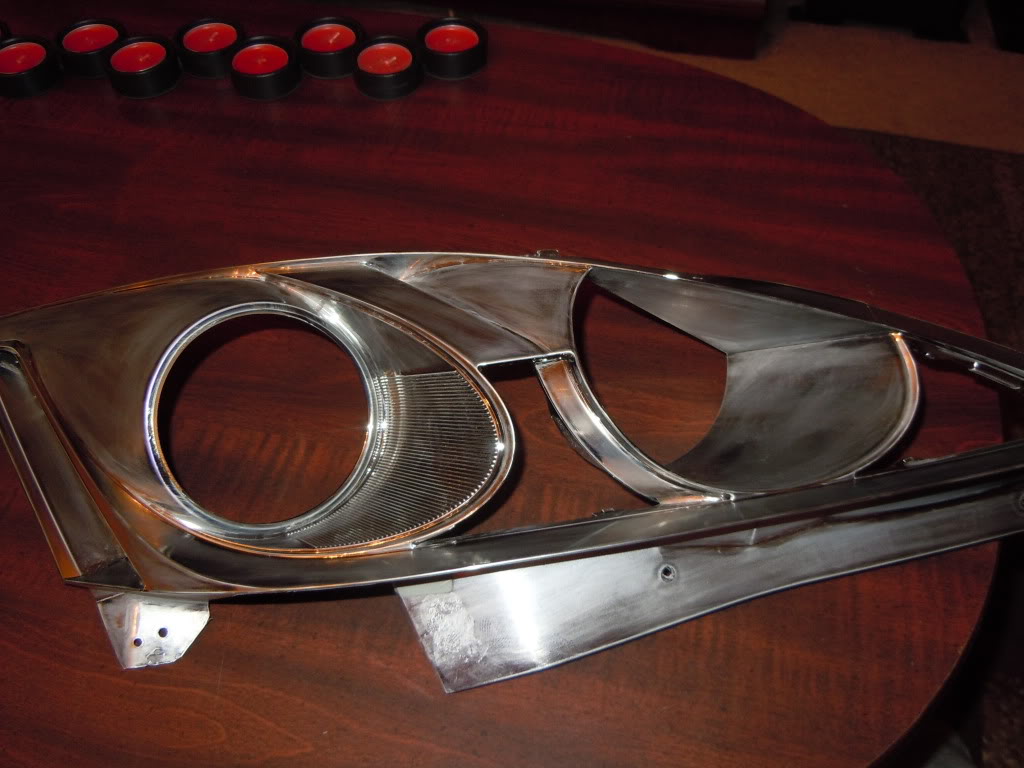
-paint and reassembale
-now for the housing i chose to paint the turn signal cups black( looks better after you put the (now black) lense cover back on (no it does not effect the brightness of your signal)
-reassembale the whole thing
-reassembale headlight and push the lense and plastic housing back together lightly and place in oven same temp same time
-when the headlight comes out place it lense down on a towel and press the casing into the lense
- FAQ what about them fogging up
-remember to float your headlight in a bathtub to see if it leaks if so let it dry out and apply silicone around lense its easier to take care now than have your headlight fog up on you later and you have to take the bumper off i got a good seal on all of mine
-do the other one put 'em back in and have fun
-any questions please ask
-can some one put this on the DIY page?
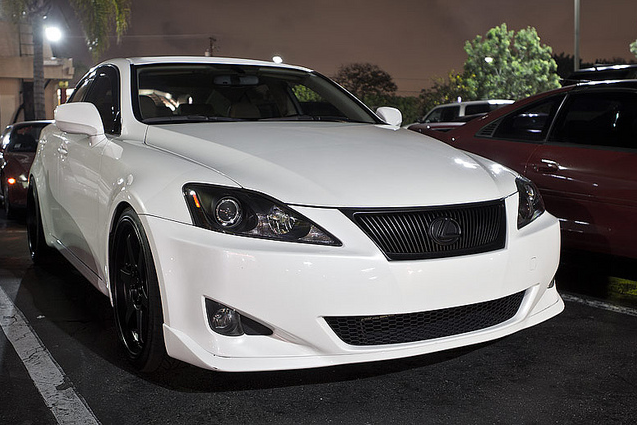
stole the pic please dont sue me lol props to Nick
- *DIY mid-pipe and ehaust install soon to follow*
-difficulty scale 2 out of 5
-nervous scale 4 out of 5
list of supplies
-oven
-butter knife (not your wifes fine china bad idea)
-800 grit sand paper
-phillips screw driver
-krylon fusion spray paint (semi-gloss)
heres a good place to start so you kinda get how it works
http://www.youtube.com/watch?v=ok1a9jyfRYw
how to remove your bumper
http://www.youtube.com/watch?v=ebp0Os7K1vM
how to remove your headlight
http://www.youtube.com/watch?v=tI_e8...eature=related
-so this is where you start out... in the begining lol
- clean the headlight the best you can before putting starting
-do a test run make sure it does fit in your oven
-remove the bottom plastic piece with 3 screws
*THATS IT!!* you cant remove the wires (trust me i tried) and i left the bulbs in there to prove the point 220 degrees doesnt do anything to this type of plastic or bulbs
-so heres the hard part is manning up to put a $500 piece of plastic into a oven
lol seriously everyone seems really nervous about doing this (i was also) but the temp never really gets hot enough to melt anything except the glue... honestly you can almost bare-hand them right outta the oven except the metal (ouch) the reason i did the foglight first is to see if i was comfortable doing this. after the first one its a breeze -preheat the oven to 220 degrees Fahrenheit (American) place in oven for 8 min.
-take out of oven with oven mitt and scrape around the plastic
repeat untill you can pull the plastic free from the casing
*quickly remove black glue if you get it on the exposed chrome casing*
if you do find some later goo gone works great on all of this
-then you will be left with 2 things
-the lense and chrome (back side)
-and housing and chrome
-to remove the chrome (lense) remove the 3 screws
-and you will be left with...
-wrap the lense in plastic wrap and put aside for you dont get dust or hair in it ( i have a husky so it was very nessary
)-take the chrome lense and pop out all the turn signals and relectors (3 total)
-I skuffed up the chrome lense so the paint would bond better...james bond lol
-paint and reassembale
-now for the housing i chose to paint the turn signal cups black( looks better after you put the (now black) lense cover back on (no it does not effect the brightness of your signal)
-reassembale the whole thing
-reassembale headlight and push the lense and plastic housing back together lightly and place in oven same temp same time
-when the headlight comes out place it lense down on a towel and press the casing into the lense
- FAQ what about them fogging up
-remember to float your headlight in a bathtub to see if it leaks if so let it dry out and apply silicone around lense its easier to take care now than have your headlight fog up on you later and you have to take the bumper off i got a good seal on all of mine
-do the other one put 'em back in and have fun
-any questions please ask
-can some one put this on the DIY page?
stole the pic please dont sue me lol props to Nick
- *DIY mid-pipe and ehaust install soon to follow*


Driver
Quote:
+1........(10 chars)Originally Posted by Bigrahizzl
wow great write up, too bad i dont have the guts to do this


Fire Slayer
nice write up. Could the turn signal bulbs have been changed in the headlight if you wanted?
Quote:
not sure if i get your question yes the bulbs could be changed... some ppl put white ones in there i think that answers your question. if not let me knowOriginally Posted by Sffd103
nice write up. Could the turn signal bulbs have been changed in the headlight if you wanted?

Driver
I did this on my old Subaru. Just make sure you do it on a dry day. If it's humid at all, you will most likely end up with condensation. (I didn't soak my in a tub)
Definitely a nice mod, if it fits the style of your car. Just take your time.
Definitely a nice mod, if it fits the style of your car. Just take your time.

Driver School Candidate
Thanks for taking the time to document your project; Great job i am appreciating all the pics also. It took alot the "unknowns out". By the way I could use help locating a qualified person or shop for my 07 IS350 project. If anyone can help me-I am looking to buy; near 805 area (vta CA) installed supercharger; and/or juice for cash. I can supply SC or theirs. Many thanks to everyone. itgot2bme@gmail.com

Pole Position
Good work son. Is there not a place that just sells blacked out headlights? Does anybody know of? If not. I really am tempted to do this.