When you click on links to various merchants on this site and make a purchase, this can result in this site earning a commission. Affiliate programs and affiliations include, but are not limited to, the eBay Partner Network.
how do I know if my spark plugs are due for change?
I bought my car with 75k miles and want to change if needed. Thanks!
I only discovered last week that my wife's IS was way overdue by reading some of the threads on this forum. One had a link to Lexus factory service recommendations and I stumbled on it when researching what was needed for a 100k service. Turns out they recommend changing plugs at 60k. However, the car ran fine and passed CA smog testing so It couldn't have been that bad.
Hopefully you have some service records for your car from the previous owner(s) and they changed them at 60k. If not, you should get to it when it's reasonably convenient.
how do I know if my spark plugs are due for change?
I bought my car with 75k miles and want to change if needed. Thanks!
You can put your VIN into Lexus Driver web site to see it has a record of it being done there. Though not having a record there doesn't necessarily mean the owner had not done it. Ask the owner if you can. After taking out my plugs, I think it would last to 90K.
Damm thanks a million...I was a lil bit worried about this didnt want to pay the dealer to do it and was scared cuz i tought i had to take out the intake manifold and all that but I see thats on the 250....great news and awesome write up thankz again buddy
Just finished 5/6 spark plugs on a 3IS last night. I can tell you that #5 going from passenger side to driver side was very difficult, and I'm sure I did not use the elegant method. #6 looks to be physically impossible. I have the manual straight from Lexus and its sort of lacking, in my experience.
I was up against the clock and growing quite frustrated, so I buttoned up the car to make sure I could start it and off I went. Live to fight another day.
Will have to devise a plan on how I'm going to tackle #6 and hopefully can get it posted. Looks like there is a very deep and hard-to-reach bolt that anchors the main Engine Wire to the "Intake Air Surge Tank Assembly", which I'll need a dedicated angled ratcheting wrench for, rather than a flex head ratchet (with drive) that I was using.
I changed mine this morning, on a 2011 IS 350. Thanks for the detailed writeup and pics! It definitely made it easier.
Tip for removing the coil pack/tube -- especially for the front-most one on the driver's side, that is the hardest to reach the 10mm bolt -- once you can break the bolt free, you can spin it out with your fingertips. For that front-most driver's side one, I found it easiest to use a 10mm offset box wrench, like this one:
I used the Denso Iridium TT plugs, IKH20TT (also marked as p/n 4705), which I got from Rockauto awhile ago. Visually, they have the same design as the OEM plugs I removed.
I changed mine this morning, on a 2011 IS 350. Thanks for the detailed writeup and pics! It definitely made it easier.
Tip for removing the coil pack/tube -- especially for the front-most one on the driver's side, that is the hardest to reach the 10mm bolt -- once you can break the bolt free, you can spin it out with your fingertips. For that front-most driver's side one, I found it easiest to use a 10mm offset box wrench, like this one: https://www.amazon.com/uxcell-Metric...6639409&sr=8-8
I used the Denso Iridium TT plugs, IKH20TT (also marked as p/n 4705), which I got from Rockauto awhile ago. Visually, they have the same design as the OEM plugs I removed.
Thanks for the offset wrench tip. I original bought a swivel socket but it was too fat to fit under the manifold. I got that offset socket and worked great. Still a tight fit where it's hard to maneuver the wrench but doable. Make sure to unclip the big wire on top of the plugs for more room.
Excluding that pain in the butt last driver's side nut, it's a 30 minute job. Screw the dealer with their $600 quote!
^^ indeed. I did mine in 45 min while detailing along the way.
The plastic expanding clip into the manifold was a PITA but it eventually got over and lived to see a second plug change.
Seriously, everyone just loosen the connections holding the wire loom and life gets pretty easy. As noted above, a box end wrench works great on coil pack #2.
I havnt actually ready through this thread, but another tip to add is, if you find the spark plug socket getting stuck to the spark plug rather than the extendee bar, j highly recommend tying a piece of string around it so you can fish it out after.
Lexus calls for changing the spark plugs at 60,000 on your IS350 - here's what you'll need to change the spark plugs on your IS350:
-10mm socket set with at least a 6 inch extender bar
-Spark plug socket
-A tiny bit of motor oil
-If have you a ratcheting wrench or a universal joint, it will very much come in handy.
-A 6-pack of your favorite beer
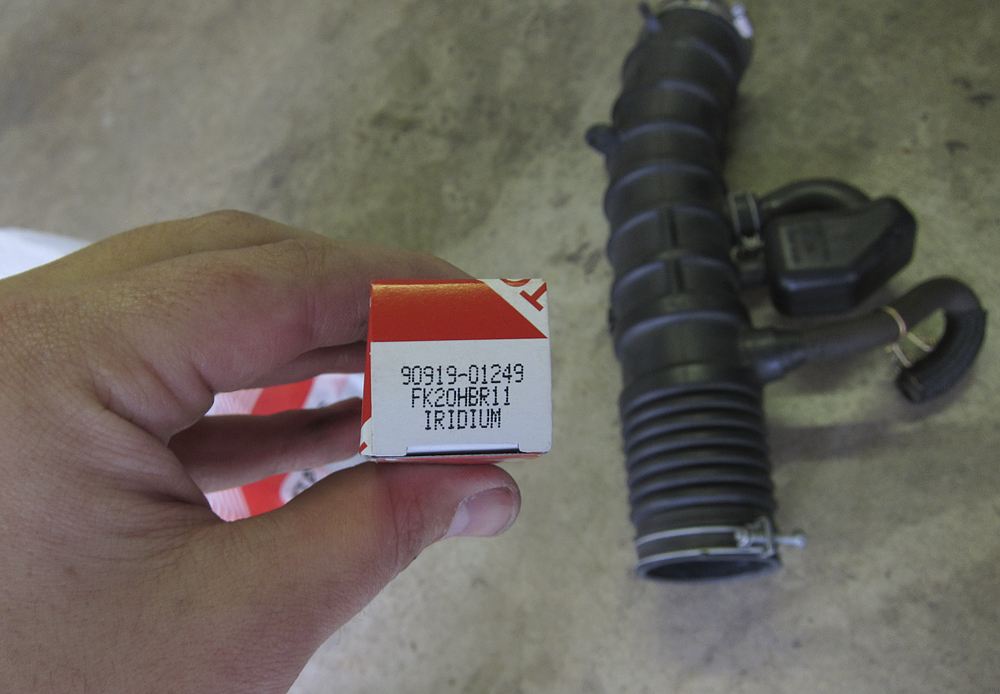
You'll need 6 spark plugs - I used the OEM Denso plugs, Lexus part # 90919-01249:
These plugs come pre-gapped, so if you're using the OEM Denso Iridium plugs DO NOT adjust the gap on these plugs.
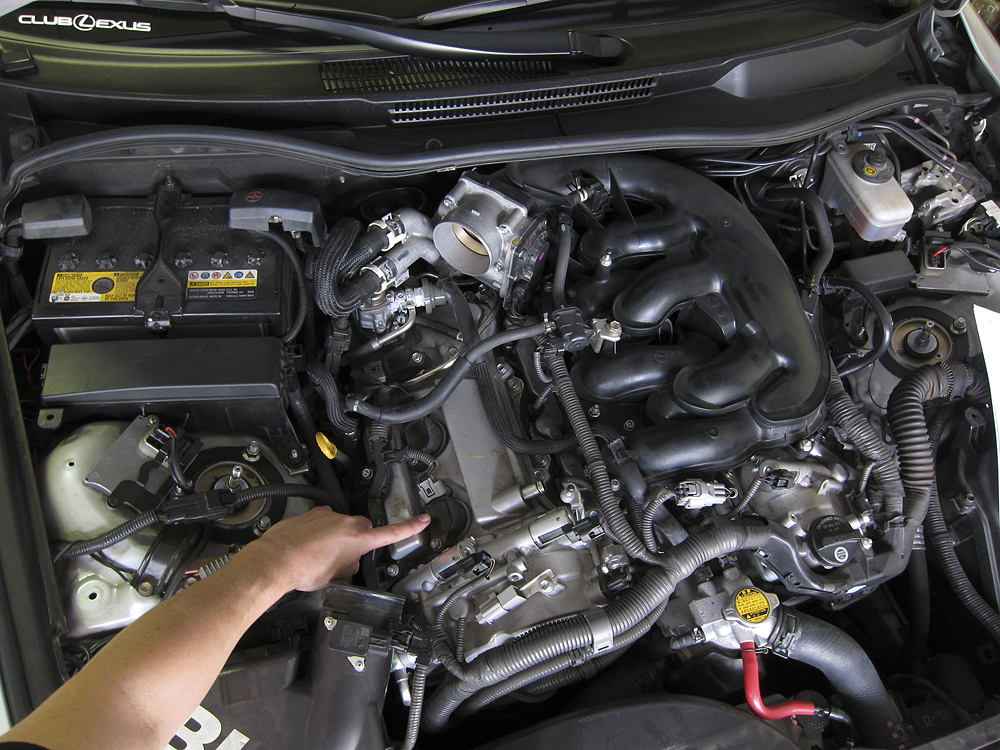
First you'll want to remove all the engine covers, along with the air intake box assembly, air hose, and induction scoop.
This is what the engine bay should look like after removing everything. In the picture below, I'm pointing to one of the ignition coil tubes that we're going to remove a few steps later. Take your time and get familiar with what they look like and locate all 6 (3 on each side), because there will be a few harnesses in the way that will have to be loosened in order to remove the ignition coil assembly:
I started with the passenger side. There are a few 10mm nuts that are fastening a harness over the ignition tubes, partially blocking access. Remove them:
Next loosen the 10mm bolts fastening the tubes to the engine block.
Separate the harness from the ignition tube by pressing on the tab and pulling the two apart:
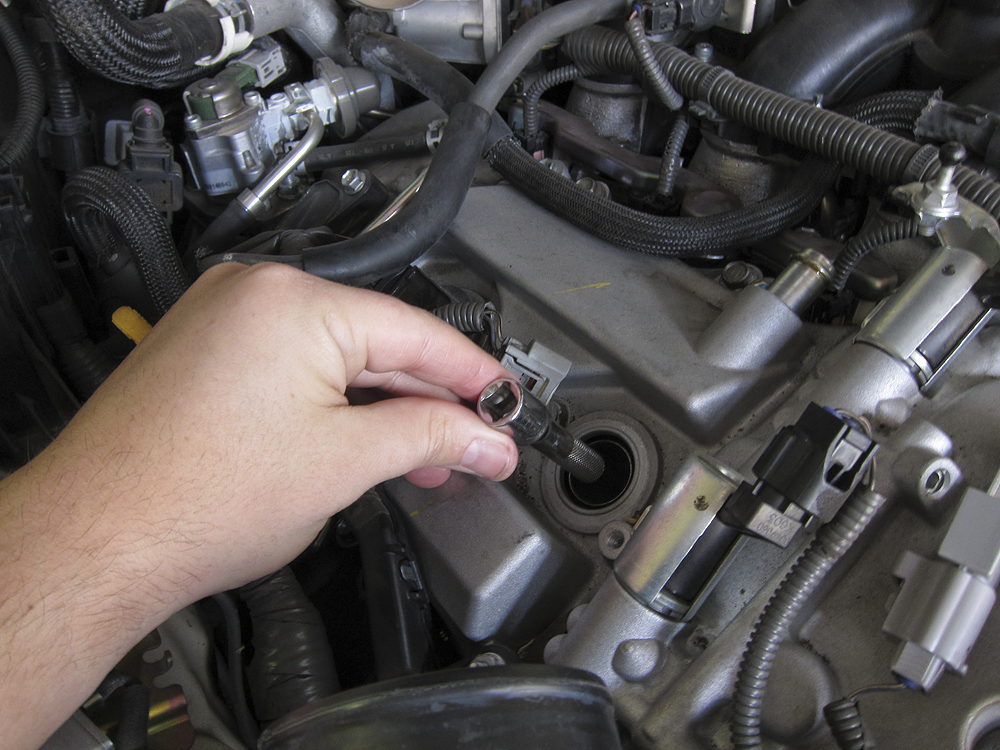
Pull the tubes upward and out.
You'll now be able to see the spark plug inside the shaft.
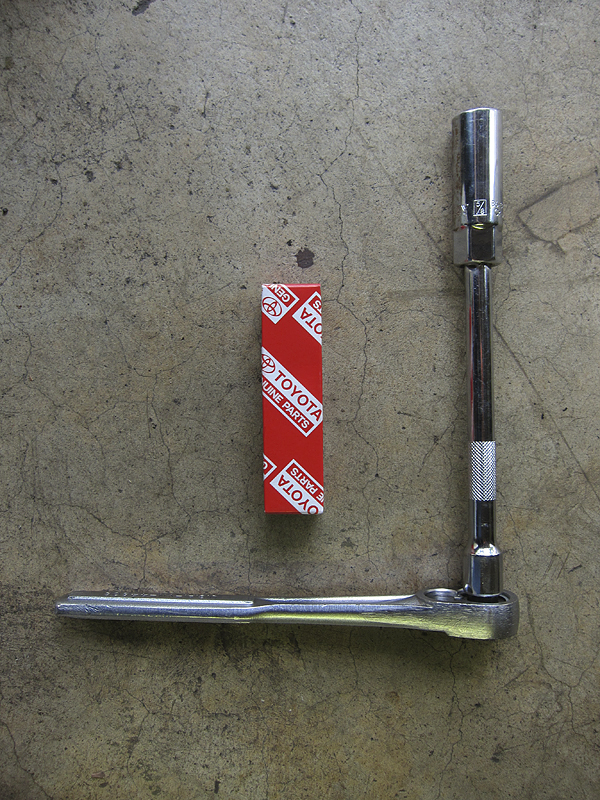
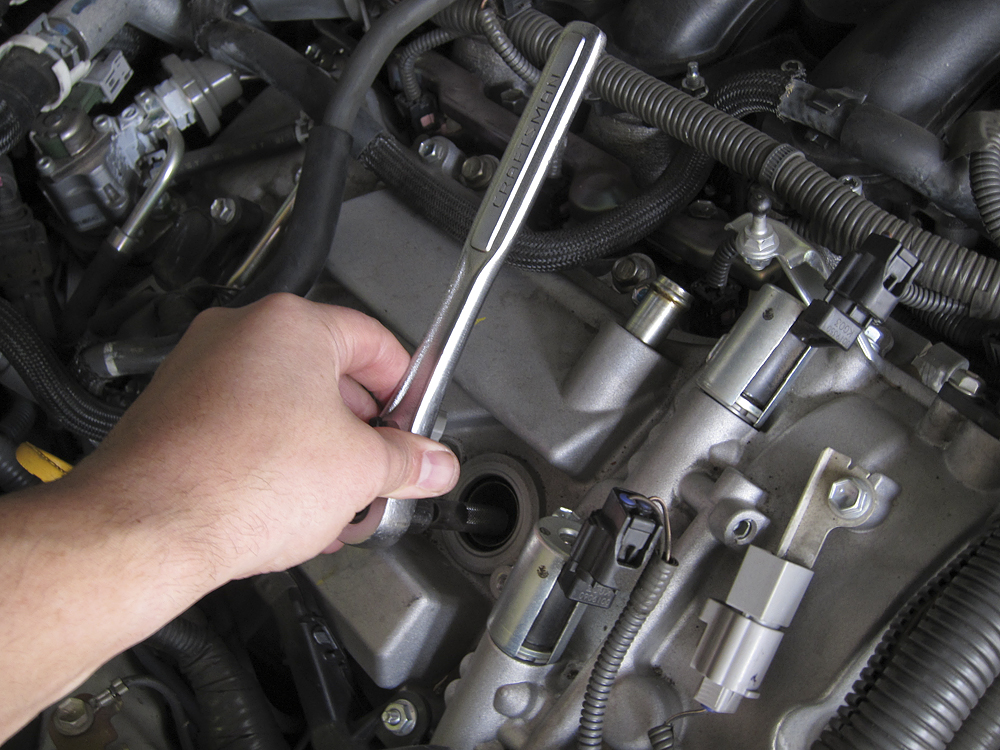
Now you'll need your spark plug socket with the 6" extender bar. The spark plug socket is a special deep socket that has rubber grommets inside that will grab the spark plug and let you remove it from inside the ignition shaft:
This is what the whole thing looks like:
You're going to need every bit of that extender bar to remove the plugs:
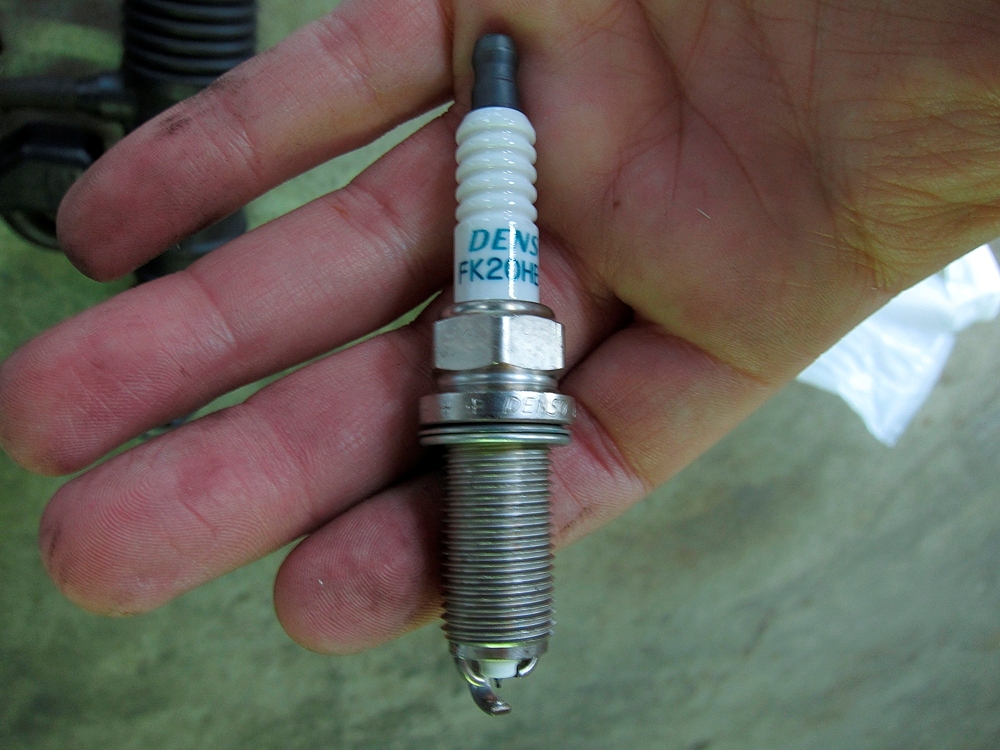
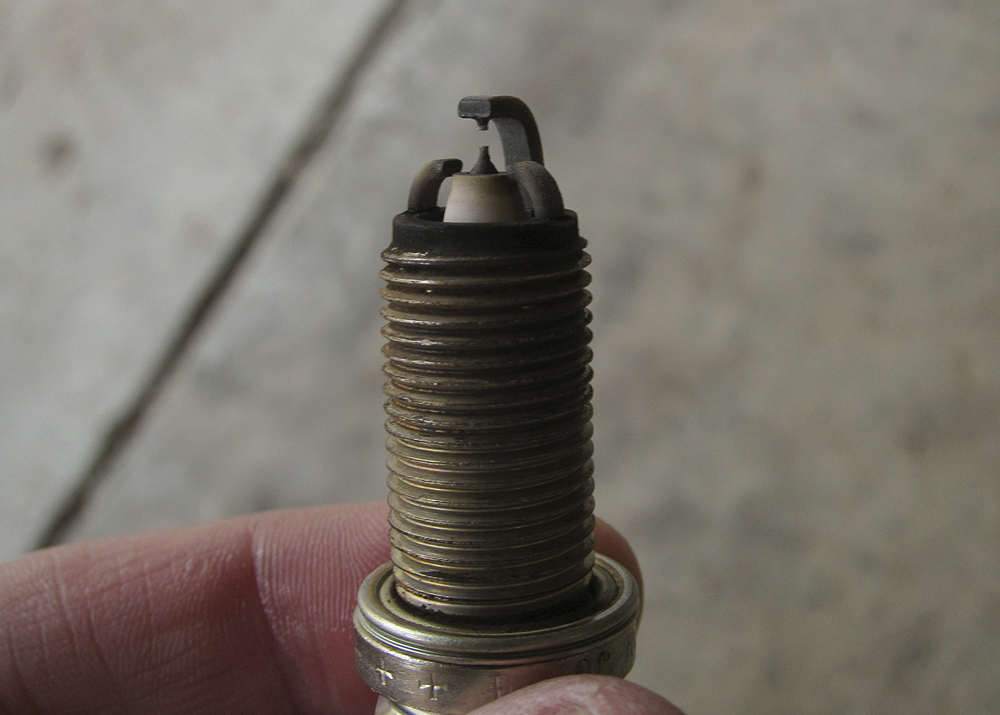
This was the first plug I removed (at 60,000 miles)
Apply a tiny bit of clean motor oil to the first three threads of the new spark plug to help avoid cross-threading the plugs. Be VERY CAREFUL installing the plugs - if you cross-thread the plugs, you now have a very big problem. Put the new plug into the same special spark plug socket tool you used to remove it, lower it into the shaft, and hand-tighten it once the plug finds the thread:
Use a torque wrench to tighten the spark plugs to 25 N*m (254 kgf*cm or 18 ft*lbf).
Reinstall the ignition coil tube, and repeat for the other 5 tubes. The bolts that fasten the ignition coil tubes to the engine block should be torqued to 10 N*m (102 kg*cfm, 7 ft*lbf). In other cars I've done this on, you had to make sure to do one plug at a time because you didn't want to connect the wrong ignition coil onto the wrong spark plug and foul up the firing sequence. On this car you can do as many as you want at the same time because the harnesses are just long enough to reach the intended plug - so no worries there.
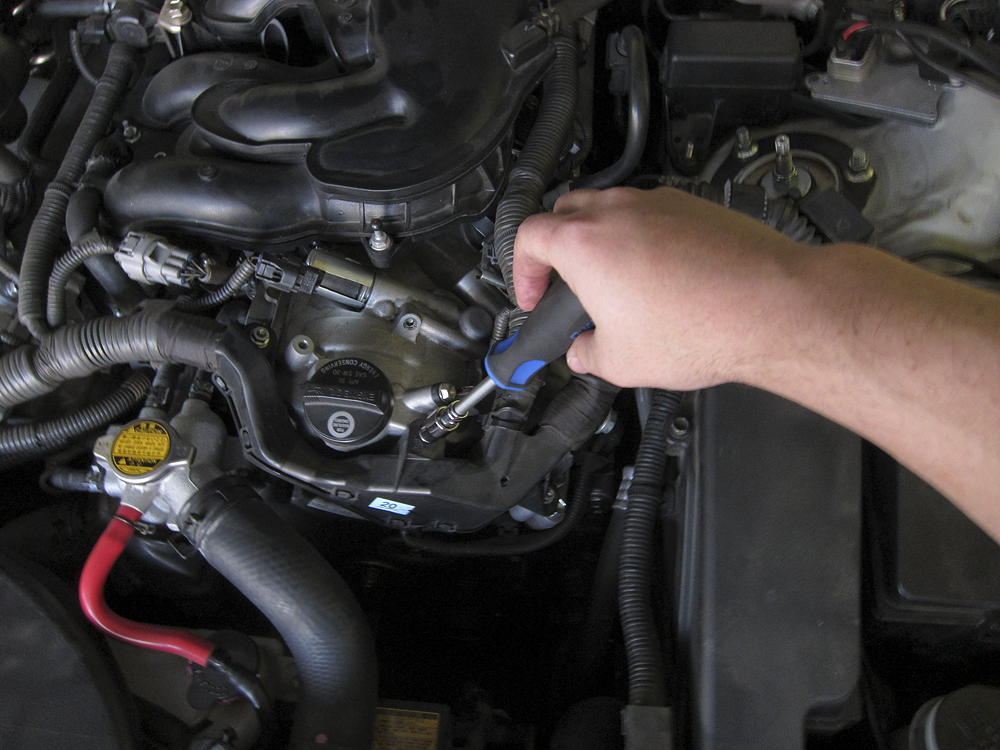
Now on to the driver's side. This side will be a little more difficult as there are a few wiring harnesses that must be removed in order to gain access to the bolts that secure the ignition tubes. Start by removing these two nuts:
You can then lift the harness out of the way just enough to slip a box wrench (the ratcheting type will make your life a whole lot easier) behind and unfasten the ignition coil tube:
Remove or loosen any wiring harnesses that impede your access to the ignition coil tube bolts. The final bolt can be accessed from above with a little elbow grease:
Reinstall everything you just removed, and enjoy a (few) well deserved beer(s) for a job well done. You might want to take this opportunity to remind the significant other of your money-saving accomplishments. Make sure and let her know you just saved $300.
I hope you all find this useful!
Javier
Update - I've just done plugs on a GS450h. The right-hand bank (left front standing in front of the car) is virtually the same as your demo IS, but in this case, the left side has the main battery cables (bright orange), and also a small coolant reservoir, that makes access a little trickier. It is a bit fiddle, but I can confirm the plugs can be replaced in around half an hour (just for that side). A few notes: I used a 1/4 drive socket set, extension, and universal joint for removing the two metal brackets (one for the battery cables and one for the main loom), and the main wiring harness attachment nuts and bolts. Then it was just a matter of releasing all the clips, (two at the camshaft end, and all the coil leads). Use a long extension and universal joint for your plug socket - 3/8 drive is best - it makes it much easier to get clearance through the cables etc. And yes the coil-packs come out past the manifold! If you've got big hands, find someone to help, otherwise, it's easier than it loo
Intake pipe side is dead simple, and as you've already covered. Front plug access Middle plug access Rear plug access
ks.

 12-16-14, 12:30 PM