


DIY INFO- Front speaker replacement on the IS300


Thread Starter


Joined: Feb 2003
Posts: 34,122
Likes: 485
From: My little world
 DIY INFO- Front speaker replacement on the IS300
Yes, another DIY 
There is already a DIY on the internet, but (a) we need our own and (b) the one that is on the net only has like 3 pics and we want a full detailed pictorial
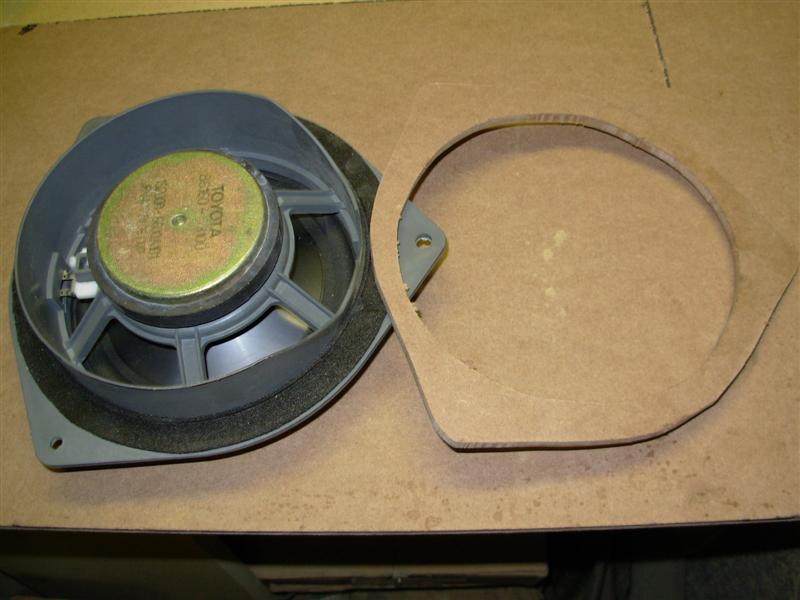
1ST order of bad news..... the mounting plates are part of the speaker so you have to make new mounting plates.............. have to. If you choose not to make new mounting plates you'll have to destroy the old speaker and frankly it is not worth it.

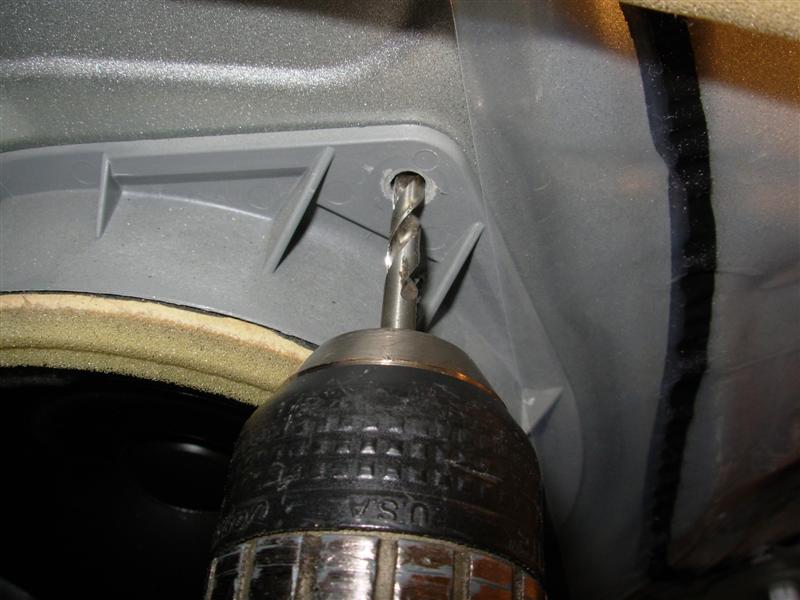
2ND order of bad news..... the mounts are riveted in so you have to drill the rivets out.

To get the door panel off, simply pull the tweeter housing off, remove the screw inside the armrest pocket on the door, pull the handle back and pop the little tab hiding the other screw, then simply pop the trim off by going just above and below the locking flap with a small pic.

There is already a DIY on the internet, but (a) we need our own and (b) the one that is on the net only has like 3 pics and we want a full detailed pictorial
1ST order of bad news..... the mounting plates are part of the speaker so you have to make new mounting plates.............. have to. If you choose not to make new mounting plates you'll have to destroy the old speaker and frankly it is not worth it.
2ND order of bad news..... the mounts are riveted in so you have to drill the rivets out.
To get the door panel off, simply pull the tweeter housing off, remove the screw inside the armrest pocket on the door, pull the handle back and pop the little tab hiding the other screw, then simply pop the trim off by going just above and below the locking flap with a small pic.
Thread Starter
Joined: Feb 2003
Posts: 34,122
Likes: 485
From: My little world
Pop the door off by pulling out on the bottom. once all the pops release lift upwards a little to get it over the lip at the top where the window is. Remember to unplug the switches and bottom light.
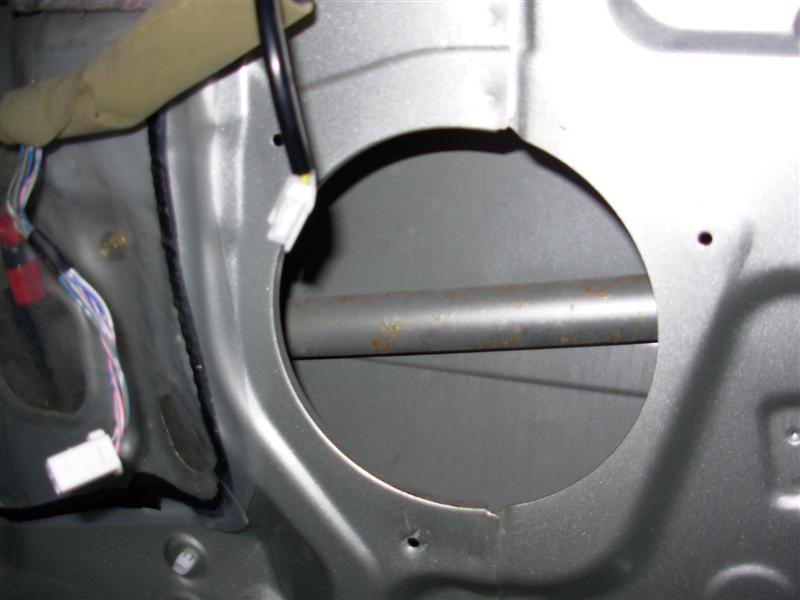
When you get in , this is what you'll see.


When you get in , this is what you'll see.
Thread Starter
Joined: Feb 2003
Posts: 34,122
Likes: 485
From: My little world
Unplug the speaker and drill the rivets out. Then remove the speaker.
Cut yourself a template of the mount.
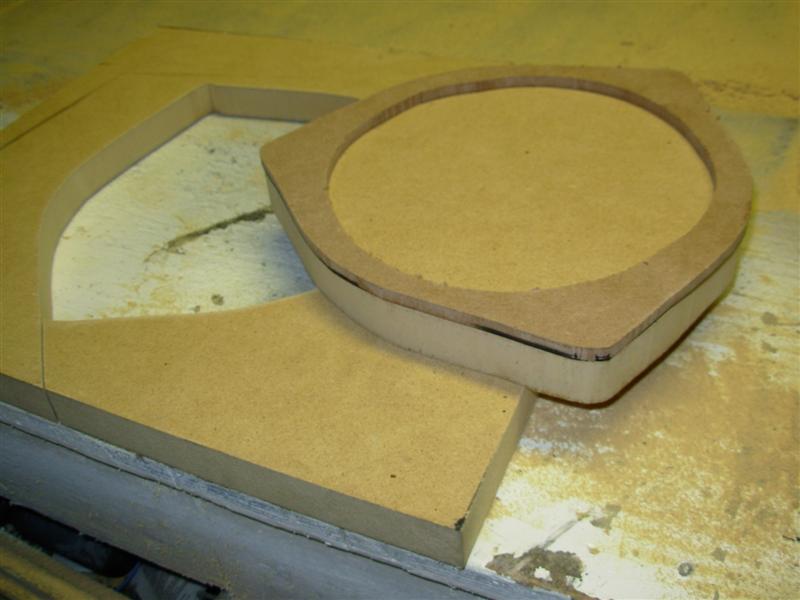
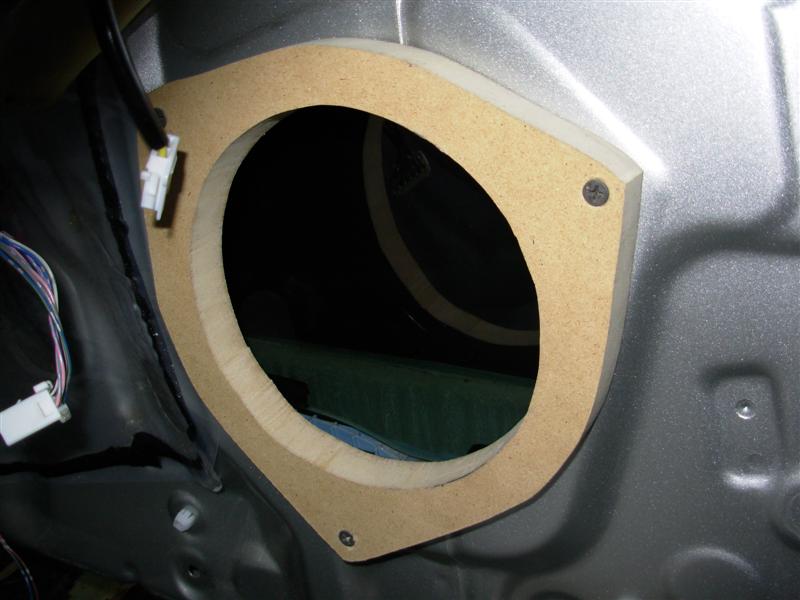
Use the template to cut a new mount from 3/4 MDF.

Cut yourself a template of the mount.
Use the template to cut a new mount from 3/4 MDF.




Thread Starter
Joined: Feb 2003
Posts: 34,122
Likes: 485
From: My little world
Once your wires are soldered up, tape the connector to the other harness to prevent rattling around in the door.
Simply stick the door panel back on, put your handle cover in, add the two screws you took out and pop the tweeter cover back on
I know, it's a pain in the butt to have to go through all this, but that's how you gotta do it because of the way the speaker mount is designed into the speaker.
Enjoy your new sound!
Simply stick the door panel back on, put your handle cover in, add the two screws you took out and pop the tweeter cover back on
I know, it's a pain in the butt to have to go through all this, but that's how you gotta do it because of the way the speaker mount is designed into the speaker.
Enjoy your new sound!



Trending Topics


Thread Starter
Joined: Feb 2003
Posts: 34,122
Likes: 485
From: My little world
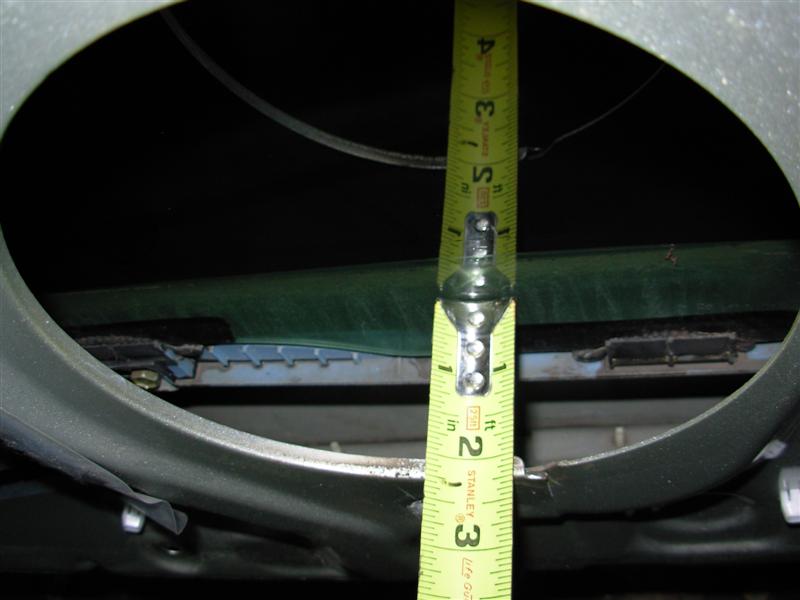
Factory depth is not very relevant in aftermarket installation. My Focals were 1/2 deeper that the factory and cleared fine on a simple 3/4 mdf plate. This simply means the factory plate was highly over extended to begin with. Most mids need 2.5 in mounting depth at the center, which is already given from the sheet metal to the window so adding another 3.4 inch is well overcompensated - but necessary, to ensure trouble free operation..


Driver School Candidate
Joined: Feb 2009
Posts: 4
Likes: 0
From: NV
question - our front speakers are pretty freakin good... whats the point of changing them out (unless damaged)? and what type and price range of speakers would you have to choose to get better?


Thread
Thread Starter
Forum
Replies
Last Post
mandyfig
SC430 - 2nd Gen (2001-2010)
61
May 3, 2017 09:25 AM
mandyfig
SC430 - 2nd Gen (2001-2010)
29
Jan 6, 2014 12:51 PM
O. L. T.
Lexus Audio, Video, Security & Electronics
8
Jun 29, 2012 11:41 AM
