
DIY INFO: Black Headlight MOD!

Thread Starter


Joined: Feb 2003
Posts: 34,122
Likes: 485
From: My little world
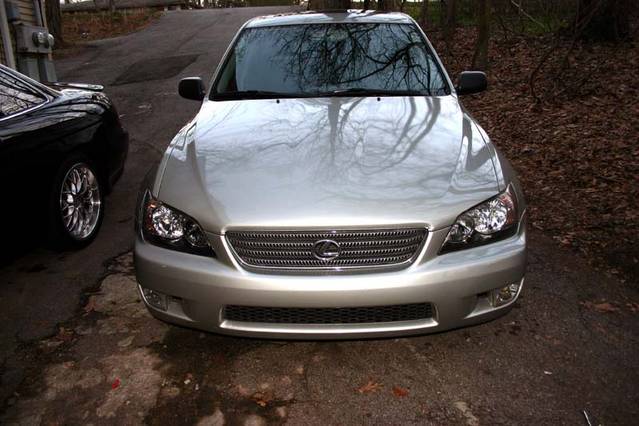
Who would have thought my first mod would have been a DIY? 
You can find this info on the net, but I felt we needed a diy thread here with pics for our members.
Remove the front bumper by removing the 10mm screws along the bottom underneath connected to the lower splash pan, the 4 push pins along the grill, the one screw in the center of the grill, and the two screws each in the fender well on each side. disconnect the side markers and fogs.
Unplug the headlight connections from the car.
Remove the 10mm screw that holds the top bracket on.
Remove the two 10mm screws that hold the headlight on the rear (inside the fender well).
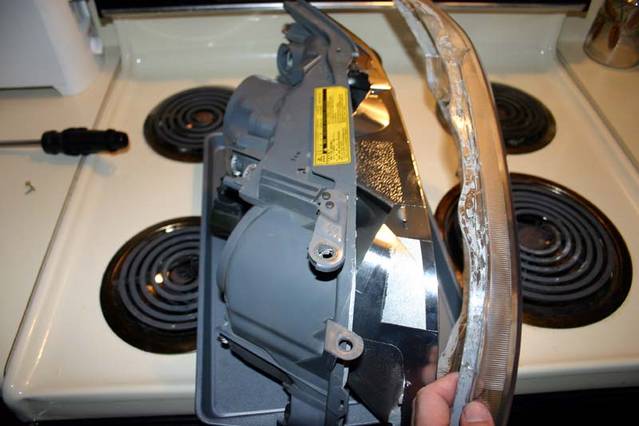
Once you have the assembly removed, remove all the bulbs. Be sure not to touch the high beam, or HID low beam! Unscrew the two bottom phillips screws from the headlight also that secure the lens to the housing.
Get a cookie pan big enough to fit the headlight on and bake the headlight for 7 minutes @ 250 degrees.

Once you remove the headlight from the oven, use a small flatblade to slide around the headlight seam - breaking the glues bond. Then carefully and gently pry apart the headlight.
You can find this info on the net, but I felt we needed a diy thread here with pics for our members.
Remove the front bumper by removing the 10mm screws along the bottom underneath connected to the lower splash pan, the 4 push pins along the grill, the one screw in the center of the grill, and the two screws each in the fender well on each side. disconnect the side markers and fogs.
Unplug the headlight connections from the car.
Remove the 10mm screw that holds the top bracket on.
Remove the two 10mm screws that hold the headlight on the rear (inside the fender well).
Once you have the assembly removed, remove all the bulbs. Be sure not to touch the high beam, or HID low beam! Unscrew the two bottom phillips screws from the headlight also that secure the lens to the housing.
Get a cookie pan big enough to fit the headlight on and bake the headlight for 7 minutes @ 250 degrees.
Once you remove the headlight from the oven, use a small flatblade to slide around the headlight seam - breaking the glues bond. Then carefully and gently pry apart the headlight.
Last edited by O. L. T.; Mar 12, 2006 at 04:33 PM.
Thread Starter
Joined: Feb 2003
Posts: 34,122
Likes: 485
From: My little world
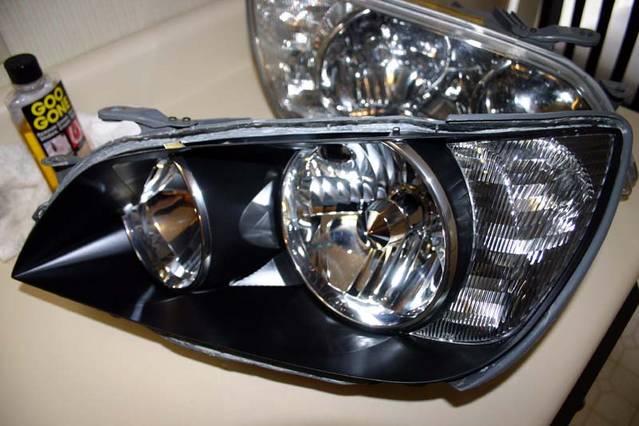
You do not HAVE to do this next step, but it makes a WORLD of difference in how the headlight looks when done. I used special purple 3M masking tape that had a low adhesion quality to mask off a certain area of the chrome ring to give the headlight some classy trim inside the black. Remember to remove the turn signal reflector!
You can use anything you wish paint wise, but I prefer a black satin as opposed to a high gloss paint.

After you have shot a few coats, remove the tape and re-insert the reflector.

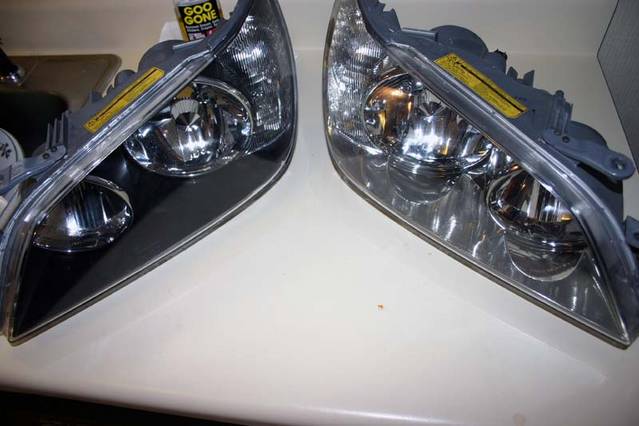
Here's what your headlights will look like inside when you have finished the above steps.
To remove the old glue, pop the headlight back in the oven for about 3 minutes and warm it up, then scrape the glue as quickly as possible.
When you are done, use a clear silicone to line the headlight and put it back together.

You can use anything you wish paint wise, but I prefer a black satin as opposed to a high gloss paint.
After you have shot a few coats, remove the tape and re-insert the reflector.
Here's what your headlights will look like inside when you have finished the above steps.
To remove the old glue, pop the headlight back in the oven for about 3 minutes and warm it up, then scrape the glue as quickly as possible.
When you are done, use a clear silicone to line the headlight and put it back together.
Last edited by O. L. T.; Mar 12, 2006 at 04:34 PM.


Trending Topics


Thread Starter
Joined: Feb 2003
Posts: 34,122
Likes: 485
From: My little world
Originally Posted by NYLexSC
Why did you use the CLEAR Silicone from ACE here, and the BLACK Silicone from ACE when you put your SC headlights back together?  Is there any real difference?
Is there any real difference?
Rookie
Joined: Jun 2006
Posts: 60
Likes: 0
From: MD
I just purchased my IS and am in the NEWB phase w/r/t this car so please cut me some slack.
I have the Xenon headlights in my IS. Will the increased burn temps of the Xenon's melt this silicone? Also, how is the headlight assembly different?
Or - for that matter, do all IS's have xenon bulbs?
Thanks!
I have the Xenon headlights in my IS. Will the increased burn temps of the Xenon's melt this silicone? Also, how is the headlight assembly different?
Or - for that matter, do all IS's have xenon bulbs?
Thanks!

Thread
Thread Starter
Forum
Replies
Last Post