When you click on links to various merchants on this site and make a purchase, this can result in this site earning a commission. Affiliate programs and affiliations include, but are not limited to, the eBay Partner Network.
I recently installed the Beat-Sonic front camera and instead of using their camera switch, I ended up adapting a camera switch from a Lexus HS250. It was complicated, since their switch has built in resistances, but I finally got it working. See below...
Looks good, do you mind sharing the part number for the switch? Also, how did you mount the camera? I saw on their YT video they made a custom bracket to mount the camera. Pic's would be awesome.
Here's the part number for the switch: 84721-75020.
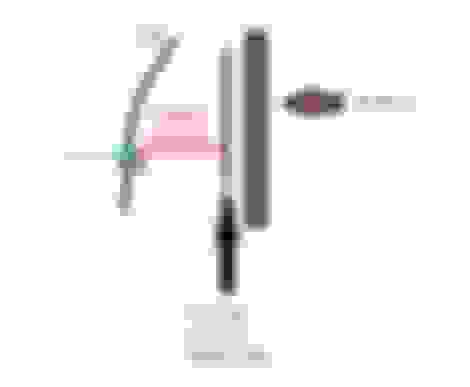
I got mine on ebay. I did make a custom bracket from L-shape aluminum and painted it black. I will have to take the top cover off to take some pictures, but I have included a rough side profile view of how the bracket fits.
I recently installed the Beat-Sonic front camera and instead of using their camera switch, I ended up adapting a camera switch from a Lexus HS250. It was complicated, since their switch has built in resistances, but I finally got it working. See below...
Is the switch a direct Plug and Play? If not then what has to be done to make the switch work?. Would like to know the amount of effort, before dropping money on the swaich as its $$
The button is not plug and play. The original button has a small circuit the unit communicates with. It measures voltage from the switch to figure out the mode. I ended up soldering into the circuit of the original switch to feed the Lexus switch.
Lexus Switch Wires
- Green + Light feed - connect to old switch LED positive
- Brown - Light feed - connect to old switch LED negative
- White / Gray (closed circuit switch) connect to the button on the old switch
The modification won't take more than 20 min and it won't cost any extra $$.
Here's the part number for the switch: 84721-75020.
I got mine on ebay. I did make a custom bracket from L-shape aluminum and painted it black. I will have to take the top cover off to take some pictures, but I have included a rough side profile view of how the bracket fits.
Great work on the switch. I was trying to find this for the longest time to retrofit.
Could you give us more info on your camera and bracket choice for us less handy folk? Like where did you get the bracket and what/how did you manipulate it to fit nicely?
I got the regular Beatsonic front facing camera. The L shape bracket is a regular aluminum bracket from a hardware store like ACE and I painted it black. I drilled a hole at the front of the bracket and mounted the camera directly to the bracket. The other end is bolted to the support bar you see in the picture.
I have the speed sensor feature enabled on the BeatSonic, which is really nice, the camera automatically activates when under 15 miles / hour.
We do not get the rear shade in the US, so you must be outside the US. Ours has a blank button cover in that spot. Your only other 2 options for a button are 1) below the dash, where the tire pressure reset button should be, 2) or cut a whole where your auto parking break is.
The button is not plug and play. The original button has a small circuit the unit communicates with. It measures voltage from the switch to figure out the mode. I ended up soldering into the circuit of the original switch to feed the Lexus switch.
Lexus Switch Wires
- Green + Light feed - connect to old switch LED positive
- Brown - Light feed - connect to old switch LED negative
- White / Gray (closed circuit switch) connect to the button on the old switch
The modification won't take more than 20 min and it won't cost any extra $$.
So I have a question. I just purchased the Beatsonic interface, camera module, and camera button for my GSF. I took the switch apart and there is only a PCB on the inside with no wires or colors. There is only circuit trace. Would you happen to have pictures or any other further insight on how to integrate this button with the Beatsonic unit? I�m getting it installed this Sunday. Thanks for your time.
I got the regular Beatsonic front facing camera. The L shape bracket is a regular aluminum bracket from a hardware store like ACE and I painted it black. I drilled a hole at the front of the bracket and mounted the camera directly to the bracket. The other end is bolted to the support bar you see in the picture.
I have the speed sensor feature enabled on the BeatSonic, which is really nice, the camera automatically activates when under 15 miles / hour.
Old thread resurrection. Did you find an existing bolt or threading on the support bar? Or did you have to drill and tap the support bar to mount the bracket? Thanks!