
Puddle / Side View Mirror Light LED Replacement Instructions


Thread Starter
Rookie
Joined: May 2013
Posts: 67
Likes: 11
From: ON
Hey guys, I just installed LEDs into my puddle / side view mirror lights. I hope this to be a solution to all those who question if it's worth the effort to change the bulbs. Just follow my tutorial and you'll have no problems! It shouldn't take you more than 15 minutes total for both sides and you'll get a much brighter & whiter light output.
No time-consuming mirror removal or potentially damaging pressure application needed. These instructions also work for the LS430, since I have changed LEDs in that vehicle the same way.
You'll need:
1) Long Phillips screwdriver
2) Panel removal tool or taped flat screwdriver
3) Pair of brightest possible 'forward' or '360deg' 194 LED bulbs (not 'flank')
Instructions (from driver's side perspective):
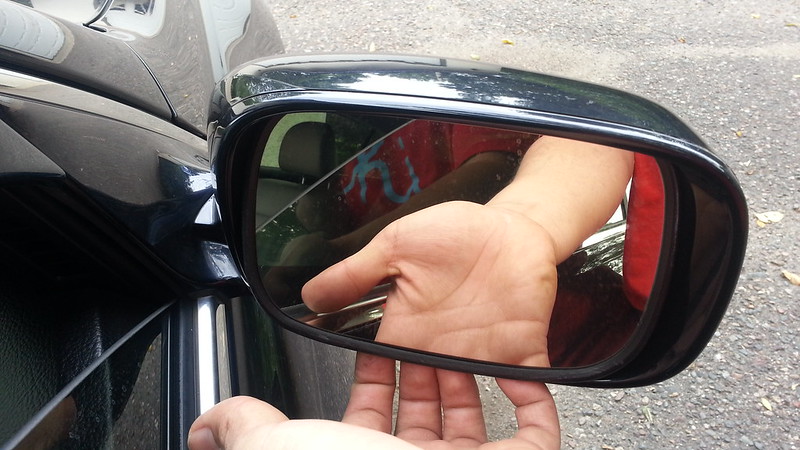
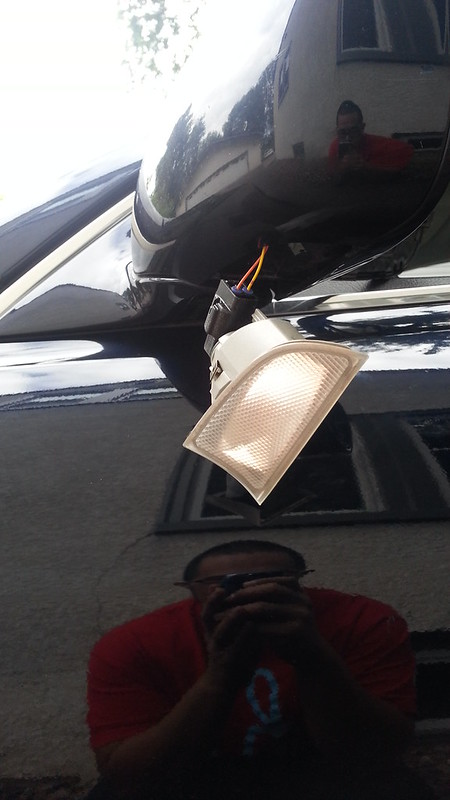
1) Roll down your driver's window all the way. Turn your side view mirror all the way up with the power switch. You will notice there are two screws on the left and right bottom, underneath the mirror. To access the left screw, turn the mirror all the way to the right + up. To access the right screw, turn the mirror all the way to the left + up. Use your long Phillips screwdriver. You should have ample room without scratching any paint, but be careful anyways. If the screw is a little stiff, just hold the plastic mirror assembly with your other hand at the back while applying pressure with the screwdriver. DO NOT REMOVE the screws, just loosen them somewhat and leave them in their place.
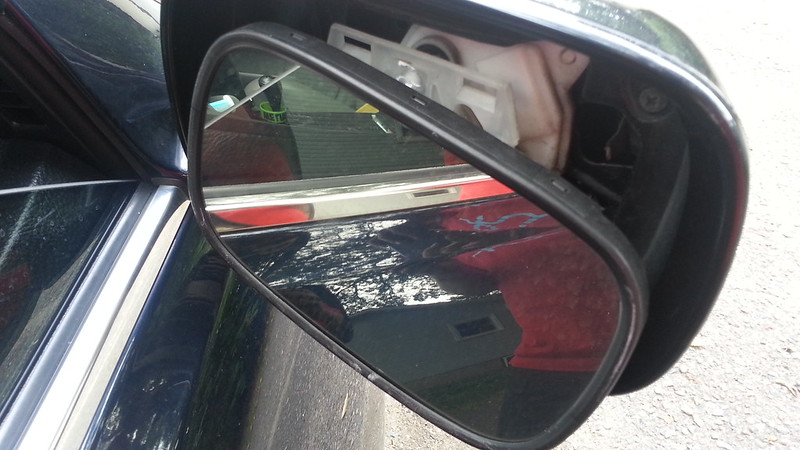
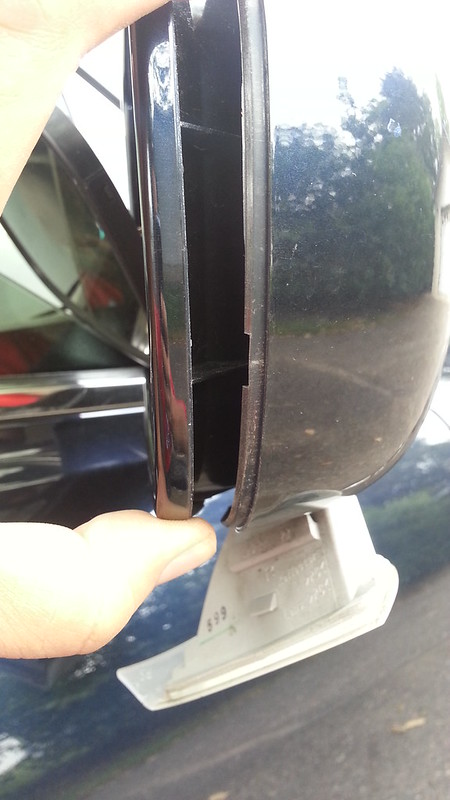
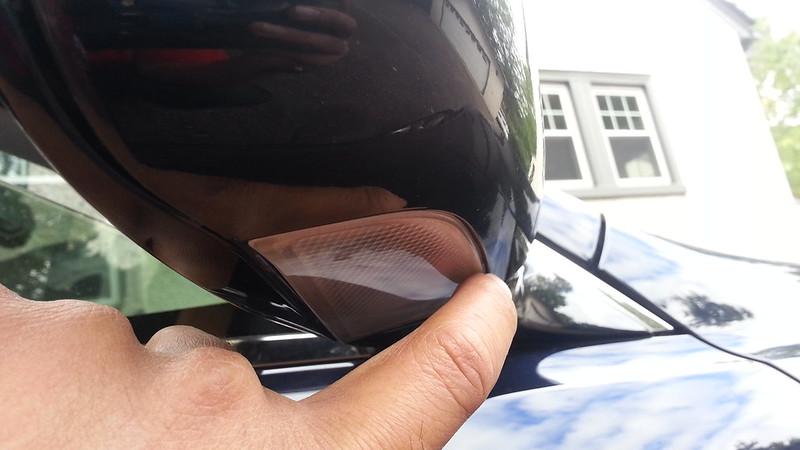
2) With your hands, gently and slightly pull apart the front and back side of the outside plastic mirror assembly along the seam from the bottom to create some room for the light to come out. Use your panel removal tool or a taped flat screwdriver (to prevent scratches) and apply to the ROUNDED side of the puddle light (the part closest to the front of the vehicle). There are two plastic tabs there under the light. Just pry it out and then pry out the flat side of the light after. It will come out EASILY since you loosened the screws in step 1. If not, loosen the screws some more and try again.
3) Remove old bulb by turning counter-clockwise from the socket and install LED. Since the bulb goes in an angle, use a 360deg bulb for brightest output (a powerful forward bulb would also work well).
4) Check to make sure the LED turns on.
5) Re-apply the light back to the side view mirror by inserting the rounded side first and then the flat side. Tighten screws.
6) Do the passenger side. Done!!
* First photo is of the original stock bulbs. Notice they are blue-coated to give us that white-ish light. However, because of this coating, the bulbs are very dim.
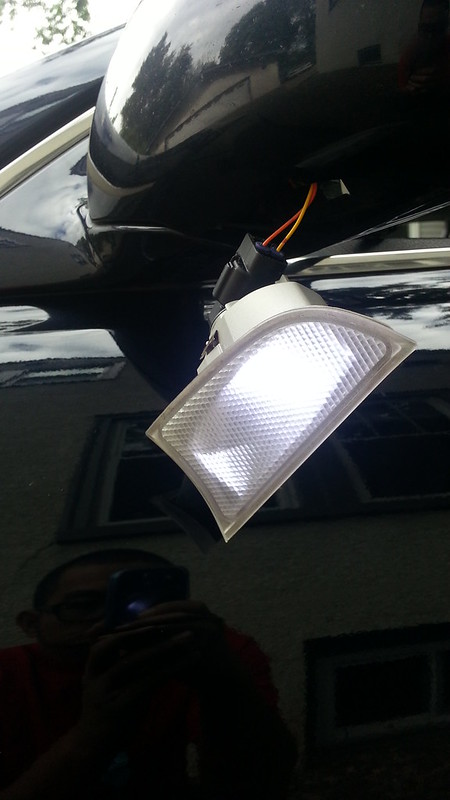
* Second photo is of 5000K LED installed.
No time-consuming mirror removal or potentially damaging pressure application needed. These instructions also work for the LS430, since I have changed LEDs in that vehicle the same way.
You'll need:
1) Long Phillips screwdriver
2) Panel removal tool or taped flat screwdriver
3) Pair of brightest possible 'forward' or '360deg' 194 LED bulbs (not 'flank')
Instructions (from driver's side perspective):
1) Roll down your driver's window all the way. Turn your side view mirror all the way up with the power switch. You will notice there are two screws on the left and right bottom, underneath the mirror. To access the left screw, turn the mirror all the way to the right + up. To access the right screw, turn the mirror all the way to the left + up. Use your long Phillips screwdriver. You should have ample room without scratching any paint, but be careful anyways. If the screw is a little stiff, just hold the plastic mirror assembly with your other hand at the back while applying pressure with the screwdriver. DO NOT REMOVE the screws, just loosen them somewhat and leave them in their place.
2) With your hands, gently and slightly pull apart the front and back side of the outside plastic mirror assembly along the seam from the bottom to create some room for the light to come out. Use your panel removal tool or a taped flat screwdriver (to prevent scratches) and apply to the ROUNDED side of the puddle light (the part closest to the front of the vehicle). There are two plastic tabs there under the light. Just pry it out and then pry out the flat side of the light after. It will come out EASILY since you loosened the screws in step 1. If not, loosen the screws some more and try again.
3) Remove old bulb by turning counter-clockwise from the socket and install LED. Since the bulb goes in an angle, use a 360deg bulb for brightest output (a powerful forward bulb would also work well).
4) Check to make sure the LED turns on.
5) Re-apply the light back to the side view mirror by inserting the rounded side first and then the flat side. Tighten screws.
6) Do the passenger side. Done!!
* First photo is of the original stock bulbs. Notice they are blue-coated to give us that white-ish light. However, because of this coating, the bulbs are very dim.
* Second photo is of 5000K LED installed.
Last edited by Majek; Oct 25, 2013 at 12:14 PM. Reason: LS430 addition


Rookie
Joined: Oct 2012
Posts: 50
Likes: 0
From: ontario
Thread Starter
Rookie
Joined: May 2013
Posts: 67
Likes: 11
From: ON
If you follow it directly as I wrote, it's very simple, fast and a safe installation.

Pole Position


Joined: Jul 2009
Posts: 3,387
Likes: 61
From: FL
OMG, I didn't want to feel stupid and say the exact same thing as you lol...... I guess SOME of the lights in our cars are still non-LEDs, (just like the fold down mirrors on our driver and pass sides).
Trending Topics
For anyone that is curious, It's fairly simple.
push the top of the mirror in, stick your hands under the bottom and pull. After the bottom pops out, you just slide downward to get it out of the grove on top.
Then you get here. Remove the 4 phillips screws
pull the front part off and then push the puddle light housing off. I just pushed from the backside(from front of car pushed to rear as seen in next pic)
and before and after
Don't mind the reflections of myself brahs I'll post night shots of the lights after the gym later.
I used these ijdmtoy LED's
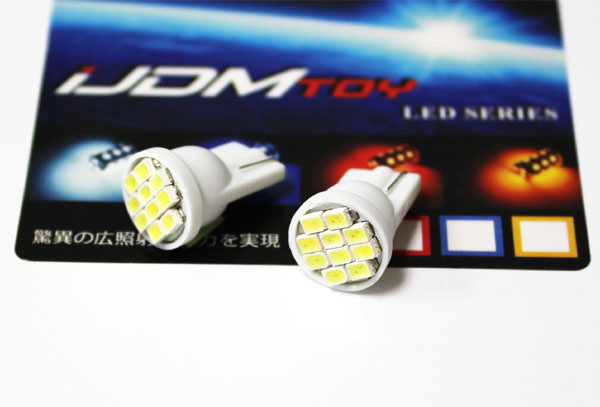
http://store.ijdmtoy.com/8-SMD-Wide-..._t10_sku18.htm
push the top of the mirror in, stick your hands under the bottom and pull. After the bottom pops out, you just slide downward to get it out of the grove on top.
Then you get here. Remove the 4 phillips screws
pull the front part off and then push the puddle light housing off. I just pushed from the backside(from front of car pushed to rear as seen in next pic)
and before and after
Don't mind the reflections of myself brahs
I'll post night shots of the lights after the gym later.I used these ijdmtoy LED's
http://store.ijdmtoy.com/8-SMD-Wide-..._t10_sku18.htm
Thread Starter
Rookie
Joined: May 2013
Posts: 67
Likes: 11
From: ON
Pole Position
Joined: Jul 2009
Posts: 3,387
Likes: 61
From: FL
TY Majek, I thought both of your ways was the same.... I'll figure out which route I wanna go in due time  . School currently pwns me so I'm just chillin for now till I have free time to order stuff lol.
. School currently pwns me so I'm just chillin for now till I have free time to order stuff lol.
Thread Starter
Rookie
Joined: May 2013
Posts: 67
Likes: 11
From: ON
Your welcome. Nope, each way is different. My method does not require removal of the mirror - it's the safest route. Good luck when you get the chance. Post pics if you can!
Push it back on. It's clipped on the bottom of the mirror and then slides down to remove. To put back on, put the teeth in the holes, slide up, and push on the bottom to snap the clips back in. I'd recommend putting a towel or shirt over the mirror so you don't ruin the defrost and what have you in our mirrors.

Driver School Candidate
Joined: Feb 2015
Posts: 44
Likes: 0
From: Illinois
bumping an old thread but I just wanted to add my experience. I found the "remove the mirror" and the "credit card prying" technique to be worthless. If I pulled on the bottom of the mirror any harder something would have broken, there was no give at all. For the credit card technique I'm not sure where you get credit cards that have harder plastic than whats found in the puddle light. My credit cards just bent when I tried to pry with them.
It took about 10 minutes once I tried this and loosened the lower screws.
It took about 10 minutes once I tried this and loosened the lower screws.