


LED Trunk Lights Hack

Thread Starter
Pole Position

Joined: Aug 2001
Posts: 230
Likes: 1
From: OH
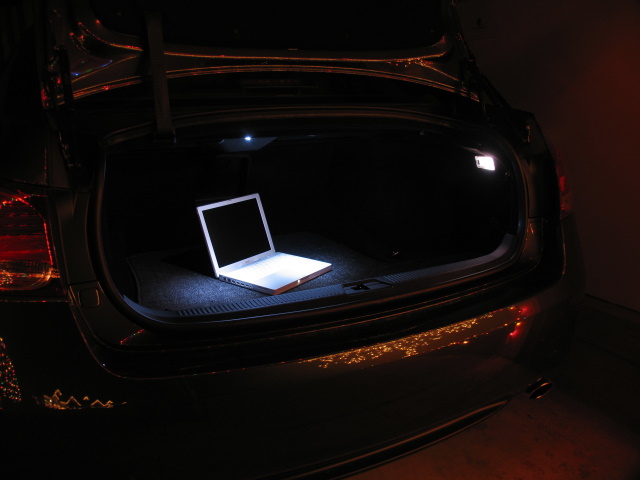
Not sure what everyone else thinks, but i found the stock trunk light a bit dim and useless for the back end of the trunk.. so, staying consistent with the Lexus LED theme, i thought i'd brighten things up a bit 
I went with two of the ALM-x6 modules from this page:
http://www.superbrightleds.com/mini_tubes.htm
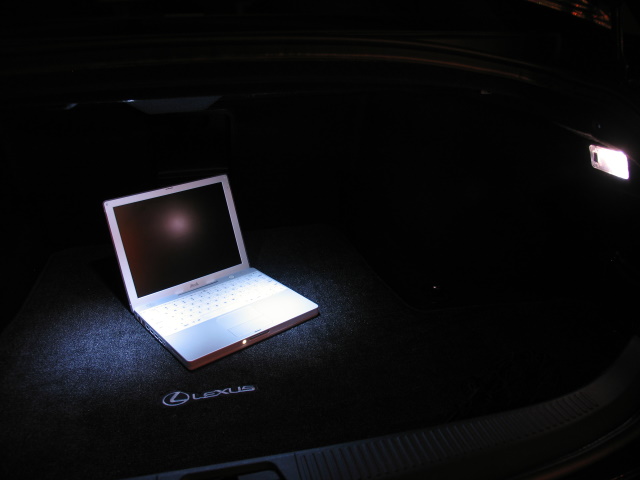
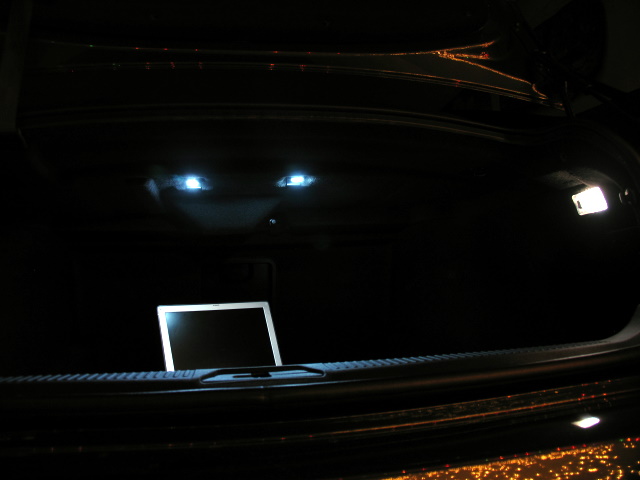
Now that i look around the site more, there may be some better options for even more light or better placement.. but i'm satisfied with my current results.. I just ran the wires through the cover and over to the original trunk light and tapped into it such that the switch also controls the LEDs and the LEDs shut off automatically like the stock light.. I placed the LEDs right in the two recessed areas where there are clips to secure the cover. A very clean install.. looks stock.. Took about 1.5hr just because i spent a lot of time exploring my options.. now i'm curious where else i can cleanly add some more LEDs. foot wells, etc.. would love to find a way to add a strip of white LEDs under the car (doors) on the outside of the car that turn on/off with the LEDs under the outside mirrors. Nice thing about the LEDs is they use so little energy, I don't see a problem tapping them in to just about any power source, switched or not..
Looks like they have replacements for the original trunk light bulb as well.. gotta get that now so they match
http://www.superbrightleds.com/festoon.html
I went with two of the ALM-x6 modules from this page:
http://www.superbrightleds.com/mini_tubes.htm
Now that i look around the site more, there may be some better options for even more light or better placement.. but i'm satisfied with my current results.. I just ran the wires through the cover and over to the original trunk light and tapped into it such that the switch also controls the LEDs and the LEDs shut off automatically like the stock light.. I placed the LEDs right in the two recessed areas where there are clips to secure the cover. A very clean install.. looks stock.. Took about 1.5hr just because i spent a lot of time exploring my options.. now i'm curious where else i can cleanly add some more LEDs. foot wells, etc..
would love to find a way to add a strip of white LEDs under the car (doors) on the outside of the car that turn on/off with the LEDs under the outside mirrors. Nice thing about the LEDs is they use so little energy, I don't see a problem tapping them in to just about any power source, switched or not..Looks like they have replacements for the original trunk light bulb as well.. gotta get that now so they match
http://www.superbrightleds.com/festoon.html
Pole Position
Joined: Apr 2006
Posts: 363
Likes: 0
From: PA
I was just thinking about the same mod. I have a pair of these that I used on my Acura before..
http://www.case-mod.com/store/12in-d...ite-p-620.html
These are used for computer cases and they do not draw lots of power. I used it to add light under dashboard and under front seats. However, there is a transformer and I need to find a place to hide it.
Was it difficult to tap into the existing light fixture?
Trending Topics
Thread Starter
Pole Position
Joined: Aug 2001
Posts: 230
Likes: 1
From: OH
I was just thinking about the same mod. I have a pair of these that I used on my Acura before..
http://www.case-mod.com/store/12in-d...ite-p-620.html
These are used for computer cases and they do not draw lots of power. I used it to add light under dashboard and under front seats. However, there is a transformer and I need to find a place to hide it.
Was it difficult to tap into the existing light fixture?
http://www.case-mod.com/store/12in-d...ite-p-620.html
These are used for computer cases and they do not draw lots of power. I used it to add light under dashboard and under front seats. However, there is a transformer and I need to find a place to hide it.
Was it difficult to tap into the existing light fixture?
ClubLexus Stories
Celebrating Lexus & Toyota from Around the Globe

Lexus NX 350h: A Fuel-Sipping Secret Hot Hatch???
Michael S. Palmer
5 Best & 5 Worst Lexus Daily Drivers
Joe Kucinski
Top 5 Hottest Lexus & Toyotas in 2026 (Hardest To Buy)
Brett Foote
2026 Lexus IS 350 F Sport Review: The Last of Its Kind Still Rocks
Michael S. Palmer
Top 10 Most Confusing Things Lexus Has Ever Done!
Joe Kucinski
2026 Lexus ES Review: Lexus Re-Embraces Founding Principles
Michael S. Palmer
10 Lexus Bargains That are Cheaper Than a New Toyota RAV4
Joe Kucinski
8 Weirdest Things Lexus Has Ever Built
Verdad Gallardo
10 Lexus Designs That Have Aged Like Fine Wine
Verdad Gallardo
That looks great, you can get a 31mm festoon LED bulb for the side bulb, or better yet get a 36mm single 1watt LED and it will be pretty bright, youll need to mod the mount a bit but it is possible for sure. Nice job

Pole Position
Joined: Jun 2002
Posts: 268
Likes: 1
From: CA
I've tried the 31mm festoon bulb and it's too large. You can make it fit but then the on/off switch doesn't work anymore. I think a T-8/28mm bulb will fit better but I've been unable to find anyone who makes an LED bulb in that size. Polarg makes a T8 bluish-white bulb that I've been meaning to pick up and try but haven't gotten around to it.
EDIT
link to Polarg bulb http://www.automotivelightingusa.com...roducts_id=546
EDIT
link to Polarg bulb http://www.automotivelightingusa.com...roducts_id=546
Last edited by toyemp; Dec 27, 2006 at 08:54 PM.
I've tried the 31mm festoon bulb and it's too large. You can make it fit but then the on/off switch doesn't work anymore. I think a T-8/28mm bulb will fit better but I've been unable to find anyone who makes an LED bulb in that size. Polarg makes a T8 bluish-white bulb that I've been meaning to pick up and try but haven't gotten around to it.
EDIT
link to Polarg bulb http://www.automotivelightingusa.com...roducts_id=546
EDIT
link to Polarg bulb http://www.automotivelightingusa.com...roducts_id=546
Just bend the moving side of the contacts using needlenose pliers, in a V so as to increase the distance from one side to the other. I was looking at that today and figure you can probably get a 36mm in there as well but that would probably mess up the switch mechanism, not a big deal for me since it is always on anyways (since it shuts off automatically w/o touching switch)
Pole Position
Joined: Jun 2002
Posts: 268
Likes: 1
From: CA
Yes, I did bend the contacts to get the 31mm in there but since the switch is more of a rocker-mechanism that moves the bulb from side-to-side, it wouldn't rock properly any more. I like being able to turn it on & off so I ended up putting the original bulb back in until I can find a better solution.

Driver
Joined: Nov 2001
Posts: 104
Likes: 0
From: NH
Quick question: how did you attach the LEDs? I just ordered them, and they appear to have two holes which could be used for screw-mounting. Did you find some appropriately-sized screws that would hold in the clips? Or did you just velcro the units onto the clips?
Thread Starter
Pole Position
Joined: Aug 2001
Posts: 230
Likes: 1
From: OH
I just used the included screws and screwed it right into the 'fuz' covered plastic cover.. the screws are small so it worked perfectly. No predrilling needed, just apply enough pressure to start the screw..