
Kyle's GS300 2JZGTE Project Reboot


After being out of a car to tinker on for the better part of a year, I found myself needing/wanting another project. Historically I've built up street cars to be track prepped and enjoyed them very much. However, with 2 young kids now I simply don't have time for all that's involved in tracking a car. I wanted something relatively inexpensive, fun, comfortable, and capable of safely transporting myself and family. My 4Runner does pretty well at a couple of those, but it's missing the fun factor when on the pavement.
I'd heard about the ability to swap the 2JZGTE motor into the Lexus GS's and SC's before. Back when I was in high school and then college I was always into import turbo cars, and the king of the hill was always the 2JZGTE powered Supra. After doing some research I came to the conclusion the GS300 would be my next car / project. It seemed to check all the boxes, and I always liked the lines of these cars. Also,since I've never done an engine swap, I figured I could learn a thing or two along the way.
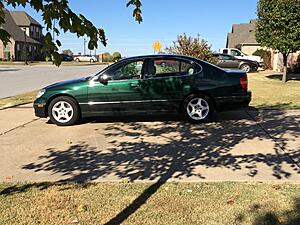
I began researching cars and trying to locate a motor. I live in Northwest Arkansas and given the population size there just isn't an abundance of used cars, especially when you're looking at such a narrow band of years on a specific model that's almost 20 years old. Luckily, I found one just 100 miles from where I live. The car is an IJM (dark green) 1999 model. It was a well cared for, well documented car that had/has just over 200k on the odometer. The couple I bought it from was happy to see the car was going to a good home. It feels cool to give a car a second life.
The motor aspect was something that really concerned me. I found lots of options, but I was more interested in finding the right supplier for the motor with some expertise in the GS's as opposed to just an exporter that simply ships and drops a motor to you. With no experience, I'd be lost for days. I found a source at Japan Parts Service. So far, I've been very pleased with the service they've provided. Additionally, there's a very knowledgeable forum member that works at that location and his advice and help has been an INVALUABLE resource in helping me out along the way.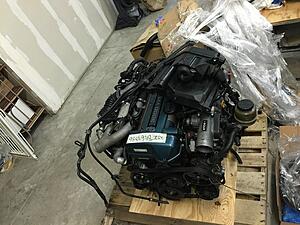
After purchasing the car, I immediately detailed the exterior. The car cleaned up quite nicely for a 17 year old car. It's not a show winner, but its not embarrassing either.
After getting the car home, I put a set of tires on it and then drove it about 600 miles. I wanted to get a feel for the way the car drove, make sure all systems were working correctly, etc. before I tore it down. The car drove well. Aside from leaking some fluids, the original engine was very smooth and surprisingly powerful for it's unremarkable power plant.
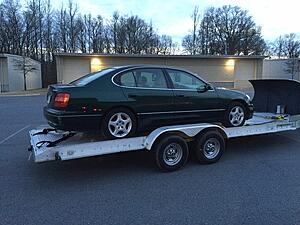
I drove the car to Little Rock and did the motor swap in a shop my folks have due to the amenities available there. Needless to say, it was trailered back to my house about 3 hours away.
I now have the car back home here where I am doing all the re-assembly of miscellaneous important bits. In addition to the engine swap, I have purchased lower control arms, ball joints, and tie rods for the front suspension. This will likely beg the question, what about the struts? Well, they're stock, and staying stock for now. I really don't know what I want to do suspension-wise. Historically I'd pu a track suspension under the car and that would be that. But this isn't a track car, and maybe it's just me getting old, but I like the ride the car has. It's smooth. After the additional weight up front and feeling how it handles with some power, I'll try and make a determination.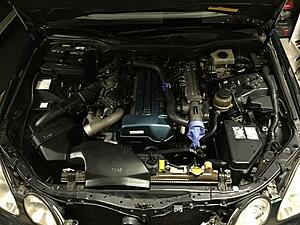
I've also made a few minor changes that I thought would help in the long run:
- Upgraded fuel pump to Warlboro 255lph pumpt
- Installed quality bushings on power steering rack
- Installed new bushings on front sway bar
- Will install a great quality front steering wheel to replace my worn out unit
- Tanabe cat-back exhaust
- Wideband O2
- Boost Gauge
- Boost Controller
- Transmission Cooler
- New Radiator
- New A/C Condenser
The car is currently sitting up on jack stands in my garage here at home. With 2 small kids my ability to work on the car in long stints is limited. I'm hoping within he next 2 weeks I'll be able to start the car. I've installed my fuel pump, run the return line, hooked up most if not all of the miscellaneous electrical connections. Bolted up the exhaust, connected the transmission, and mounted the intercooler. Right now I'm in the midst of fighting with the front suspension bits. The camber bolts that pass through the front lower control arms essentially fused themselves to the metal sleeve they pass through, making removal... less than ideal. I was able to get one side out today. I couldn't put the new parts in, as I destroyed the camber bolt in the process.
Bolt side of camber adjuster: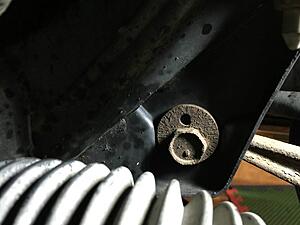
Nut side of camber adjuster: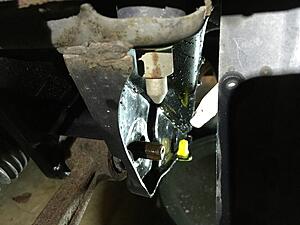
Bolt remover: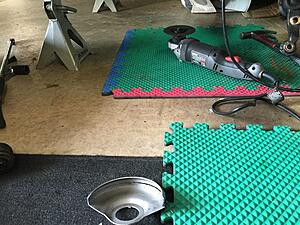
Hence, a new bolt will be required: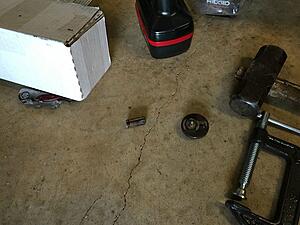
Notable things to do or in progress:
Replacement of front suspension components noted above
Bolt up and plumb power steering reservoir
Repair (smashed during engine install) heater core outlet and plumb heater hoses
Install Trac/ABS ECU
Install Boost Gauge & Boost Controller
Fill all fluids
Anyway, that's enough rambling for tonight. I'll try to add pictures and updates as progress continues.
Cheers,
Kyle
I'd heard about the ability to swap the 2JZGTE motor into the Lexus GS's and SC's before. Back when I was in high school and then college I was always into import turbo cars, and the king of the hill was always the 2JZGTE powered Supra. After doing some research I came to the conclusion the GS300 would be my next car / project. It seemed to check all the boxes, and I always liked the lines of these cars. Also,since I've never done an engine swap, I figured I could learn a thing or two along the way.
I began researching cars and trying to locate a motor. I live in Northwest Arkansas and given the population size there just isn't an abundance of used cars, especially when you're looking at such a narrow band of years on a specific model that's almost 20 years old. Luckily, I found one just 100 miles from where I live. The car is an IJM (dark green) 1999 model. It was a well cared for, well documented car that had/has just over 200k on the odometer. The couple I bought it from was happy to see the car was going to a good home. It feels cool to give a car a second life.
The motor aspect was something that really concerned me. I found lots of options, but I was more interested in finding the right supplier for the motor with some expertise in the GS's as opposed to just an exporter that simply ships and drops a motor to you. With no experience, I'd be lost for days. I found a source at Japan Parts Service. So far, I've been very pleased with the service they've provided. Additionally, there's a very knowledgeable forum member that works at that location and his advice and help has been an INVALUABLE resource in helping me out along the way.

After purchasing the car, I immediately detailed the exterior. The car cleaned up quite nicely for a 17 year old car. It's not a show winner, but its not embarrassing either.

After getting the car home, I put a set of tires on it and then drove it about 600 miles. I wanted to get a feel for the way the car drove, make sure all systems were working correctly, etc. before I tore it down. The car drove well. Aside from leaking some fluids, the original engine was very smooth and surprisingly powerful for it's unremarkable power plant.
I drove the car to Little Rock and did the motor swap in a shop my folks have due to the amenities available there. Needless to say, it was trailered back to my house about 3 hours away.

I now have the car back home here where I am doing all the re-assembly of miscellaneous important bits. In addition to the engine swap, I have purchased lower control arms, ball joints, and tie rods for the front suspension. This will likely beg the question, what about the struts? Well, they're stock, and staying stock for now. I really don't know what I want to do suspension-wise. Historically I'd pu a track suspension under the car and that would be that. But this isn't a track car, and maybe it's just me getting old, but I like the ride the car has. It's smooth. After the additional weight up front and feeling how it handles with some power, I'll try and make a determination.

I've also made a few minor changes that I thought would help in the long run:
- Upgraded fuel pump to Warlboro 255lph pumpt
- Installed quality bushings on power steering rack
- Installed new bushings on front sway bar
- Will install a great quality front steering wheel to replace my worn out unit
- Tanabe cat-back exhaust
- Wideband O2
- Boost Gauge
- Boost Controller
- Transmission Cooler
- New Radiator
- New A/C Condenser
The car is currently sitting up on jack stands in my garage here at home. With 2 small kids my ability to work on the car in long stints is limited. I'm hoping within he next 2 weeks I'll be able to start the car. I've installed my fuel pump, run the return line, hooked up most if not all of the miscellaneous electrical connections. Bolted up the exhaust, connected the transmission, and mounted the intercooler. Right now I'm in the midst of fighting with the front suspension bits. The camber bolts that pass through the front lower control arms essentially fused themselves to the metal sleeve they pass through, making removal... less than ideal. I was able to get one side out today. I couldn't put the new parts in, as I destroyed the camber bolt in the process.
Bolt side of camber adjuster:

Nut side of camber adjuster:

Bolt remover:

Hence, a new bolt will be required:

Notable things to do or in progress:
Replacement of front suspension components noted above
Bolt up and plumb power steering reservoir
Repair (smashed during engine install) heater core outlet and plumb heater hoses
Install Trac/ABS ECU
Install Boost Gauge & Boost Controller
Fill all fluids
Anyway, that's enough rambling for tonight. I'll try to add pictures and updates as progress continues.
Cheers,
Kyle
Last edited by KyleH; Jan 24, 2016 at 08:21 PM.

Lead Lap
Joined: May 2012
Posts: 657
Likes: 12
From: VA
Congrats Kyle and welcome to the world of GS-GTE I know JPS very well as thats the same place my motor came from and they are very good friends of mine. Keep us updated on your build and when you finally get it started.

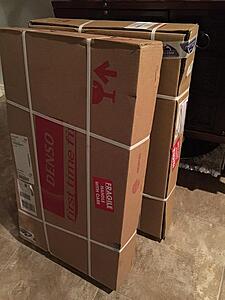
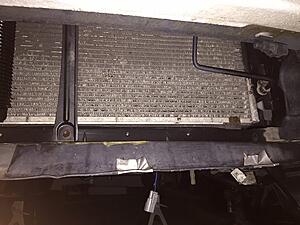
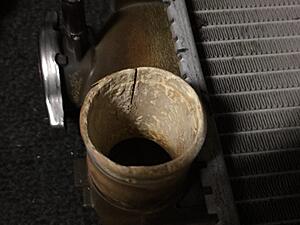
I received the new radiator and condenser today. I couldn't let two big boxes clutter up the house, so after the kids were to bed I went ahead and bolted them up. I'm not sure if it makes any difference in the look of the car, but it makes me feel a lot better when I pop the hood not to see a beat up condenser or the yellowing top of the factory plastic tank on the radiator. I cringed to think what the inside of that radiator looked like, as it didn't look great when I drained the coolant initially. Additionally, come to find out, one of the outlets had actually cracked, so it would likely only be a matter of time before it began leaking and or failed critically. With as much money as I have in the car, a $100 radiator is cheap insurance.
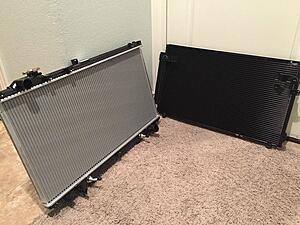
Both of the items fit great and made the car look much better. The condenser even came with the brackets so that you don't need to reuse your old ones.
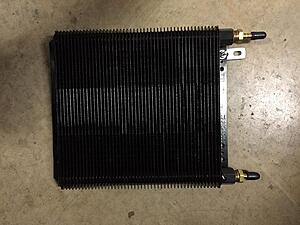
Additionally, I bought a transmission cooler. It seems to be a recommended practice for a longer life at higher HP levels. I have it partially mounted. I'll be grabbing another bracket to finish the job later. However, I think for the winter I'll let the transmission fluid run through the radiator and then hook it up to the cooler when warmer weather arrives.
The unit with the bracket attached. This bracket hooks up top on the upper mounting point for the condenser:
I removed this screw in the condenser for the lower attachment point:
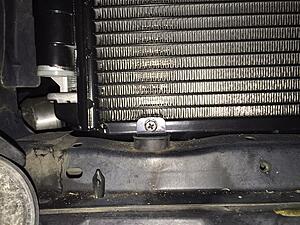
I replaced it with a longer bolt and attached the cooler along with these rubber spacers
The horn was rotated around to make room for the trans cooler.
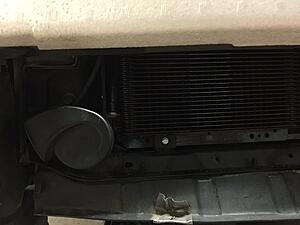
Upper mounting point:
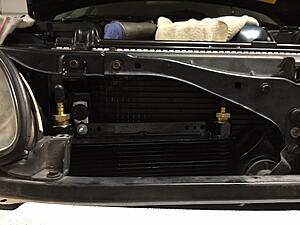
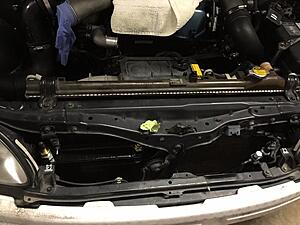
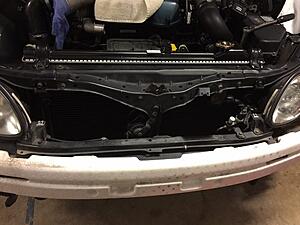
New radiator, condenser, and trans cooler installed:
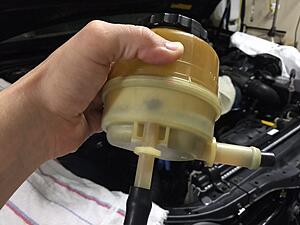
I've also been trying to get the power steering resevior cleaned up. I put it in a can of purple power for about 24 hours and it took off 75%+ of the gunk inside. There's still a little bit left. I got smarter and just capped off the outlets and put some degreaser in there to let it sit. It's now on about day 3 and it doesn't seem to be doing much more. I think I'll call it good soon. It was far better than it was.
That's it for the night. Until next time, stay classy CL.


Both of the items fit great and made the car look much better. The condenser even came with the brackets so that you don't need to reuse your old ones.
Additionally, I bought a transmission cooler. It seems to be a recommended practice for a longer life at higher HP levels. I have it partially mounted. I'll be grabbing another bracket to finish the job later. However, I think for the winter I'll let the transmission fluid run through the radiator and then hook it up to the cooler when warmer weather arrives.
The unit with the bracket attached. This bracket hooks up top on the upper mounting point for the condenser:

I removed this screw in the condenser for the lower attachment point:

I replaced it with a longer bolt and attached the cooler along with these rubber spacers
The horn was rotated around to make room for the trans cooler.

Upper mounting point:

New radiator, condenser, and trans cooler installed:

I've also been trying to get the power steering resevior cleaned up. I put it in a can of purple power for about 24 hours and it took off 75%+ of the gunk inside. There's still a little bit left. I got smarter and just capped off the outlets and put some degreaser in there to let it sit. It's now on about day 3 and it doesn't seem to be doing much more. I think I'll call it good soon. It was far better than it was.

That's it for the night. Until next time, stay classy CL.
Last edited by KyleH; Jan 26, 2016 at 08:52 PM.

Thanks fellas. My priority before I enjoy this with my family is to ensure it's a safe vehicle for us all to ride in. Although the ball joint failures seem to correlate highly with lowered vehicles, knowing I'll be pushing the car harder (while alone) than it probably ever was before wouldn't do any favors on the worn bushings and other bits.
With regard to the radiator, I assume you're referring to the worn out one in the car - no it did not come as art of the swap. It was the original GS radiator.
With regard to the radiator, I assume you're referring to the worn out one in the car - no it did not come as art of the swap. It was the original GS radiator.
Trending Topics
Lead Lap
Joined: May 2012
Posts: 657
Likes: 12
From: VA
yes please do LBJ the part is not that expensive for a piece of mind.
OK thats the answer I was looking for on the radiator I ended up using the stock GS one instead of the aristo one that came with the swap had to get a random hose off the shelf the local auto store to work for the top hose.
DM me and i'll get you the stock number on the hose
OK thats the answer I was looking for on the radiator I ended up using the stock GS one instead of the aristo one that came with the swap had to get a random hose off the shelf the local auto store to work for the top hose.
DM me and i'll get you the stock number on the hose
Thanks for the offer. I *think* the motor came with the correct upper radiator hose for my application. I'll try and fit it soon and if not, I'll reach out to you. Thanks for the offer.
I am putting in new ball joints, outer (and maybe inner, I purchased them, but not sure if i'll install or not - will inspect original first) tie rods, camber arm, and lower control arm. I will see how the car rides when I get it back on the road and go from there as it relates to any additional parts and suspension upgrades.
I am putting in new ball joints, outer (and maybe inner, I purchased them, but not sure if i'll install or not - will inspect original first) tie rods, camber arm, and lower control arm. I will see how the car rides when I get it back on the road and go from there as it relates to any additional parts and suspension upgrades.
Good to see it almost running Kyle!
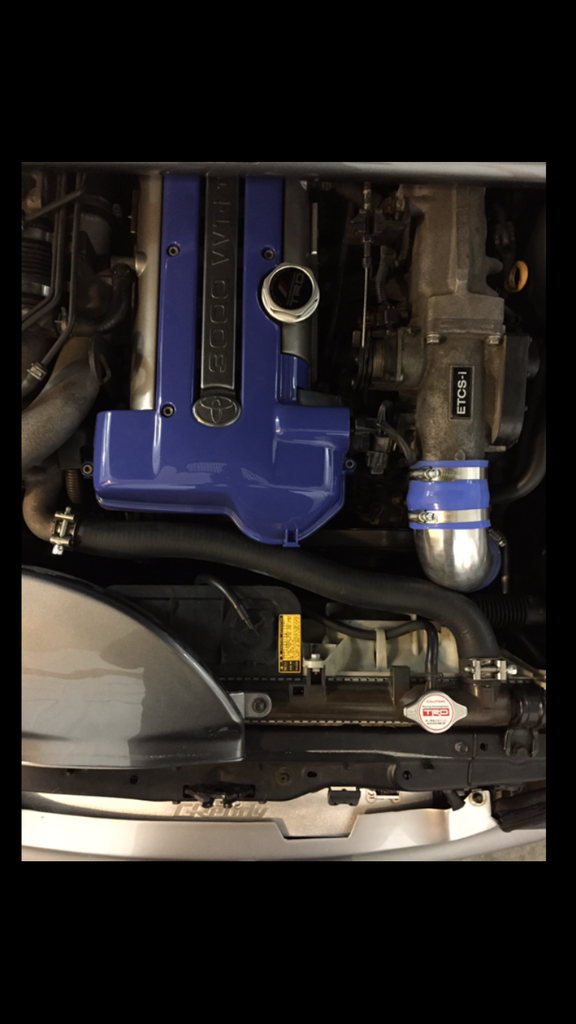
As for the radiator hose, we include a Gates hose from Napa with all Aristo swaps shipping out that fits around the VVTI bump. It needs to be cut shorter, and massaged into place on the waterpump neck, after it warms up it relaxes right into shape.
Rick maybe you can post a top view pic of your bay to help Kyle see how that hose fits to help visualize how he needs to cut the radiator hose shipped with the engine.
Kyle call me if you have any questions before you cut it.
Good to see it almost running Kyle!
As for the radiator hose, we include a Gates hose from Napa with all Aristo swaps shipping out that fits around the VVTI bump. It needs to be cut shorter, and massaged into place on the waterpump neck, after it warms up it relaxes right into shape.
Rick maybe you can post a top view pic of your bay to help Kyle see how that hose fits to help visualize how he needs to cut the radiator hose shipped with the engine.
Kyle call me if you have any questions before you cut it.

Well I made some good progress on the suspension. My new shiny camber bolts came in. So I was able to go ahead and get the new parts bolted up. Should anyone be interested, I found it's important to re-install these items in a particular order in order to avoid doing it more than once. Ask me how I know. I think the first side took me about an hour and a half and the second side about 30-45min.
Note, I was replacing the lower control arm, the rear caster arm, the lower ball joint, and the tie rod end. Instructions below assume you've already mounted the bracket to the lower control arm:
Tip: I find that while installing the components (until you get to the strut install) you can locate the hub/knuckle upward and toward the front of the car. It rests with the caliper contacting the sway bar. This is fully extending the rubber brake line. Your results may vary.
1) Put the caster arm on the stud coming out of the body and put the nut, tightened just a few threads up to keep it from falling off on you.
2) Attach the 2 bolts that connect the caster arm into the lower control arm
3) Attach the lower control arm to the subframe with the camber bolt. The bolt is supposed to face forward, at least it was on my car when I removed it. I put it back in the same way. It was difficult to get it in with the steering arm being in the way of the bolt. I forced it in on the driver's side, but had to loosen the steering rack bolts a bit on the passenger's side to squeeze it in. Torque the bolt down pretty good at this time, as you don't want it flopping around on you while you're bolting items to it.
4) Install the sway bar end-link to the lower control arm / bracket
5) Attach the tie rod (assume you've already attached it to the steering shaft) to the lower control arm
6) Install the lower ball joint onto the control arm
7) Set the knuckle that was out of your way down onto the lower control arm
8) Install the strut/shock up through the body in the engine bay
9) Install the bolt through the bottom of the shock
10) Install the bolts through the bottom of the ball joint that thread into the knuckle - note: One one of my balljoints I received new bolts, on the other I didn't. Sam'e mfr, same part nbr from moog. Maybe one's older than the other. Also note, if these don't thread in easily by hand, reposition your balljoint to ensure it's aligned with the knuckle.
11) Bolt sway endlink to sway bar
12) Torque all bolts - I couldn't find an FSM resource for this, but Autozone does post some decent schematics that include torque ratings. If you can't find another source, check there. Since I don't have an official FSM source, I don't feel comfortable quoting them here.
13) Enjoy a tighter riding and driving and hopefully more clunk-free GS.
Finished product.

It feels good to have the wheels back on! I even had a chance to re-thread a cross-threaded bolt hole for one of bolts that holds up the lower brace that I mangled a few weeks back while putting things together for the trailering back home.
The original belly pan was beat to heck, torn in a couple of spots and lined with dirt and oil, so I pitched it in the trash. Looks like there are aftermarket ones available for ~$150 I'll pick up as a replacement. For now I'll leave it off as I want to ensure I don't have any drips for leaks.
Project list is dwindling...
Trac/ABS ECU install
Install Power Steering reservoir
Install Supra Throttle cable
Install boost gauge
Install manual boost control
Assemble heater hoses & upper radiator hose
Hook up intercooler piping
If anyone has any tips on where/how to hook up the manual boost control for a stock twin setup, I'd take any help I can get. I'm assuming I just tee off the intake manifold somewhere for a boost reading...
...until next time...
Lead Lap
Joined: May 2012
Posts: 657
Likes: 12
From: VA
Mike: ask and you shall receive
Kyle hopefully this can help you out when it comes time to cut. I appreciate your latest post with all those parts replaced in the front end that car is going to drive like a dream.

Kyle hopefully this can help you out when it comes time to cut. I appreciate your latest post with all those parts replaced in the front end that car is going to drive like a dream.