Lexus 3IS: How to Install Engine Start/Stop Button
Add a punctuation mark to the third generation IS' interior with a TRD red start/stop button. It's quick, easy, and painless.
This article applies to the third-generation Lexus IS (2014-2015).
Let's face it: some things just aren't very exciting. Count among them the start/stop button. For something that plays such a major part of operating a car, the stock one is pretty bland. An easy way to remedy this is to install a bright red one from Toyota Racing Development (TRD). How easy is this modification? Follow these steps and it'll be up and running in no time.

Materials Needed
- Plastic trim removal pry bars
- Small, flat-bladed jeweler's screwdriver
- Toyota TRD start/stop button
- Two-part epoxy (optional for trim ring swap)
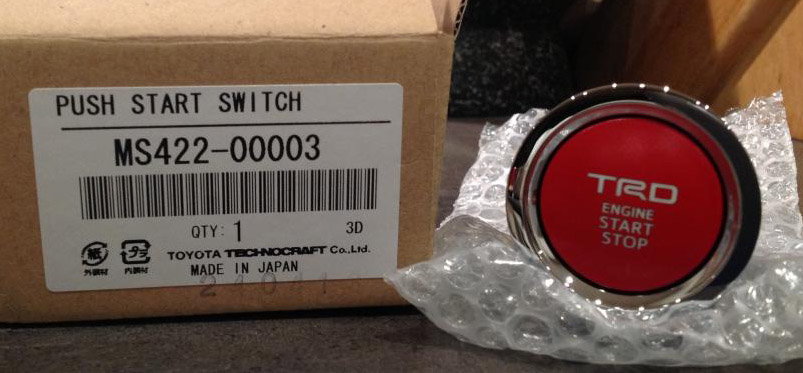
Step 1 - Get the new button assembly
TRD parts can be sourced through your local Lexus or Toyota dealer's parts department or online. Ask for the button used on the Scion GT86 or Toyota FR-S/BRZ, part number MS422-00003.
Pro Tip
There are knock-off switches for sale online that may look like a bargain. Beware that they may have the wrong plug-in configuration or are made of lesser-quality parts that don't meet Toyota's specifications. No modification whatsoever should be needed to plug the TRD button into the existing wiring harness.
Step 2 - Pull instrument panel shroud away from dash
Grab the instrument panel shroud where it joins the dash and pull towards you. Make things easier by using a plastic pry tool to push down on the mounting clips.

Figure 2. Grab panel and pull away from dash. Use moderate force to pull and small pry bars or screwdrivers to push down on retaining tabs. 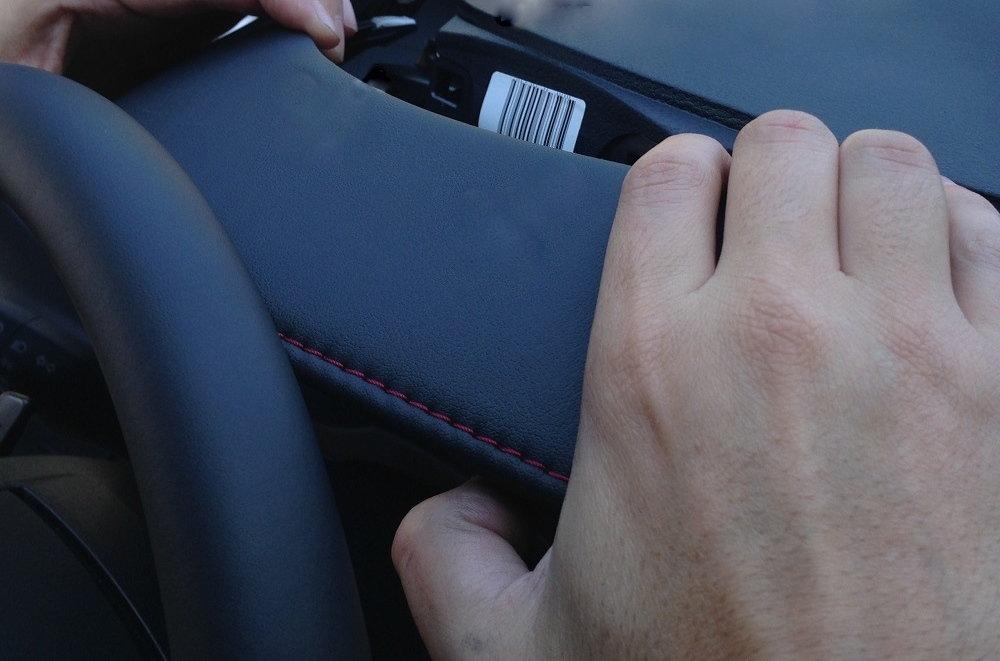
Figure 3. Pull shroud back far enough to get hands behind panel to push out switch.
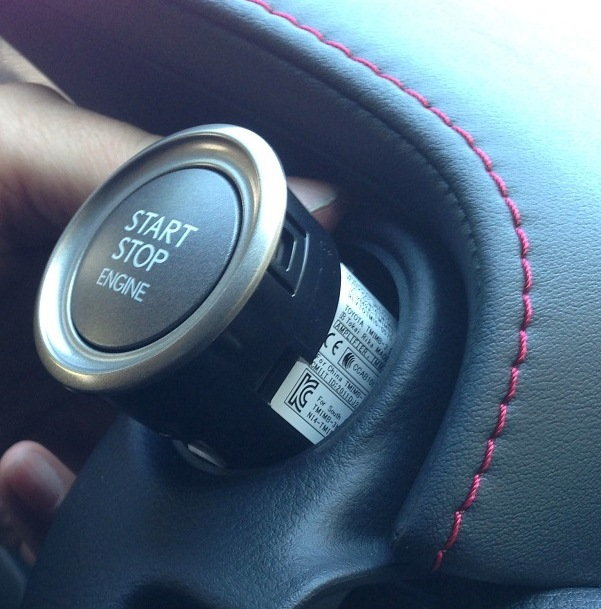
Step 3 - Remove switch from panel
Reach behind the panel and the start button. Push the button out of the panel. Pull out enough to get to the wiring connector. If you want to use the trim ring on the new switch, you'll need to carefully pry it off.
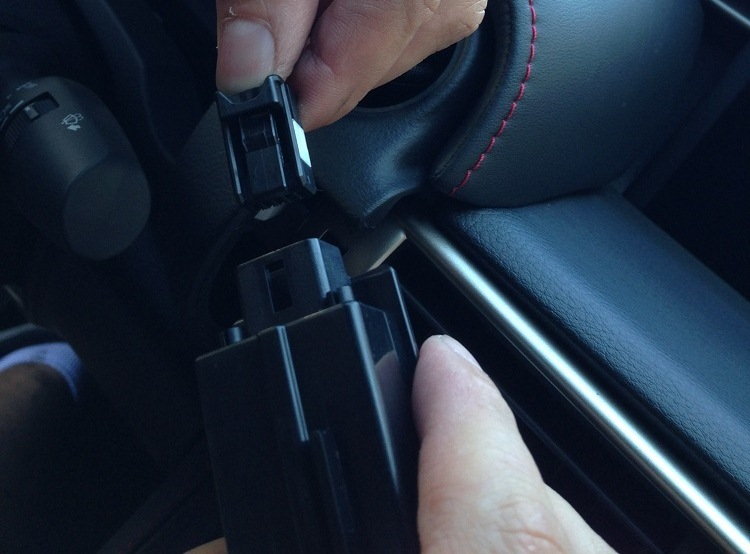
Step 4 - Unplug wiring connector
Pinch retainer clips on wiring connector and pull out from switch body.
Step 5 - Swap old switch bezel to new TRD switch
Swap out the trim rings to keep things looking consistent. The TRD switch's bezel is smooth with a bright chrome finish, while the original switch has a recessed ring and a satin finish. Carefully pry off the bezels from both switches with a jeweler's flat-bladed screwdriver and place the old bezel on the new switch. Use a few drops of 2-part epoxy or any adhesive compatible with plastics to mount the bezel. Re-crimp the back side of bezel back with pliers; wrap the jaws with masking tape to keep from marring/scratching the bezel finish.

Pro Tip
Use only a minimal amount of glue around the bezel to hold it in place. Don't put so much on that it oozes out onto the button.
Step 6 - Pop new switch into place
Plug the wiring connector into the switch. Push the new switch into place, indexing it so that the text on button is level when installed. Re-install instrument panel shroud by pushing it in place.

Figure 7. Close-up of TRD button with IS bezel in dash. 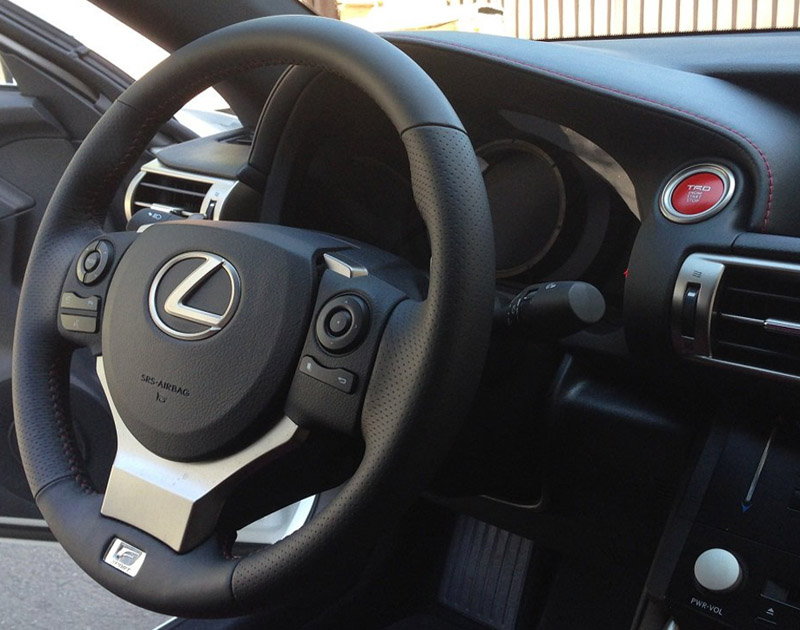
Figure 7a. Overview of dash with new red TRD button in place. No mistaking what the "launch" button is now!
Featured Video: How to Install Engine Start Button in Lexus
Related Discussion
-
DIY TRD Engine Start Stop Button Install 2104 IS 350/250 - ClubLexus.com