When you click on links to various merchants on this site and make a purchase, this can result in this site earning a commission. Affiliate programs and affiliations include, but are not limited to, the eBay Partner Network.
Revisiting this, as I happened across a set of LS door handles at the junkyard and figured what the hell? Looking over the DIY directions again, the one step that troubles me is #6, melting/softening the purple plastic rod clip on the LS handle to accommodate the SC cable barrel. It may be sufficient, but it doesn't seem like the best solution. I'd rather adapt the metal handle to accept the barrel directly somehow... Murco had a solid alternative with the metal spring clip, but I prefer something easier to disconnect like stock, so you don't have a bunch of fixed stuff dangling off the door card when removing it.
I haven't tried this yet, but it looks like an easier solution is to pop the two clips (purple for R, white for L) off the LS handles, then swap them to the other side. The SC cable snaps pretty snug into that clip. The only issue is its direction of travel is pulling against the open slot in the clip. Switch them to the other side and that's no longer a problem.
Let me know if you find a better solution. I didn't discover the lighter trick until after I did my handles, so mine are still wide open. I haven't had any issues so far, so bending the plastic clip in step 6 seems to be for peace of mind only.
If my memory is right, those plastic clips rotate to face the direction of pull off the cable, so I don't think that swapping them will give you any benefit, but I might be wrong. Give it a shot, take some pictures, and let us know how it turns out!
I tried it out yesterday and it was moderately successful, but the cable is still able to pop out of the clip when tension is released. Here's the pic I took:
That's with the purple and white clips swapped sides. As pictured, the handle is on the left and pulls the white clip that direction, so the cable is pulled to the solid back edge. If the purple clip were still on that side, it would be pulling the cable toward the open slot. Now, if you're rotating the purple clip the opposite direction to face away from the cable, that changes things. I would think that would create tensioning/rotating issues, however, with the clip fighting the cable for orientation.
I plan to play around with it a bit more today, stripping 1-2" of sleeve off various sizes of wire, slicing it lengthwise, and wrapping that around the cable, then clipping it in. As long as the sleeve is snug enough for the wire to have a tough time sliding out, and long enough that it can't really leave the clip, that should make for a very solid connection in the plastic clips. TBD...
Your method may well be good enough. It just makes me nervous deforming the plastic on something that is regularly stressed. We know how prone the fairly similar outer handle rod clips are to breaking! I'd still like to figure out some way to modify the back of the metal handle to have a stock-like slit to accept the cable barrel directly.
p.s. Has anyone noticed the lock buttons being more difficult to rotate after adding the metal handles? Mine are annoyingly tight now. I don't think it's tension from the pin against the plastic bracket, because the lock button rotates freely with the pin fixed, and it's just as tight without the plastic bracket on. It seems like maybe the metal handle is slightly thicker than the plastic one and placing too much tension on the white cups that allow the lock button to rotate in its grooves.
You should be covered if you try both of Murco's suggestions.
Originally Posted by Murco
snip
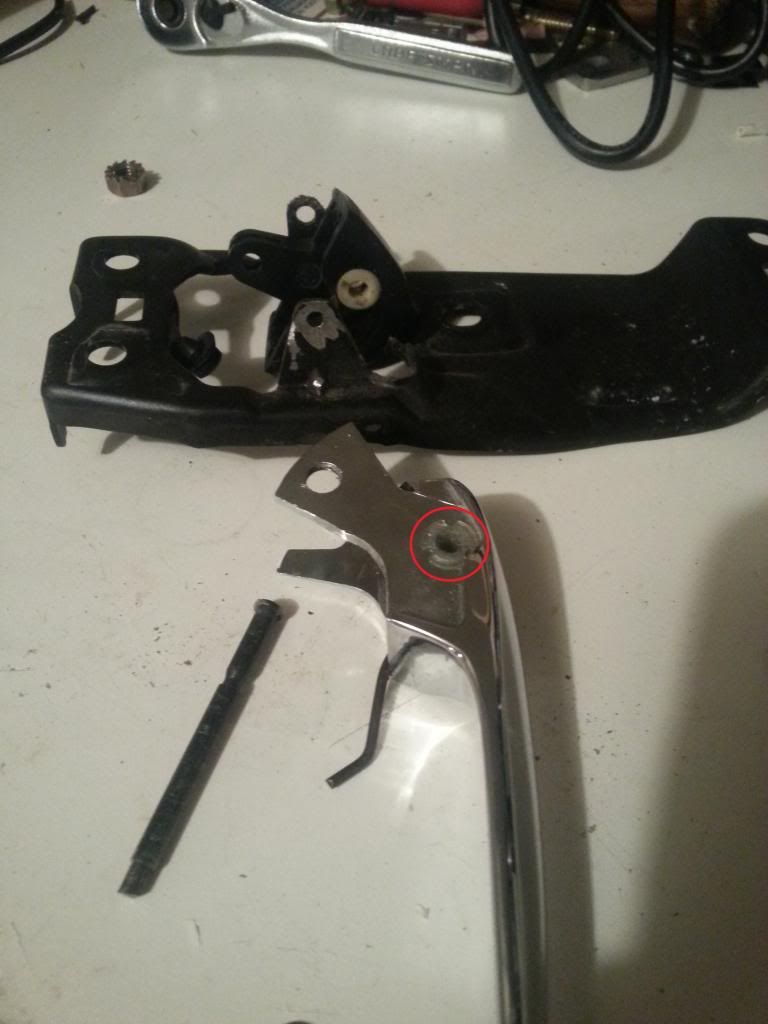
First difference in my swap was with the new handle itself. I found the handle bound against the lock switch so I ground about 1mm off the upper pin opening of the handle for more clearance (top opposite, top side of the handle)...
Another change was the pin mounting, the LS pin is a little longer so you can use the plastic handle surround to hold it without having to replace the circular clip. After opening the slots on top and bottom pictured here the surround will retain the pin...
You should be covered if you try both of Murco's suggestions.
I missed or forgot that one, thanks.
Funny, I just got done with both sides and was hopping on to post... Here's the driver's side, with the plastic clip swapped from the pass. handle:
I wrapped the cable in the sheath from 10 or 12 ga wire, cut in a spiral pattern and wrapped with electrical tape so it would be next to impossible for the cable to pop out of the sheath and/or the sheathed cable to pop out of the clip. That worked really well, so I went back and did the same thing on the passenger side.
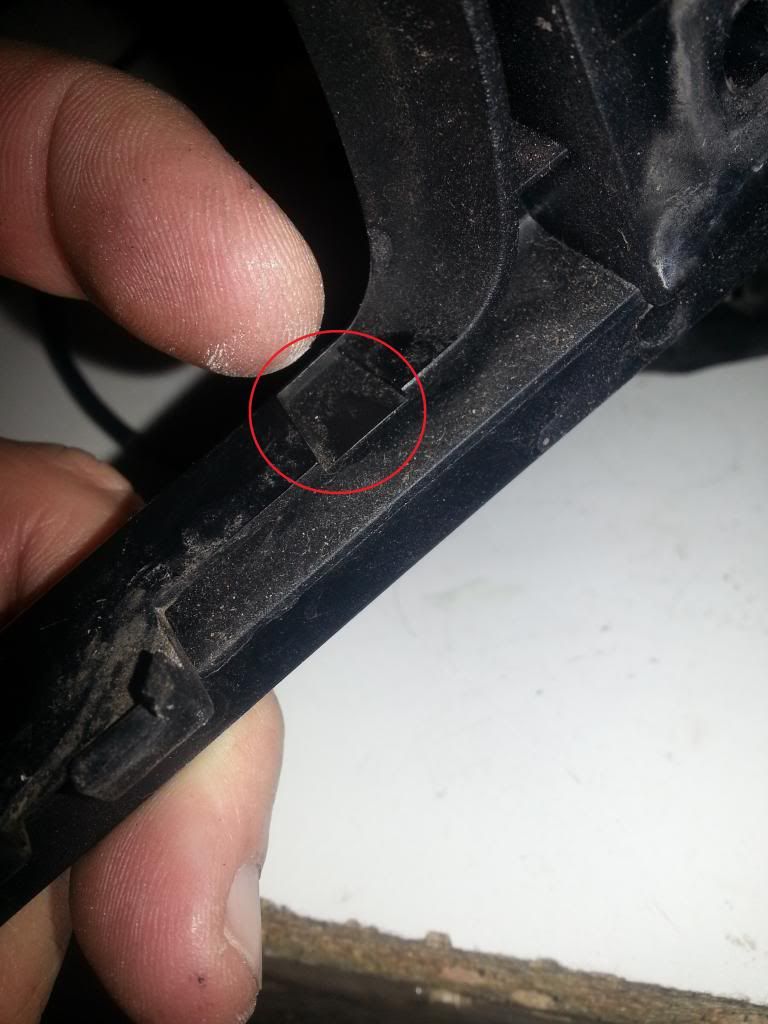
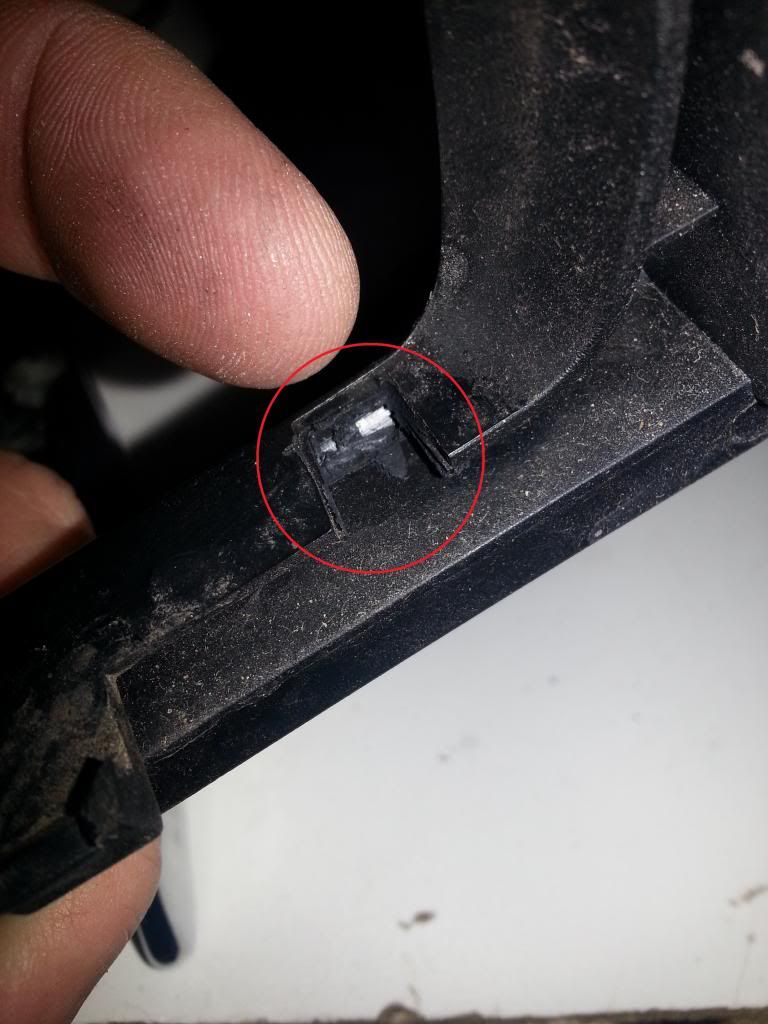
I did end up shaving down the spot on the outer plastic frame where Murco circled it in red. That along with some white lithium grease on the cups in the back loosened things up to the point of being acceptably firm.
I had to get something going on a Sunday so I used what I found. I saw the chrome pieces at the yard but didnt think they would work. The SC I went to strip was almost gutted when I got there. Opened both doors and the interior panels were already ripped out and the only thing missing on them were the door handles.....
 04-03-16, 08:49 AM