DIY - Water Pump - Remove and Install
 12-18-15, 07:56 PM
#1

Ok this isnt the best DIY but here we go
Tools Needed:
10mm Socket
12mm Deep and short socket
14mm Deep and short socket
Flat Head Screw Driver
Catch Container for coolant waste
Flashlight
Parts:
Revised Water Pump
2 Gallons of 50/50 Pink Toyota Coolant ( You will use about a gallon and a quarter give or take)
Step 1: Remove the intake - Now i didnt remove the entire thing i just remove the intake tube. I have a K&N intake but I would imagine that you could leave the box in just like I did.
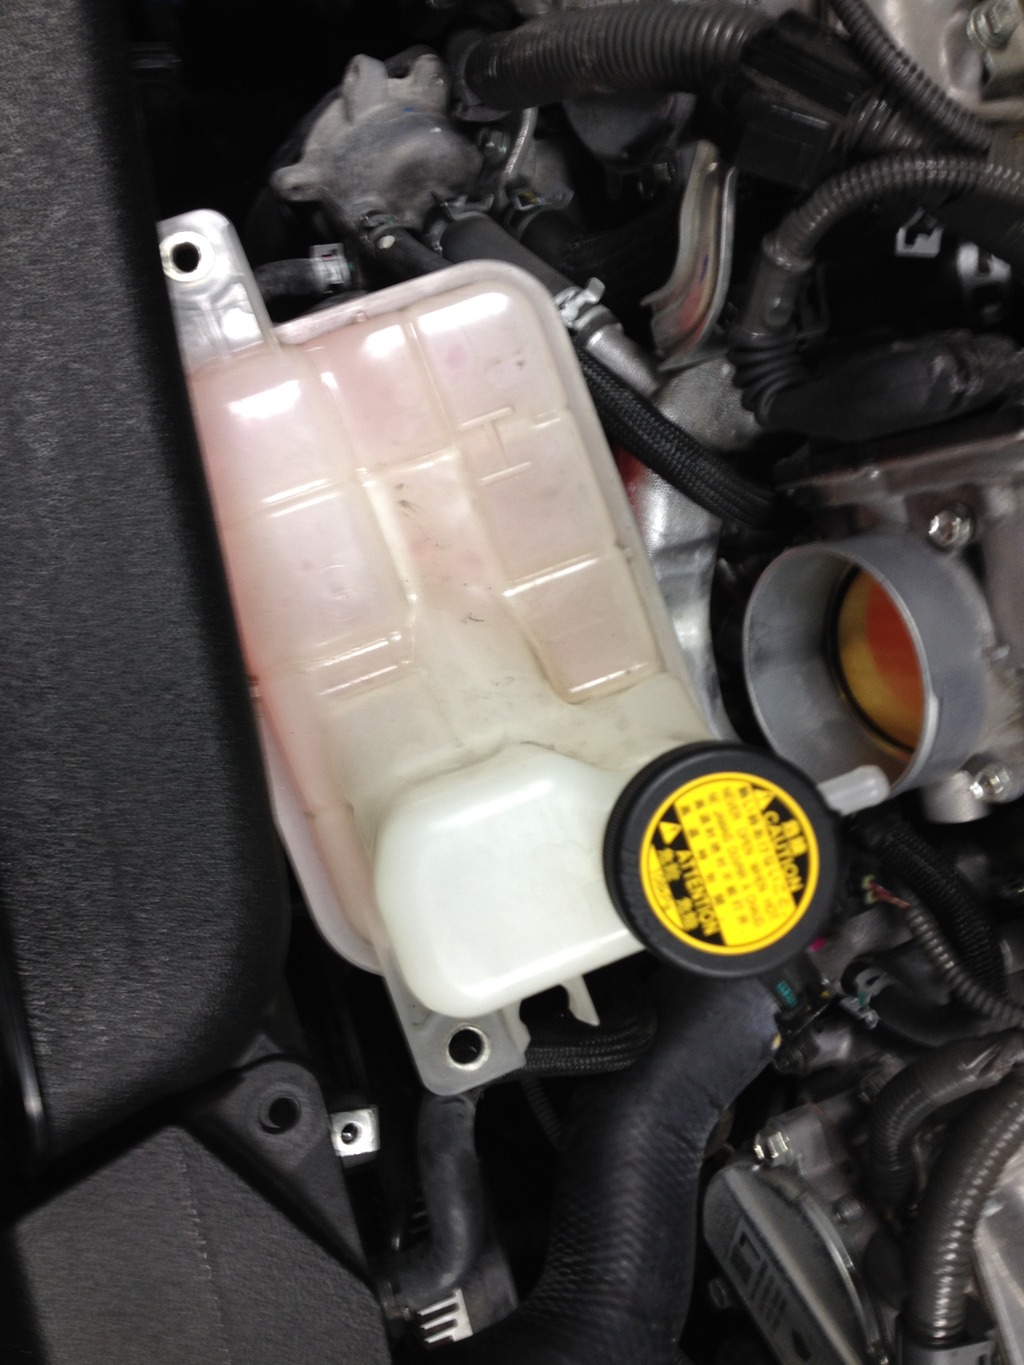
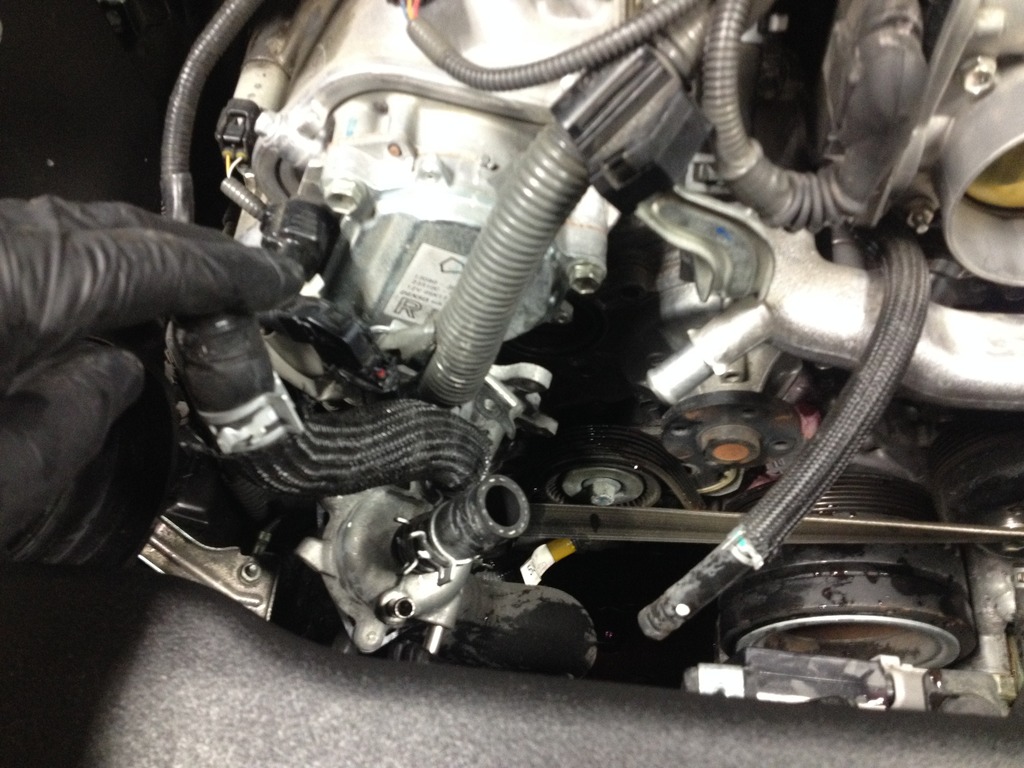
Step 2: Remove the Coolant reservoir - Remove the 2 10mm bolts on each side of the reservoir then remove the 2 hoses on each side. Remove the right side hose from the radiator and remove the other from the lower part of the thermostat housing. ***Please note once you remove the left hose from the thermostat housing all of the coolent will drain out of your water pump housing and the thermostat housing. None will drain out of the radiator so dont be worried about that. You should put a splash shield against your radiator fans otherwise it will drain directly on them.

Step 3: Take a seat and let it drain. This will take a bit. If you havent already you need something under the car to catch all of your coolant.

Step 4: Remove the 4 12mm holds holding the water pump pull on. I used a impact but you'll be fine with a regular old socket and ratchet.
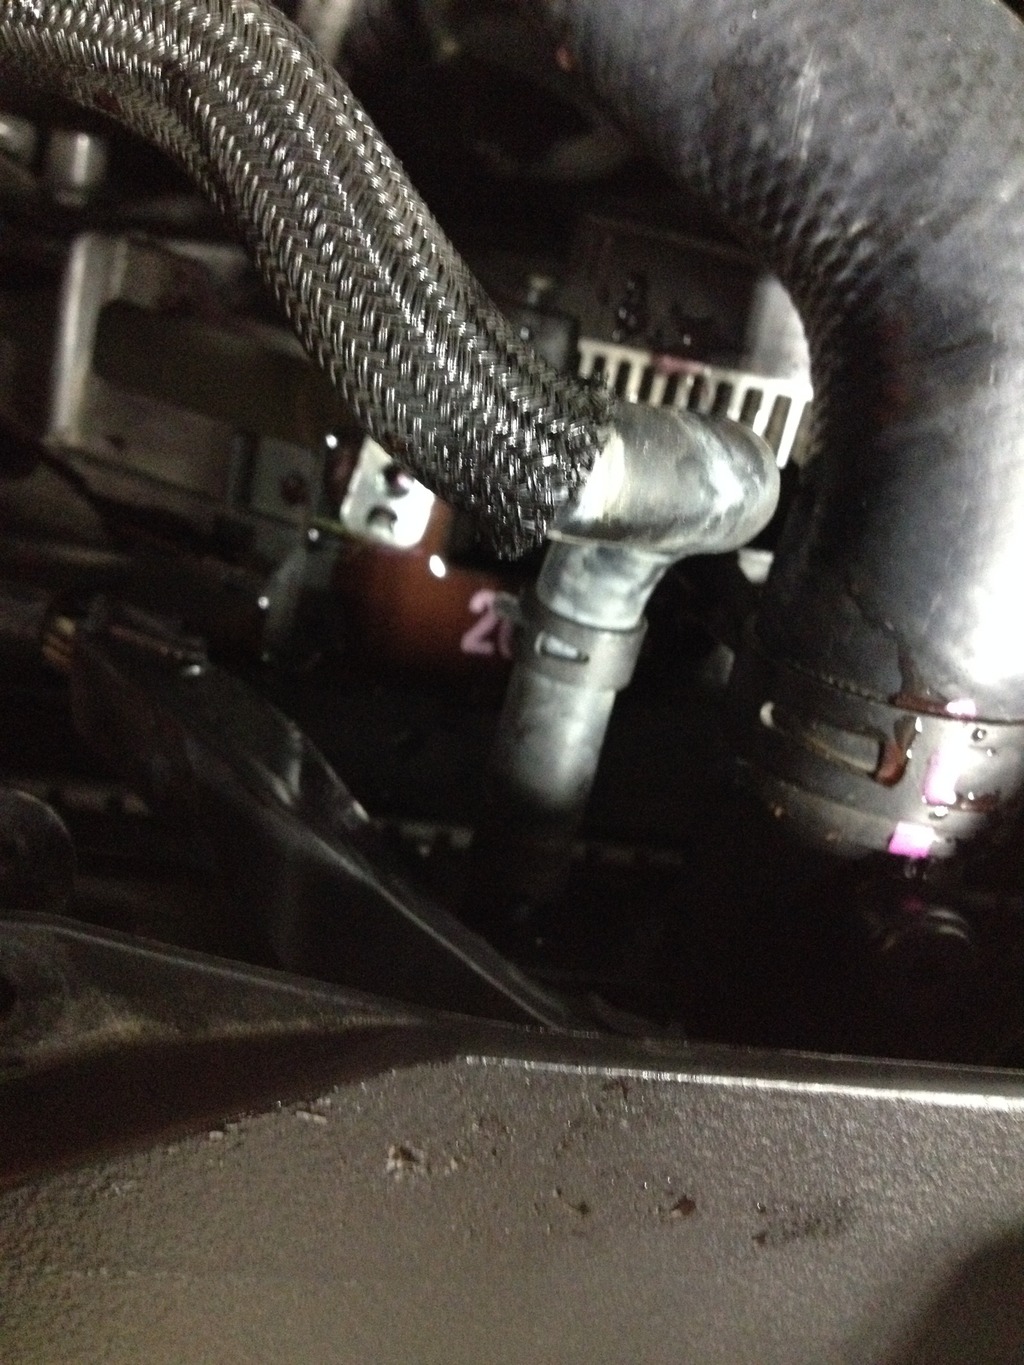
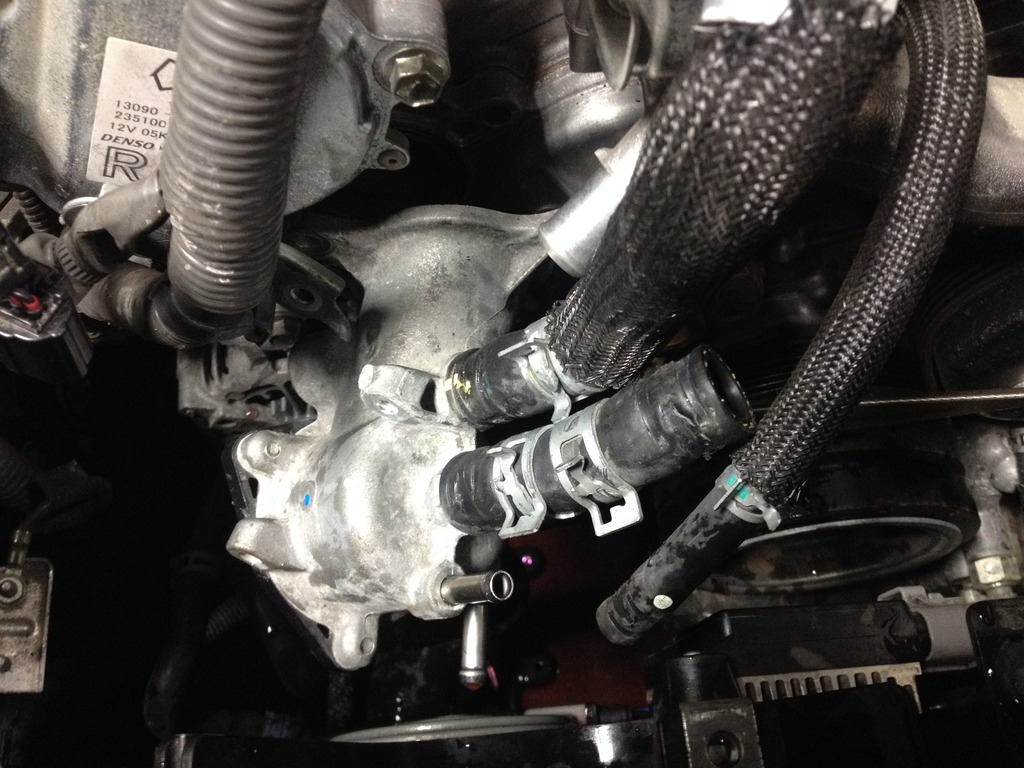
Step 5: Remove the 3 12mm bolts holding the thermostat housing on - Their are 3 12mm bolts that are in a triangle. Once you remove those you can remove the three hoses on the top, one small two big.
Step 6: Swing the thermostat housing out of your way- Once the 3 12mm bolts are removed along with the 3 hoses you can hang the housing off the the side. You dont have to remove the lower radiator hose.
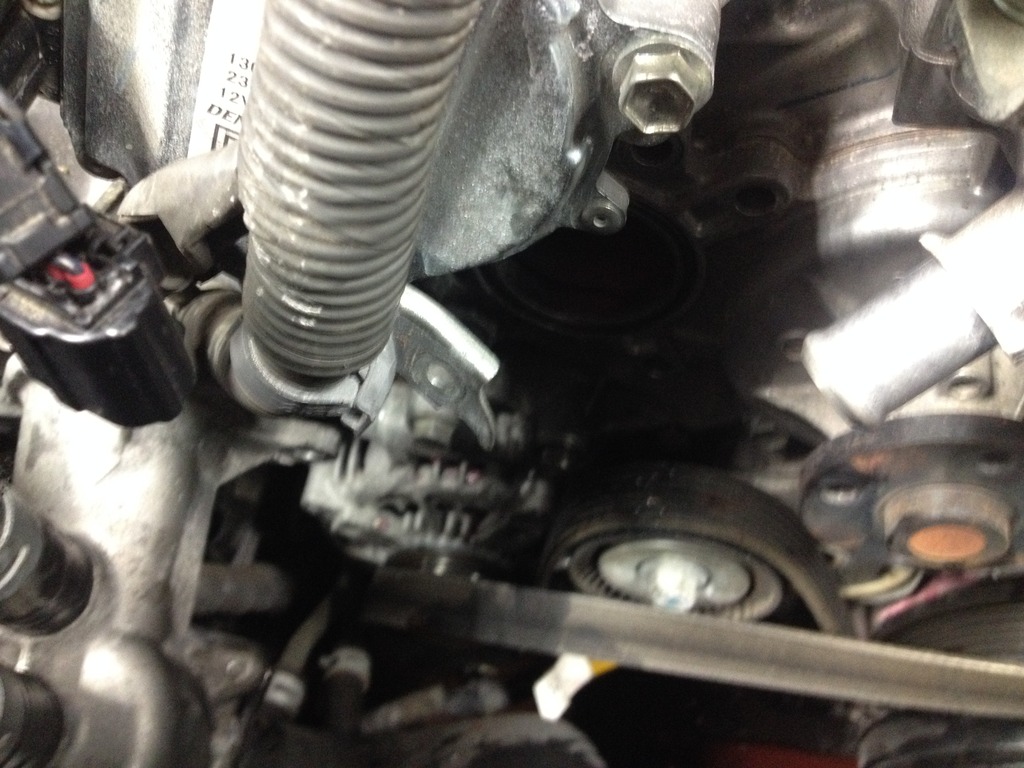
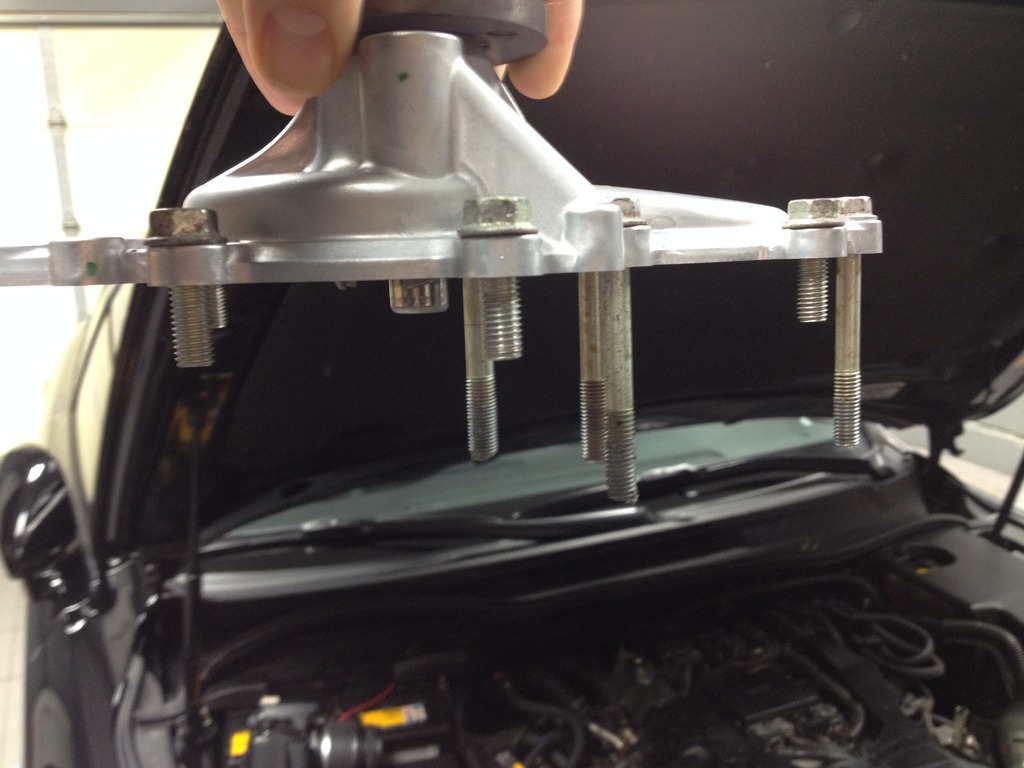
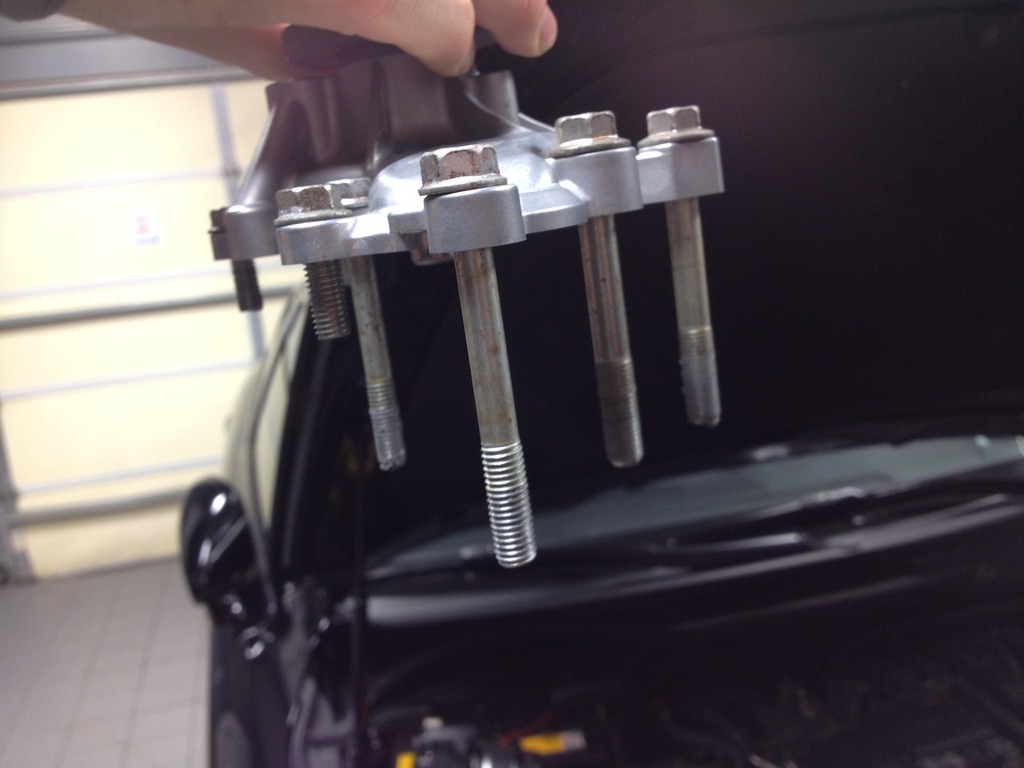
Step 7: Remove the water Pump - Remove the 7 12mm and 2 14mm bolts ( 14mm are Towards the top) Be sure to pay close attention what bolts when where because their are 2 longer than the other.You will need a long ratchet with a 14mm socket to depress the tensioner to get to the last one at the bottom.
Step 8: Once the old pump is off install everything in reverse order. Be sure to take some 220 sand paper and clean up your housing on the motor. ***** Put a tiny (and I mean tiny this isnt to seal the o-ring just to hold it in place) dab of sealant on each side of the o-ring for the thermostat housing so it stays in place when your installing it into place. You dont wanna lose that thing! Tighten everything up I dont remember the torque speck I just googled them
Step 9: Filler her up! - Fill the coolant reservoir up and it will burp down a bit.This car dosnt have a filler on the radiator. Keep filling until it stops bubbling. Once you have continuously filled it until the bubbles have stopped fill the car to max and start the car. Leaving the cap off let the coolant slowly bubble down this will take a while. Crank the heat and pay attention to your temp. The fans will kick on after a while and will bubble down. **** Never ever let the tank run dry it will be a huge pain in the ***. Don't let it get below the min.You may have to drive it just pay attention to your temp. Once the heat is blasting hot and you inspect for leaks spray down the lower shield and clean all the coolant up.
Done!
If you guys need any help pm me or respond here I know this isnt the best with pictures but the step by step is spot on. Just take your time and dont get frusterated its actually really easy. Start to finish about a hour
Tools Needed:
10mm Socket
12mm Deep and short socket
14mm Deep and short socket
Flat Head Screw Driver
Catch Container for coolant waste
Flashlight
Parts:
Revised Water Pump
2 Gallons of 50/50 Pink Toyota Coolant ( You will use about a gallon and a quarter give or take)
Step 1: Remove the intake - Now i didnt remove the entire thing i just remove the intake tube. I have a K&N intake but I would imagine that you could leave the box in just like I did.
Step 2: Remove the Coolant reservoir - Remove the 2 10mm bolts on each side of the reservoir then remove the 2 hoses on each side. Remove the right side hose from the radiator and remove the other from the lower part of the thermostat housing. ***Please note once you remove the left hose from the thermostat housing all of the coolent will drain out of your water pump housing and the thermostat housing. None will drain out of the radiator so dont be worried about that. You should put a splash shield against your radiator fans otherwise it will drain directly on them.


Step 3: Take a seat and let it drain. This will take a bit. If you havent already you need something under the car to catch all of your coolant.

Step 4: Remove the 4 12mm holds holding the water pump pull on. I used a impact but you'll be fine with a regular old socket and ratchet.
Step 5: Remove the 3 12mm bolts holding the thermostat housing on - Their are 3 12mm bolts that are in a triangle. Once you remove those you can remove the three hoses on the top, one small two big.

Step 6: Swing the thermostat housing out of your way- Once the 3 12mm bolts are removed along with the 3 hoses you can hang the housing off the the side. You dont have to remove the lower radiator hose.

Step 7: Remove the water Pump - Remove the 7 12mm and 2 14mm bolts ( 14mm are Towards the top) Be sure to pay close attention what bolts when where because their are 2 longer than the other.You will need a long ratchet with a 14mm socket to depress the tensioner to get to the last one at the bottom.


Step 8: Once the old pump is off install everything in reverse order. Be sure to take some 220 sand paper and clean up your housing on the motor. ***** Put a tiny (and I mean tiny this isnt to seal the o-ring just to hold it in place) dab of sealant on each side of the o-ring for the thermostat housing so it stays in place when your installing it into place. You dont wanna lose that thing! Tighten everything up I dont remember the torque speck I just googled them
Step 9: Filler her up! - Fill the coolant reservoir up and it will burp down a bit.This car dosnt have a filler on the radiator. Keep filling until it stops bubbling. Once you have continuously filled it until the bubbles have stopped fill the car to max and start the car. Leaving the cap off let the coolant slowly bubble down this will take a while. Crank the heat and pay attention to your temp. The fans will kick on after a while and will bubble down. **** Never ever let the tank run dry it will be a huge pain in the ***. Don't let it get below the min.You may have to drive it just pay attention to your temp. Once the heat is blasting hot and you inspect for leaks spray down the lower shield and clean all the coolant up.
Done!
If you guys need any help pm me or respond here I know this isnt the best with pictures but the step by step is spot on. Just take your time and dont get frusterated its actually really easy. Start to finish about a hour
Last edited by nickj718; 02-10-16 at 10:41 PM.

The following users liked this post:
kzlflash (08-25-20)
 12-18-15, 10:30 PM
#6

You could also use a tube and there is a peacock plug at the bottom of the rad. It will help to keep the job clean and not spill coolant everywhere.
Then later when you pull the other parts off just use a large old towel below the items.
Then later when you pull the other parts off just use a large old towel below the items.
Trending Topics
12-18-15, 11:24 PM
#8
when is it recommended to change out the water pump I see so many isfs changing these out so early whatever happened to those days when the water pump was changed out the same time the timing belt service was done which is at 100k+
op is there anything in particular to look for prior to completing this service?
op is there anything in particular to look for prior to completing this service?
12-19-15, 07:09 AM
#9
when is it recommended to change out the water pump I see so many isfs changing these out so early whatever happened to those days when the water pump was changed out the same time the timing belt service was done which is at 100k+
op is there anything in particular to look for prior to completing this service?
op is there anything in particular to look for prior to completing this service?
 12-19-15, 09:46 AM
#11

May want to clean up that coolant that spilled on the pulleys and belts because that stuff is slick and those belts will be slipping like a ***** on shifts and could squeal like a stick pig on cold starts.
12-19-15, 10:55 AM
#12
Thanks man I appreciate it. I hope a lot of people use it I know its not the best but once you start it clicks.
The whole thing cost me 250 I think all Toyota stuff vs 950 for the dealer to do it.
Xutvjet - Your absolutely right before I started it I degreased the while front of the motor and sprayed it down
12-19-15, 11:36 AM
#13

Dude, you da man. I've got an early '08 (#0815) car, and even though the header installer guy reported no pink crusties, my dealer SA (also an F owner) keeps telling me this will need to be done sooner or later. I'm now totally confident I can do this myself after reading your writeup. Thank you.
12-19-15, 11:58 AM
#14
Dude, you da man. I've got an early '08 (#0815) car, and even though the header installer guy reported no pink crusties, my dealer SA (also an F owner) keeps telling me this will need to be done sooner or later. I'm now totally confident I can do this myself after reading your writeup. Thank you.
Good! Trying to help was my whole goal glad you liked it. If you need anything let me know

Thread
Thread Starter
Forum
Replies
Last Post
raylor
RX - 3rd Gen (2010-2015)
0
09-02-15 07:01 AM