Lexus RX: How to Replace Radiator
Learn how to change the radiator yourself and make sure your Lexus is always cool.
This article applies to the Lexus RX (2005-2013).
Like many other components on vehicles today, radiators are prone to wear and could require replacement or servicing. Radiators are in charge of keeping your engine cool, so you can only imagine how important this job is. On the Lexus RX, there is a known problem with the bottom of the radiator being prone to cracking. There may be an unexpected situation where this component will need to be replaced. Read on for more information on how to perform this DIY.

Materials Needed
- Socket wrench set
- Pliers or Channel locks
- Flathead screwdriver
- Drain pan
- Funnel
- New radiator
- Coolant
- Coolant hoses
Step 1 – Drain coolant
Before the radiator can be removed for replacement, the system must be drained of its existing coolant.
- Remove covers under front bumper.
- Connect a clear tube to allow clean draining into your drain pan.
- Loosen drain plug under front bumper on passenger side.
- Let the coolant drain.
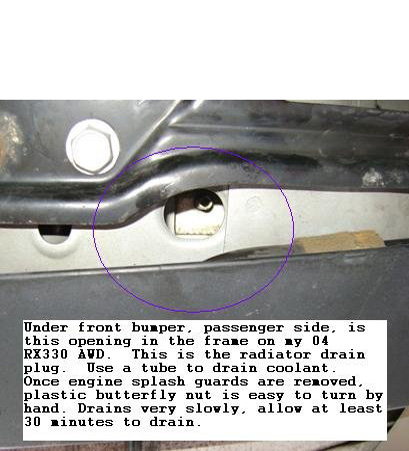
Figure 1a. Location of radiator drain plug. 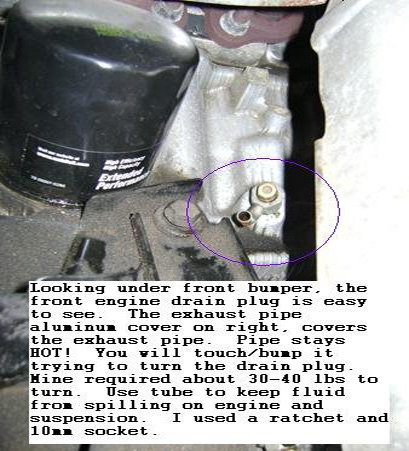
Figure 1b. Location of front engine drain plug.
Pro Tip
The drain plug located at the rear of engine block may be inaccessible. You will be able to drain the majority of fluid from the system through the front drain plugs.
Step 2 – Remove top plastic covers
The top area of the radiator will be covered by plastic covers. These will need to be removed.
- Press plastic rivets to release and lift covers off.

Pro Tip
This is a good time to remove the upper radiator hose, if it needs replacement, using the pliers or channel locks.
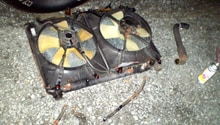
Step 3 – Remove brackets, harnesses and hoses
To further expose removal of the radiator, there are several brackets, harnesses, and tubes that need to be removed.
- Undo related bolts on top and bottom of radiator.
- Use Phillips head screwdriver to unscrew related screws.
- Use flathead screwdriver to pry clip connected to front bumper.
- Unplug related harnesses.
- Remove fan shroud.
- Disconnect transmission line hoses (Figure 3b).

Figure 3a. Radiator cover removed. 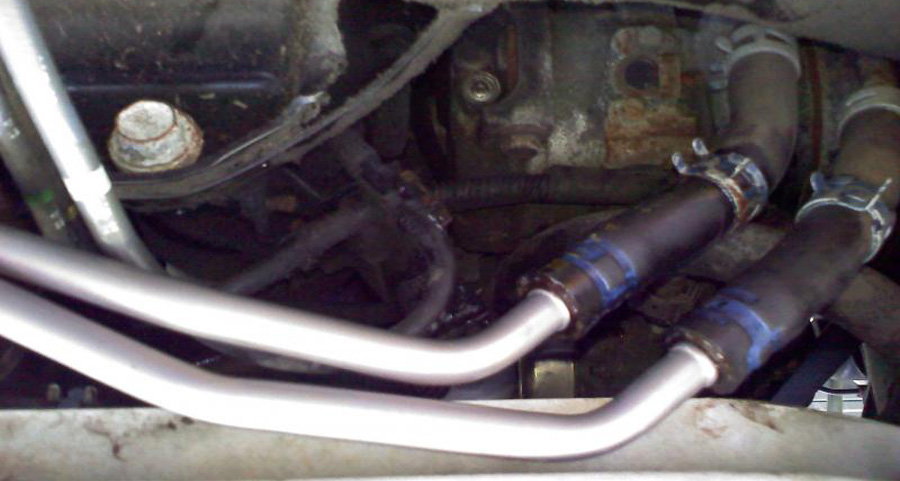
Figure 3b. Transmission line hoses.
Pro Tip
This is a good time to remove the lower radiator hose using pliers or channel locks.
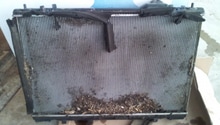
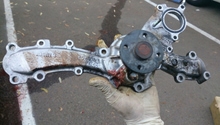
Step 4 – Replace radiator
Now that all components have been removed, the radiator can be lifted out and replaced.
- Remove radiator by lifting out.
- Install new radiator by dropping in.
- Installation is reverse of removal. Install all the hoses, bolts, and screws. Install the fan shroud and tighten all the screws.

Pro Tip
At this time, all related hoses, harnesses and brackets can be reinstalled and secured.
Step 5 – Refill coolant
Now that the new radiator is installed and related components are secured, the system needs to be refilled with fresh coolant.
- Fill coolant reservoir to max level.
- Turn the car on and let it run to operating temperatures.
- Top off system accordingly.

Figure 5a. Location of coolant reservoir. 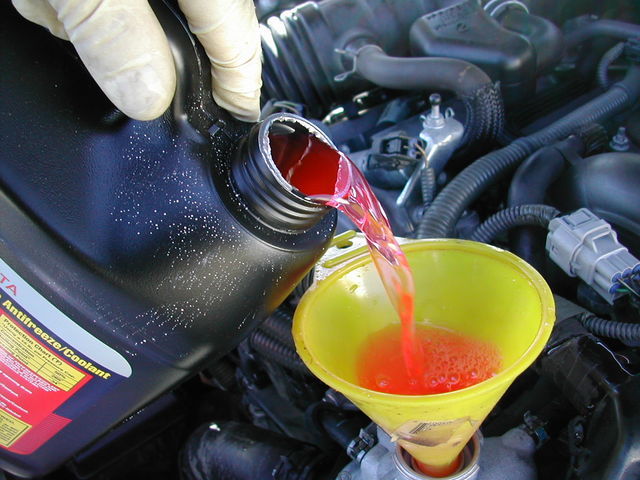
Figure 5b. Refilling coolant.
Related Discussions
- Lexus RX DIY Coolant flush and fill - ClubLexus.com
- Lexus RX DIY Radiator Replacement - ClubLexus.com