Lexus IS: How to Replace Brake Line
Old, decaying brake lines are a recipe for disaster. Replace them before they let you down.
This article applies to the Lexus IS (1999-2009).
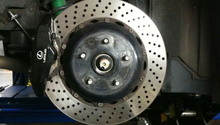
Brakes are something you don't think about until you need them. All it takes is for one part to fail and disaster can strike. The weak link in the chain between the pedal and the pads is the rubber hose that routes brake fluid to and from the calipers. Age and high mileage will render hoses unsafe as they lose their ability to contain high hydraulic pressure. Hoses can also swell shut or deteriorate from the inside, which visual inspection can't detect. Take a look at what your Lexus has and consider replacing them.

Materials Needed
- Lug wrench, jack and jack stands
- Wire brush
- Flared-end wrenches 10, 13 & 17 mm, plus 14 mm
- Box-end wrench 14 mm for banjo fitting bolt
- Deep-well 6-point socket wrench for brake bleeder fitting
- Locking pliers (e.g. Vise-Grips) and adjustable/slip-joint pliers
- Torque wrench
- Penetrating oil (e.g. WD-40, PB Blaster)
- Brake fluid
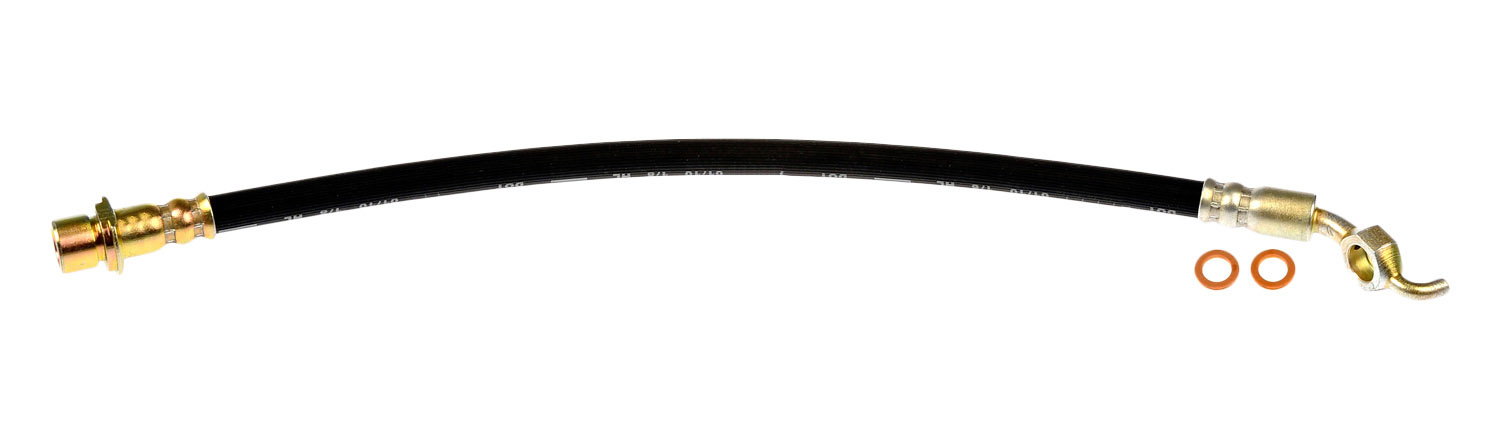
- Brake hoses
- Rags/towels
- Vinyl tubing
- Drip pan
- Old plastic bottle or cups
- Assistant/helper
Step 1 - Lift/support car and remove the wheels
- Break loose (but do not remove) the lug nuts using a lug wrench or 21 mm impact socket/wrench.
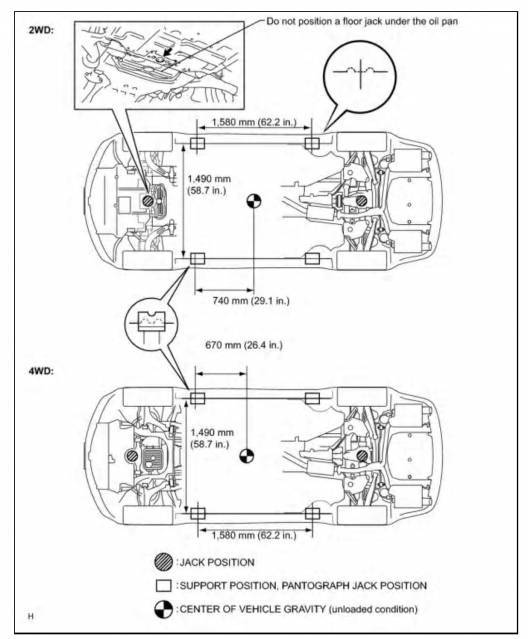
- Lift the vehicle using a floor jack and place jack stands at the points illustrated in figure 1.
- Lower the vehicle onto the jack stands. Repeat for rear if replacing rear lines.
- Lastly, remove the wheels.
Pro Tip
Check the lug nuts; if they use an aluminum cover they may swell and not allow you to use the correct-sized lug/socket wrench, and can be damaged cosmetically as well as physically during removal/re-installation. Get a set of solid metal replacements.
(Related Article: How to Jack Up Your Lexus - ClubLexus.com
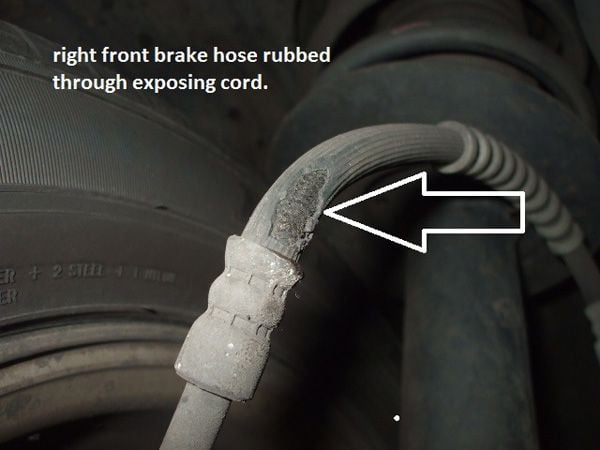
Step 2 - Inspect the brake hose
Look at the rubber hose between brake calipers and body. If cracked or swollen, it needs to be replaced.
Step 3 - Remove brake line
- Clean areas around the hose, caliper, and hard lines with a wire brush. Spray threaded fittings at hose ends with penetrating oil. Follow directions on the package and let it soak.
- Position a drip pan to catch brake fluid.
- Loosen the fitting at the end of the hard line. Use a 10 mm flare wrench on the fitting and 17 mm wrench on hose's metal end. Once loosened, use a 14 mm wrench to remove the bolt attaching the brake line to the brake caliper.
- Finish unscrewing the hard line fitting, pull out retaining clip with pliers, then pull hose away from bracket/hard line.
- Remove bolt and hose from caliper. Plug inlet port of caliper to keep dirt and debris out.
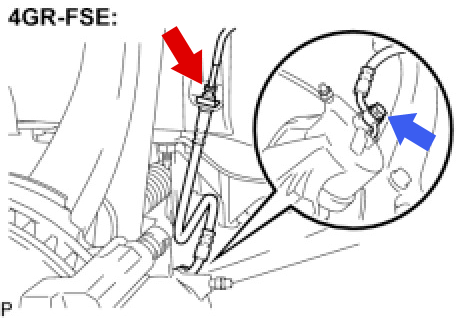
Figure 3. Brake line fittings on the Lexus IS 250. 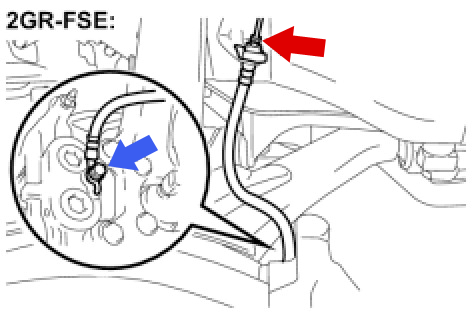
Figure 4. Brake line fittings on the Lexus IS 350. 
Figure 5. Loosen fitting at end of hard line. 
Figure 6. Remove bolt attaching brake line to brake caliper.
Pro Tip
Replace round copper sealing washers at banjo fitting; make sure the replacement hose has these.
Step 4 - Install new hose
- Bolt new hose and crush washers to caliper and tighten.
- Place other end in bracket and re-install retaining clip.
- Finger-tighten hard line fitting into hose end, then tighten using flared-end wrenches.
Step 5 - Bleed the brakes
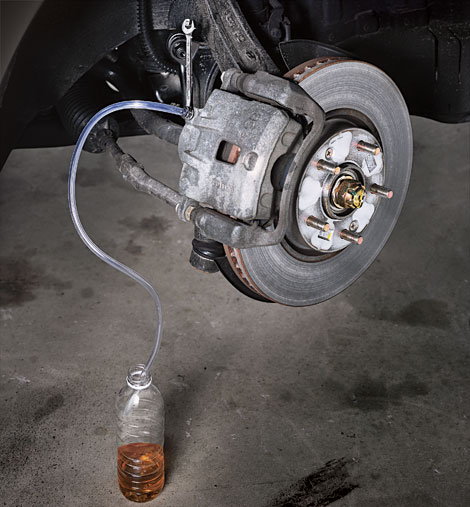
- You'll need a helper to press on the brake pedal; another would be helpful to monitor and refill the master cylinder. Start at the wheel farthest from the master cylinder (typically the right rear), loosen the bleeder screw with a flared-end wrench, and have a helper push pedal all the way to floor.
- Tighten the screw, then tell the helper to pump the brakes while making sure the master cylinder has fluid. When the brake pedal gets hard, loosen the bleeder screw so that fluid exits the fitting. Continue pumping the brakes until fresh fluid and no air bubbles come out.
- When finished, tighten the screw and move to next caliper. Repeat for left rear, then move to right front, and finally left front.
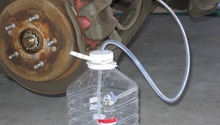
- Place a clear vinyl tube over the end of the bleeder screw and extend it into a bottle that's partially filled with brake fluid. Extend the tube to the bottom of the bottle so that it's covered by brake fluid and doesn't draw air back into the line.
Pro Tip
Do not let the master cylinder reservoir go dry during bleeding. If it does, it could draw air into the system.
Step 6 - Check for leaks
Once all the brakes are bled, have your helper press the pedal while you recheck that fluid isn't leaking at any of the brake line connections. Re-tighten if it is.
Step 7 - Re-install wheels
- Place wheels back on car; install lug nuts.
- Lift car, remove stands, and set wheels/tires back on ground.
- Finish tightening lug nuts: torque to 76 ft-lbs (10.5 kg-m).
Step 8 - Test drive
Take a short drive, come check again for leaks, and re-torque lug nuts. Provided there aren't any issues with brakes grabbing or more leaks, you should be finished.
Featured Video: How to Replace Brake Lines in Lexus IS
Related Discussions
- Lexus ES Brake System Overhaul - ClubLexus.com
- Opinions on Stainless Steel Brake Lines - ClubLexus.com