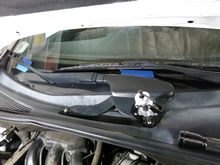
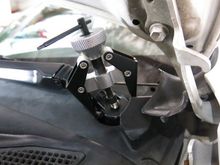
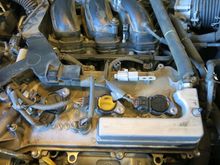
Easy access to the rear fasteners that holds down the intake surge tank. I now have much more confidence in a DIY job on the spark plug replacement. The driver side windshield wiper arm removal was a PITA. However, with easier access to the firewall and the fasteners to the intake and surge tank stays, this makes the job easier.