


2000 LS new bushings in the rear, which ones?


Thread Starter
Lead Lap
Joined: Oct 2013
Posts: 580
Likes: 4
From: North of Detroit

got new arms loaded with new BJ and bearings, all new knuckle bushings and tension rod bushings as well as sway bar links, as well as teh SPC press tool figs engineering showcased, ~600 bucks  and then gotta move on to front bushings. oh well, she got 115k miles, first big bushing service. has new BJ and upper control arms up front already. as well as strut rod bushings. Not much left to do to make it all new!
and then gotta move on to front bushings. oh well, she got 115k miles, first big bushing service. has new BJ and upper control arms up front already. as well as strut rod bushings. Not much left to do to make it all new!
Thread Starter
Lead Lap
Joined: Oct 2013
Posts: 580
Likes: 4
From: North of Detroit
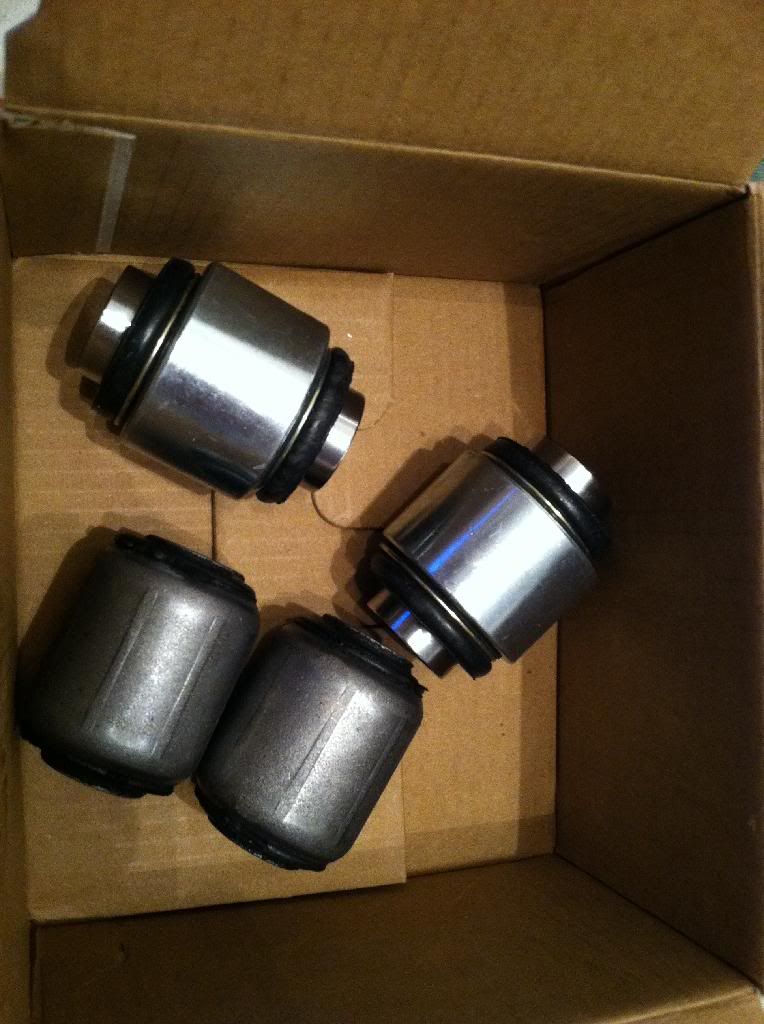
here are my new carrier bushings (i call it the camber arm). I do not need the smaller bushings (chassis side) so if anyone wants them 20$ plus the ride.
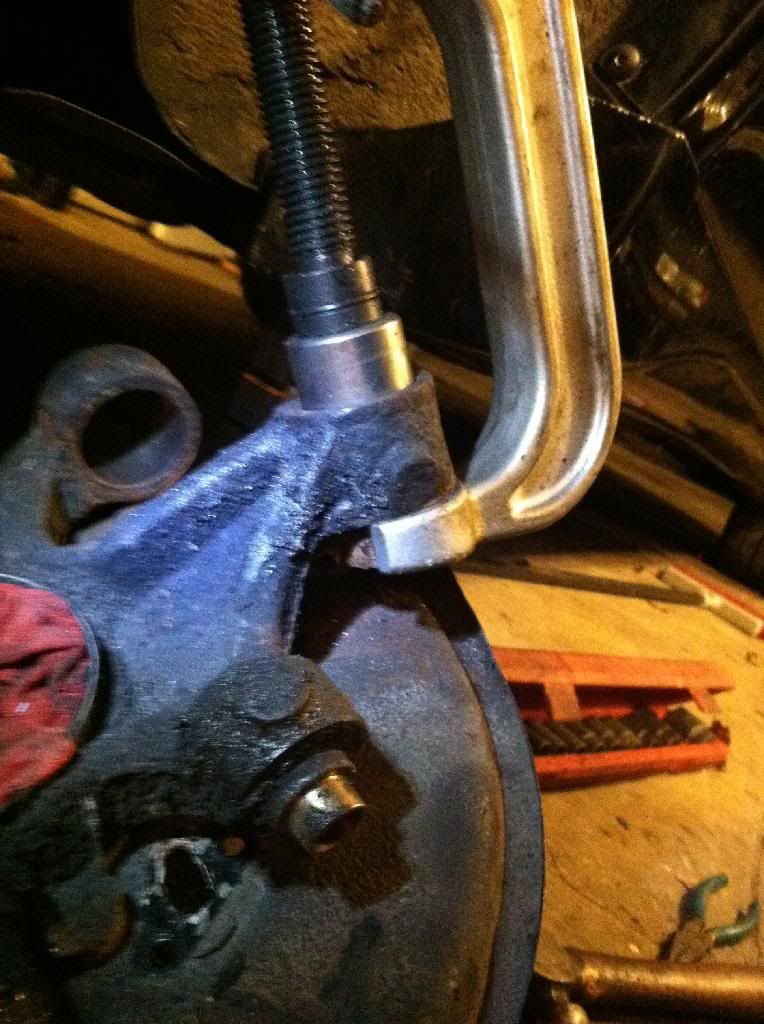
this tool is essential, or a similar low profile c clamp press. Thanks to Figs engineering for showing this is what we need.
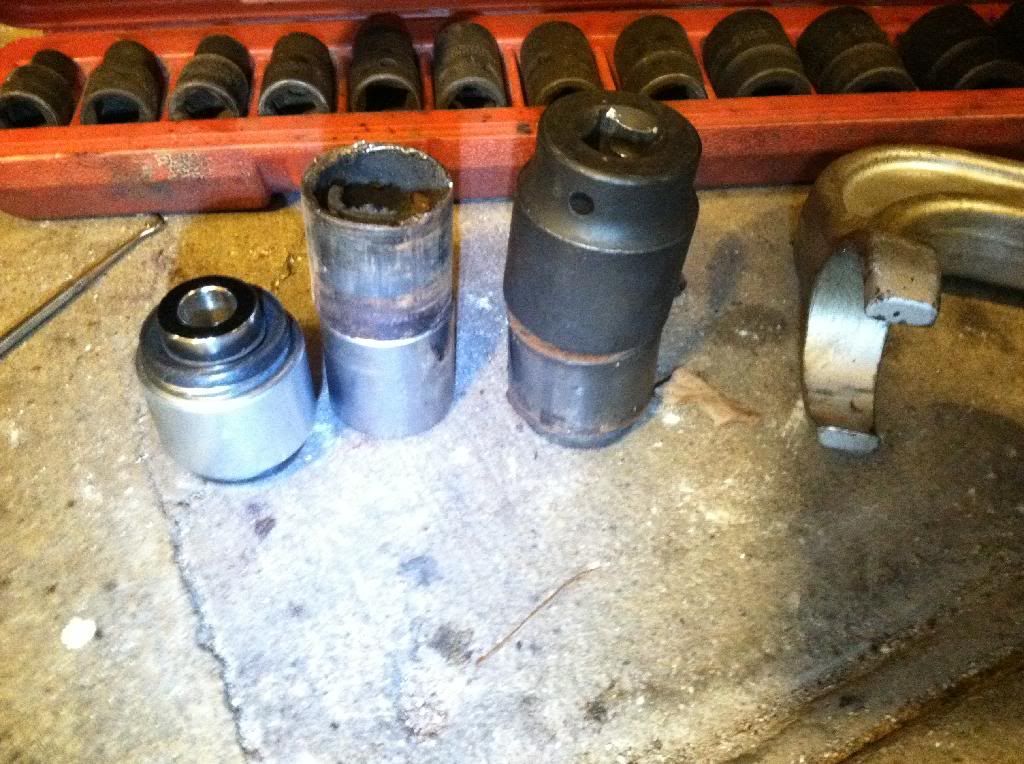
used a 1" socket to press old one out, and a 27mm to press new one in. Its slightly larger than the bore opening, so once its bottomed you know the bushing is in there flat.
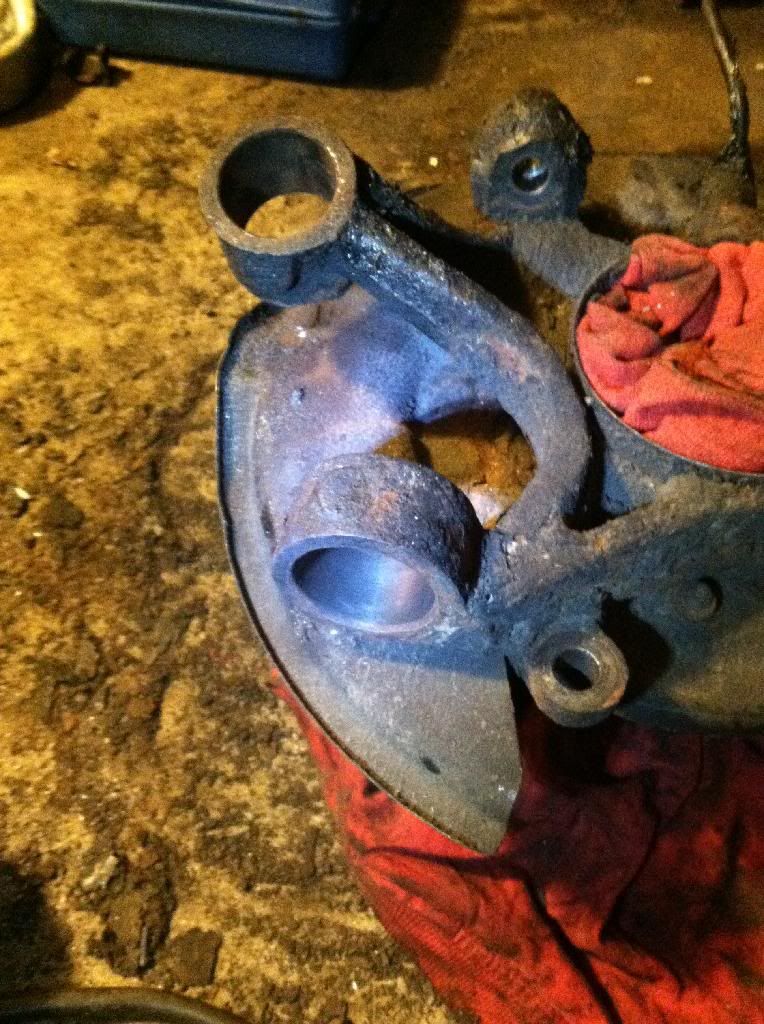
tension rod and camber arm bushings out.
my favourite for pressing them out. 3 seconds on the gun and its out.

hopefullly my sewel parts and tension rod bushings are in today or tomorrow and i can finish off this side, then start on the other!

this tool is essential, or a similar low profile c clamp press. Thanks to Figs engineering for showing this is what we need.

used a 1" socket to press old one out, and a 27mm to press new one in. Its slightly larger than the bore opening, so once its bottomed you know the bushing is in there flat.

tension rod and camber arm bushings out.

my favourite for pressing them out. 3 seconds on the gun and its out.

hopefullly my sewel parts and tension rod bushings are in today or tomorrow and i can finish off this side, then start on the other!
Thread Starter
Lead Lap
Joined: Oct 2013
Posts: 580
Likes: 4
From: North of Detroit
question about the bearing. its impossible to not get any crud in there while pullign the spindle off, so a few pieces of rust and dirt got in there. Its not a toally sealed unit, as in I can see the rollers. Im thinking to just spray it liberaly with brake clean, upside down, wait an hour for everything o evaporate, pick out any pieces of dirt with a dentist pick tha ti can see, and replentish some grease.
anythign wrong with that?
anythign wrong with that?

you will never get everything out...
Get a big grease syringe and back flush the debris out with new fresh grease between each bearing.
It's best to do a lot off these things ON the car for this reason.
Get a big grease syringe and back flush the debris out with new fresh grease between each bearing.
It's best to do a lot off these things ON the car for this reason.
Thread Starter
Lead Lap
Joined: Oct 2013
Posts: 580
Likes: 4
From: North of Detroit
also couldnt get the tension rod off the chassis. that bolt has become one with the inner sleeve of the bushing. That bushing had no play in it but you can see its old, the rubber has small cracks in it. Im going to leave this for another time, when i can get the car on a lift and sawzall the bolt out. Just no room around there right now, unless i pull the axles out of the diff and, no...just not doing that at this stage
Well, considering you have the axel out of the knuckle and the knuckle on the floor... No it's not ON the car, it's quite obvious it's off or out of the car. Both of those bushings can be pressed out with the knuckle still attached to the car, keeping the axel in the knuckle and not exposing the bearing to debris.
That is what I meant by "on the car."
And sorry if that came off a little "****-ish", not how it was intended.
And just as a heads up, I'd probably start preparing to replace the wheel bearings on those rear knuckles. Separating the axel and knuckle on this type of bearing, with that sort of rust and as many miles and years as yours and the rest of our cars now have, can lead to accelerated bearing failure.
You might want to grad a set of rear bearings and do them at the same time as that seized bolt&bushing, since you are going to be in there again.... Up side is all new rear parts!!
That is what I meant by "on the car."
And sorry if that came off a little "****-ish", not how it was intended.
And just as a heads up, I'd probably start preparing to replace the wheel bearings on those rear knuckles. Separating the axel and knuckle on this type of bearing, with that sort of rust and as many miles and years as yours and the rest of our cars now have, can lead to accelerated bearing failure.
You might want to grad a set of rear bearings and do them at the same time as that seized bolt&bushing, since you are going to be in there again.... Up side is all new rear parts!!
Thread Starter
Lead Lap
Joined: Oct 2013
Posts: 580
Likes: 4
From: North of Detroit
at first i didnt know u need a special tool to press those bushings out so thats why i pulled it off. But u have to pull it off anyhow to undo the bolt holding the UCA to the knuckle (slide the axle out).
Ill probably do the bearings and the seized bolt at the same time, perhaps in the fall. Then-100% all new parts!
Ill probably do the bearings and the seized bolt at the same time, perhaps in the fall. Then-100% all new parts!
Thread Starter
Lead Lap
Joined: Oct 2013
Posts: 580
Likes: 4
From: North of Detroit
finally all the stuff is in
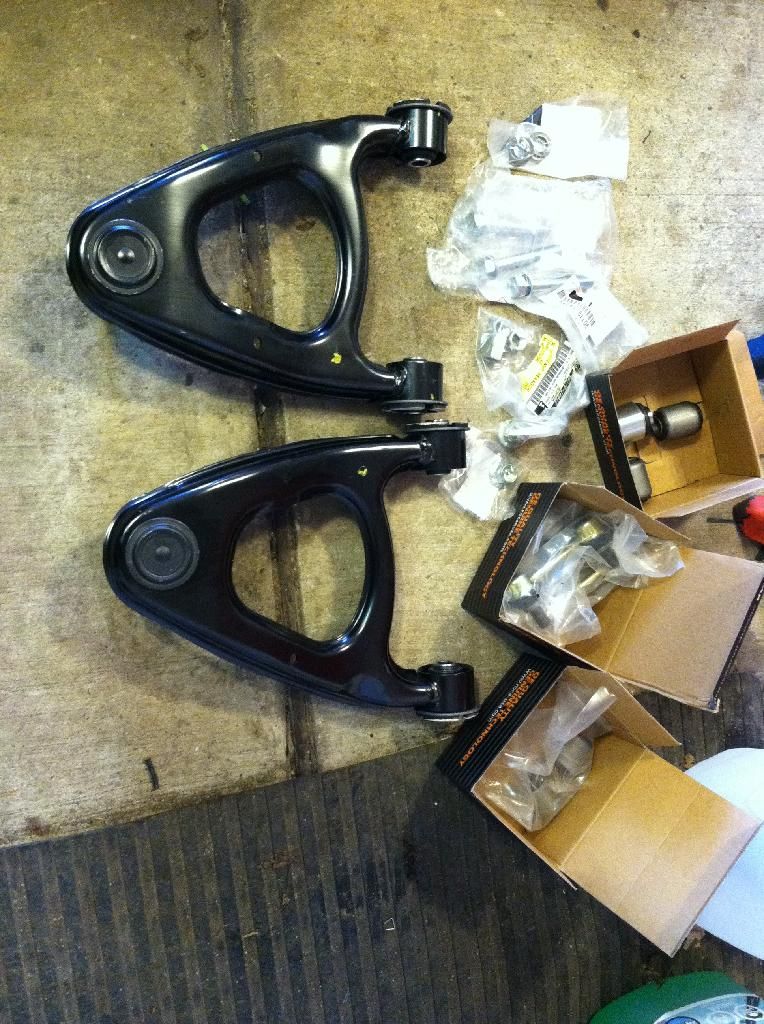
finished the passenger side last night, just need to ge the ebrake shoes back on.
COnfirming the OEM arms come with the speherical bearings in the control arms.
Also got new licence plate light covers as mine were broken and nasty.

finished the passenger side last night, just need to ge the ebrake shoes back on.
COnfirming the OEM arms come with the speherical bearings in the control arms.
Also got new licence plate light covers as mine were broken and nasty.

Thread
Thread Starter
Forum
Replies
Last Post
MissStutz
SC - 1st Gen (1992-2000)
9
Aug 8, 2015 03:25 PM
V8drummer
SC400 / 300 Classifieds
7
Mar 26, 2013 02:10 PM
stockhatch
SC - 1st Gen (1992-2000)
14
Dec 17, 2010 01:40 PM
en11871
LS - 1st and 2nd Gen (1990-2000)
3
Nov 21, 2010 08:14 PM