When you click on links to various merchants on this site and make a purchase, this can result in this site earning a commission. Affiliate programs and affiliations include, but are not limited to, the eBay Partner Network.
I will look into it, but we always allow some tolerance especially since these holes are rough cut, but it should be snug.
Mike
Thank you for your reply. I was surprised to see 1mm of play on each end. I am using the spacer made from the aluminum tube as Seattle SCone devised. Would love to use your reduction spacers if you come up with a revision. They are very high quality, just too much free play.
Thank you for your reply. I was surprised to see 1mm of play on each end. I am using the spacer made from the aluminum tube as Seattle SCone devised. Would love to use your reduction spacers if you come up with a revision. They are very high quality, just too much free play.
Thanks so much.
David
I looked into it a bit more. The design calls out 12mm nominal, which is what the typical bolt passage would be. Keep in mind that be it .005" or 0.05", This is not a precision dowel fitment, meaning the thrust and friction on the face are the means of retention. So the larger flat surface area and the torque on the stud will be the part that holds the stud in place, not the bore. In order for that to be true, you would need a precision ground shoulder bolt and a precision reamed hole, of which the factory bars are not very precise. Our stud is machined to tight tolerances, but the washer stack up is what will hold it in place. Hope that makes sense, tightening them down will keep them in place, we have used the same design for the past 10 years or so and never had an issue.
Mike
__________________ Redefining Lexus Aftermarket Parts Since 2001 -- We are your Lexus suspension experts--
BCR - KW - PENSKE - OHLINS - HKS - GREDDY - STANCEPARTS
Links - Arms - SuperPro Poly Bushings - Solid Bearing Conversions - Motor Mounts
RB BBK's and 2P Rotors, G-Loc pads, Radium Fuel Systems
Custom Fabrication Design and Machining - Industrial 3D Printing - Laser Cutting 2018 USTCC Sportsman Class Champions - 2018 NASA ST5 National Champions
Lying on the ground to get my rear ISF sway bar flat thicknesses, I get 6.85 and 7.05 mm left vs right. However, the "flat" sections seem to be slightly concave and the actual thickness at the hole is a bit smaller. I think 6.0 mm should be a pretty safe thickness to ask from your machinist friend. At worst you'll need to take a few minutes to knock off a few mics with a metal file.
Huge thanks for those measurements! I was away from my car for the week, so unable to measure myself.
Regarding rear camber, I came across this thread in my search. I was planning on going the SPC (SPC67510) route once I order my coilovers. It sound like if you don't go too low, you shouldn't have issues with toe like Iamsam did. At least that's what Bgw reported.
Are you running the SPC UCA's too? Or was your front camber fine without them? If you're interested, you can get them from Rock Auto for under $300 for the pair. MEVOTECH CMS861207 is the same as SPC 722701.
FWIW the rear sway bar hole is 12.9mm, the factory endlink for an IS-F is M12 which will come in around 11.8mm. So that is our basis of the spacer design.
__________________ Redefining Lexus Aftermarket Parts Since 2001 -- We are your Lexus suspension experts--
BCR - KW - PENSKE - OHLINS - HKS - GREDDY - STANCEPARTS
Links - Arms - SuperPro Poly Bushings - Solid Bearing Conversions - Motor Mounts
RB BBK's and 2P Rotors, G-Loc pads, Radium Fuel Systems
Custom Fabrication Design and Machining - Industrial 3D Printing - Laser Cutting 2018 USTCC Sportsman Class Champions - 2018 NASA ST5 National Champions
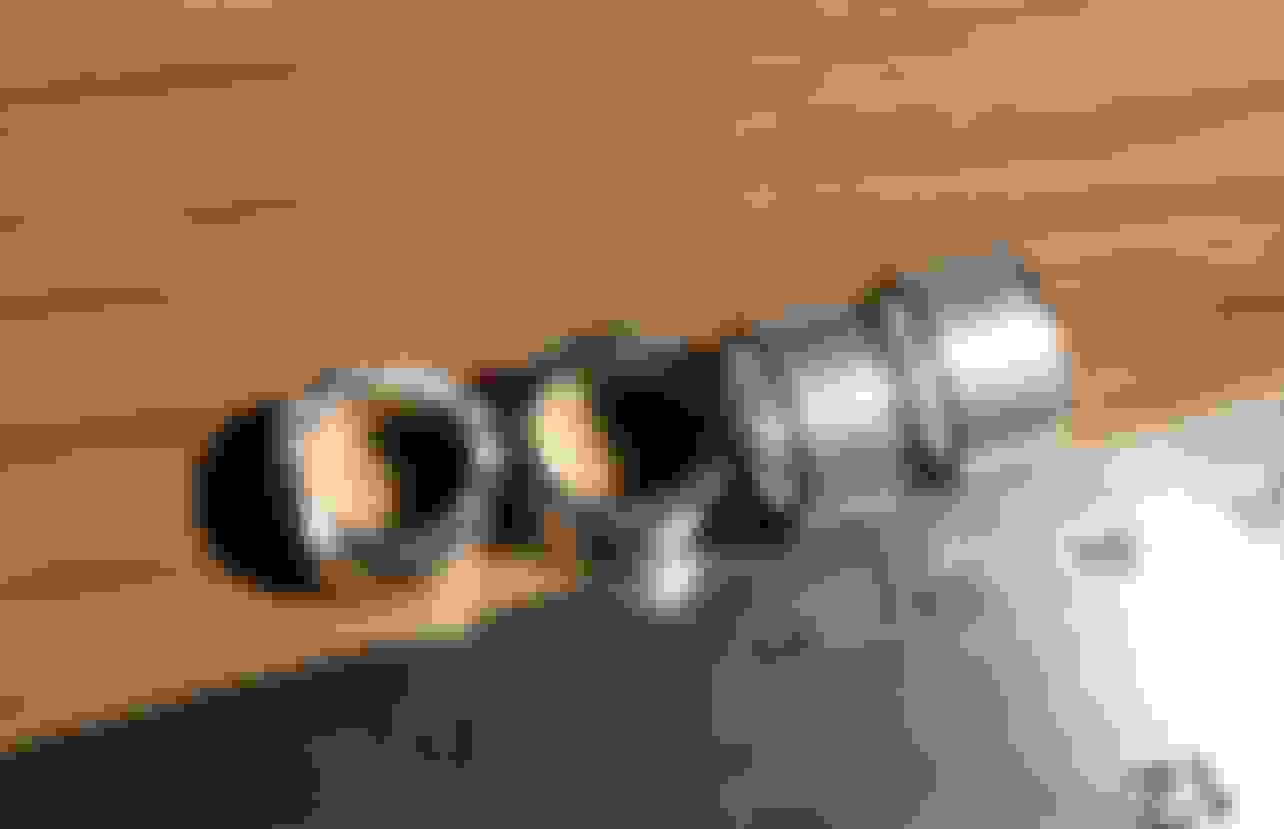
These are what my DIY aluminum reduction bushings look like when sliced off the tubing with a hacksaw. Didn't need to be fancy or pretty. You can't see them once installed.
I adjusted length atop a metal file until flush with sway bar flats. Don't want them too long or nut and stud won't engage against the actual sway bar.
BTW, don't final insertion until AFTER you have passed the sway bar into position. You don't want one to drop out and disappear for a while.
Posting this because related threads can get detached form each other on the forum.
In case anybody follows makes the aluminum reduction fittings like mine....
My car developed a difficult to track down, intermittent soft clink noise in the rear that would SOMETIMES occur at <15 mph and only on very shallow road surface changes. During my workup for the noise, I checked the rear sways with vigorous pushing/pulling of its ends. I therefore ruled out the rear sway bar as the noise source. 6 weeks of searching and fixing up various things that might be the noise source yielded no resolution. Eventually, obtained a Steelman ChassisEar and that finally narrowed the noise to be the rear sway bar. That hunt is covered in https://www.clublexus.com/forums/sc4...se-solved.html
Tips to avoid this clink noise issue.
1. Be sure to make your reduction fittings shorter than the sway bar is thick. Shorter allows the stud and nut to tightly engage the actual sway bar, not the the reduction fitting. My issue was mostly the nut not being tight enough to prevent slipping.
2. Mushroom the aluminum reduction fitting slightly by standing them on end upon an anvil. Then hit end lightly with a hammer. I mushroomed mine to be press fit into the rear sway bar bolt hole and tight around the link's stud. The stud and its nut can readily press the mushroomed fitting into the sway bar. Tighter fit reduces risk of motion even if stud nut is looser.
3. Torque up the sway bar link's stud and nut tight so it sway bar cannot slide beneath the nut's surface. This was my main problem.
4. Check for adequate tightness of the links with the sway bar bracket (of the side being checked) DETACHED. Listen for a click as you push/pull the tie stud connection. I specify detached because my sway bar to stud connection made no noise with manual manipulation while both brackets were attached. Only with a bracket detached could I elicit a click with manual manipulation.
That was my problem as well after I first installed the ISF bar. When I re-torqued them back to spec, I added blue Locktite to keep them in place.