
Metal Pedals Installed w/pics
 04-25-06, 10:18 PM
#1

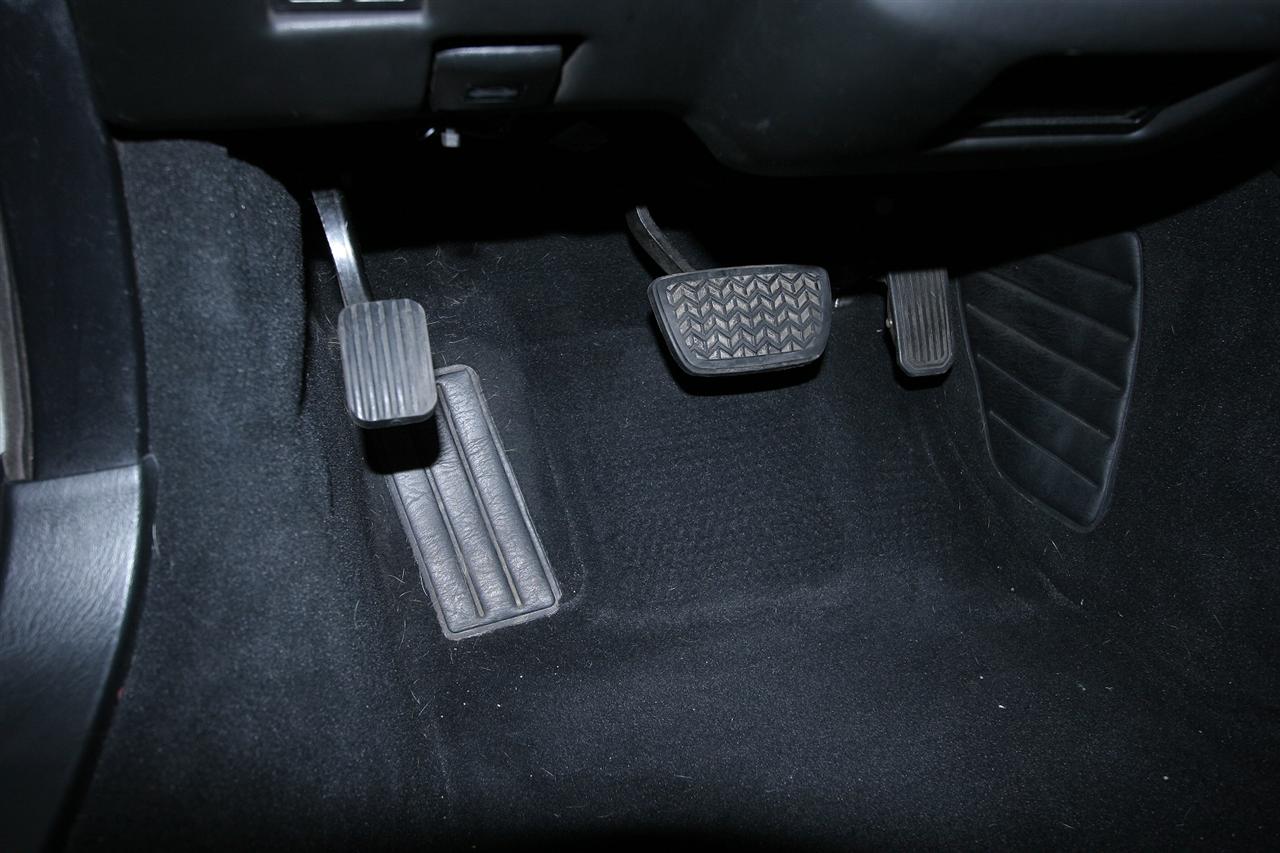
I got around to installing these this evening after work. I picked them up off of Ebay after viewing other positive posts here . I paid around $100 for the entire set. Took 2 days to get to my door. 
Quality is pretty good. Couple of pointers-lay a flashlight behind the pedals to line up the holes on the pedals. I recommend removing the gas pedal for installation as it is much easier.Use a flat head screwdriver to remove the small pushed on nut on the pedal and slide out the hinge bar. Use a mirror to look at the back of the gas pedal to see how the spring is orientated first. Also one of the bolts for the gas pedal may interfere with the rotate function of the pedal. I just cut off the excess bolt from the other side with a dremel. Problem solved. I also recommend lock tight for the nuts.
For the dead pedal you have two options. Use the screws with the kit and make permanent holes in the plastic area of carpet or cut off the top of the screws, silicone onto the pedal, and use strong double sided tape to adhere to the carpet.
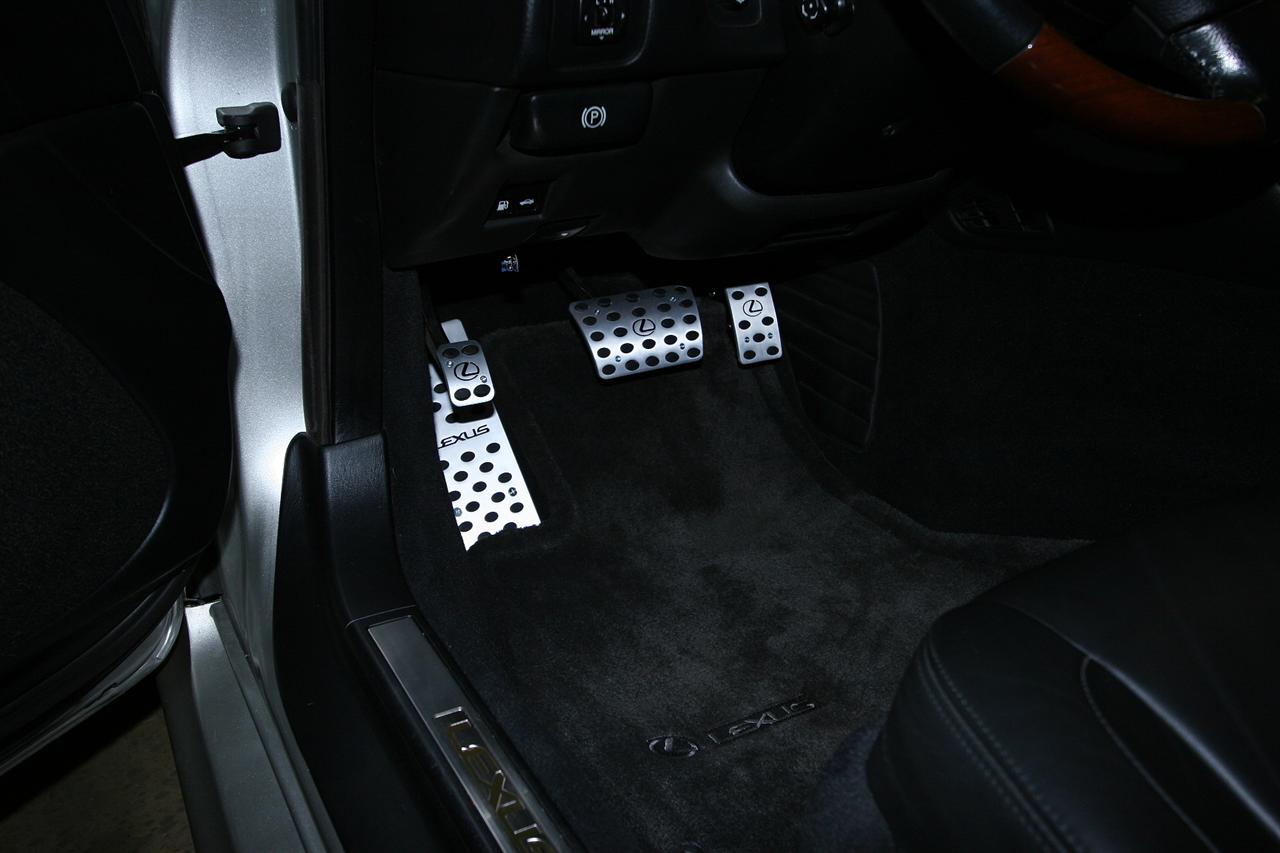
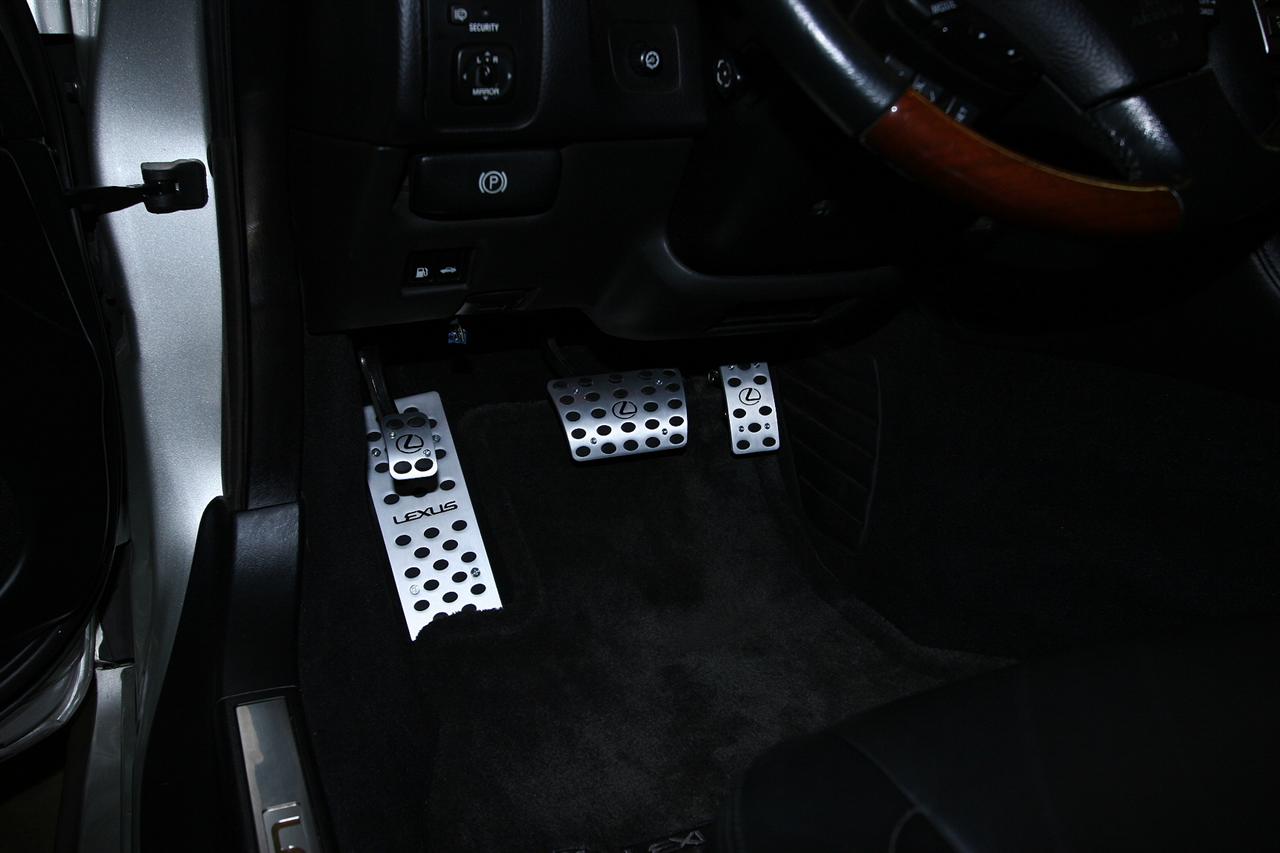
I must say that this looks much better in person vs the pics. Very sporty yet not bling or over the top, at least to me. Expect around 1-2 hr install time.
I do like the fact that the gas pedal is larger.Feel is about the same but keep in mind that the SC has been on jack stands for a few days while I have bumpers painted, custom caliper brackets made, etc.....so I have not driven the car with the new pedals yet. But it does feel good at idle.
Also before someone asks, they do not get stuck on the carpet.
Tools needed:
1) Flashlight
2) Drill with bits, shorter the drill the better as the top can hit the lower dash and prevent a straight shot
3) Flat head screwdriver
4) White out or something to mark the holes
5) Allen head wrench is included in this kit
6) Needle nose or regular small pliers to hold tiny nuts on the back while tightening
7) Lock tight
8) Vacuum cleaner
Lee

Quality is pretty good. Couple of pointers-lay a flashlight behind the pedals to line up the holes on the pedals. I recommend removing the gas pedal for installation as it is much easier.Use a flat head screwdriver to remove the small pushed on nut on the pedal and slide out the hinge bar. Use a mirror to look at the back of the gas pedal to see how the spring is orientated first. Also one of the bolts for the gas pedal may interfere with the rotate function of the pedal. I just cut off the excess bolt from the other side with a dremel. Problem solved. I also recommend lock tight for the nuts.
For the dead pedal you have two options. Use the screws with the kit and make permanent holes in the plastic area of carpet or cut off the top of the screws, silicone onto the pedal, and use strong double sided tape to adhere to the carpet.
I must say that this looks much better in person vs the pics. Very sporty yet not bling or over the top, at least to me. Expect around 1-2 hr install time.
I do like the fact that the gas pedal is larger.Feel is about the same but keep in mind that the SC has been on jack stands for a few days while I have bumpers painted, custom caliper brackets made, etc.....so I have not driven the car with the new pedals yet. But it does feel good at idle.
Also before someone asks, they do not get stuck on the carpet.
Tools needed:
1) Flashlight
2) Drill with bits, shorter the drill the better as the top can hit the lower dash and prevent a straight shot
3) Flat head screwdriver
4) White out or something to mark the holes
5) Allen head wrench is included in this kit
6) Needle nose or regular small pliers to hold tiny nuts on the back while tightening
7) Lock tight
8) Vacuum cleaner
Lee
Last edited by Pearlpower; 11-23-09 at 11:48 PM.


 04-25-06, 11:04 PM
#4
Originally Posted by Pearlpower
Thanks Henry. What I like is that the logos are recessed so they will not wear off. I now have something else on the car to keep clean. 
 04-26-06, 04:52 AM
#6
Very nice look Lee! I saw these on ebay, but as always, I was concerned about quality.
Are they stainless steel, aluminium, or alloy?
Are they rigid or flexable?
Did you have to cut the carpet at the bottom of the dead pedal?
Great job. You are the trendsetter. Thanks for the install tips.
Are they stainless steel, aluminium, or alloy?
Are they rigid or flexable?
Did you have to cut the carpet at the bottom of the dead pedal?
Great job. You are the trendsetter. Thanks for the install tips.
04-26-06, 05:47 AM
#7
Driver School Candidate

Join Date: Sep 2005
Location: MD
Posts: 23
Likes: 0
Received 0 Likes
on
0 Posts
That looks greattt but one question though, does the new pedals you bought go right on top of the old ones and you just drilled it into the orginal pedals?
yeah great work mannn deff. a trendsetter
yeah great work mannn deff. a trendsetter
Trending Topics
04-26-06, 07:11 AM
#8
Thanks guys.
To answer your questions, these go on top of the metal portion of the old pedals. Removal of the old rubber pieces is required and these are lined up and the holes marked ,drilling is required. The nuts and bolts go through the metal so these are not going anywhere or sliding off.
Sorry, I should have taken a pic of the bare pedals as well. Perhaps someone can provide that if they perform this mod.
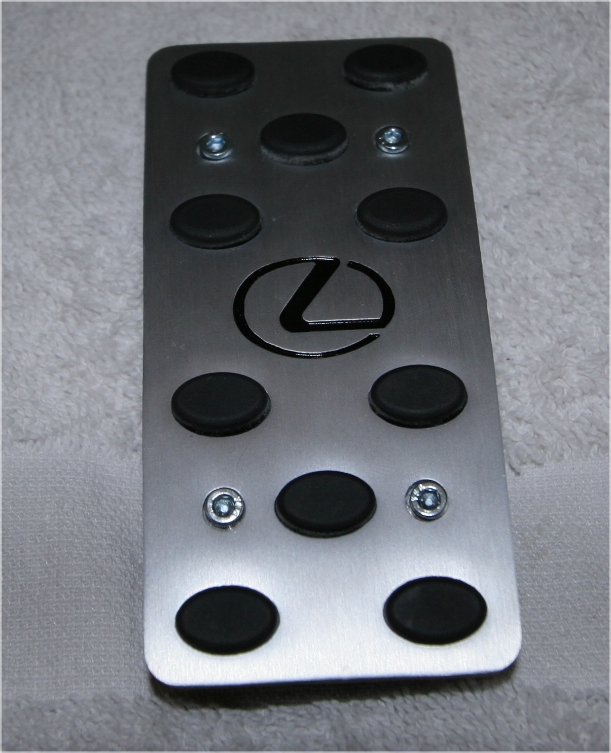
There is no flex as these pedals are nice and thick aluminum and very solid.
For the dead pedal Billy no cutting of the carpet was required.
I had to take a look at it a few more times last night and then this morning and I am still very satisfied with these. Looks great and the wifey actually approves of this mod. But then she approves of most of the mods once I explain the benefits . Headers took a while longer to convince her though.
To answer your questions, these go on top of the metal portion of the old pedals. Removal of the old rubber pieces is required and these are lined up and the holes marked ,drilling is required. The nuts and bolts go through the metal so these are not going anywhere or sliding off.
Sorry, I should have taken a pic of the bare pedals as well. Perhaps someone can provide that if they perform this mod.
There is no flex as these pedals are nice and thick aluminum and very solid.
For the dead pedal Billy no cutting of the carpet was required.
I had to take a look at it a few more times last night and then this morning and I am still very satisfied with these. Looks great and the wifey actually approves of this mod. But then she approves of most of the mods once I explain the benefits . Headers took a while longer to convince her though.
Last edited by Pearlpower; 04-26-06 at 07:19 AM.

 Looking good..

 they look hottt
  04-26-06, 10:17 AM
#13
Originally Posted by DChuka
Man! I love the look!
Any issues concerning the pedals being slippery when wet?
Any issues concerning the pedals being slippery when wet?
I have not driven the car with it for the reasons above but each pedal does have thick hard rubber on the surface so I do not think slipping would be an issue. I played with them this morning pretending as if I was driving and they felt really good.
I am sure these will fit most if not all auto equipped Lexus's. They bolt on the existing pedal unlike some other aftermarkets that have a bracket that loops around that allows the pedal to come off or get loose. These are directly bolted on. More work but worth the piece of mind.
04-26-06, 10:28 AM
#14
Lexus Test Driver

dang, I saw these on ebay a couple of weeks ago and I was going to get them. But I never thought it would look so nice on your car, Pearlpower. great job.
i'm kicking myself in the (you know what) right now.
I guess it was never meant to be for me.
i'm kicking myself in the (you know what) right now.
I guess it was never meant to be for me.
Last edited by martini3; 04-26-06 at 10:31 AM.