
My First DIY gated shifter wood trim
 11-25-14, 11:37 PM
#1
Racer
Thread Starter
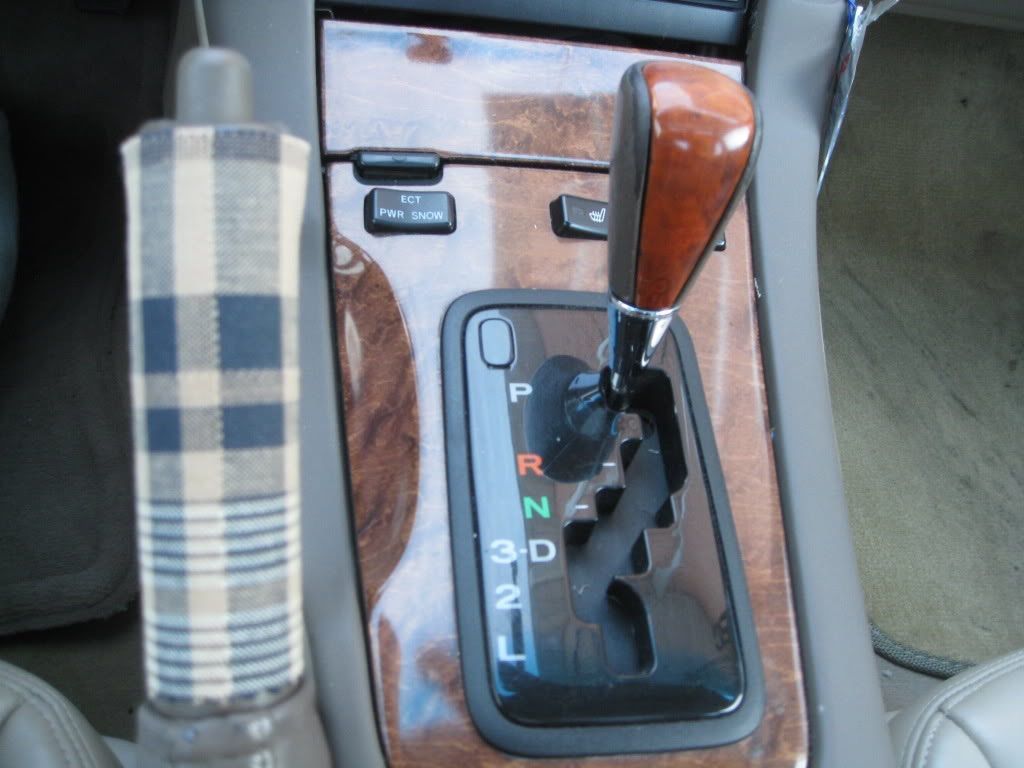
I did this a little while ago and thought I should do a write up to show you all the steps I took to renew my wood trim around shifter and shift **** also, please note my shifter doesn't look the best because it's worn out from daily driving so much couldn't be done. I didn't take pics of the method I used however here is the details and products I used for the transformation
First-wipe down the surface with a wet cloth using small amount of Meguiars Gold Class Shampoo to lift any dirt or oils off the surface.rinse and ring out so it isn't soapy
Second-tape off everywhere so you don't get any excess in any creases.
Third- use a dime size of 3m rubbing compound on a terry towel and rub it in until it's completely covered evenly ,then you wait a little let it sit for 2 mins and then you buff it off with a clean towel
Fourth-apply a polish of your choice to it you rub it in with medium pressure then you can add mothers polishing glaze to add more depth for a new look then you wipe it down with a damp cloth to clean up around the area
Fifth add a sealant on top my choice was the Detailers Pro Poli-Coat Paint Sealant I
before do not mind the fur wry cloth was just getting some ideas
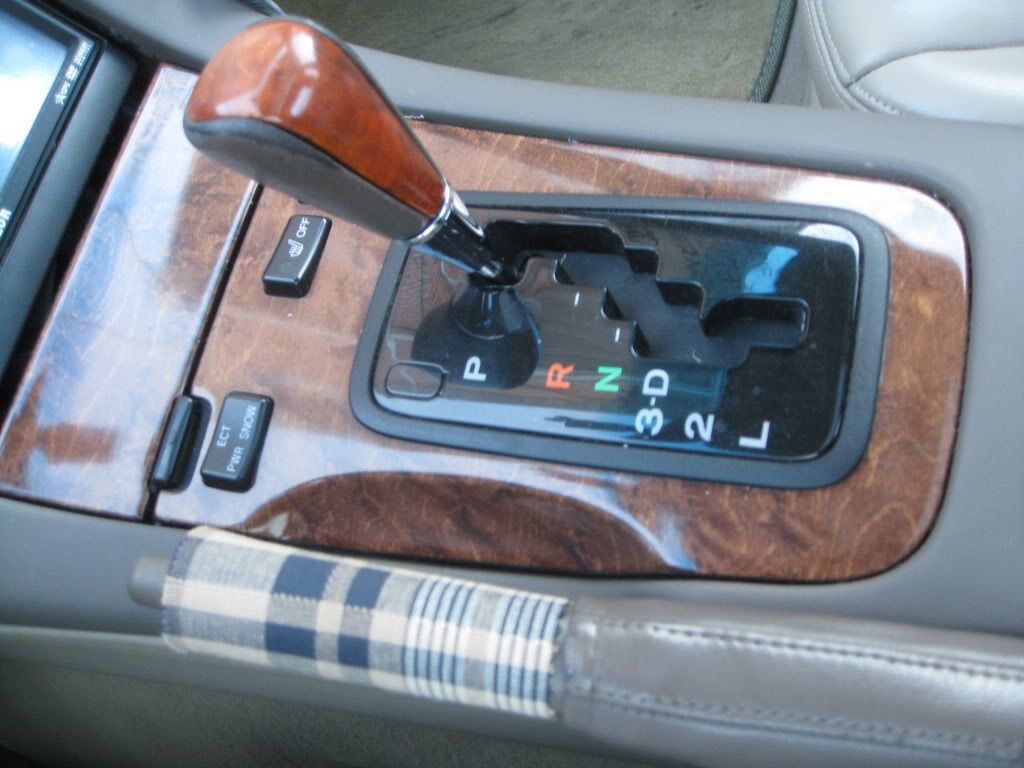
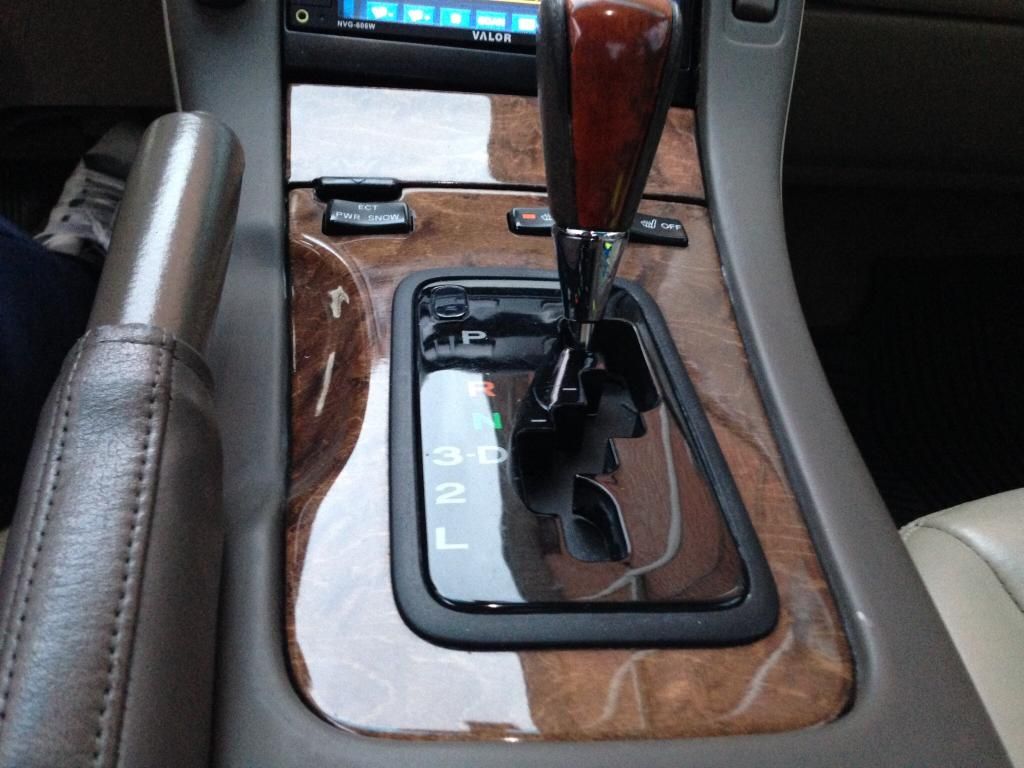
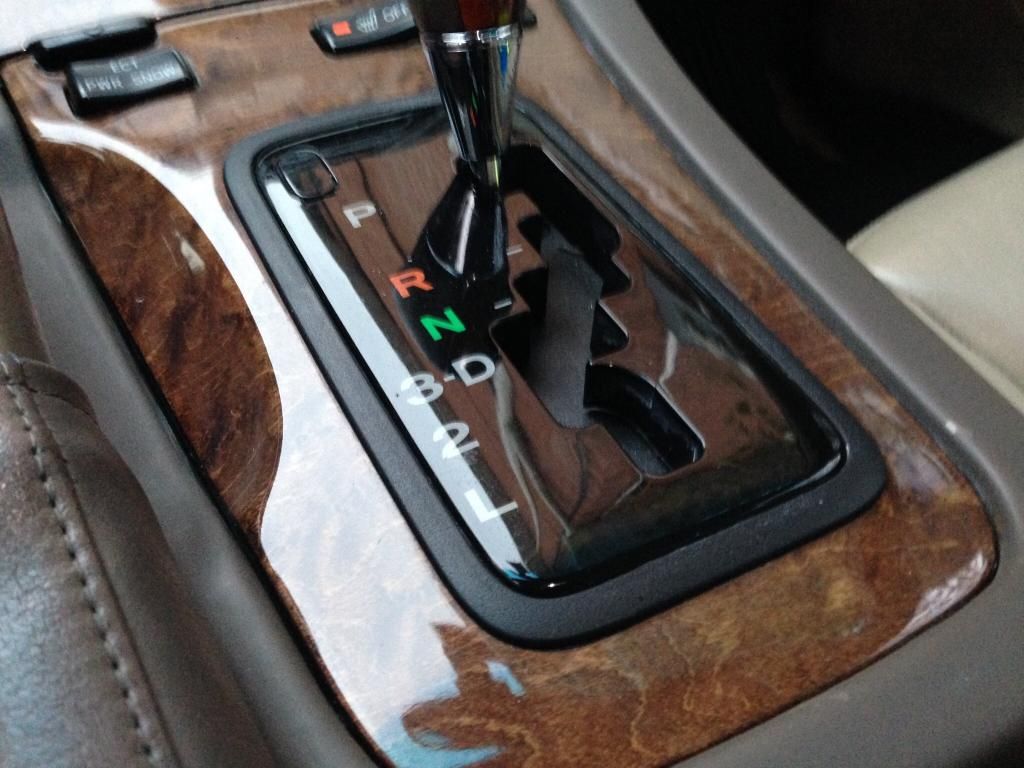
Here's the after results
pleaee let me know if you have a better or easier solution to this process let me know what you think next mission is the seats overhaul stay tuned
First-wipe down the surface with a wet cloth using small amount of Meguiars Gold Class Shampoo to lift any dirt or oils off the surface.rinse and ring out so it isn't soapy
Second-tape off everywhere so you don't get any excess in any creases.
Third- use a dime size of 3m rubbing compound on a terry towel and rub it in until it's completely covered evenly ,then you wait a little let it sit for 2 mins and then you buff it off with a clean towel
Fourth-apply a polish of your choice to it you rub it in with medium pressure then you can add mothers polishing glaze to add more depth for a new look then you wipe it down with a damp cloth to clean up around the area
Fifth add a sealant on top my choice was the Detailers Pro Poli-Coat Paint Sealant I
before do not mind the fur wry cloth was just getting some ideas
Here's the after results
pleaee let me know if you have a better or easier solution to this process let me know what you think next mission is the seats overhaul stay tuned
Last edited by boostinsc; 11-26-14 at 08:14 AM.
 11-26-14, 06:40 PM
#3
Racer
Thread Starter
Thanks for the reply Kbb I guess I didn't want to go through all that trouble of removing it so I did it as best as I possibly could.and it's truly amazing the differnce it made. Will try to get some better pics up and with flash on
11-26-14, 08:08 PM
#5
Racer
Thread Starter
Am very glad I was able to inspire somebody who is interested in doing this also good luck on your restoration looking forward to seeing your new and improved look.
11-26-14, 10:16 PM
#6
Looks really nice. I was wondering how to clean mine up because it's really dull right now. I had considered using a headlight polish kit because it comes with the sealant but I'll try your method first.
Trending Topics
12-01-14, 10:29 AM
#12
Pole Position

iTrader: (1)

Join Date: May 2014
Location: Orlando, Florida
Posts: 243
Likes: 0
Received 0 Likes
on
0 Posts

Thread
Thread Starter
Forum
Replies
Last Post