
Daizen Steering Rack Bushings Install *56K Warning*


How does this piece get replaced?
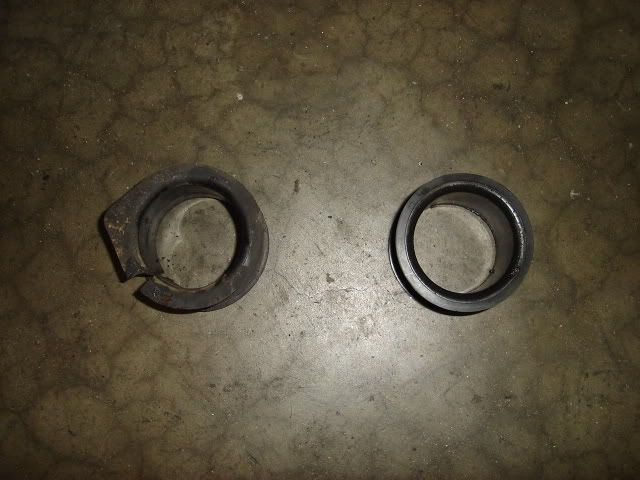
I see taking it off is easy since the original one is cut,
but the new one looks like a complete uncut circle or rubber...
how does it get slipped on?


Lexus Champion
Joined: Aug 2006
Posts: 1,650
Likes: 2
From: In
I was sure my 95 400 needed rack bushings because of wander on uneven pavement, but today I finally got time to get under it, the bushings were all comp. dry and I used a pry bar on both ends and there was no precievable play. While I was looking around I noticed one of the front tires had worn prematurally on the inside, sounds like an allignment issue for me. Nice DIY.
Lead Lap
Joined: Feb 2003
Posts: 736
Likes: 0
From: Florida
I just installed the rack and control arm bushings this past weekend WITHOUT a lift and i found it impossible with regular hand tools to reach the rear rack bushing. Its good that you mention that you dont need to realign after installing the bushings because i just had it aligned and i'll have to wait until the car is being swapped in january to use a lift.


Pole Position
Joined: Dec 2001
Posts: 378
Likes: 0
Just thought I would bump this up to say that you will need a 17mm deep socket to remove the bolts. You may want to also use a 17mm box wrench to hold the nut in position while you turn w/ the socket.
See the metal washer that holds the bushing in place, in the 2nd picture? (The large oversized one that covers the entire diameter of the bushing). For some reason, mine was missing. So I used a metal washer that was of similar size and adapted it for use. Just thought I would mention this, as I had to Kragen and Home Depot to find a suitable metal washer...only for my neighbor to provide me w/ two...which I filed down to fit.
I also decided to grease the bushings, as I noticed the area covered by the single large diameter bushing above (the one that holds down the steering rack piece), had rubbed to remove the "black" coating revealing a "shiny" metal surface.
This job would've probably taken anywhere between 30 minutes to 45 minutes at most, had I not run into complications. My rubber bushings were gone. Only the metal inserts were remaining. Once the bushings were installed, my steering wheel is fine again. No alignment needed.
A very easy job for anyone w/ the tools mentioned above.


Driver School Candidate
Joined: Nov 2006
Posts: 38
Likes: 0
From: tx
has anyone who has replaced their rack bushings noticed a clunking in the front end dissappear after installation?
i have a clunking in my front end that i dont know really what is causing it.
i figure i might try this to remedy it
i have a clunking in my front end that i dont know really what is causing it.
i figure i might try this to remedy it