When you click on links to various merchants on this site and make a purchase, this can result in this site earning a commission. Affiliate programs and affiliations include, but are not limited to, the eBay Partner Network.
First off, this is a tremendous DIY and I greatly appreciate your efforts alchemist. New to the RX330 world...bought a high mileage (190,000) 2004 in fabulous condition. But I can see myself doing this operation in the near future.
My question regarding the castle nut...wouldn't it be easier to use a pickle fork and drive the lower ball joint down with it to allow the castle nut the room it needs to be removed? For some reason I'm a little scared of pulling the hub off of the drive shaft.
And THANK YOU alchemist for your efforts. I used your spark plug DIY to replace the plugs and valve cover gaskets...it was invaluable and really took any fears I might have had away.
Another +1 for your write up of this Alchemist. My rack is bad and I need to replace it and the outer tie rod ends. The lower arm bushings are bad so I'm having this done while its all apart.
Thinking of doing struts too. Heard that I should get the complete assemblies. Any brands recommended while I'm assembling parts?
First off, this is a tremendous DIY and I greatly appreciate your efforts alchemist. New to the RX330 world...bought a high mileage (190,000) 2004 in fabulous condition. But I can see myself doing this operation in the near future.
My question regarding the castle nut...wouldn't it be easier to use a pickle fork and drive the lower ball joint down with it to allow the castle nut the room it needs to be removed? For some reason I'm a little scared of pulling the hub off of the drive shaft.
And THANK YOU alchemist for your efforts. I used your spark plug DIY to replace the plugs and valve cover gaskets...it was invaluable and really took any fears I might have had away.
I did extactly this, used a pickle fork and walked castle nut off and ordered arm with a ball joint. Hint remove new ball joint from arm before installing and after arm is installed, than install ball joint. I left axle in and threaded ball joint a little at a time with hub. However applying torque is impossible, but decided that wrenching until real tight, and aligning cotter key is sufficient. Just did this last weekend. The write up is excellent.
Another +1 for your write up of this Alchemist. My rack is bad and I need to replace it and the outer tie rod ends. The lower arm bushings are bad so I'm having this done while its all apart.
Thinking of doing struts too. Heard that I should get the complete assemblies. Any brands recommended while I'm assembling parts?
I used MOOG control arm with Ball joints from RockAuto....priced under $49 apiece...
After doing my rear wheel bearings and new brakes, I still have some vibration at higher speeds. So I may have to continue towards the front.
It's my wife's car but I've been driving it for a few days. Noticed when I hit some big bumps that I heard (and felt) some harsh banging up front. I can only assume the bushings need to be replace now.
While you were in there, does it make sense to also replace the bearings and wheel hub at the same time?
Did you also replace the two (I'm guessing based off of Amazon), stabilizer arms?
I'm at $288 in parts to replace everything (hub, bearing, nut, lower control arm with ball joint and stabilizer arms)....for both sides. Moog and Timken.
I finally downloaded your write-up....very impressive! Thank you for all the step by step pics. That's going to really help.
So, I do a quick scan and see some YouTube video by "Scotty Kilmer" replacing the lower control arm on a Lexus RX. He had no mention of an engine lifting....he just did it with a breaker bar. Is there any difference in FWD and AWD? I'll have to look at it more closely as my parts arrive but just wondering why he did it so fast?!?
Everything went just as instructed, thanks! I did have to raise engine....I don't know where that guy came up with his change out?!?
The only thing I did different was not take the dog bone arm all the way out. I just disconnected one end and was able to jack up the engine with no problem. Thanks Again!
I finally downloaded your write-up....very impressive! Thank you for all the step by step pics. That's going to really help.
So, I do a quick scan and see some YouTube video by "Scotty Kilmer" replacing the lower control arm on a Lexus RX. He had no mention of an engine lifting....he just did it with a breaker bar. Is there any difference in FWD and AWD? I'll have to look at it more closely as my parts arrive but just wondering why he did it so fast?!? https://www.youtube.com/watch?v=R62cw--wl1E
I'm pretty sure that's a first gen RX he's working on, so that may be different. Also, Scotty has been known to gloss over details every now and then - it's tough to be comprehensive in a 2 minute video.
I did extactly this, used a pickle fork and walked castle nut off and ordered arm with a ball joint. Hint remove new ball joint from arm before installing and after arm is installed, than install ball joint. I left axle in and threaded ball joint a little at a time with hub. However applying torque is impossible, but decided that wrenching until real tight, and aligning cotter key is sufficient. Just did this last weekend. The write up is excellent.
Thanks for the great write up Alchemist! I have followed the steps and managed to get the arm out. I am based in the UK so it�s my driver side ( your passenger side) that I did. I saw crack in the rubber when jacking up the car hence replacing it.
Once the bush was out I was quite shock by the crack intensity so thought maybe the previous garage put the orientation wrong. I have attached a photo below, does it looks ok? It�s not way out of sort right? Edit: struggle to attach photo, am trying to attach direct from my iPhone but didn�t work?
also I have bought a blue print new bush but the new bush steel surround is castellated (see 2nd photo), like the top of a round castle. I pressed my old one out using a short section of 2.5� pipe under a 12tonne press. But with the castellated blue print bush can I still use my pipe section? Will it bend the protruded part of the steel when pressed? Why did blue print made it like that? Must be a reason there, anyone know?
Last edited by aeroelasti; Sep 8, 2018 at 01:09 PM.
Reason: Photos
First - again big props to JT aka HTOWNBLUE - his advice and help by both email, text and phone was extremely helpful as this one is not for the faint at heart.
A common weak link in the 2nd gen RX is the lower A arm bushing. Between dealer and independent mechanics, you could spend $800-$1300 � so this fix can have huge savings for owners. For a DIY, some choose to purchase the entire A arm, I purchased only the bushings and had a shop press them in. My car has 116k miles (FWD) and have had a steering vibration for a year or so discussed here:
I encourage all who attempt this to change your ball joints at the same time � you�re already in there (that�s what she said). I also provide a step-by-step to do this as well.
Below is my experience in doing both replacements (both driver and passenger bushings and ball joints). I would rate it on a scale of 1-10 with 10 being most difficult probably an 8. Total time is ~5hrs. If I did it again it would take 3hrs. I like to break things down in two days � 1st day teardown and 2nd day build up and I would suggest this for others.
Disclaimer: Attempt at your own risk. This is the method that I found most useful and efficient � yours may differ and may not be the exact as described herein. As with any do-it-yourself project, unfamiliarity with the tools and process can be dangerous. This project should be construed as theoretical advice.***I will not be held responsible for any injury or engine failure due to the misuse or misunderstanding of this DIY project****.
Non-typical parts needed, including special tools:
22mm (7/8) wrench and socket
30mm deep well (12 point) socket
breaker bar
2 floor jacks
2 jack stands
penetrating oil
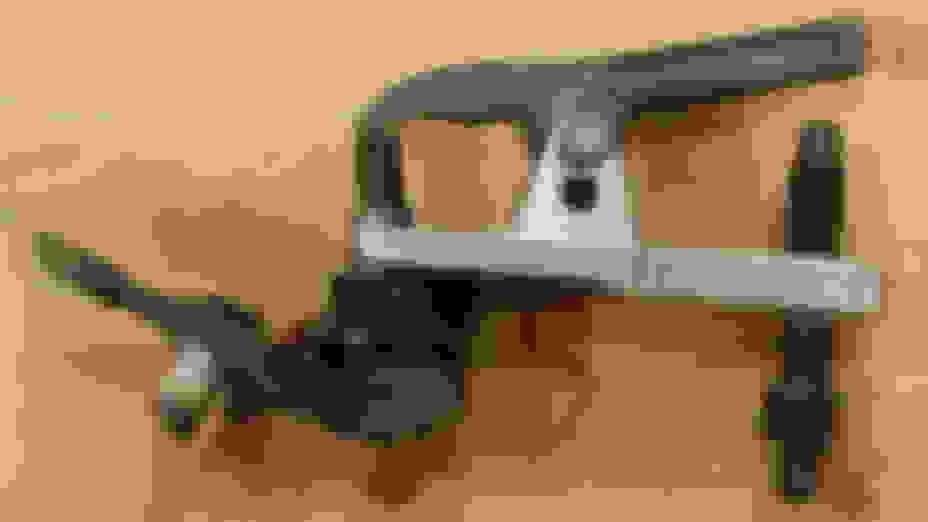
ball joint separator (Harbor freight)
2 new OEM bushings (ebay)
2 new ball joints (autozone)
My total cost in this was:
$50 bushings
$20 shop to press them in existing A arms
$50 for ball joints
$3 for 30mm socket
________________
~$120 all in
Here is a high level summary of the bushing and ball joint procedure:
1. Jack vehicle and remove front wheels. Remove dog bone engine mount
2. Remove nuts from both pass and driver side engine mounts
3. Remove nuts from front engine mount
4. Remove bolt from rear engine mount
5. Jack up engine using two jacks, one on oil pan and other on tranny pan
6. Completely remove only the side engine mounts
7. Remove both A-arms
8. Replace bushings
9. Reinstall A-Arms except for ball joint end
10. Remove passenger side caliper assembly, rotor, speed sensor
11. Remove passenger cv joint assembly nut with drivers wheel/tire on and on ground
12. Remove tie rod
13. With mallet hammer cv joint assembly back through spindle
14. Remove ball joint
15. Pull cv joint assembly back through spindle
16. Reinstall new ball joint and everything else
17. Add wheel/tire to passenger side and lower vehicle.
18. Repeat 10-17 on drivers side.
Feel free to add additional info in this thread.
*******23MB FILE IS ATTACHED BELOW WITH ALL OF THE PICS AND WRITEUP********
I'm getting ready to replace the control arms, ball joints and motor mounts on my RX. The write up on this thread looks like it covers all that. Does anyone know the torque spec of all the bolts that are encounter along the way of doing this service?
I was able to do the ball joint without taking the axle apart. An open end 19mm wrench worked fine for me to loosen the ball joint nut. I did have to use an extender to get more leverage. The lever on my floor jack works great for that. It's hollow and fits over most of my wrenches to give me an extra 2 feet of extension to any wrench. By far the hardest part of replacing the control arms, ball joints and motor mounts was getting the ball joint out. What I ended up doing was loosening the nut just enough to make a small gap between the knuckle and the nut and then using a ball joint separator like the one from Harbor Freight. The only problem was I could not get a good angle with the one from Harbor Freight. I think because the forked opening was only 3/4" which was too small. I ordered a similar one from amazon that had a 7/8" opening but I could just never get a good angle with either of them. Part of the problem is the distance between the forked part and the part that presses on the bolt has to be just right and the part that presses on the bolt has to be just the right shape to fit between the ball joint bolt and the axle. I finally got a perfect fit by using the bottom piece from one and the top piece from the other. Once I started tightening the screw on the separator I could not believe how much I was turning it and the force I had to apply. By the end I had to use a breaker bar. I was sure something in the separator was going to break but after a good 30 minute of carefully turning and checking from every angle that the separator was not going to break the ball joint finally broke free with an extremely loud pop. What a relief. After that it was fairly smooth sailing. To tighten the ball joint nut to spec I used a crows foot wrench attached to my torque wrench. If you angle the crows foot 90 degrees to the torque wrench you get the correct torque otherwise you have to lower the setting on your torque wrench to compensate for the extension of the crows foot.
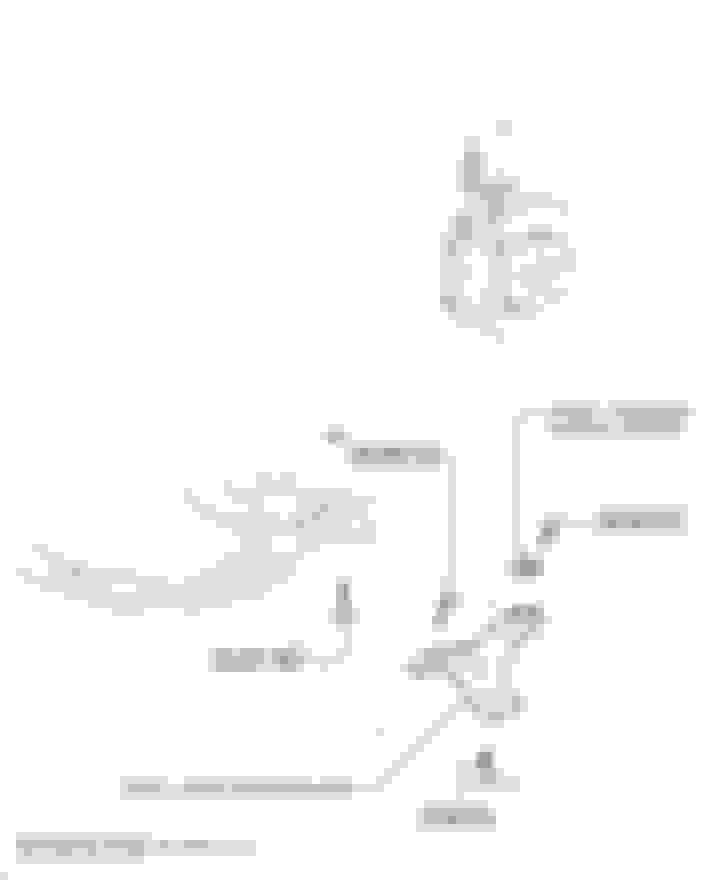
I could not find the specific torque specs for an RX but I did find it for a Highlander and other cars with 3MZ-FE engines. Here are the torques I used. Again I'm not sure these are right for an RX so you may want to search for yourself.
The 2 large bolts on the control arm toward the front of the car - 147 ft-lbs.
The large bolt on the control arm through the large bushing - 100 ft-lbs.
The 3 nuts/bolts between the control arm and the ball joint - 68 ft-lbs.
The ball joint castle nut - 90 ft-lbs.
Motor mount bottom nuts and any bolts on motor brackets connected to the engine - 47 ft-lbs.
Larger motor mount nuts at the top of each motor mount - 70 ft-lbs.
The nuts and bolts holding the engine shock absorber to the engine and frame 35 ft-lbs.
The dog bone bolts going through the round ends - 47 ft-lbs.
The larger dog bone bracket bolts (2 longer ones) - 47 ft-lbs.
The smaller dog bone bracket bolt - 23 ft-lbs.
The rear motor mount bolt holding the 2 pieces of the mount together - 47 ft-lbs
Here are some picture of where I got the torque values and a picture of the ball joint separator that I used.
Last edited by rlopez1024; Jul 26, 2019 at 11:36 AM.


 Jan 7, 2015, 12:32 PM