How to: Install JoeZ Intake 06+ 2IS


Thread Starter
Lexus Champion
iTrader: (10)
Joined: Dec 2007
Posts: 1,602
Likes: 3
From: Diamond Bar/Irvine, CA
 How to: Install JoeZ Intake 06+ 2IS
Since i didn't see any guides for this i guess i'd make one since i installed mine today. The included instruction didn't have any pictures so for future reference...
Tools needed:
1. Philips and/or flat head screw drivers
2. Small socket wrench w/ 8mm and 10mm w/ extension
What's in the box:
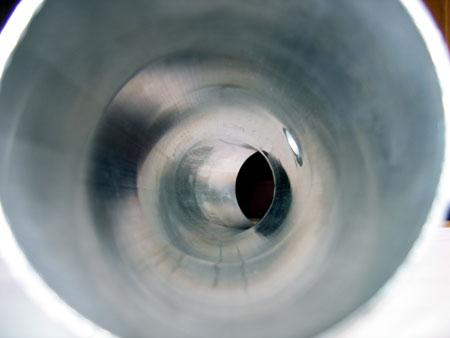
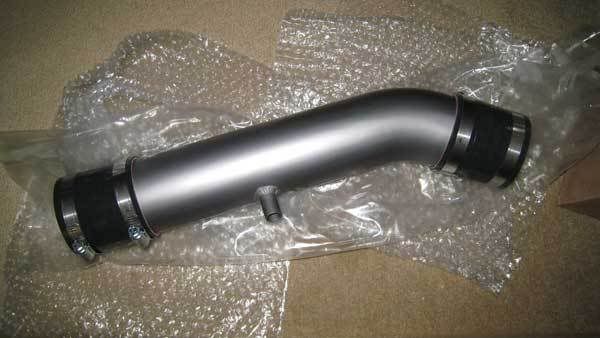
Your plan jane gunmetal JoeZ intake ready for install.
Step 1: (Optional) Loosen and remove the negative terminal on your battery or remove the fuse for the ECU.
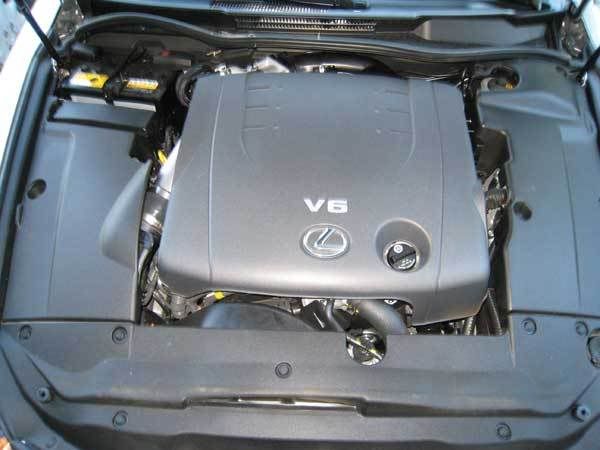
Step 2: Remove the large plastic engine cover. Just pull up on it and it pops right off.
Step 3. Remove the fasteners to remove the plastic cover by pressing down the middle of fastener. It should lock all the way down.
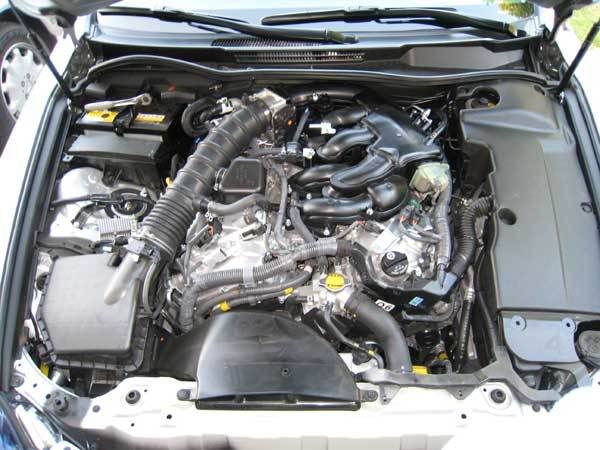
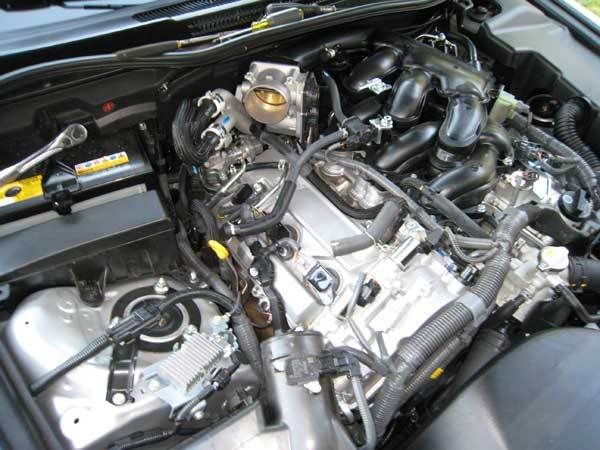
You should now have a stock bare engine bay
Step 4: With your screwdriver or 10mm socket wrench remove the top and bottom clamps. They will loosen but will not completely come off. Basically just loosen them enough so you can remove the tube. You will also need to remove the stock pcv vacuum line from the intake pipe by squeezing the little spring clamp. Remove only the vacuum line from the intake end only.
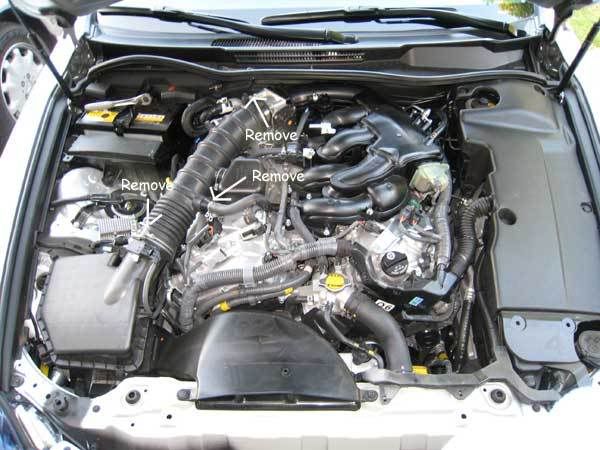
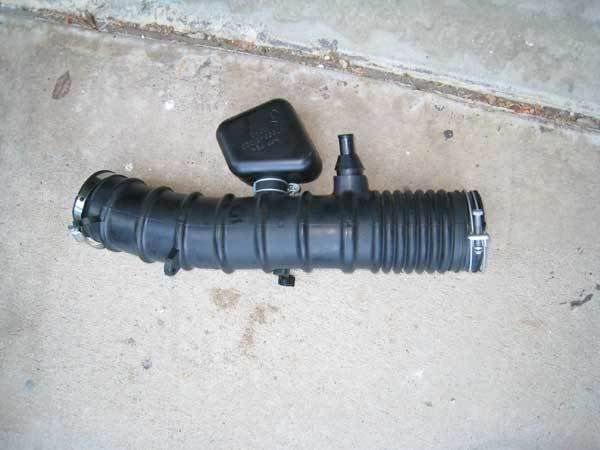
Step 5: With both hands remove the stock intake pipe by wiggling it back and forth from the air box and throttle body. The throttle body portion may require more elbow grease since it's sealed on pretty tight. Note: You do NOT need to touch any sensors on or around the air box. It will gently pop right off.
This is all you should have to remove.
Step 6: Now install the sleeve onto the throttle body first without the pipe being attached first with the clamp. DO NOT TIGHTEN THE CLAMP YET.
Step 7. Now put the pipe into the throttle body into the sleeve at a 90 degree angle.
Step 8. Now install the airbox portion with the second sleeve.
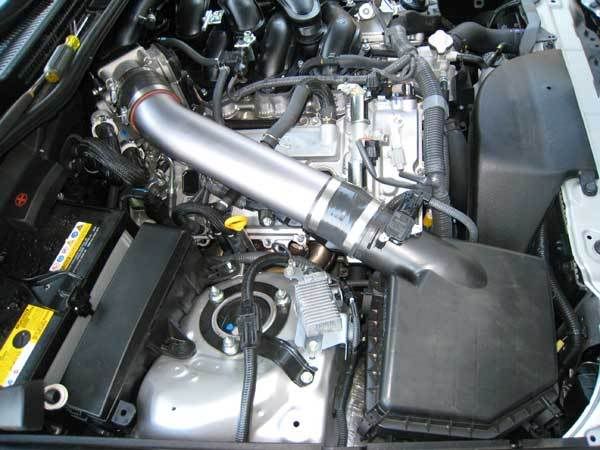
Step 9: Make sure neither end of the pipe is touching the throttle body or air box or you may have vibrations or chatter.
Step 10: Now that you have everything lined up tighten the clamps on each end of the sleeve. Make sure everything is nice and snug. DO NOT OVER TIGHTEN.
Step 11: Insert the end of the vacuum line over the new intake pipe nipple and squeeze the spring clamp back into place on the groove.
Step 12: Put the negative battery cable back if you removed it or put the fuses back in.
Step 13: Go start your car. It may stall on the first attempt and run rough for a couple seconds or minutes as the ECU relearns the new pattern. It is recommended to let it idle for about 5-10 minutes. Be sure all your accessories are OFF. (eg. radio, AC, etc.)
Step 14: Recheck your clamps are secure.
Step 15: Reinstall your engine cover by snapping it back into place. Reinstall your panel covers with the fasteners. The clips have to be "reset" in order for it to snap in again.
And enjoy your newly install JoeZ intake!
Notes: The car will need to relearn the Optimum Performance Levels so you will need to drive more or less 200 miles. This is normal and you will begin to feel performance gains in all ranges of RPM's.
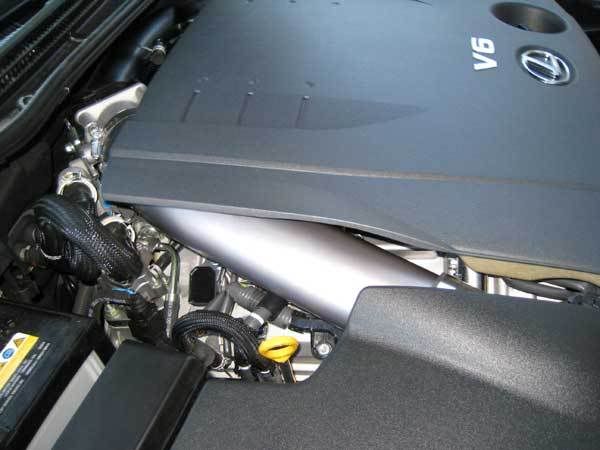
Complete installation time: 15-20 minutes.
Enjoyment time: Priceless
Special Thanks to JoeZ and Luis @ Carson Lexus!
Tools needed:
1. Philips and/or flat head screw drivers
2. Small socket wrench w/ 8mm and 10mm w/ extension
What's in the box:
Your plan jane gunmetal JoeZ intake ready for install.
Step 1: (Optional) Loosen and remove the negative terminal on your battery or remove the fuse for the ECU.
Step 2: Remove the large plastic engine cover. Just pull up on it and it pops right off.
Step 3. Remove the fasteners to remove the plastic cover by pressing down the middle of fastener. It should lock all the way down.
You should now have a stock bare engine bay
Step 4: With your screwdriver or 10mm socket wrench remove the top and bottom clamps. They will loosen but will not completely come off. Basically just loosen them enough so you can remove the tube. You will also need to remove the stock pcv vacuum line from the intake pipe by squeezing the little spring clamp. Remove only the vacuum line from the intake end only.
Step 5: With both hands remove the stock intake pipe by wiggling it back and forth from the air box and throttle body. The throttle body portion may require more elbow grease since it's sealed on pretty tight. Note: You do NOT need to touch any sensors on or around the air box. It will gently pop right off.
This is all you should have to remove.
Step 6: Now install the sleeve onto the throttle body first without the pipe being attached first with the clamp. DO NOT TIGHTEN THE CLAMP YET.
Step 7. Now put the pipe into the throttle body into the sleeve at a 90 degree angle.
Step 8. Now install the airbox portion with the second sleeve.
Step 9: Make sure neither end of the pipe is touching the throttle body or air box or you may have vibrations or chatter.
Step 10: Now that you have everything lined up tighten the clamps on each end of the sleeve. Make sure everything is nice and snug. DO NOT OVER TIGHTEN.
Step 11: Insert the end of the vacuum line over the new intake pipe nipple and squeeze the spring clamp back into place on the groove.
Step 12: Put the negative battery cable back if you removed it or put the fuses back in.
Step 13: Go start your car. It may stall on the first attempt and run rough for a couple seconds or minutes as the ECU relearns the new pattern. It is recommended to let it idle for about 5-10 minutes. Be sure all your accessories are OFF. (eg. radio, AC, etc.)
Step 14: Recheck your clamps are secure.
Step 15: Reinstall your engine cover by snapping it back into place. Reinstall your panel covers with the fasteners. The clips have to be "reset" in order for it to snap in again.
And enjoy your newly install JoeZ intake!
Notes: The car will need to relearn the Optimum Performance Levels so you will need to drive more or less 200 miles. This is normal and you will begin to feel performance gains in all ranges of RPM's.
Complete installation time: 15-20 minutes.
Enjoyment time: Priceless
Special Thanks to JoeZ and Luis @ Carson Lexus!
Last edited by XprincoX; Apr 22, 2008 at 11:19 PM.


Driver
Joined: Jan 2007
Posts: 126
Likes: 0
From: Ca
Woo!!! i jus recieved mine today.. installation was a piece of cake.. takes less than 10 mins.. sorta took me longer because i uninstalled the original tube and had to wait for UPS to drop the JoeZ off..
This should be added to the DIY section!!!!
This should be added to the DIY section!!!!

Pole Position
Joined: Nov 2007
Posts: 2,794
Likes: 0
From: Lake Country, WI

Lexus Fanatic
iTrader: (10)
Joined: Nov 2004
Posts: 13,441
Likes: 1,080
From: Under an IS F since 2008
Awesome post of the play by play install with photos... !!
Those Steps are very close in verabge to the install intructions..
But pictures are always better of course..
Thank You
Joe Z
P.S. - These steps can apply to the GS350 & GS450h as well........
Those Steps are very close in verabge to the install intructions..
But pictures are always better of course..
Thank You
Joe Z
P.S. - These steps can apply to the GS350 & GS450h as well........
Last edited by Joe Z; Apr 23, 2008 at 09:53 AM.

Lexus Fanatic
iTrader: (10)
Joined: Nov 2004
Posts: 13,441
Likes: 1,080
From: Under an IS F since 2008

Trending Topics


Thread Starter
Lexus Champion
iTrader: (10)
Joined: Dec 2007
Posts: 1,602
Likes: 3
From: Diamond Bar/Irvine, CA