My NA-T project... for all you picture *****s(56k... doubt it)
 01-13-09, 06:39 PM
#1
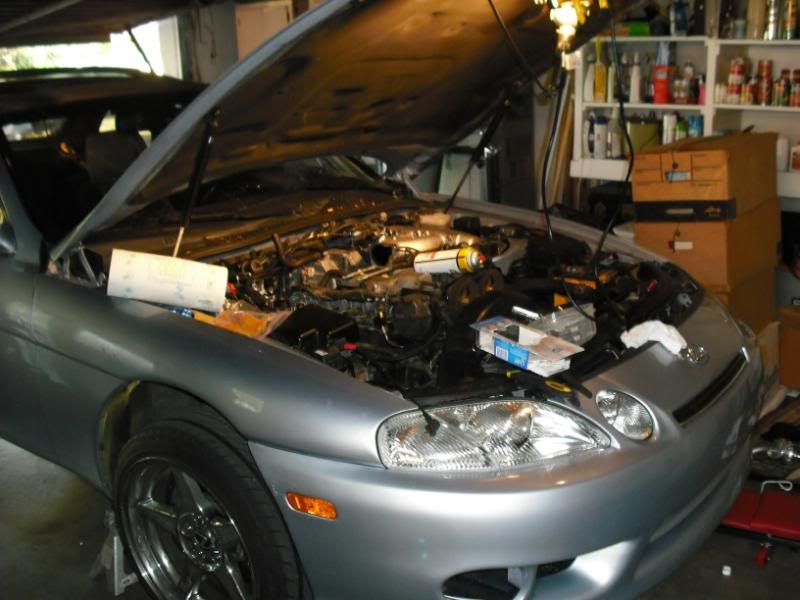
Last semester I purchased a Boostwerks (Dave H) t61 turbo kit from another CL member. It sat in my garage at home for a couple months while I was away at school. As I waited for winter break to roll around, I spent a lot of my time researching and buying the necessary parts to go na-t. The plan was to stay on stock fuel and only 8lbs of boost until a later date when money and time would allow me to upgrade the fuel system, install a thicker headgasket, and turn the boost up. For fuel management, I chose to go with MAP ECU1 even though I had heard bad things about it, I thought I might have better luck because the car is OBDII, which, I had heard, would be easier for me on an OBDII car. I was also planning on swapping the w58 out of my last car as well as the 4.09 ring gear, but I ran out of time before I had to come back to school, it’s just going to have to wait till summer break.
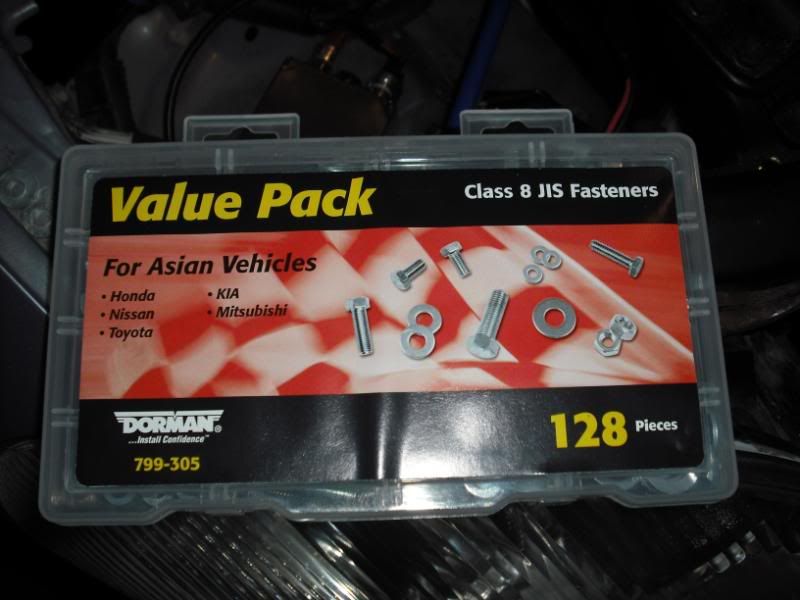
To anyone planning on going na-t and doing the work themselves, I suggest buying this:
To start off with, I chopped out the stock exhaust with a Sawzall… unfortunately I didn’t take pictures.
Next came time to remove the throttle body, exhaust manifold, and all those damn little sensors. The only issues I had removing the throttle body were two small coolant lines which connect underneath the throttle body assembly and are just long enough to fit and just short enough to cause me to cuss and swear throughout their removal and reassembly.
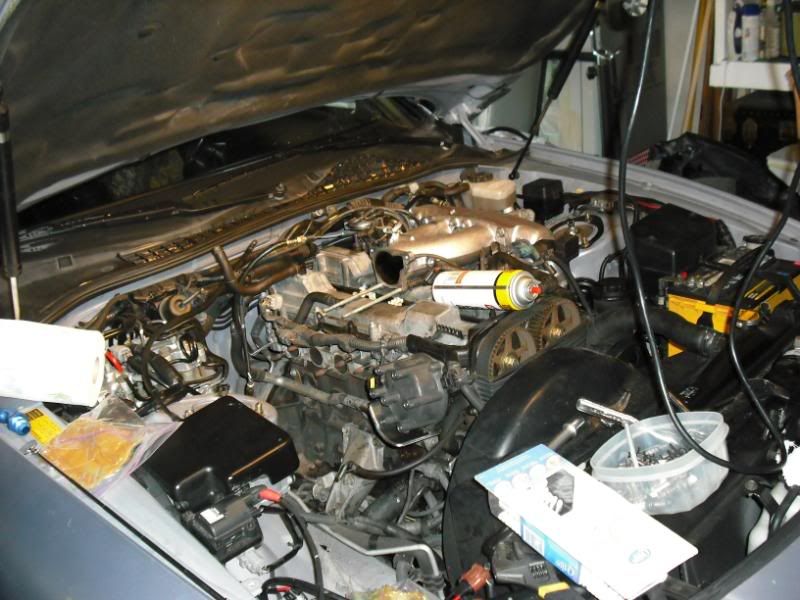
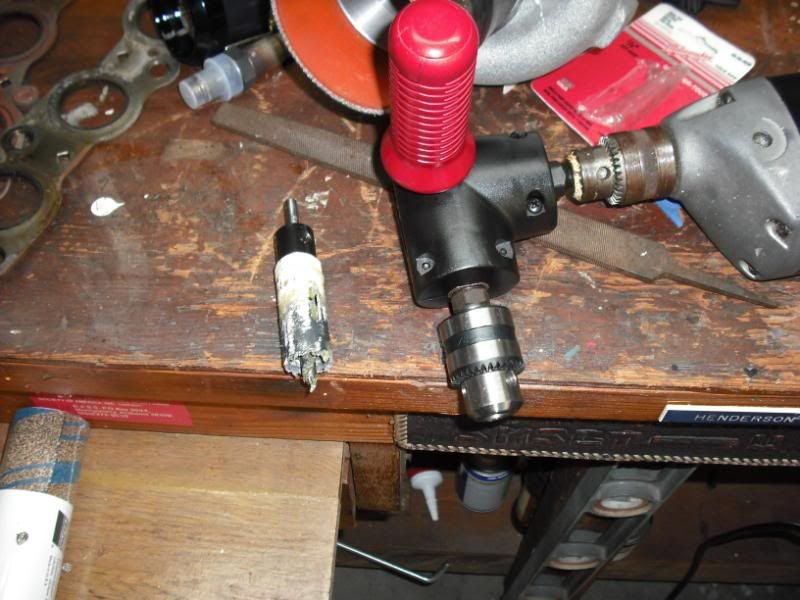
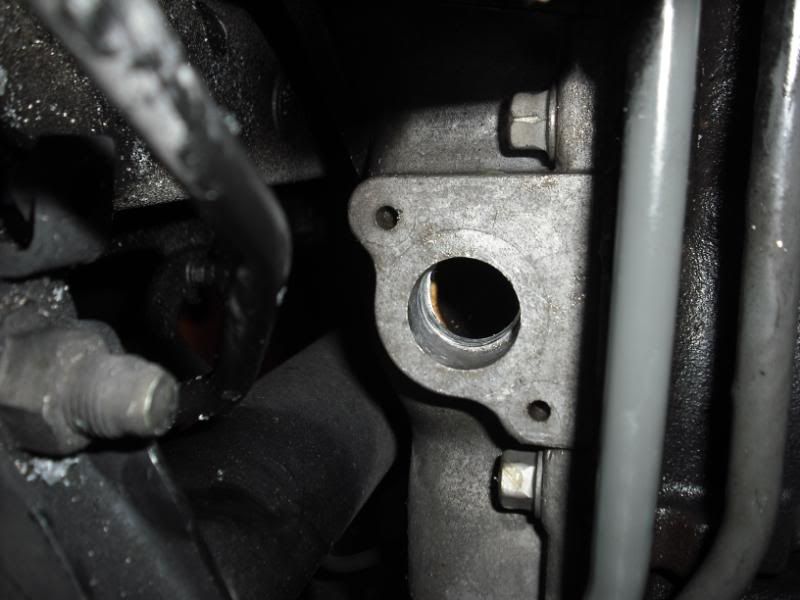
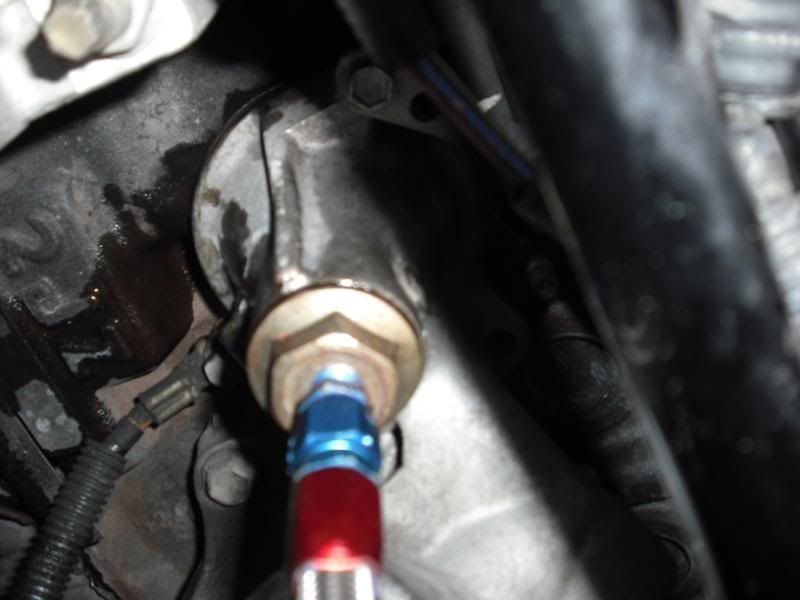
The next phase of the project was the scariest part for me… drilling the oil pan for the oil return line. I was bothered by the challenge that if I messed up in any way, chances are I would be pulling the motor to correct it. To lower the chances of getting metal shavings inside the motor and avoid a whole other level of frustration, I used a ****ton of lithium grease while drilling the hole to collect the shavings. I wasn’t sure exactly how thick the pan was that I was drilling into so I drilled about a quarter inch, then backed it out and cleaned the entire hole till it was completely free of shavings and then started the process over again. A 90 degree extension for the drill was necessary to get the right angle to drill the hole.
And the final product:
To anyone planning on going na-t and doing the work themselves, I suggest buying this:
To start off with, I chopped out the stock exhaust with a Sawzall… unfortunately I didn’t take pictures.
Next came time to remove the throttle body, exhaust manifold, and all those damn little sensors. The only issues I had removing the throttle body were two small coolant lines which connect underneath the throttle body assembly and are just long enough to fit and just short enough to cause me to cuss and swear throughout their removal and reassembly.
The next phase of the project was the scariest part for me… drilling the oil pan for the oil return line. I was bothered by the challenge that if I messed up in any way, chances are I would be pulling the motor to correct it. To lower the chances of getting metal shavings inside the motor and avoid a whole other level of frustration, I used a ****ton of lithium grease while drilling the hole to collect the shavings. I wasn’t sure exactly how thick the pan was that I was drilling into so I drilled about a quarter inch, then backed it out and cleaned the entire hole till it was completely free of shavings and then started the process over again. A 90 degree extension for the drill was necessary to get the right angle to drill the hole.
And the final product:
Last edited by CCC-TT; 01-15-09 at 12:22 PM.
 01-13-09, 06:41 PM
#2
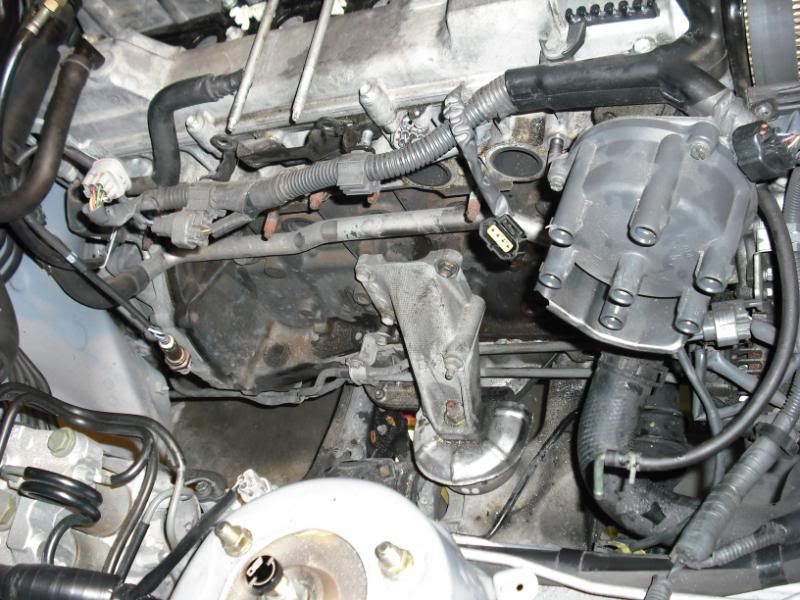
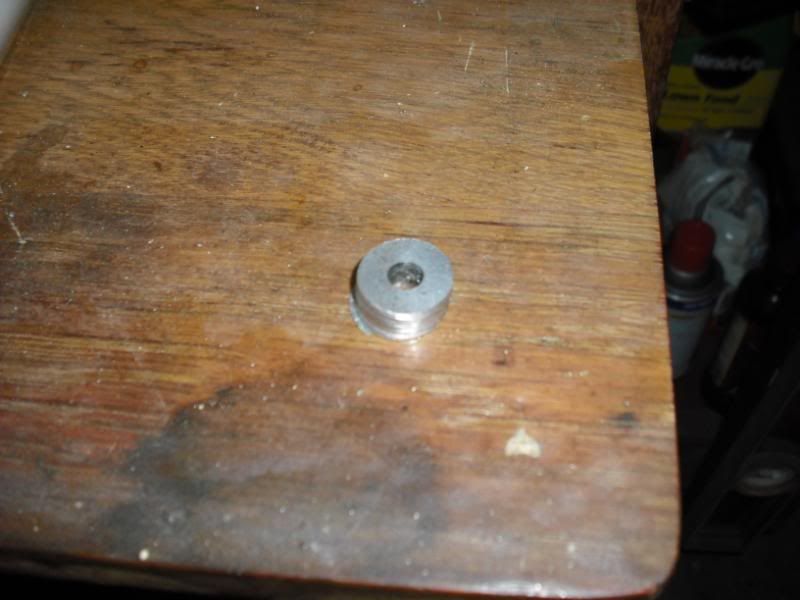
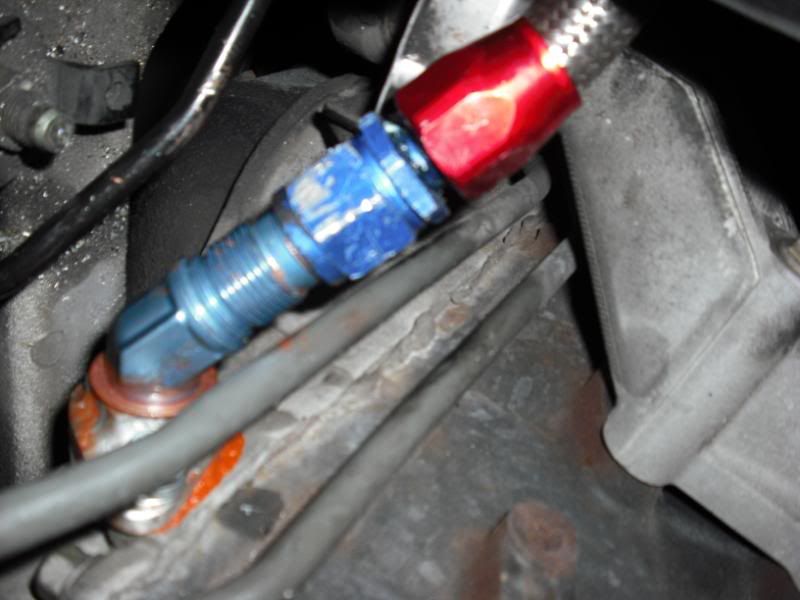
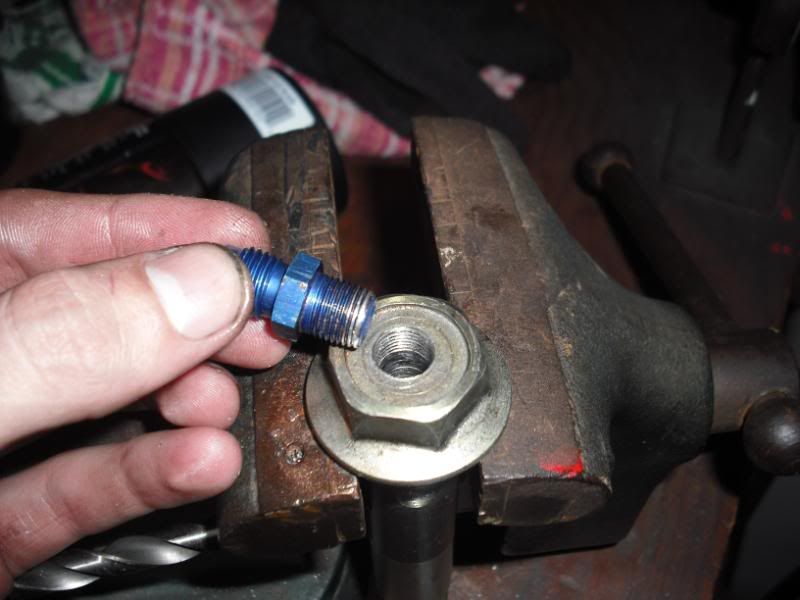
Next came drilling the union bolt for the oil feed lines. Another possibility would have been to purchase the union bolt from an is300 but I liked the idea of doing it myself a little better. I drilled the top of the bolt and tapped it for a 4 AN fitting. Be prepared to use more than 1 drill bit on this because it’s pretty solid metal.
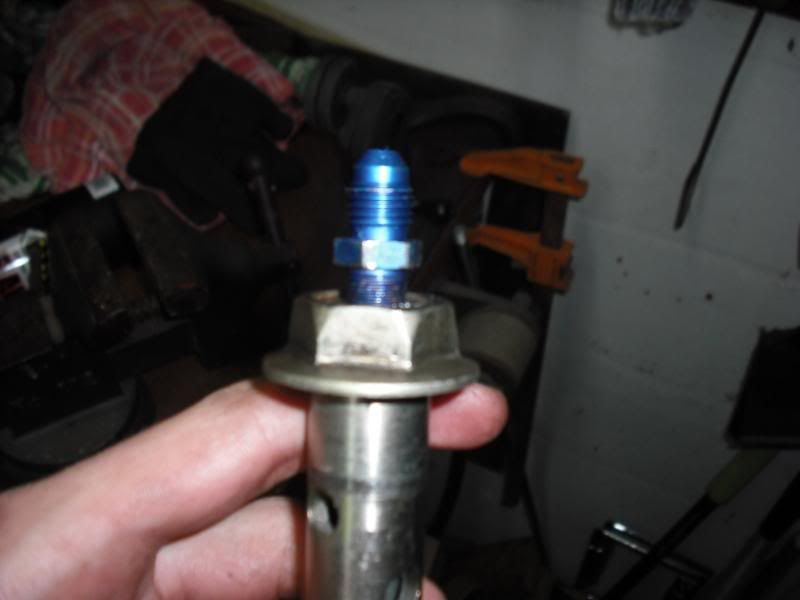
And the feed line connected:
And the feed line connected:
Last edited by CCC-TT; 01-15-09 at 12:24 PM.
01-13-09, 06:41 PM
#3
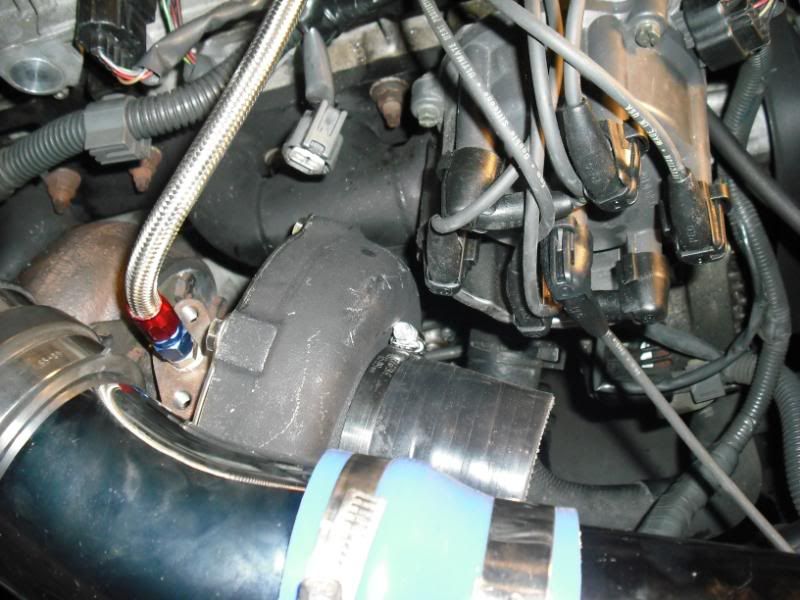
After accomplishing both the feed and return lines for the turbo, I decided to try my luck with the intercooler and routing the piping. I had trouble with the piping throughout most of the project until I realized the fleabay company I got the stuff from skimped me on a coupler and some piping. I didn’t actually hook up all the piping until the last few days but I’ll just show the final pics.
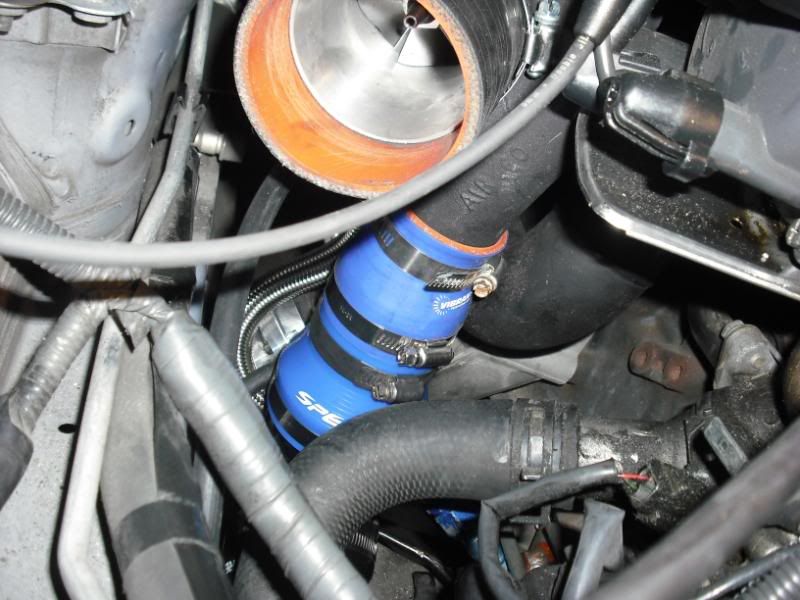
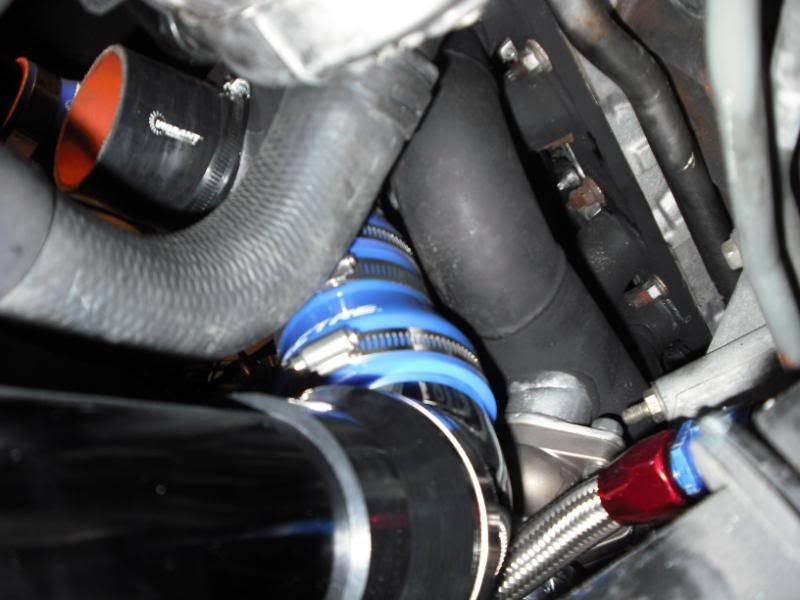
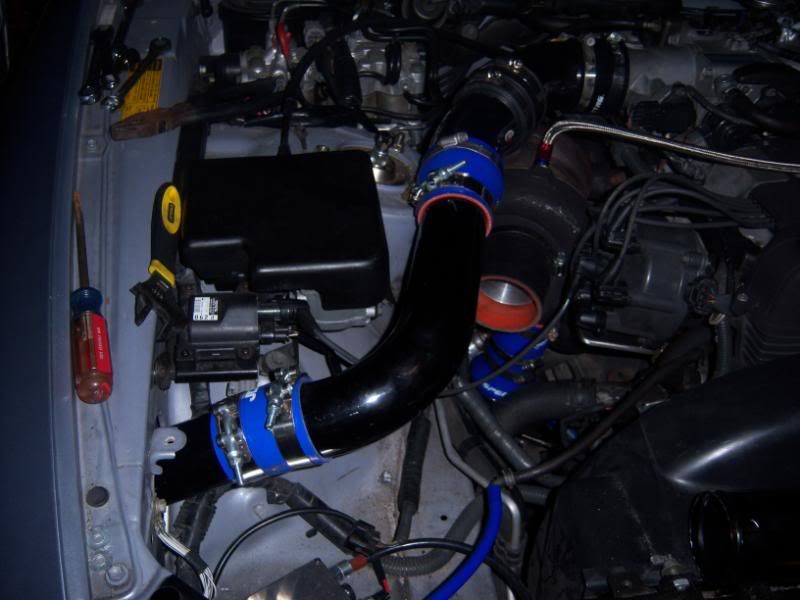
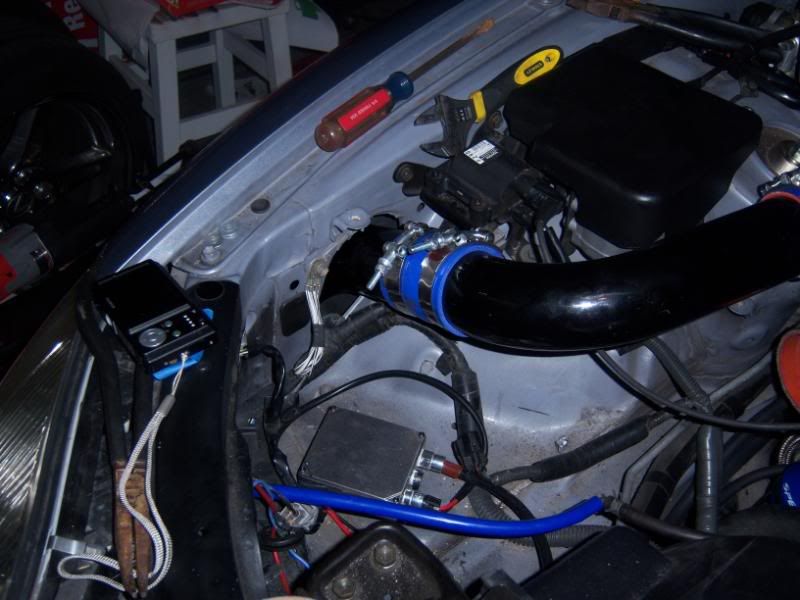
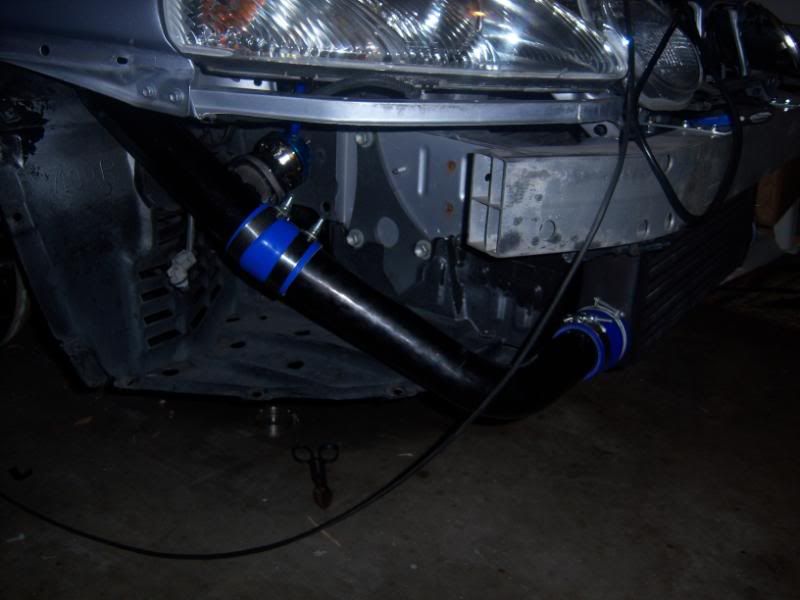
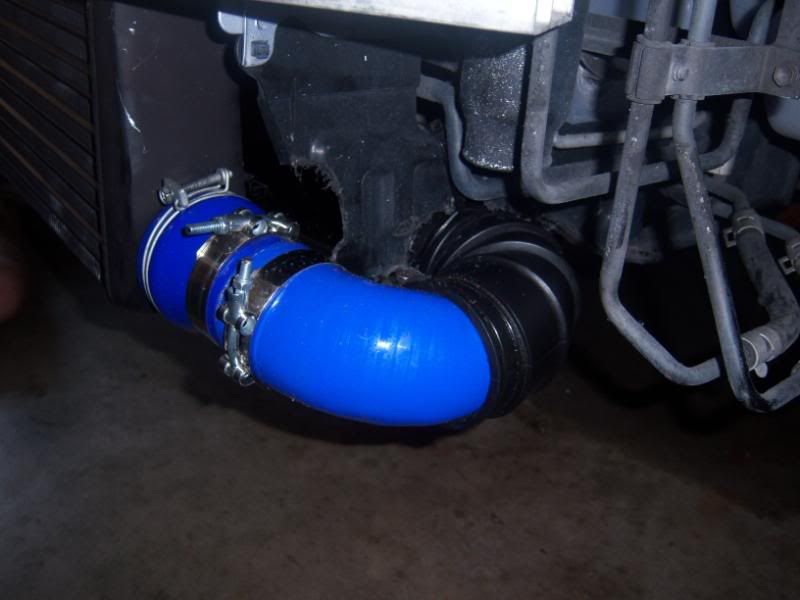
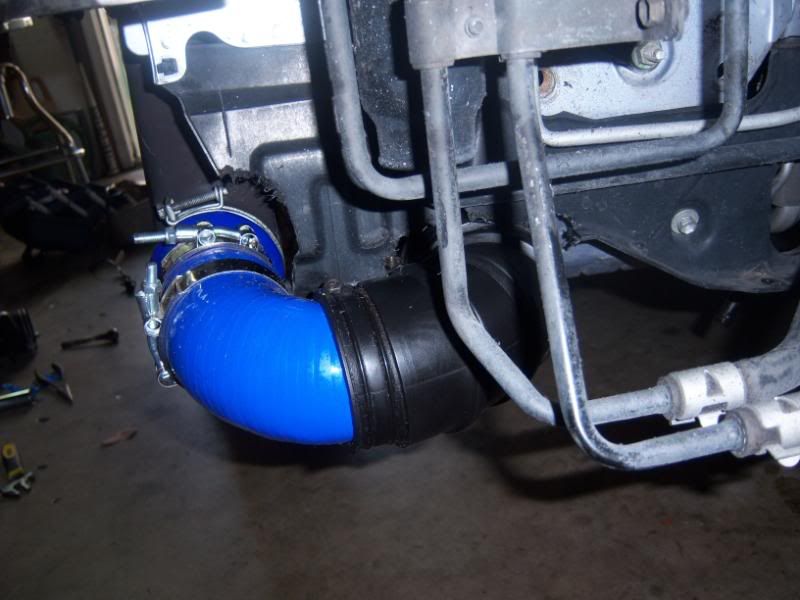
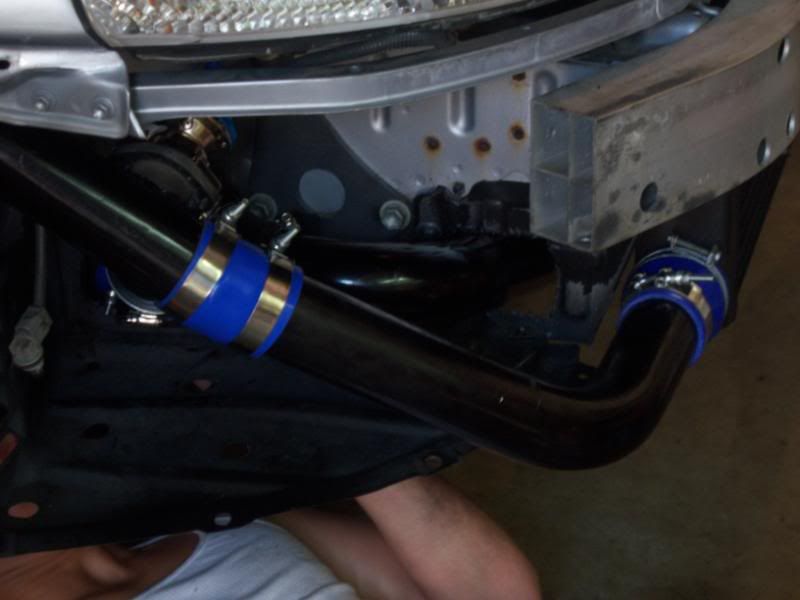
And all connected:

And all connected:
Last edited by CCC-TT; 01-15-09 at 12:25 PM.
01-13-09, 06:42 PM
#4
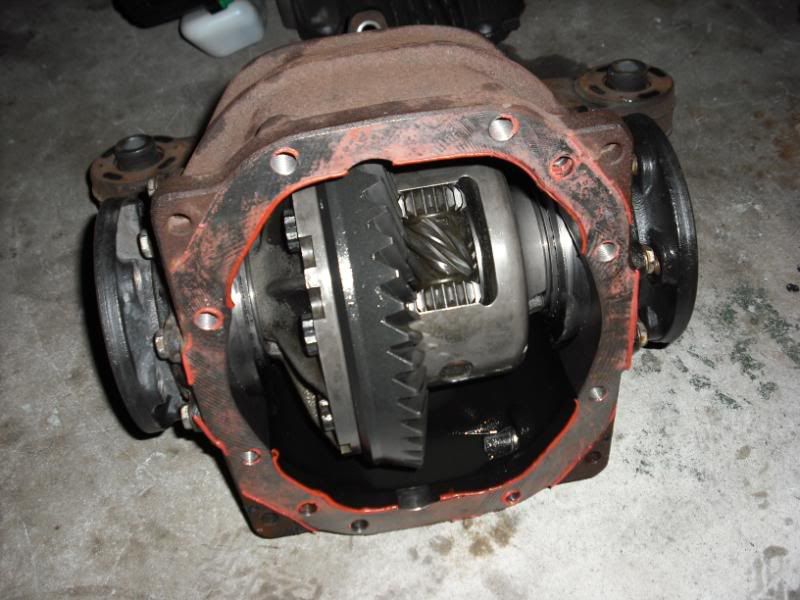
After everything else, I realized I still hadn’t done anything about installing my autoTT Supra LSD into the pumpkin. I tried my luck with Blizzy’s method on his write up, but couldn’t manage to pry the axle stubs out so I took it to a local shop(Race Related)and had them do it for me…  I know, I know lol.
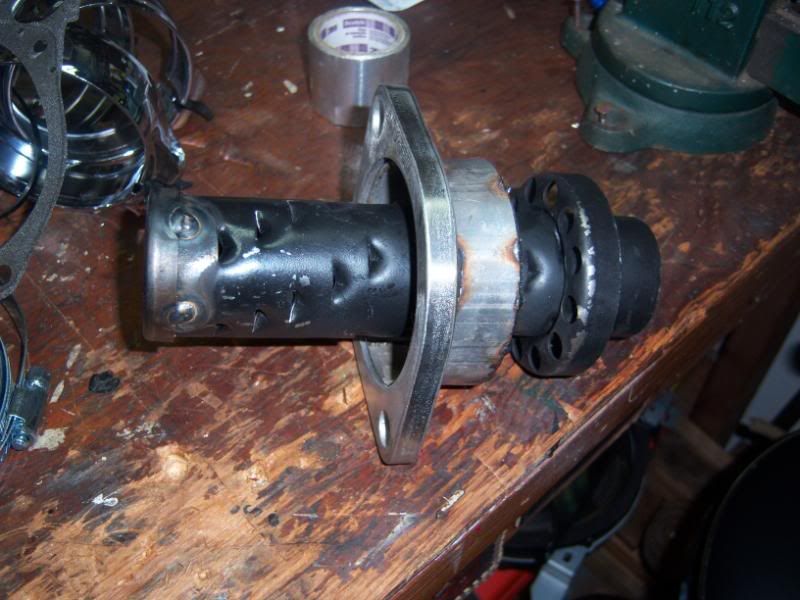
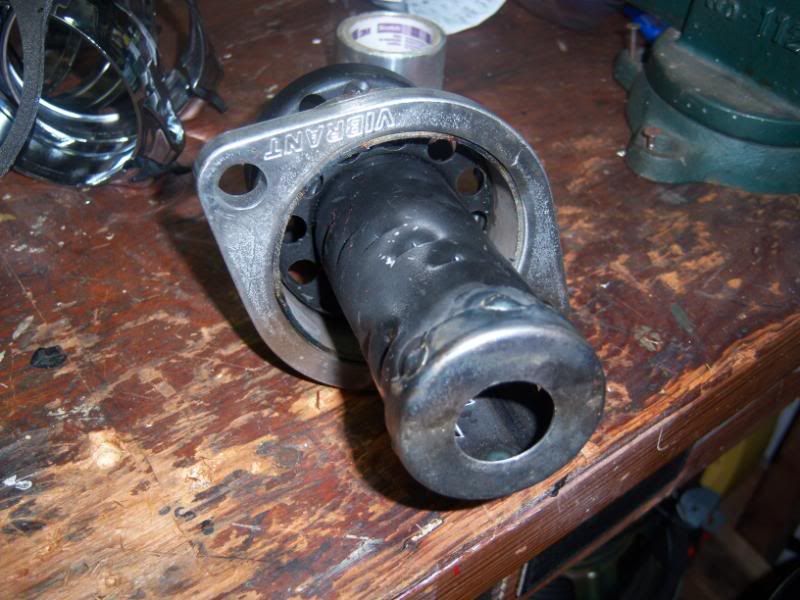
And finally, the silencer I purchased/had made because open dp was a little too loud but I didn’t have time to get an exhaust on the car before I had to drive back to school.
After returning to school from a grueling 4 hour, open downpipe, disconnected FMIC piping, and no tune drive back to school, I started trying to tune the MAP ECU. After 3.5hrs I had the WOT settings tuned and was able to drive around. It was a little rough under normal driving conditions but after about 3-4 more hours spent tuning, I’ve got it driving as close to stock as possible without dyno’ing the car, I’m not experiencing any stuttering or stalling and the A/F ratios are very smooth across the RPMs. I’m extremely happy with the MAPECU and how easy it was to tune, compared to the nightmare stories I’ve read about over on ClubNA-T. I plan on uploading the final tune I’m using for others because I was left with no base table to start with other than the 2JZGTE550cc.tbl file because apparently MAPECU hasn’t done much work with the OBDII 2JZGE computer. I should have it uploaded soon, once I remember to get it off of the laptop that I’ve been using for tuning.
I know, I know lol.And finally, the silencer I purchased/had made because open dp was a little too loud but I didn’t have time to get an exhaust on the car before I had to drive back to school.
After returning to school from a grueling 4 hour, open downpipe, disconnected FMIC piping, and no tune drive back to school, I started trying to tune the MAP ECU. After 3.5hrs I had the WOT settings tuned and was able to drive around. It was a little rough under normal driving conditions but after about 3-4 more hours spent tuning, I’ve got it driving as close to stock as possible without dyno’ing the car, I’m not experiencing any stuttering or stalling and the A/F ratios are very smooth across the RPMs. I’m extremely happy with the MAPECU and how easy it was to tune, compared to the nightmare stories I’ve read about over on ClubNA-T. I plan on uploading the final tune I’m using for others because I was left with no base table to start with other than the 2JZGTE550cc.tbl file because apparently MAPECU hasn’t done much work with the OBDII 2JZGE computer. I should have it uploaded soon, once I remember to get it off of the laptop that I’ve been using for tuning.
Last edited by CCC-TT; 01-15-09 at 12:26 PM.


Trending Topics

 and is your intercooler black ????
01-13-09, 10:50 PM
and is your intercooler black ????
01-13-09, 10:50 PM
#11
NA-T = GAY.  Just kidding. Lookin good man. We have similar projects, I did the same thing with the union bolt, nuts and bolts box, and am currently doing an Auto to manual conversion (the pedals are a blast).This is the most current picture, from a few weeks ago...

You don't realize how much you need a forward facing intake until you build one. Took me about 6 hours to fab, But Totally worth it.
Just kidding. Lookin good man. We have similar projects, I did the same thing with the union bolt, nuts and bolts box, and am currently doing an Auto to manual conversion (the pedals are a blast).This is the most current picture, from a few weeks ago...You don't realize how much you need a forward facing intake until you build one. Took me about 6 hours to fab, But Totally worth it.


 01-14-09, 09:11 AM
#15
Thanks guys
The intercooler is matte black along with the turbo, downpipe, manifold, and the timing belt cover. I plan on eventually painting the valvecovers matte black as well.
As soon as i learn to weld, I'll try a front facing intake manifold but until then I'm stuck with the goofy *** NA manifold lol.
no fogs for me, I dont think they would clear if they were installed though.
I'm still not sure I did the BOV correctly because it doesnt sound like its working. I read something a while ago about using grease or something on it to make it more willing to move, but I'm also not sure I'm using a good vaccuum source.
I've got class in a few minutes but afterwards I'm going to go out and take some final engine bay pics and one of the front of the car to show you just how hidden that black intercooler and piping really are... Even car guys might not notice it's there in person
Last edited by CCC-TT; 01-14-09 at 09:15 AM.