
Remove rear seat and armrest dissassy - 2002 UL


Thread Starter
Pit Crew


Joined: Nov 2011
Posts: 148
Likes: 47
From: GA
I hunted for some tips on removing the back seat. Couldn't find any, so I took pics while I tore mine apart today.
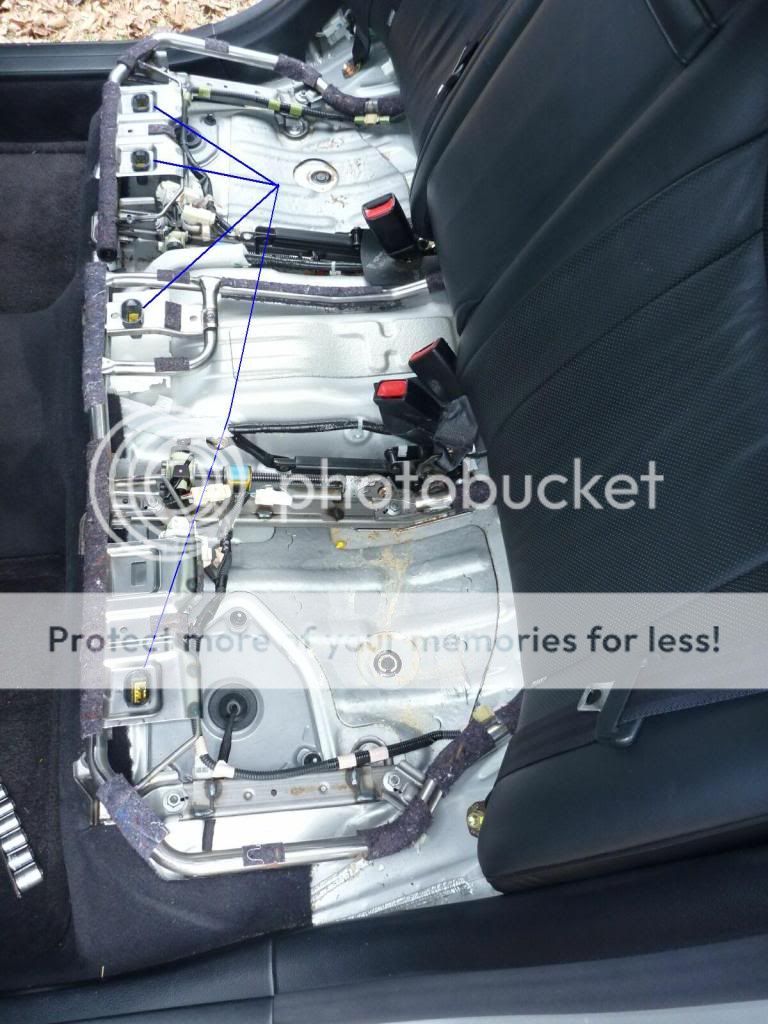
First - Raise both headrests. Seat bottoms come out first. Yank straight up on the front of the seat. Try to yank in line with the friction snaps.
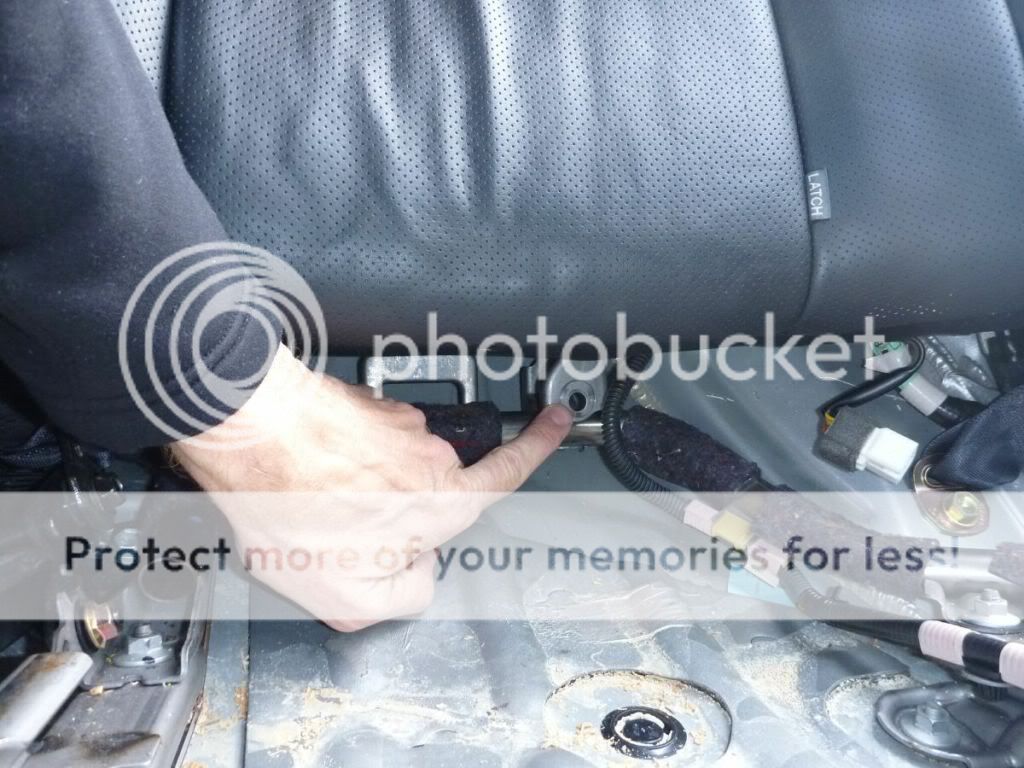
Second - remove the bottom nuts from the seat-back.
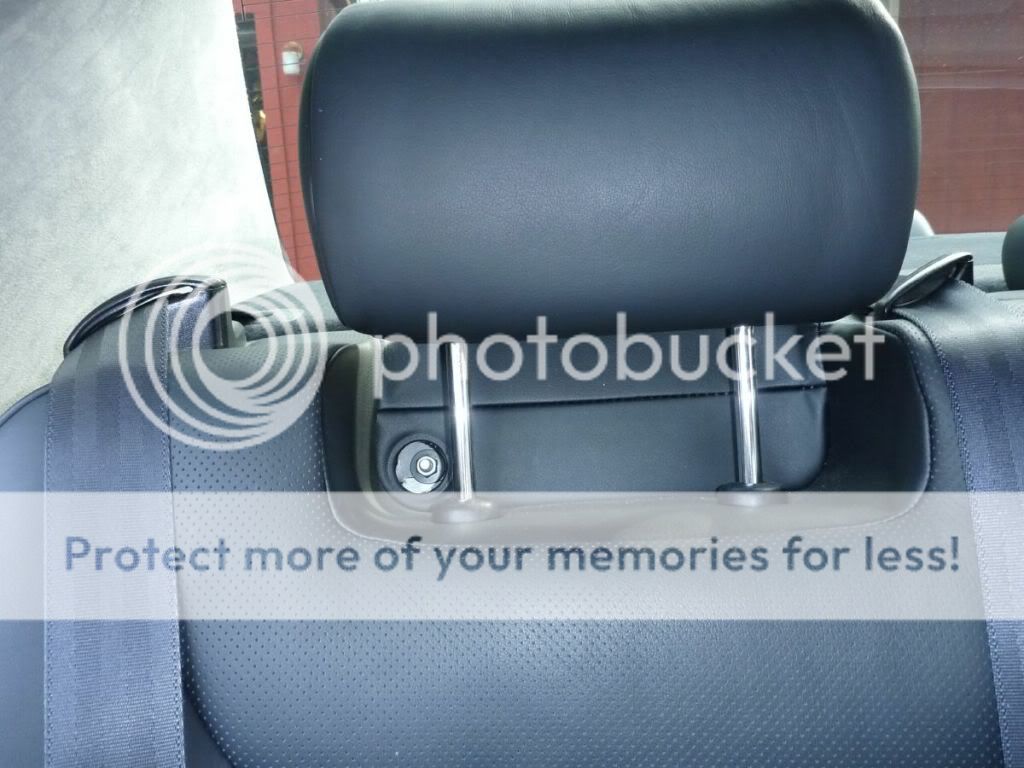
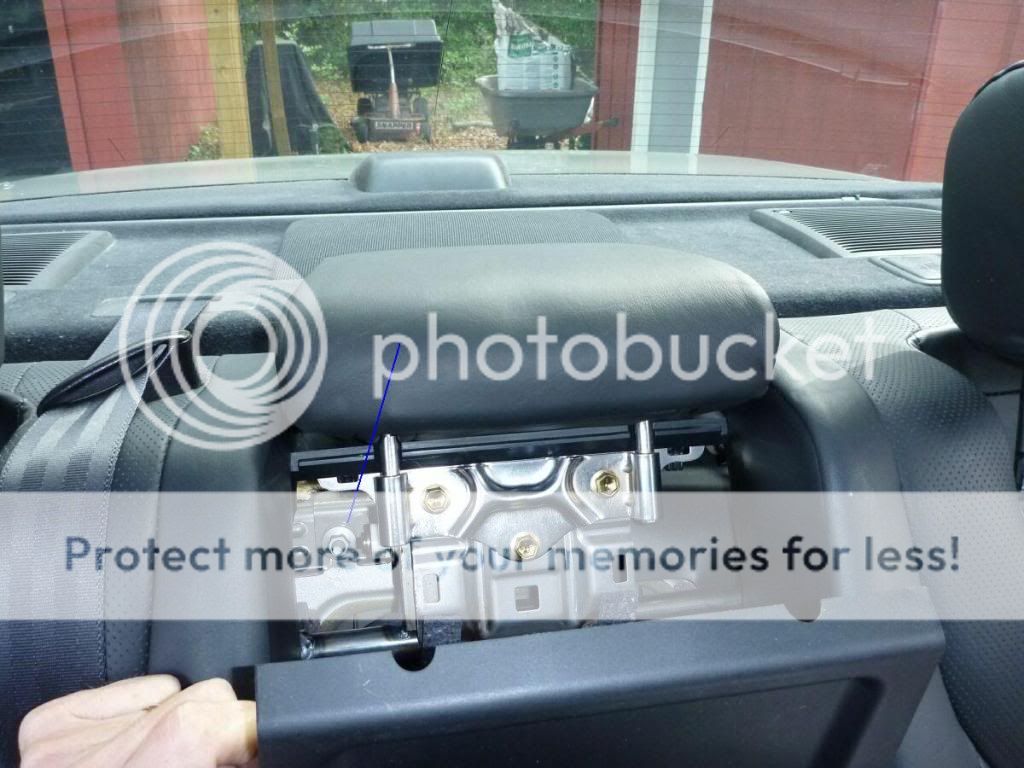
Third - Loosen the top nuts from the seat-back. The ones on the left and right sides are behind the black plastic cover plug. To get the center nut, pull straight forward on the plastic trim that's below the center head rest. The upper nuts don't have to come clear off. The metal frame is slotted to let you lift the seat off.
Lower seat retainers (like the dried milk shake? - Thanks PO!):
Bottom nut for seat-back:
Top nut for seat-back:
Top center nut for seat-back:
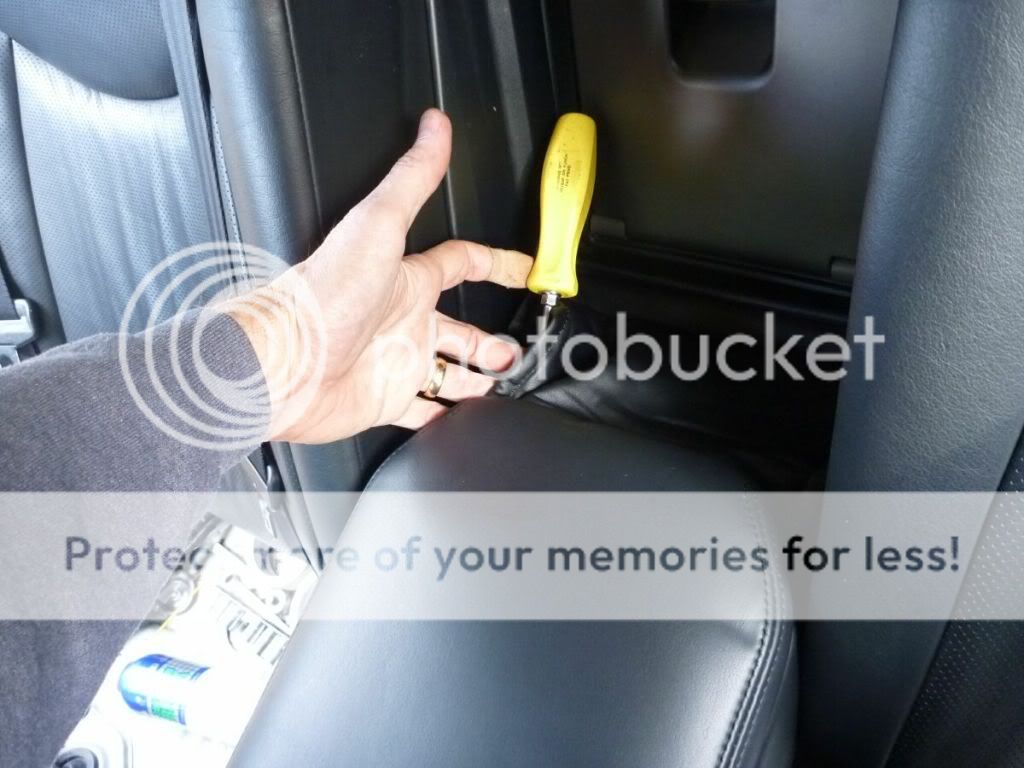
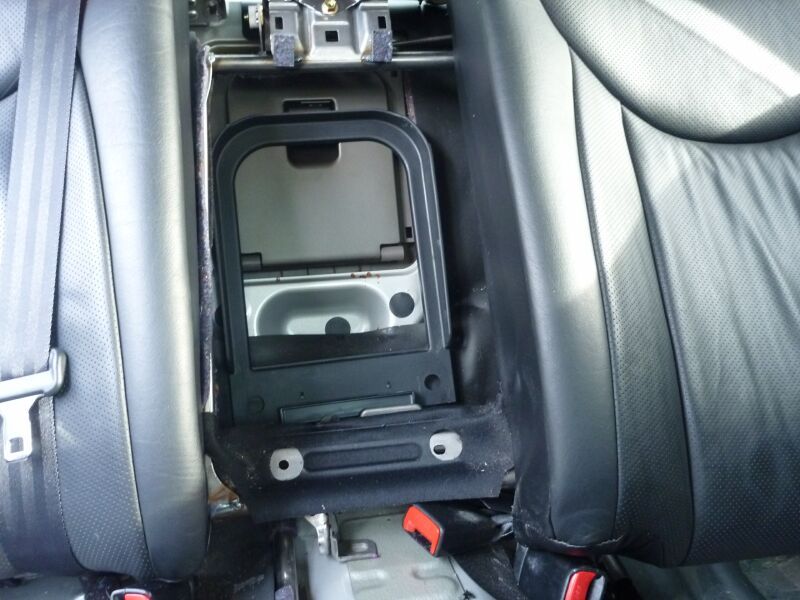
I needed to remove the switch panel from the center arm rest. I did it the hard way and removed the whole back seat. If you can get the two to four small screws removed from underneath this fod catcher flap, you don't have to pull the whole back seat.
Here's what I was trying to fix...coke or milkshake spilled and soaked under the LCD display. Yuck!

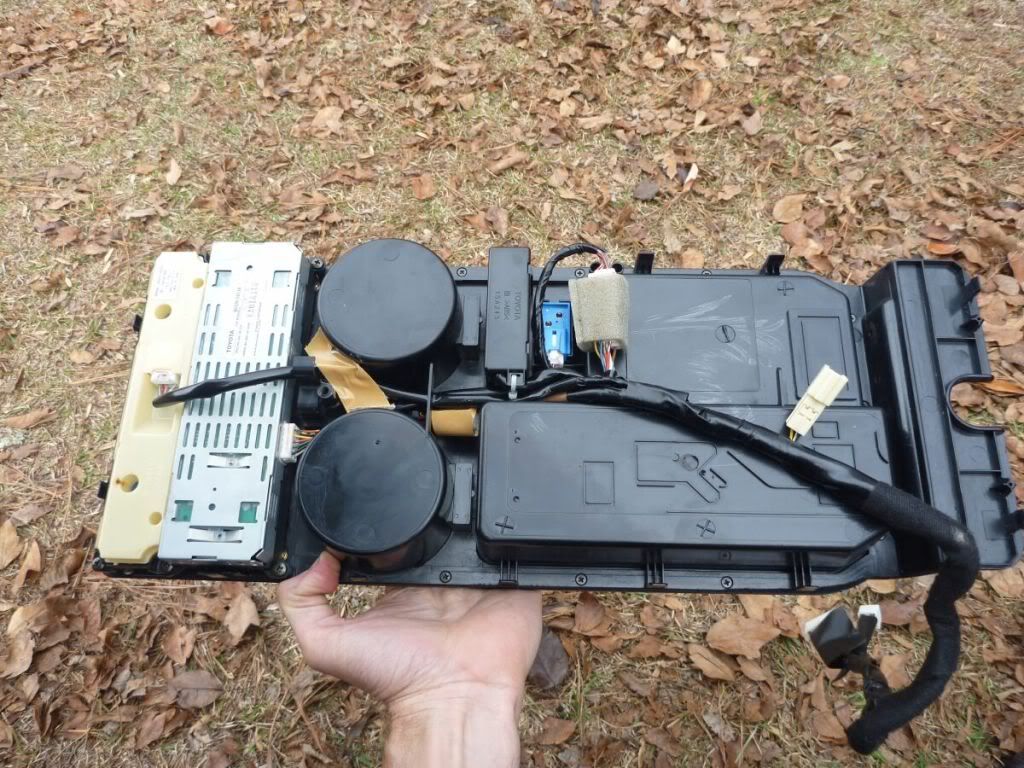
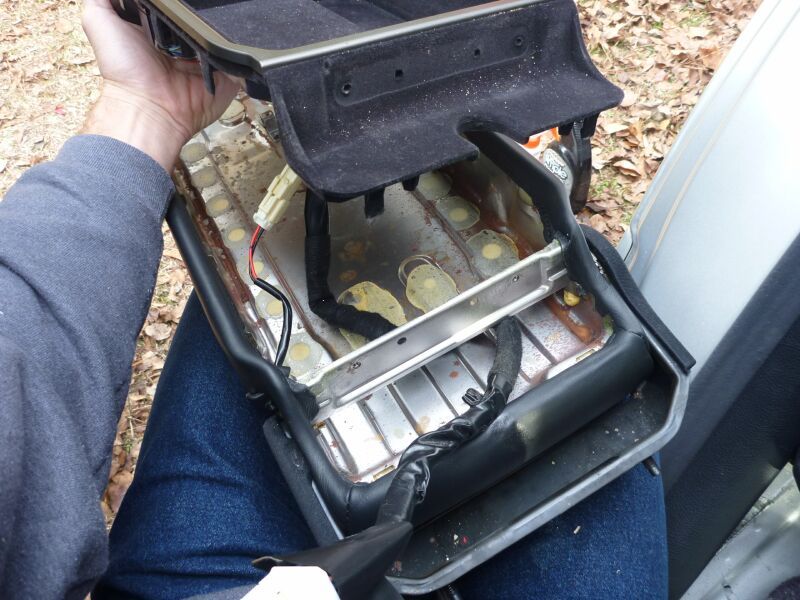
Armrest inner panel removed:
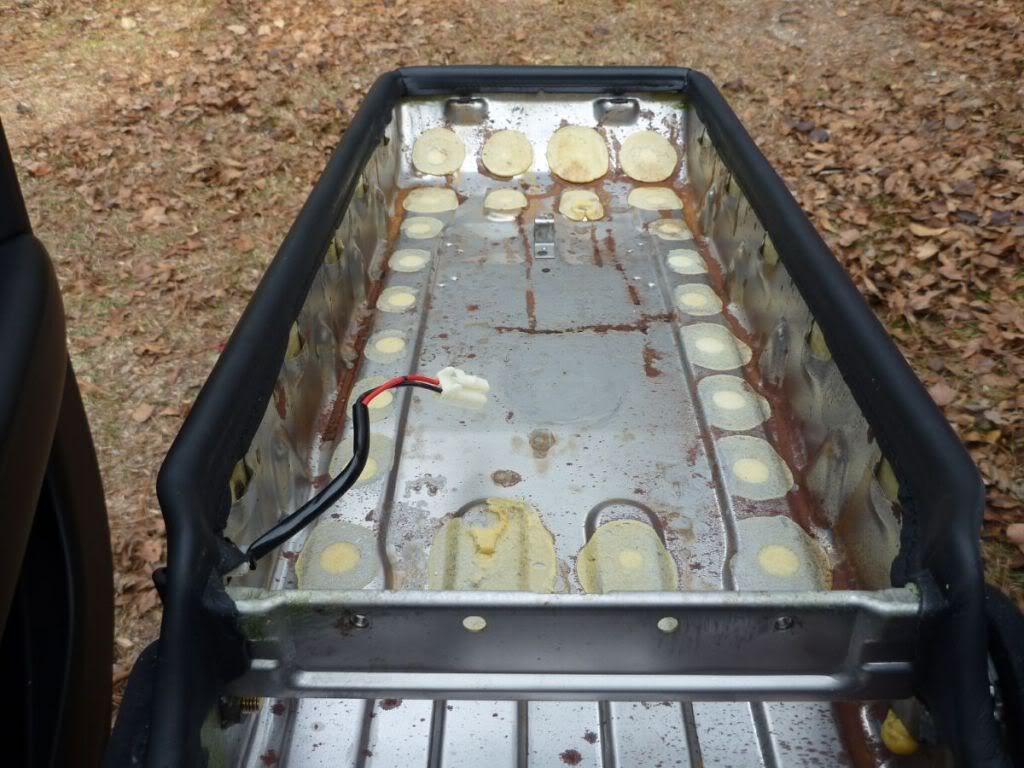
Armrest outer bucket:
Guts laid out for cleaning. Can of corrosion block on the right. I like that stuff!
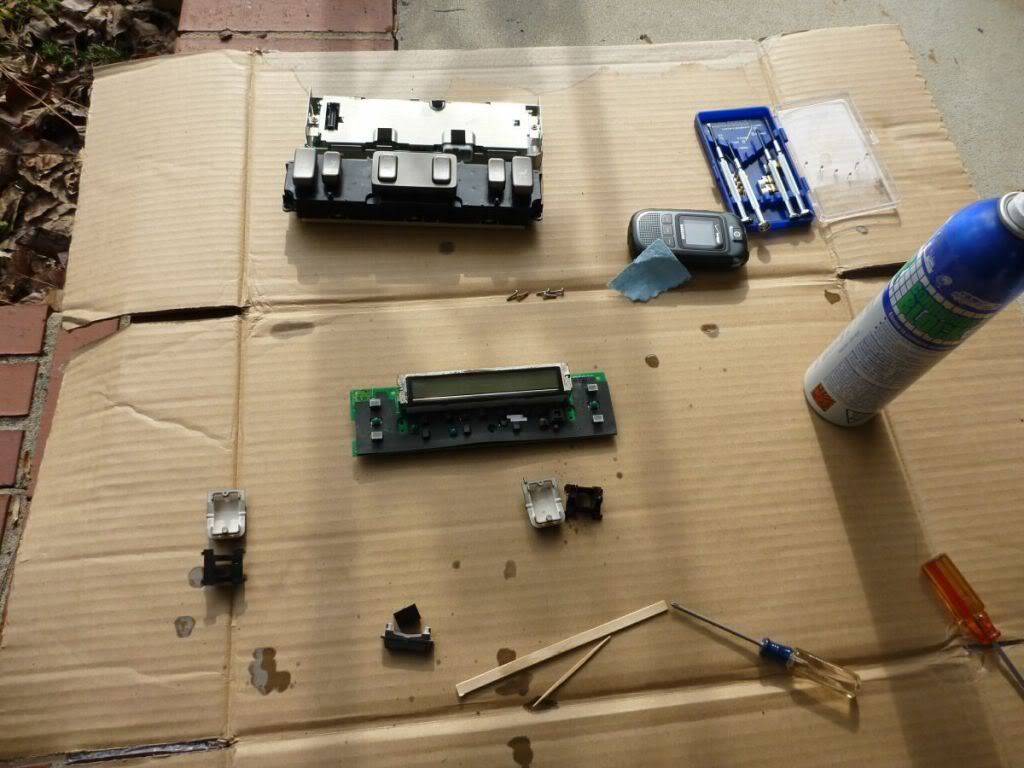
Prying the LCD panel up, to flush out the coke with alcohol. This was scary. I did NOT want to ruin the LCD display. Don't bend the pins!
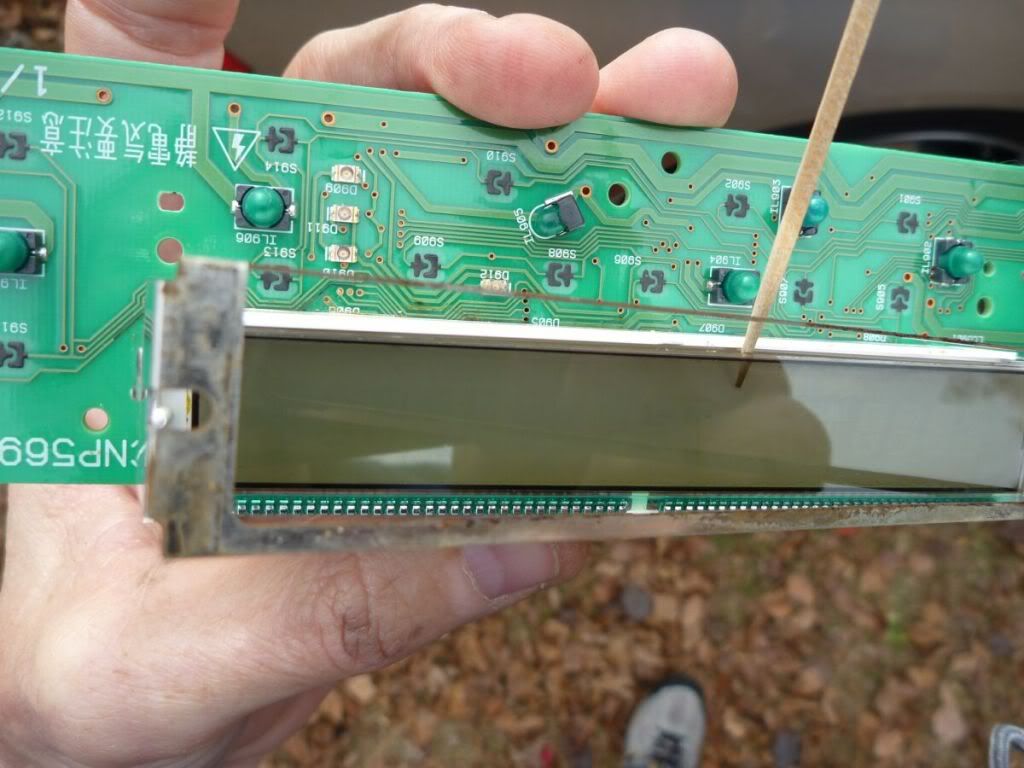
I hosed all the printed circuit boards and all the connectors with "corrosion block" spray.
Reassembled - everything works, and the cruddy coke stains are gone!
First - Raise both headrests. Seat bottoms come out first. Yank straight up on the front of the seat. Try to yank in line with the friction snaps.
Second - remove the bottom nuts from the seat-back.
Third - Loosen the top nuts from the seat-back. The ones on the left and right sides are behind the black plastic cover plug. To get the center nut, pull straight forward on the plastic trim that's below the center head rest. The upper nuts don't have to come clear off. The metal frame is slotted to let you lift the seat off.
Lower seat retainers (like the dried milk shake? - Thanks PO!):
Bottom nut for seat-back:
Top nut for seat-back:
Top center nut for seat-back:
I needed to remove the switch panel from the center arm rest. I did it the hard way and removed the whole back seat. If you can get the two to four small screws removed from underneath this fod catcher flap, you don't have to pull the whole back seat.
Here's what I was trying to fix...coke or milkshake spilled and soaked under the LCD display. Yuck!
Armrest inner panel removed:
Armrest outer bucket:
Guts laid out for cleaning. Can of corrosion block on the right. I like that stuff!
Prying the LCD panel up, to flush out the coke with alcohol. This was scary. I did NOT want to ruin the LCD display. Don't bend the pins!
I hosed all the printed circuit boards and all the connectors with "corrosion block" spray.
Reassembled - everything works, and the cruddy coke stains are gone!
Last edited by cyclehead; Jan 5, 2012 at 07:03 PM.

Driver
Joined: Jul 2011
Posts: 67
Likes: 2
From: NC
Did your project result in you removing the entire center armrest, and if so, do you recall if there was anything in the way it is installed that would allow you to adjust it left or right? Mine is not installed properly. When it's down, the front is leaning left. When in the upright position the right side sticks further out and is not flush with the rest of the seat back... the left side is fine. In a perfect world I'd be able to loosen the passenger side pivot point and slide it rearward about 1/2", but I've not found any way to adjust this.
My apologies to the forum..I've posted these two pictures before, but I think it's the only way to convey exactly what is wrong. Would appreciate it if you have any thoughts on how to correct this. Thanks.
My apologies to the forum..I've posted these two pictures before, but I think it's the only way to convey exactly what is wrong. Would appreciate it if you have any thoughts on how to correct this. Thanks.
Thread Starter
Pit Crew
Joined: Nov 2011
Posts: 148
Likes: 47
From: GA
That corner of the seat back is the end of the unit. (The passenger seat-back is a separate unit). Looking through my photos, I think you should remove the seat bottom. Then remove the two mounting nuts for the armrest assy (leave all the wiring alone). If you can get the mounting surface of the armrest exposed, then you can choose to force/bend the passenger side of the armrest mounting surface further aft; or alternatively stick washers under the driver's side bolt. One other idea would be to bend the whole seat-back frame aft in the lower corner. I think the nearest mounting bolt for the seat-back is near the center of the car. That corner of the seat-back frame is kind of floating out there where the armrest mounts. Since you show the whole thing sticking out when folded - I'd try one of the two "bend it" options on the seat back structure. Hope these pictures help you see how it all fits together!
http://i1101.photobucket.com/albums/...rmrestassy.jpg
http://i1101.photobucket.com/albums/...rmrestassy.jpg
Driver
Joined: Jul 2011
Posts: 67
Likes: 2
From: NC
Thanks for the pictures. I'm still not sure I see exactly where/how this thing bolts on, but it looks like rear seat bottom removal is almost a must, and then go from there. Thing is, that's all some pretty heavy duty steel back there. I can't imagine it came from the factory like this, yet I also can't imagine it got bent by accident. Very weird.
Lexus Champion
Joined: Oct 2007
Posts: 2,489
Likes: 107
From: AZ
Did your project result in you removing the entire center armrest, and if so, do you recall if there was anything in the way it is installed that would allow you to adjust it left or right? Mine is not installed properly. When it's down, the front is leaning left. When in the upright position the right side sticks further out and is not flush with the rest of the seat back... the left side is fine. In a perfect world I'd be able to loosen the passenger side pivot point and slide it rearward about 1/2", but I've not found any way to adjust this.
My apologies to the forum..I've posted these two pictures before, but I think it's the only way to convey exactly what is wrong. Would appreciate it if you have any thoughts on how to correct this. Thanks.
My apologies to the forum..I've posted these two pictures before, but I think it's the only way to convey exactly what is wrong. Would appreciate it if you have any thoughts on how to correct this. Thanks.

Trending Topics
Driver
Joined: Jul 2015
Posts: 69
Likes: 1
From: FL
I hunted for some tips on removing the back seat. Couldn't find any, so I took pics while I tore mine apart today.
First - Raise both headrests. Seat bottoms come out first. Yank straight up on the front of the seat. Try to yank in line with the friction snaps.
Second - remove the bottom nuts from the seat-back.
Third - Loosen the top nuts from the seat-back. The ones on the left and right sides are behind the black plastic cover plug. To get the center nut, pull straight forward on the plastic trim that's below the center head rest. The upper nuts don't have to come clear off. The metal frame is slotted to let you lift the seat off.
Lower seat retainers (like the dried milk shake? - Thanks PO!):

Bottom nut for seat-back:

Top nut for seat-back:

Top center nut for seat-back:

I needed to remove the switch panel from the center arm rest. I did it the hard way and removed the whole back seat. If you can get the two to four small screws removed from underneath this fod catcher flap, you don't have to pull the whole back seat.

Here's what I was trying to fix...coke or milkshake spilled and soaked under the LCD display. Yuck!

Armrest inner panel removed:

Armrest outer bucket:

Guts laid out for cleaning. Can of corrosion block on the right. I like that stuff!

Prying the LCD panel up, to flush out the coke with alcohol. This was scary. I did NOT want to ruin the LCD display. Don't bend the pins!

I hosed all the printed circuit boards and all the connectors with "corrosion block" spray.
Reassembled - everything works, and the cruddy coke stains are gone!
First - Raise both headrests. Seat bottoms come out first. Yank straight up on the front of the seat. Try to yank in line with the friction snaps.
Second - remove the bottom nuts from the seat-back.
Third - Loosen the top nuts from the seat-back. The ones on the left and right sides are behind the black plastic cover plug. To get the center nut, pull straight forward on the plastic trim that's below the center head rest. The upper nuts don't have to come clear off. The metal frame is slotted to let you lift the seat off.
Lower seat retainers (like the dried milk shake? - Thanks PO!):
Bottom nut for seat-back:
Top nut for seat-back:
Top center nut for seat-back:
I needed to remove the switch panel from the center arm rest. I did it the hard way and removed the whole back seat. If you can get the two to four small screws removed from underneath this fod catcher flap, you don't have to pull the whole back seat.
Here's what I was trying to fix...coke or milkshake spilled and soaked under the LCD display. Yuck!
Armrest inner panel removed:
Armrest outer bucket:
Guts laid out for cleaning. Can of corrosion block on the right. I like that stuff!
Prying the LCD panel up, to flush out the coke with alcohol. This was scary. I did NOT want to ruin the LCD display. Don't bend the pins!
I hosed all the printed circuit boards and all the connectors with "corrosion block" spray.
Reassembled - everything works, and the cruddy coke stains are gone!
I cant see the pictures

Thread
Thread Starter
Forum
Replies
Last Post
Timster
GS - 2nd Gen (1998-2005)
4
Jan 11, 2004 07:32 PM